Date
Posted by Paul

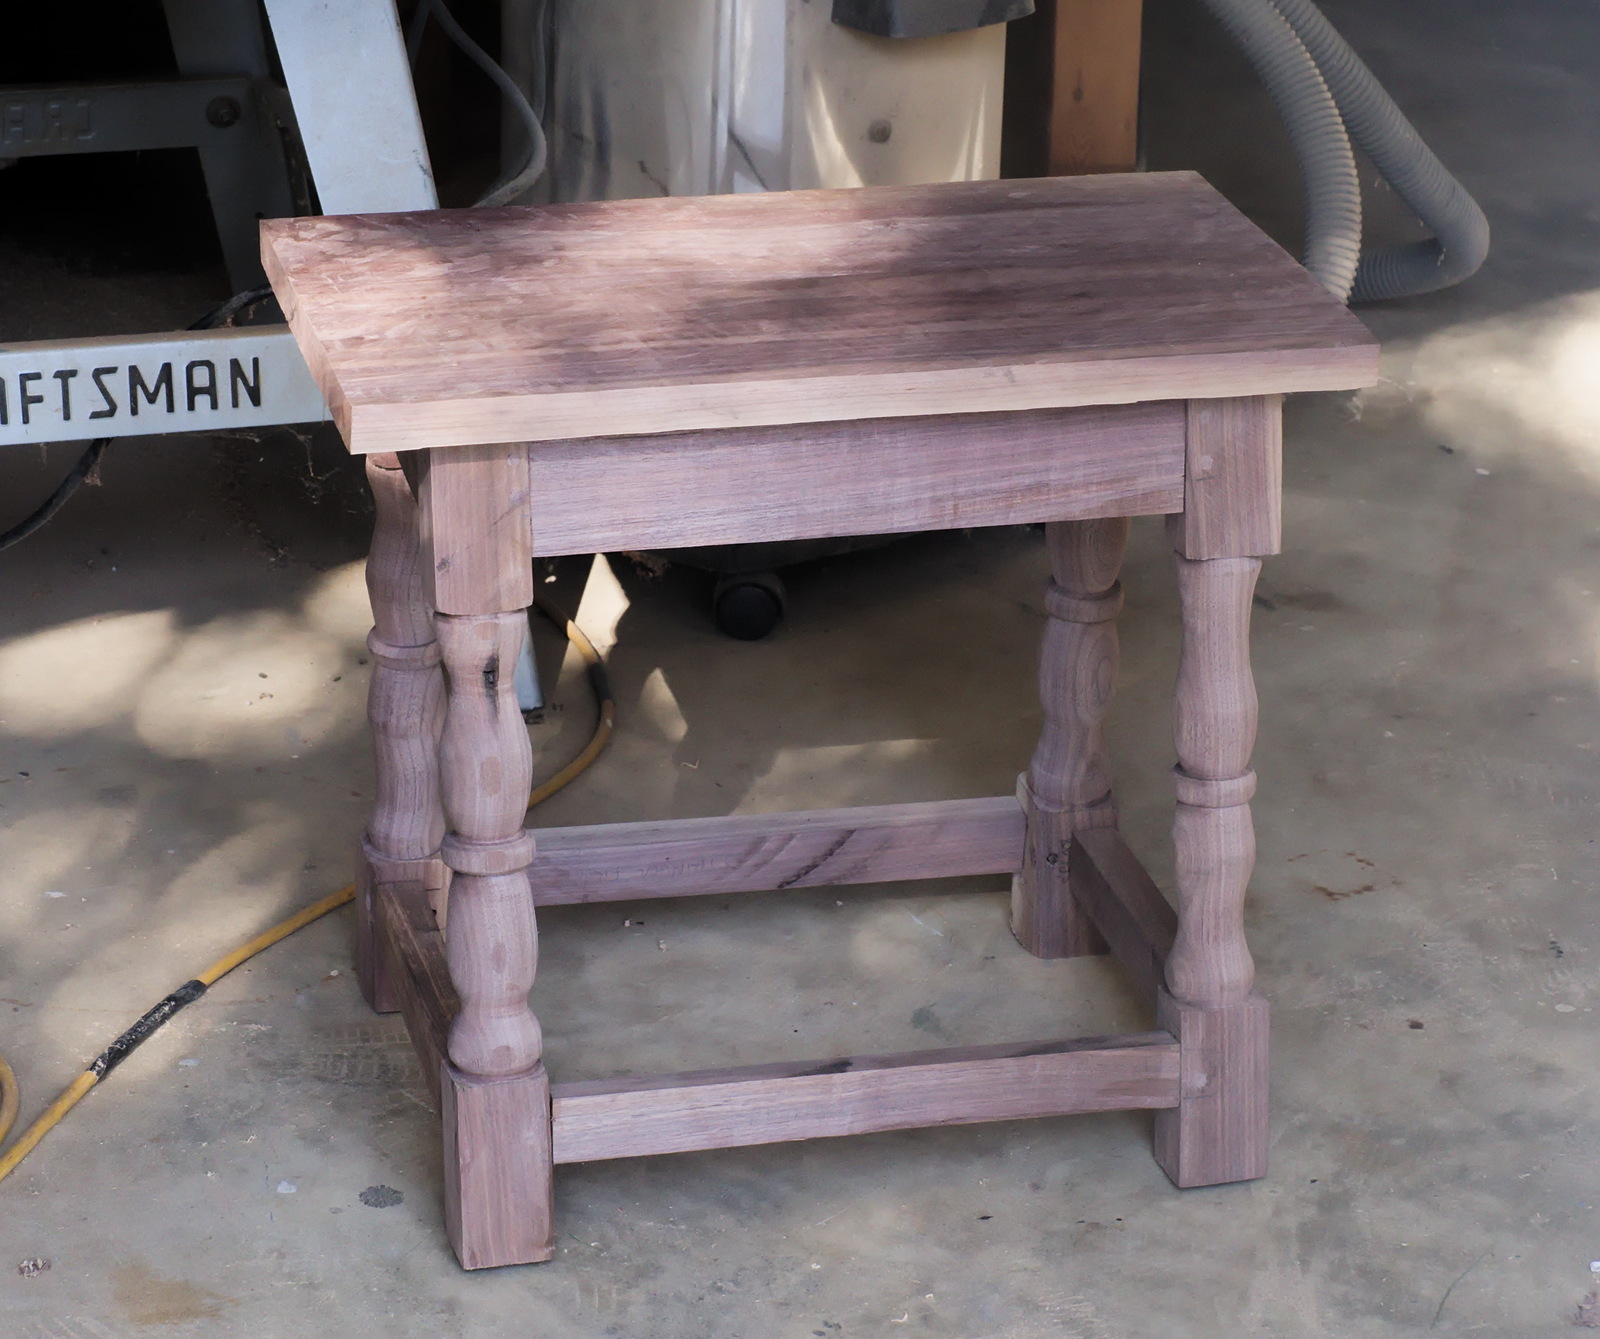
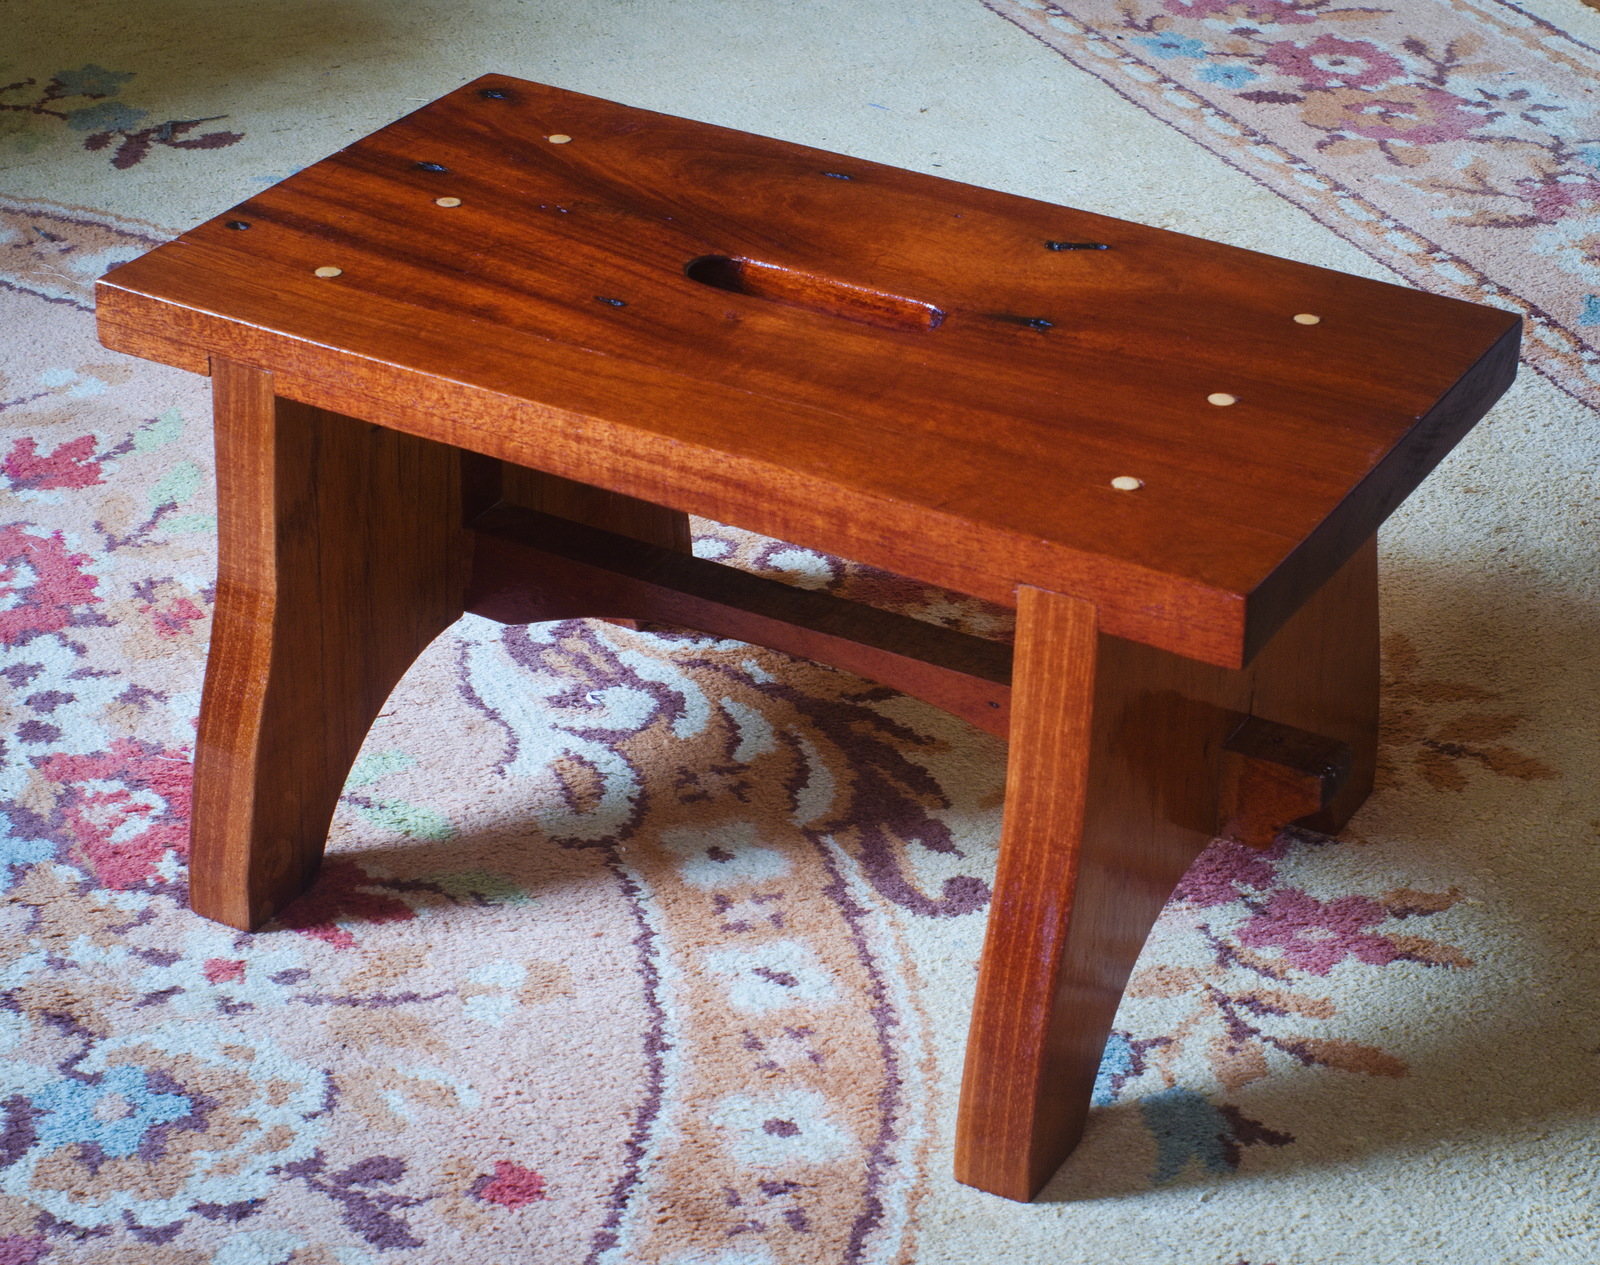
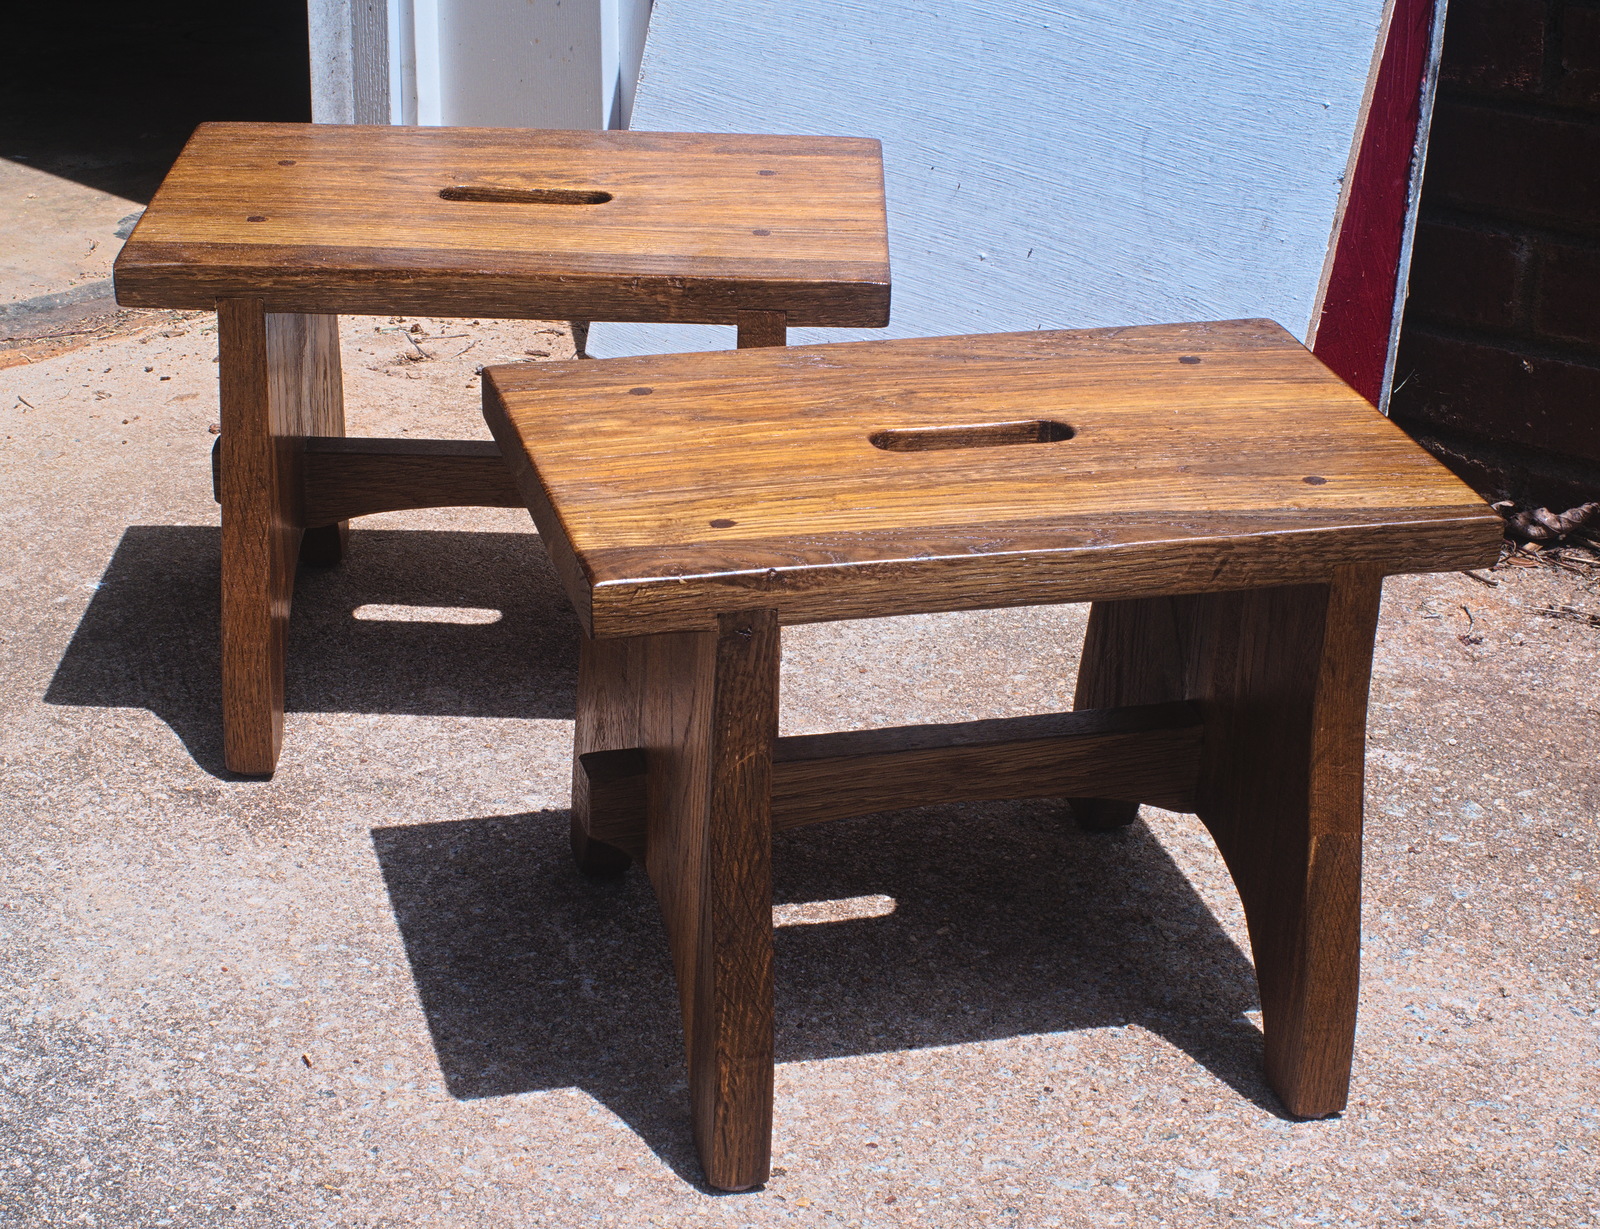
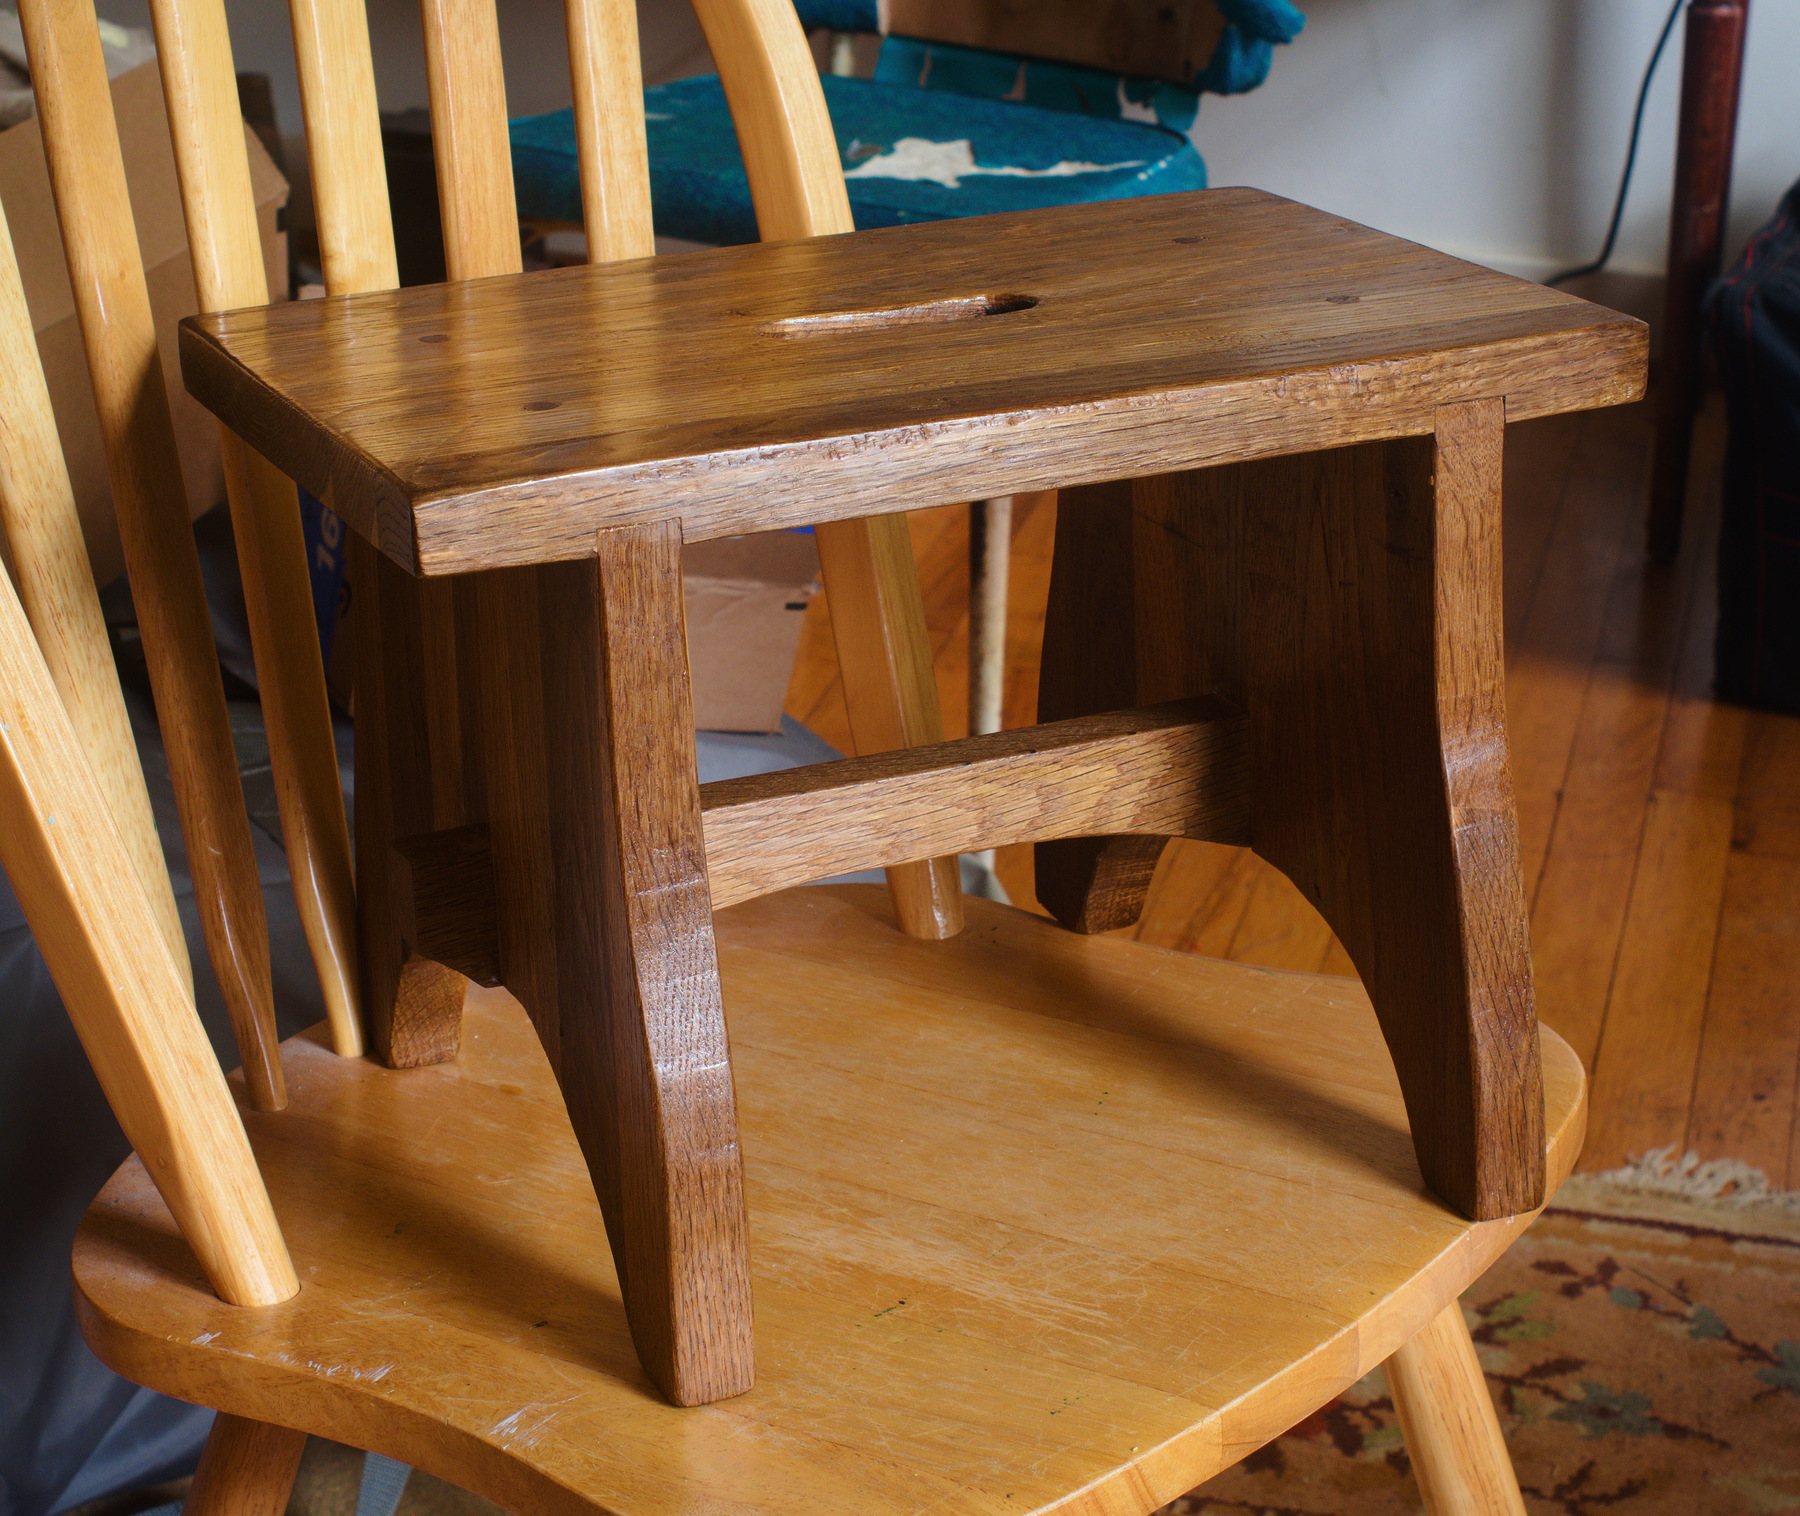
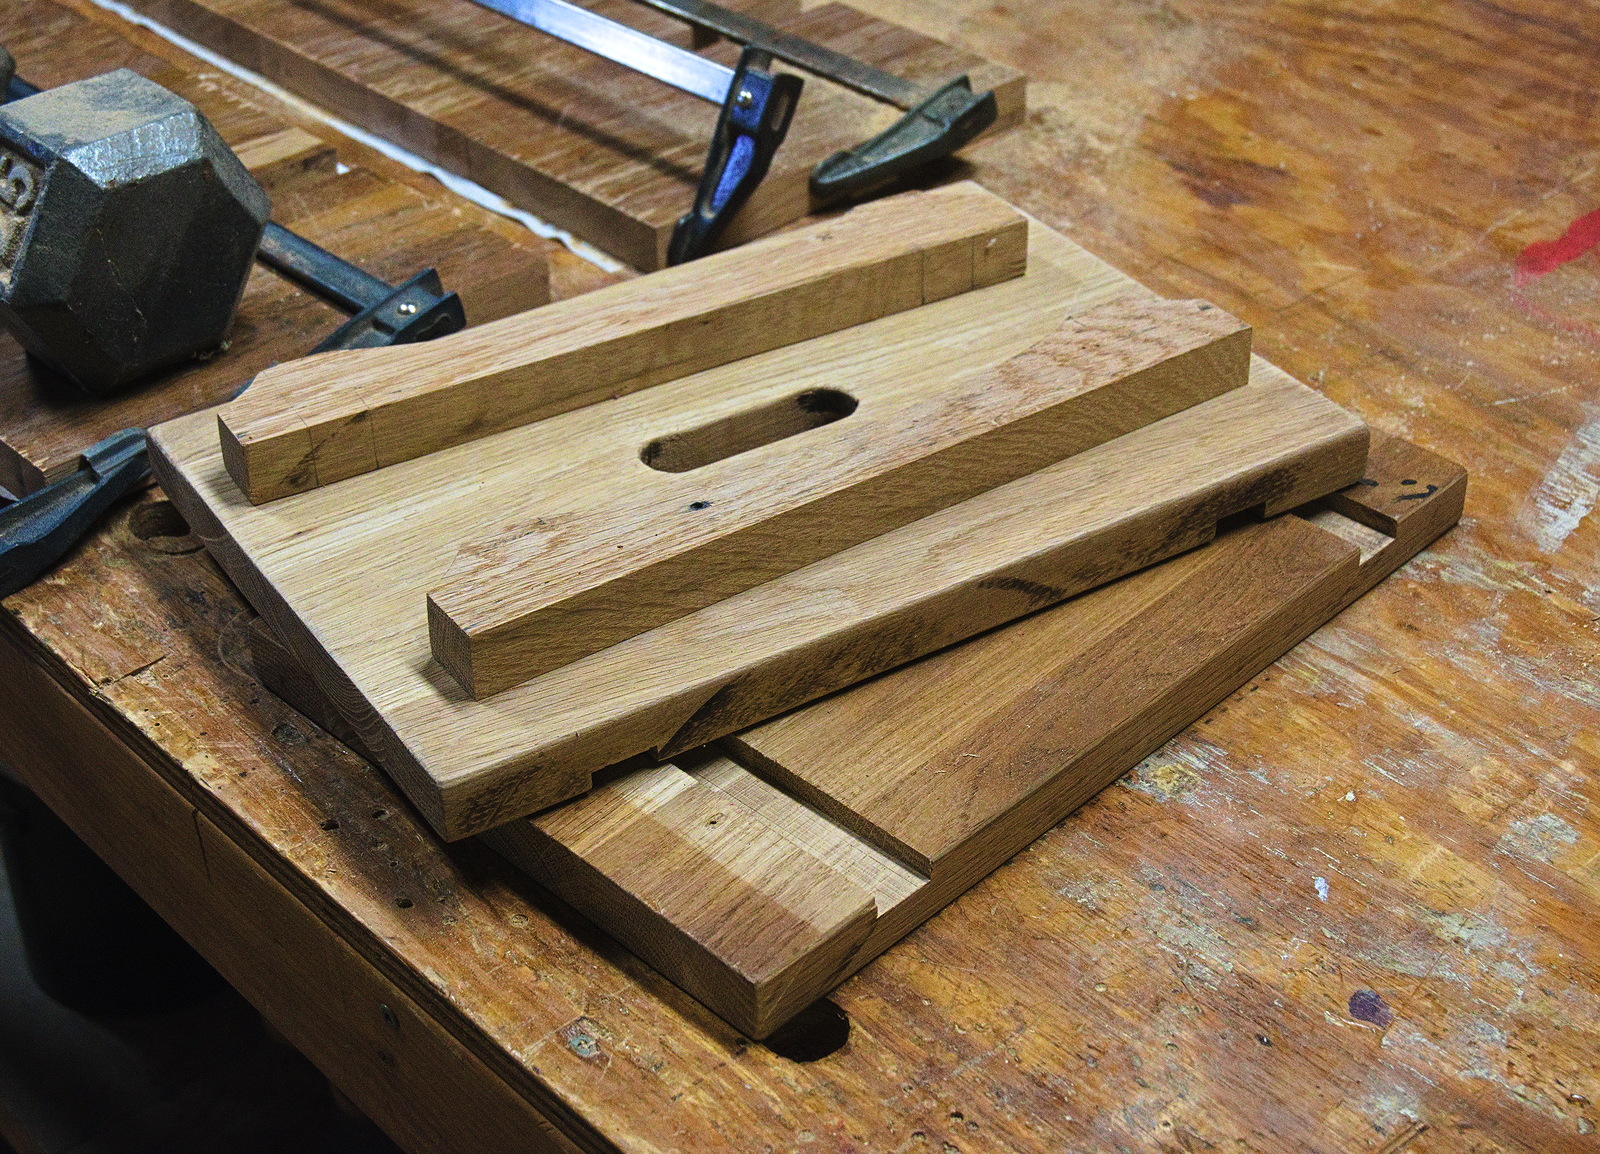
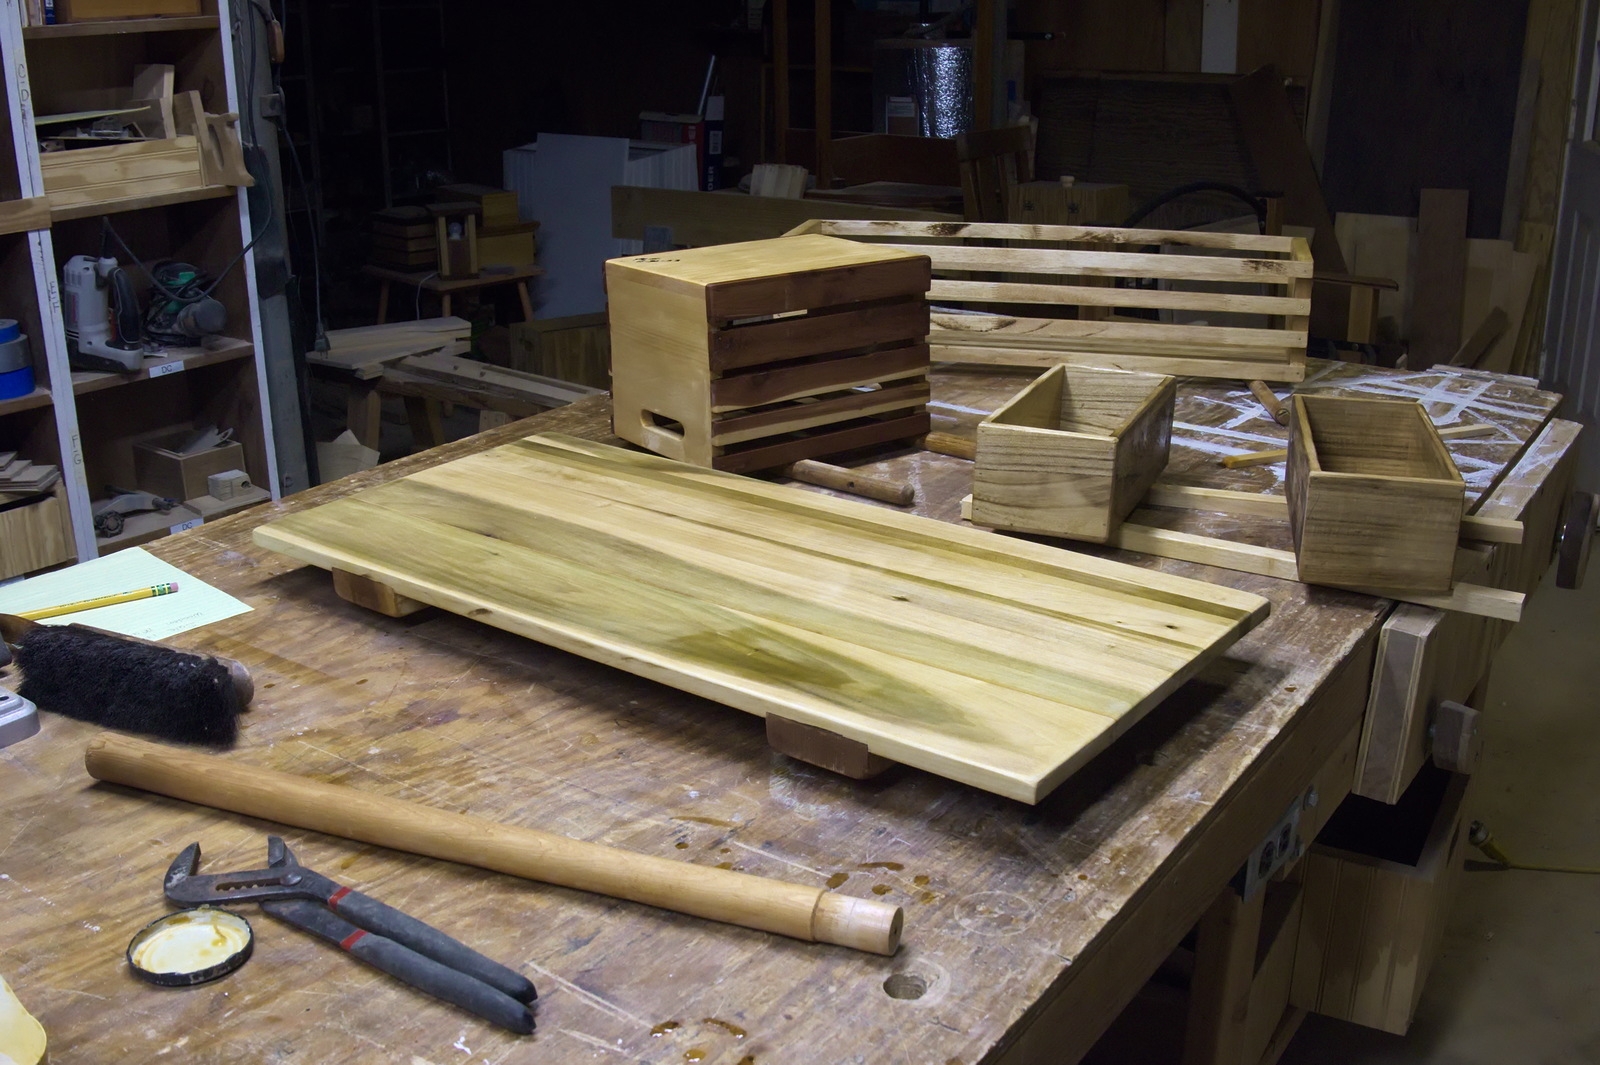
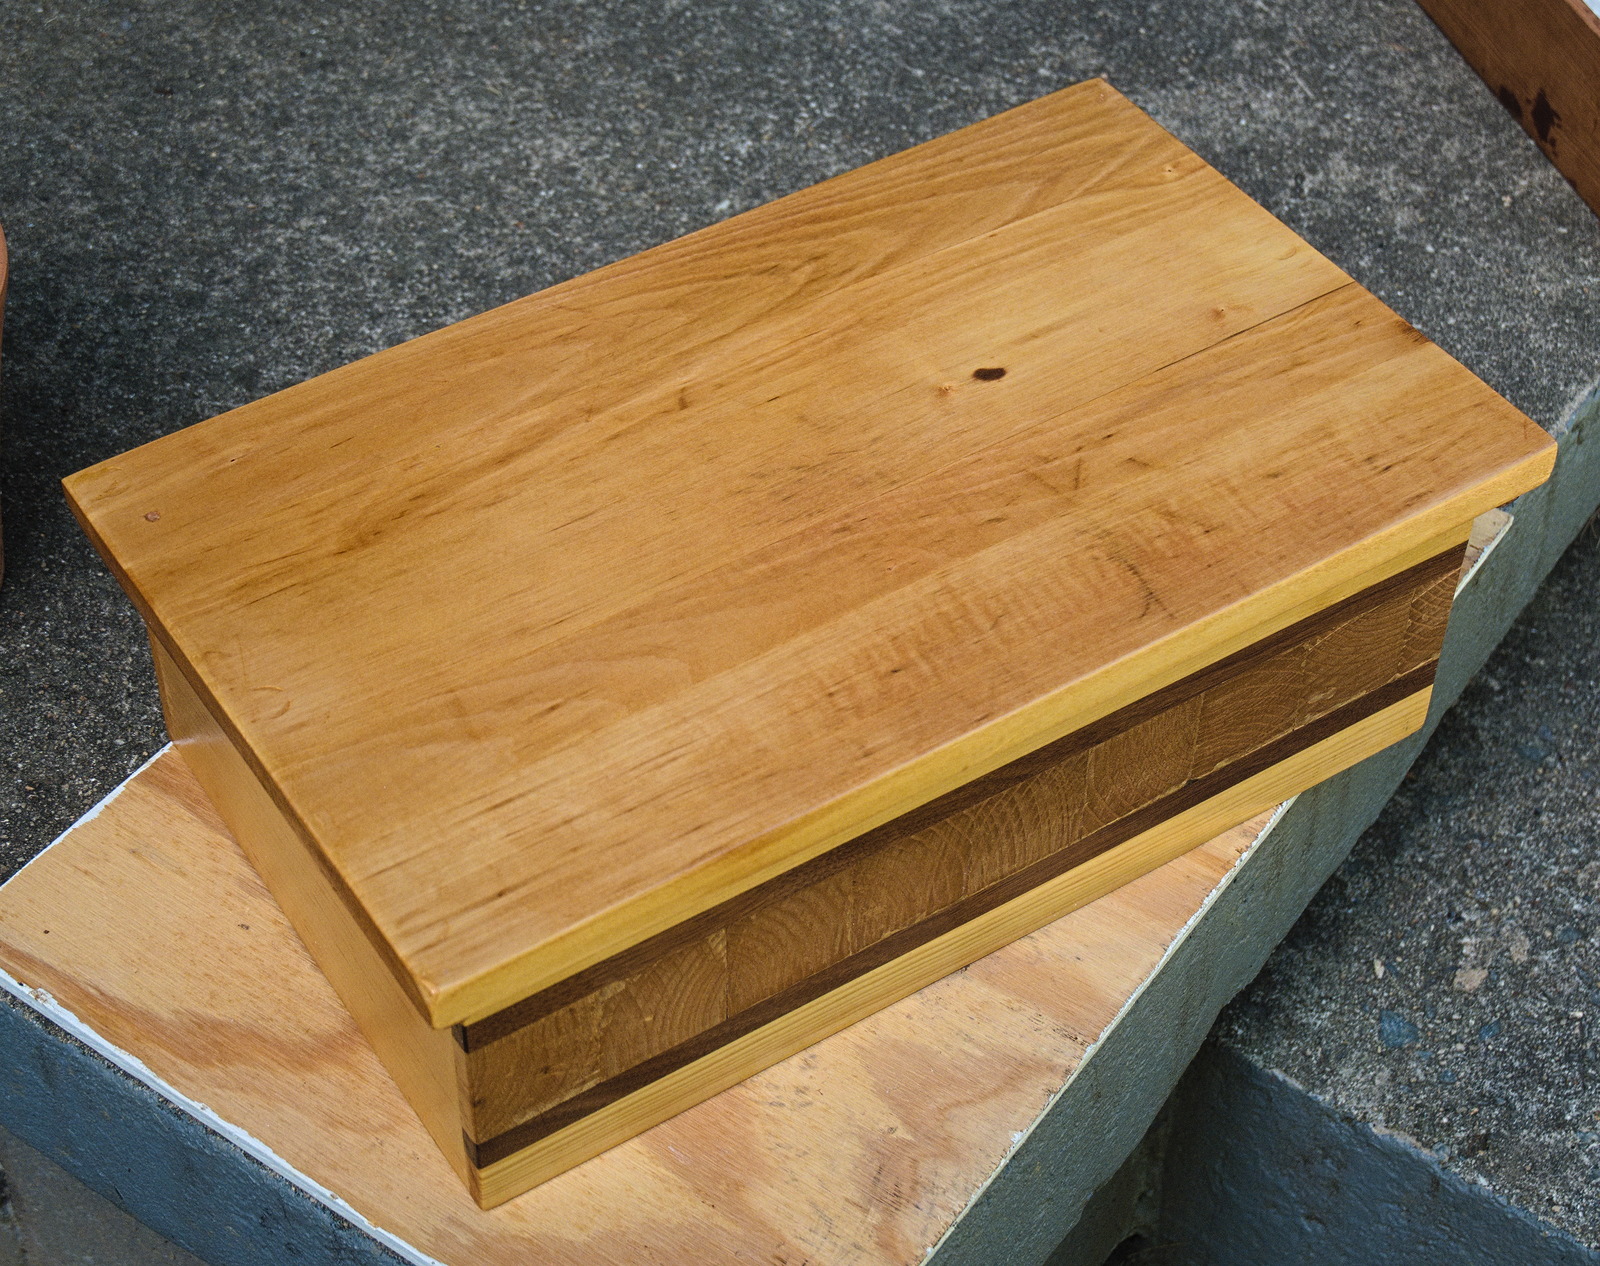
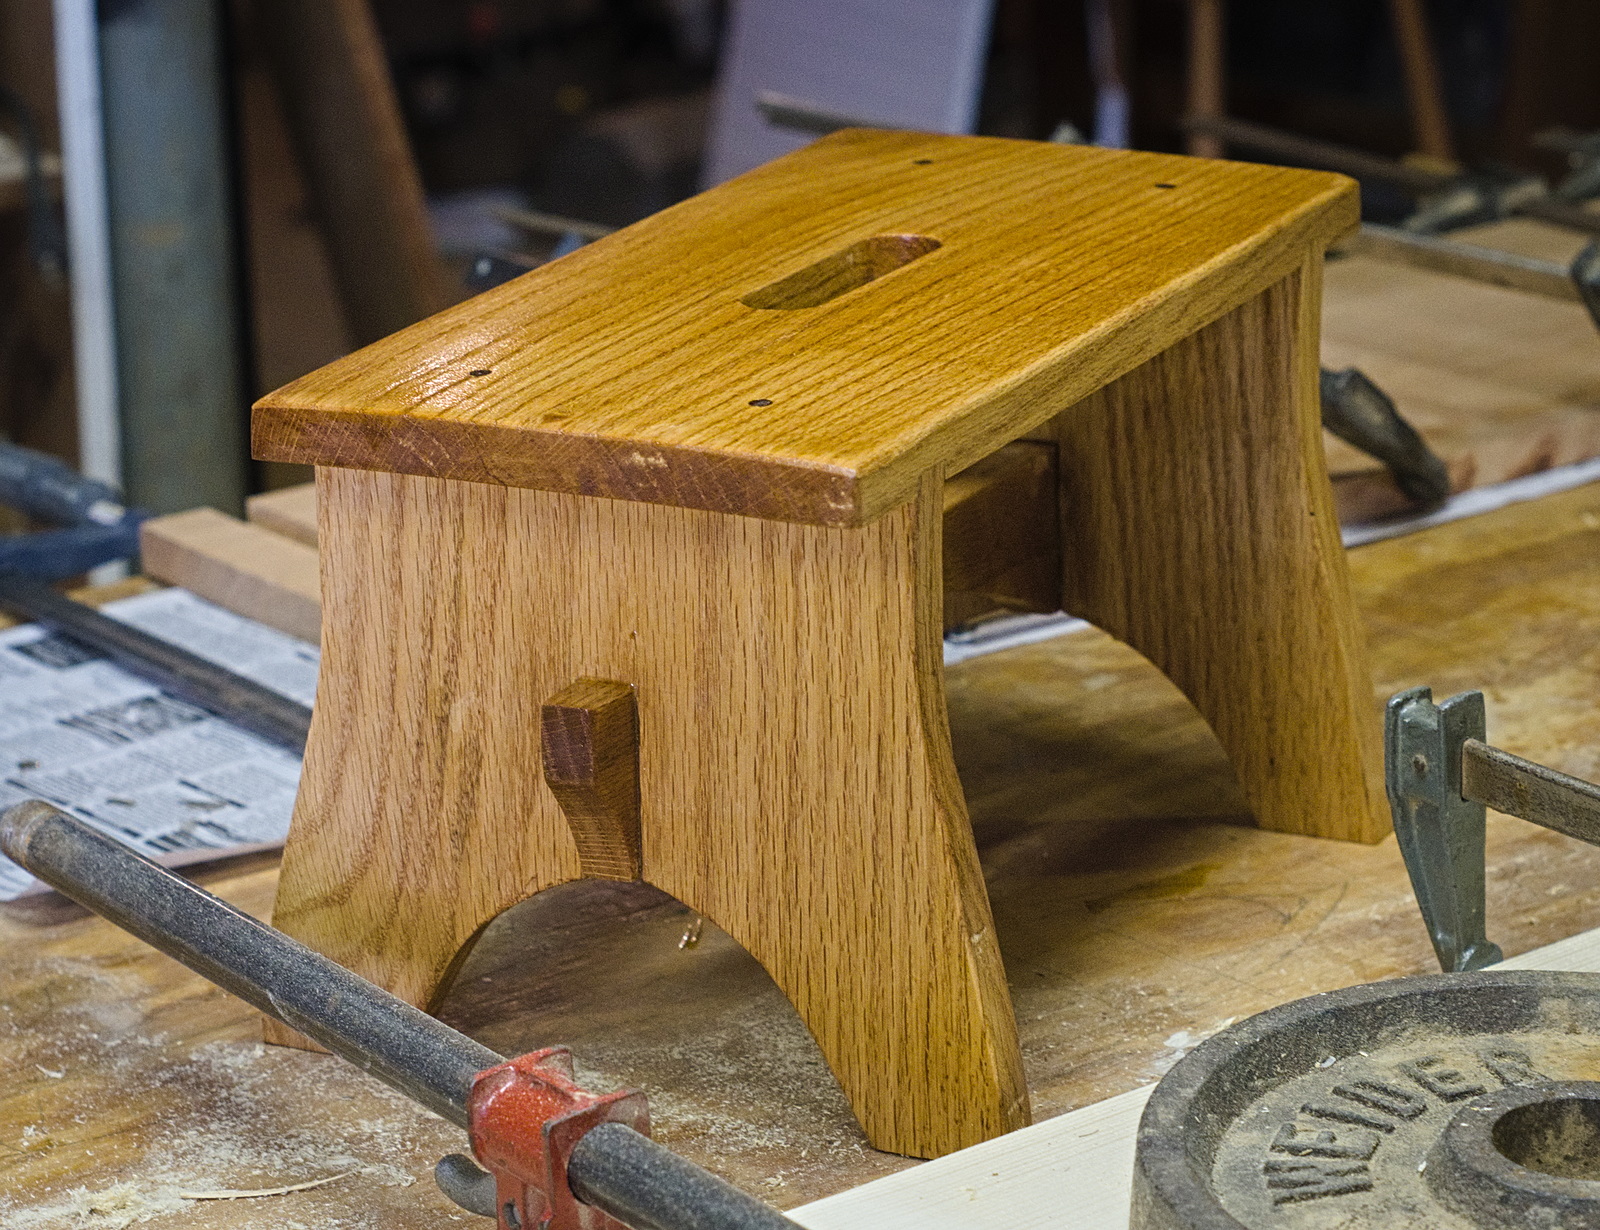
We don't even remember building this step-stool but I guess we did since it's in our shop. It has been laying around for a while with one coat of finish on it. The other day we broke out the jar of poly and coated the cricket table and a pair of boxes Joe built from a broken-down oak desk, and added a coat to this old, forgotten step-stool.
Looking back through old posts, I think I see it peeking out from behind a 105mm barbell on February 8th, 2026.
July 24th, 2026
Posted by Paul

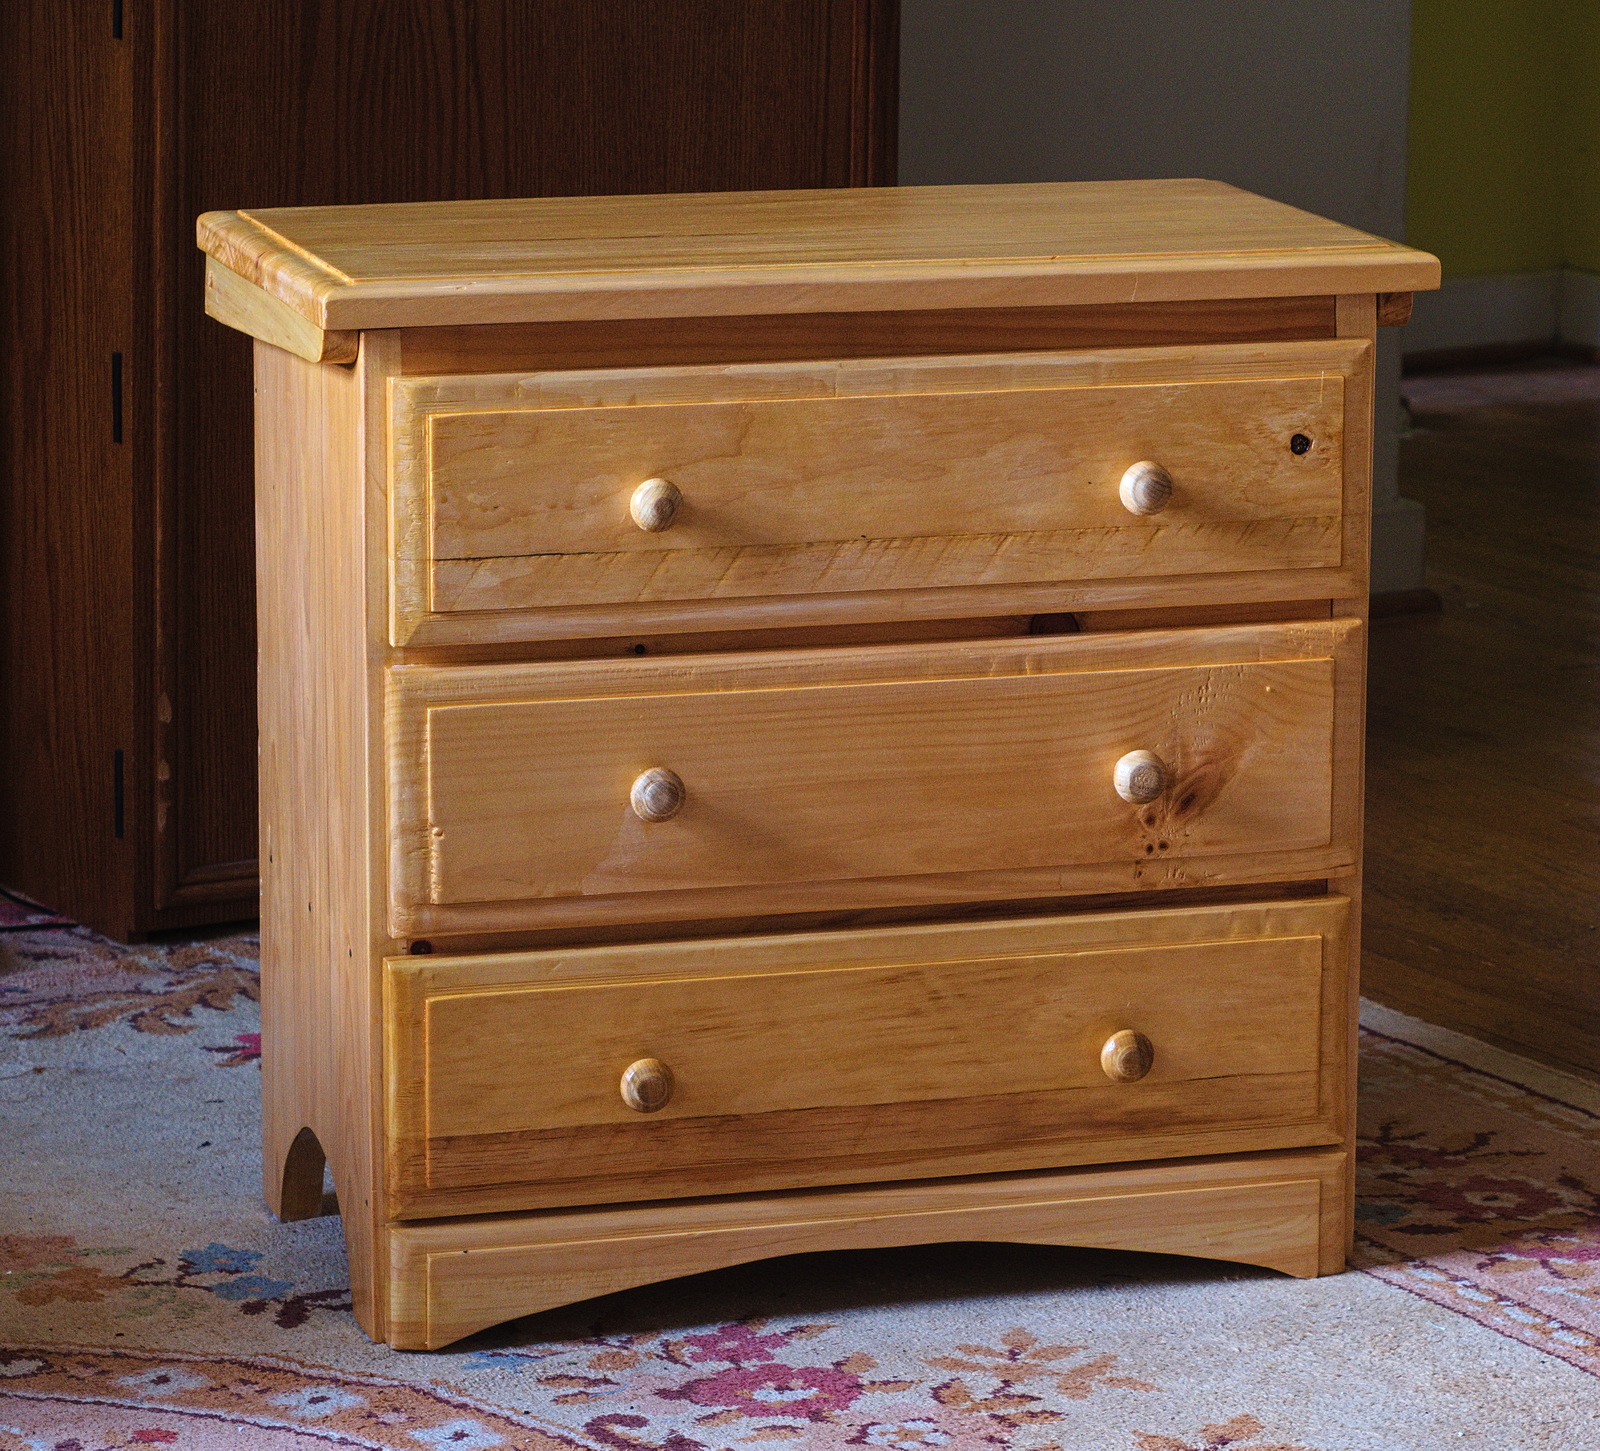
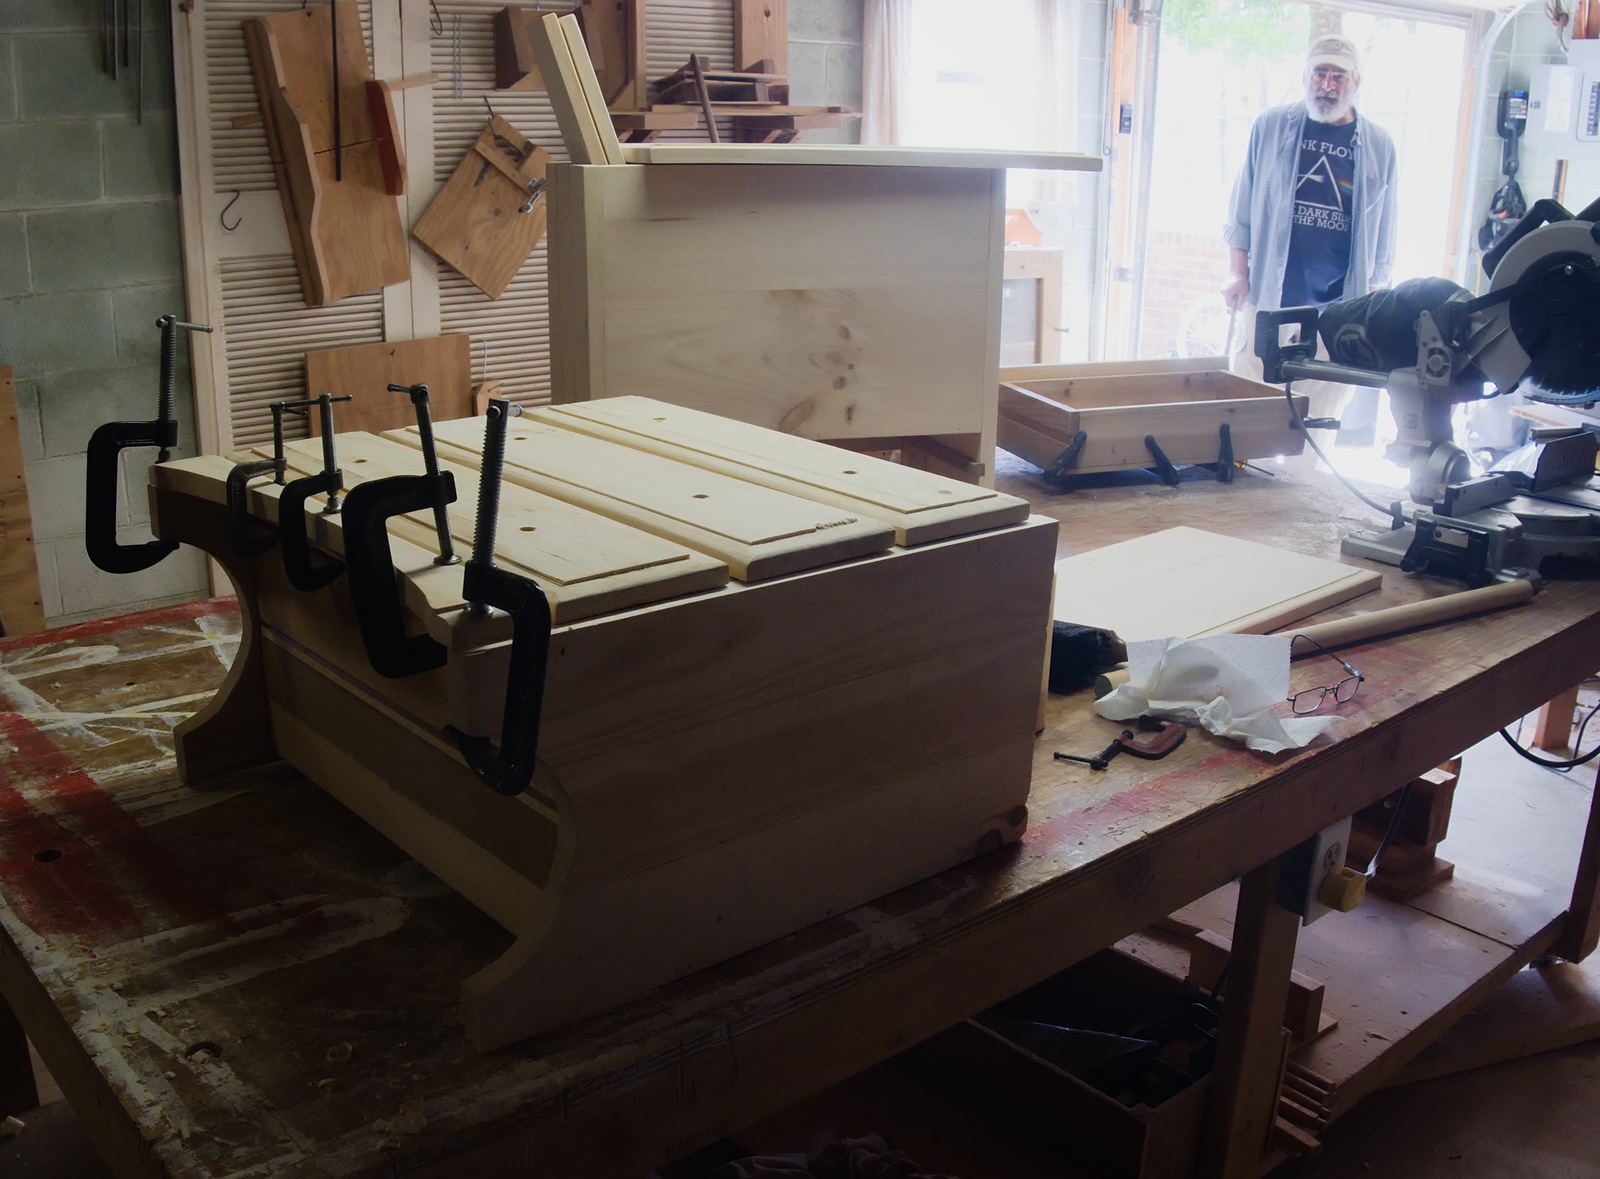
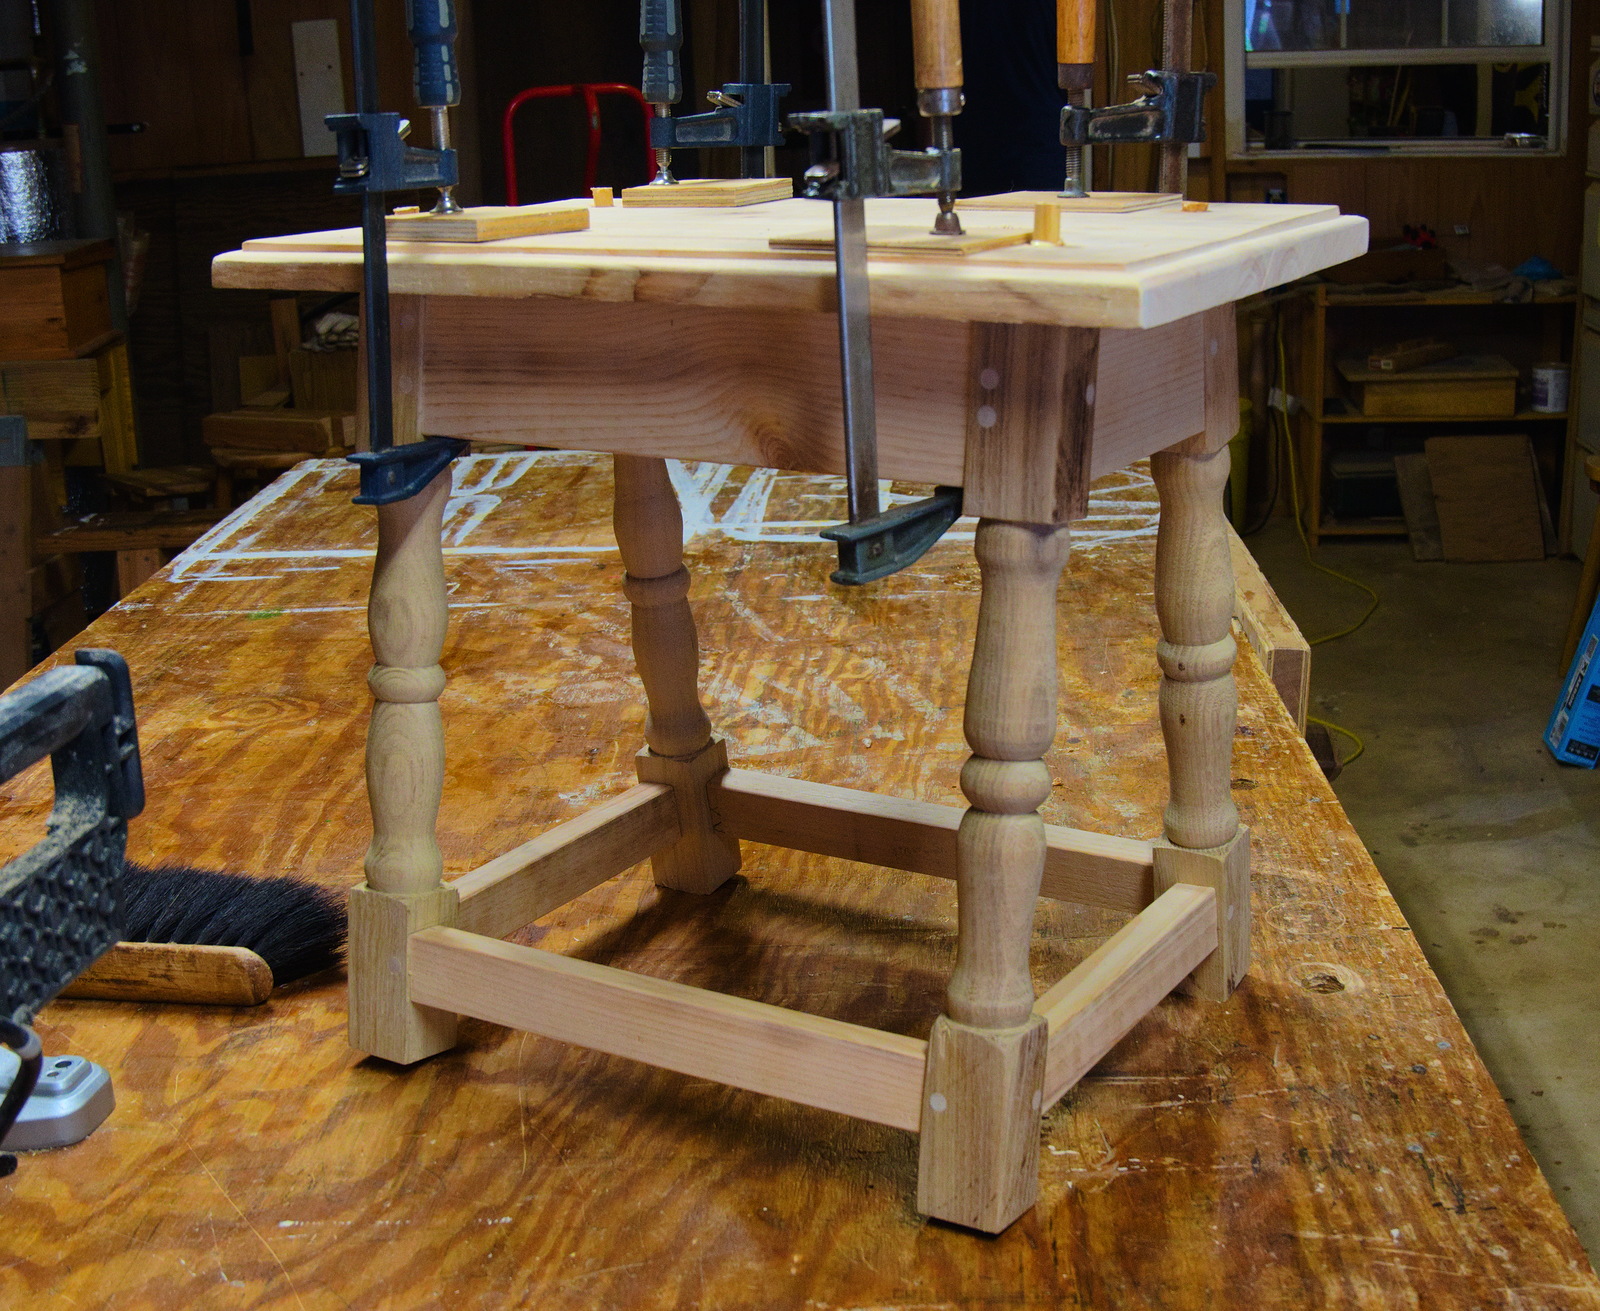
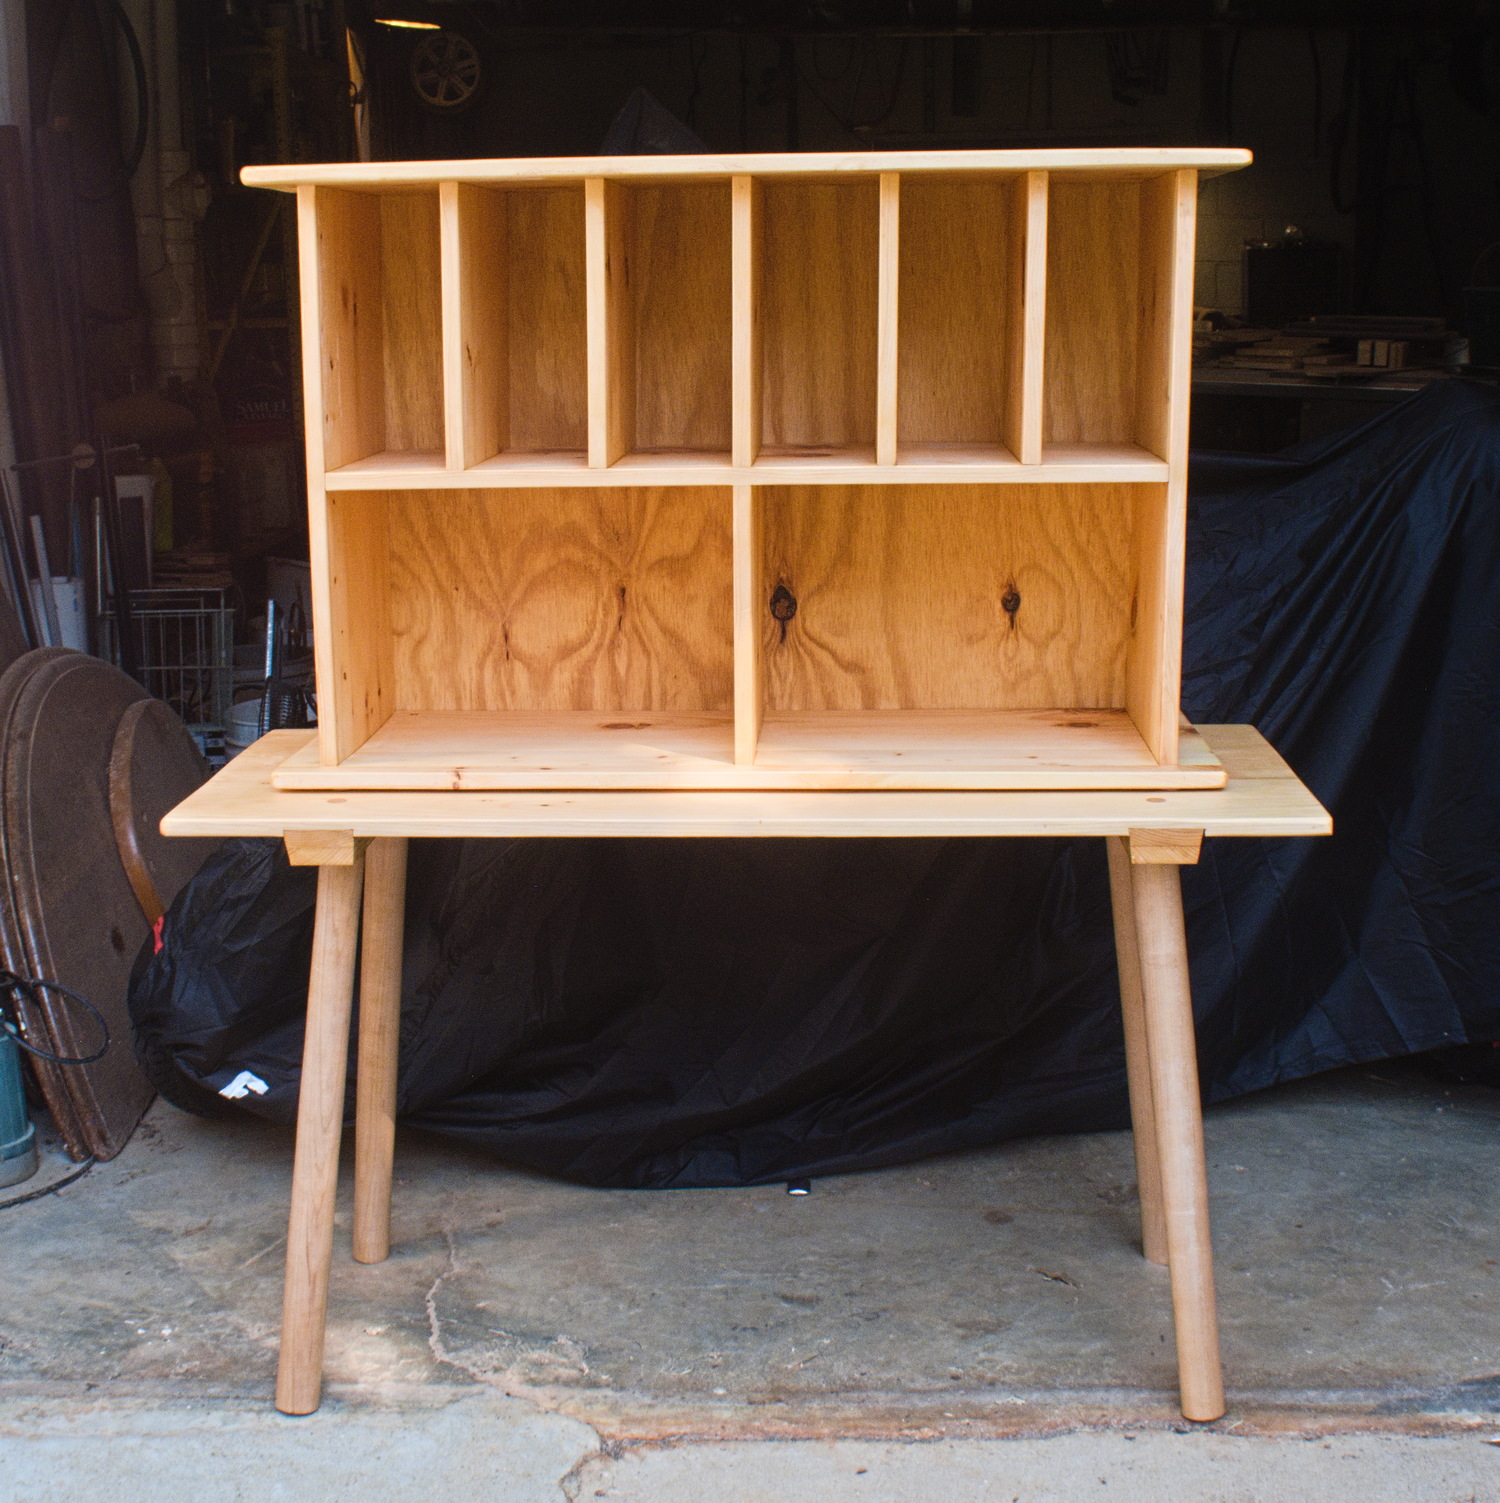
There might be a holiday or two in this first coat of poly, but most of the dry spots got that way in the couple of minutes between finish application and the picture being taken. I've never seen wood quite this thirsty, but another coat or two ought to cover. The wood color of the - soft maple? birch? - stiles has already deepened, and the grain patterns intensified, and my guess is this piece is going to look spectacular when it is truly and completely finished.
July 18th, 2026
Posted by Paul
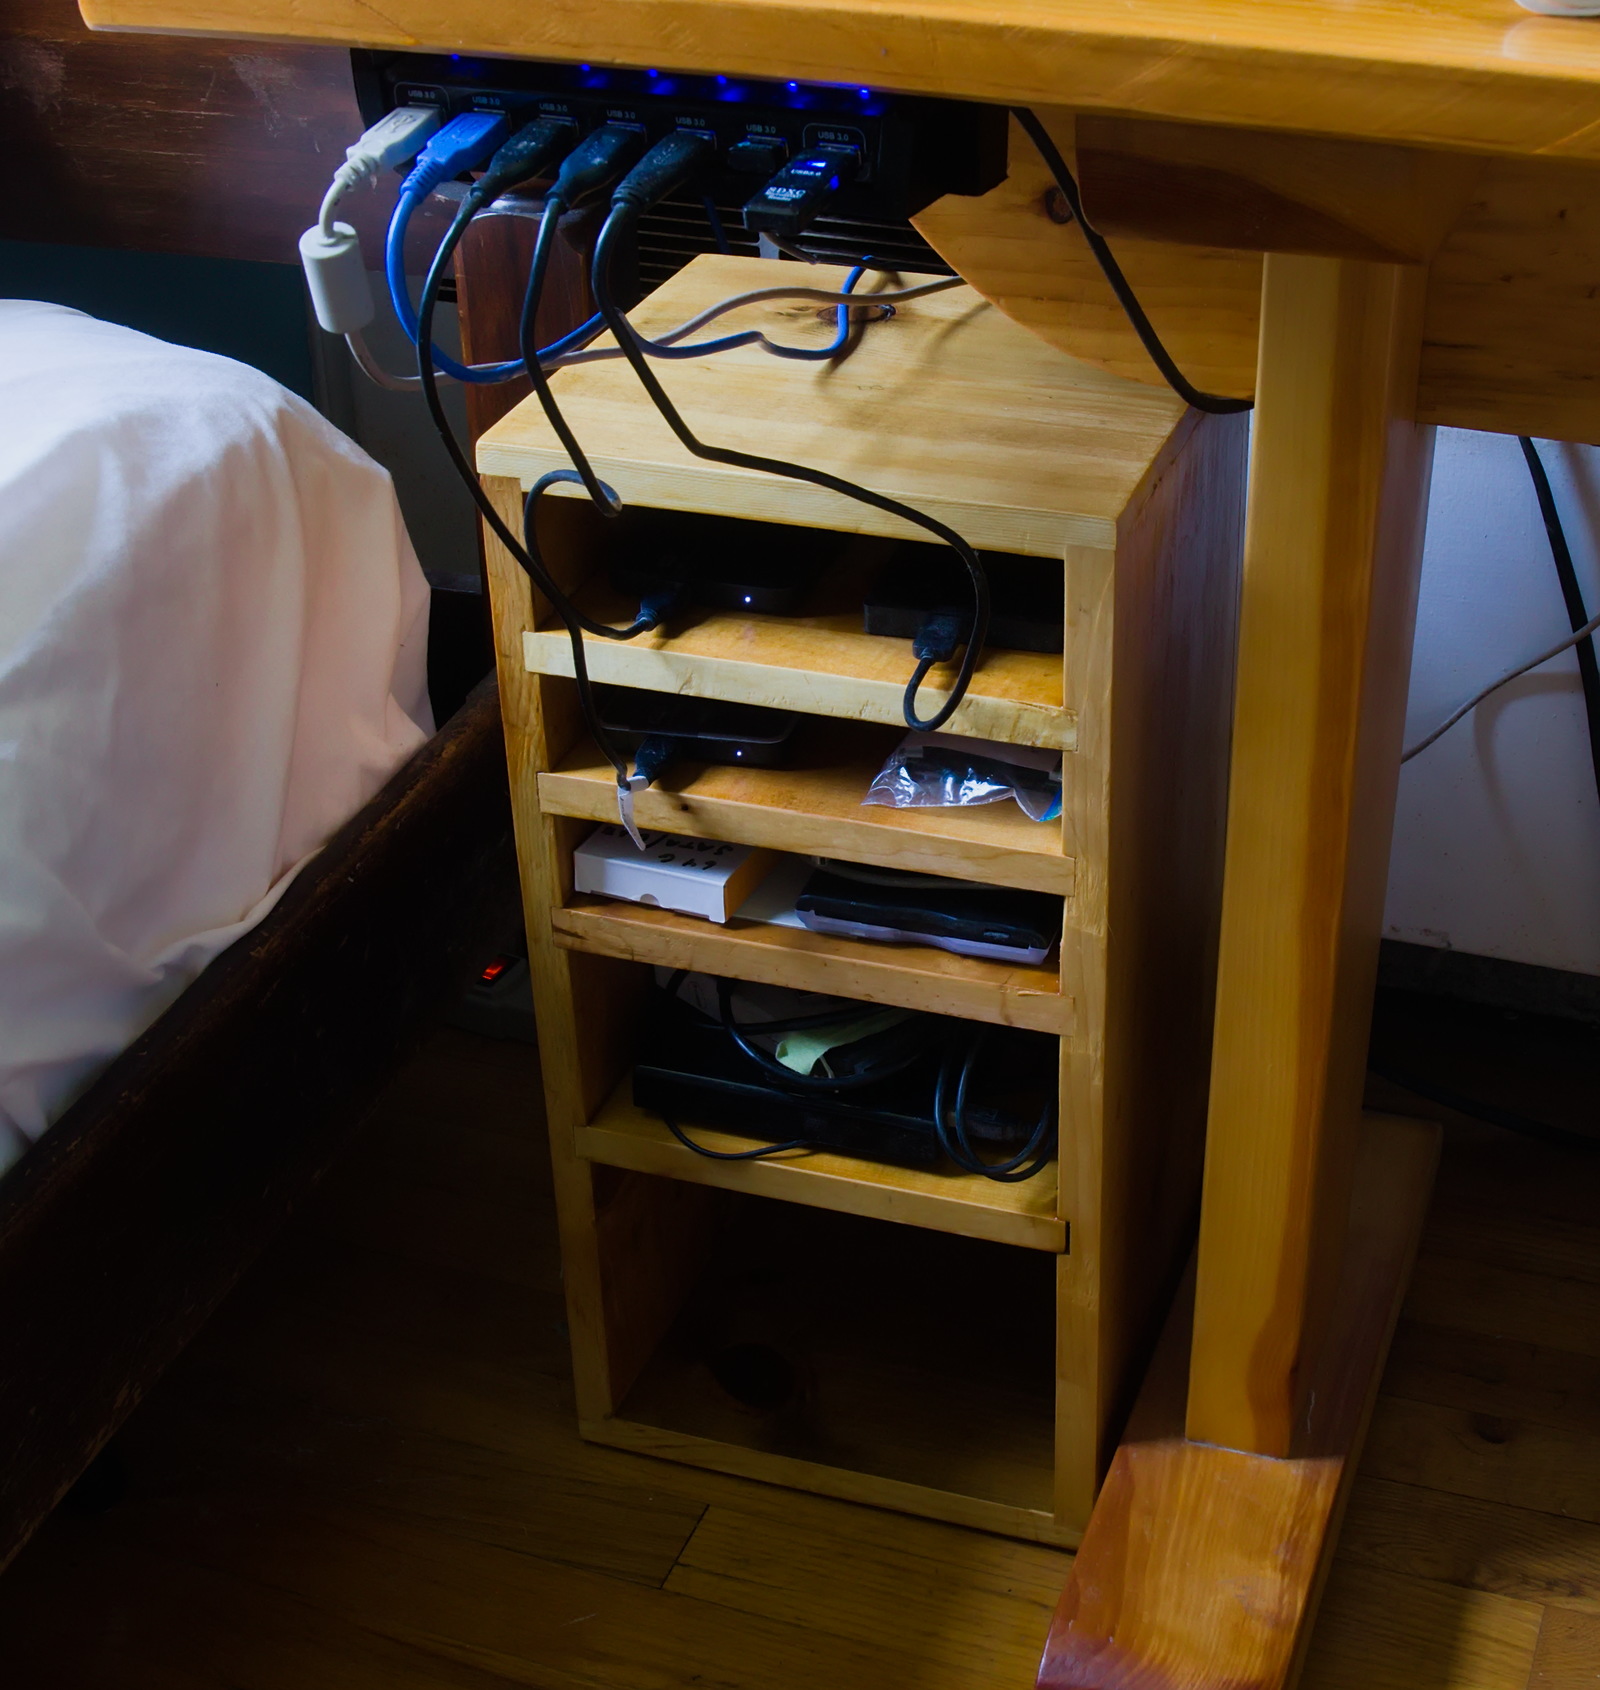
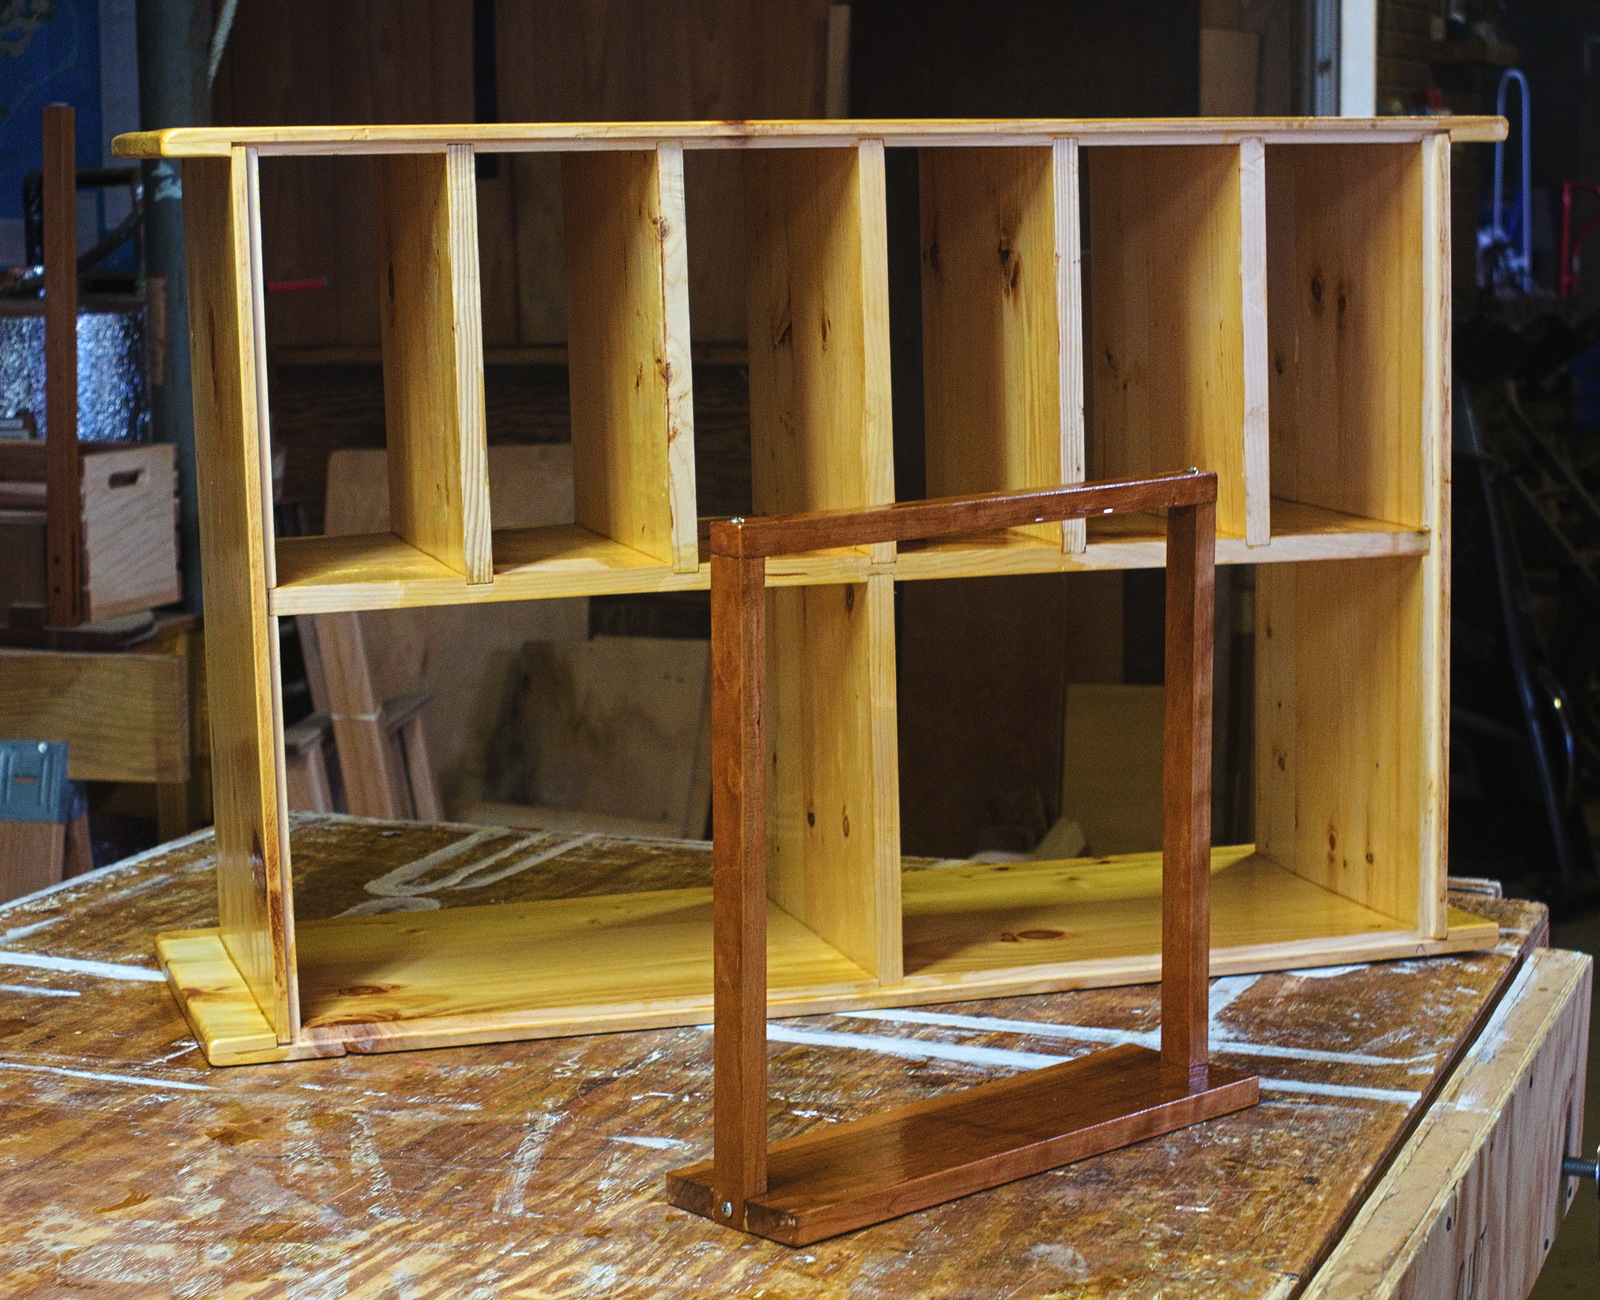
My external hard drives long resided in a rack we built for my Shuttle computer several years ago. The rack was propped on an upturned empty cat litter bucket. Aesthetically, it left a lot to be desired. I drew up a replacement rack which we built in a bit over an hour of a recent workday - or I should say Joe built it, he did 90% of the work. Not that I was idle - I was attending to details on the cricket table.
July 17th, 2026
Posted by Paul

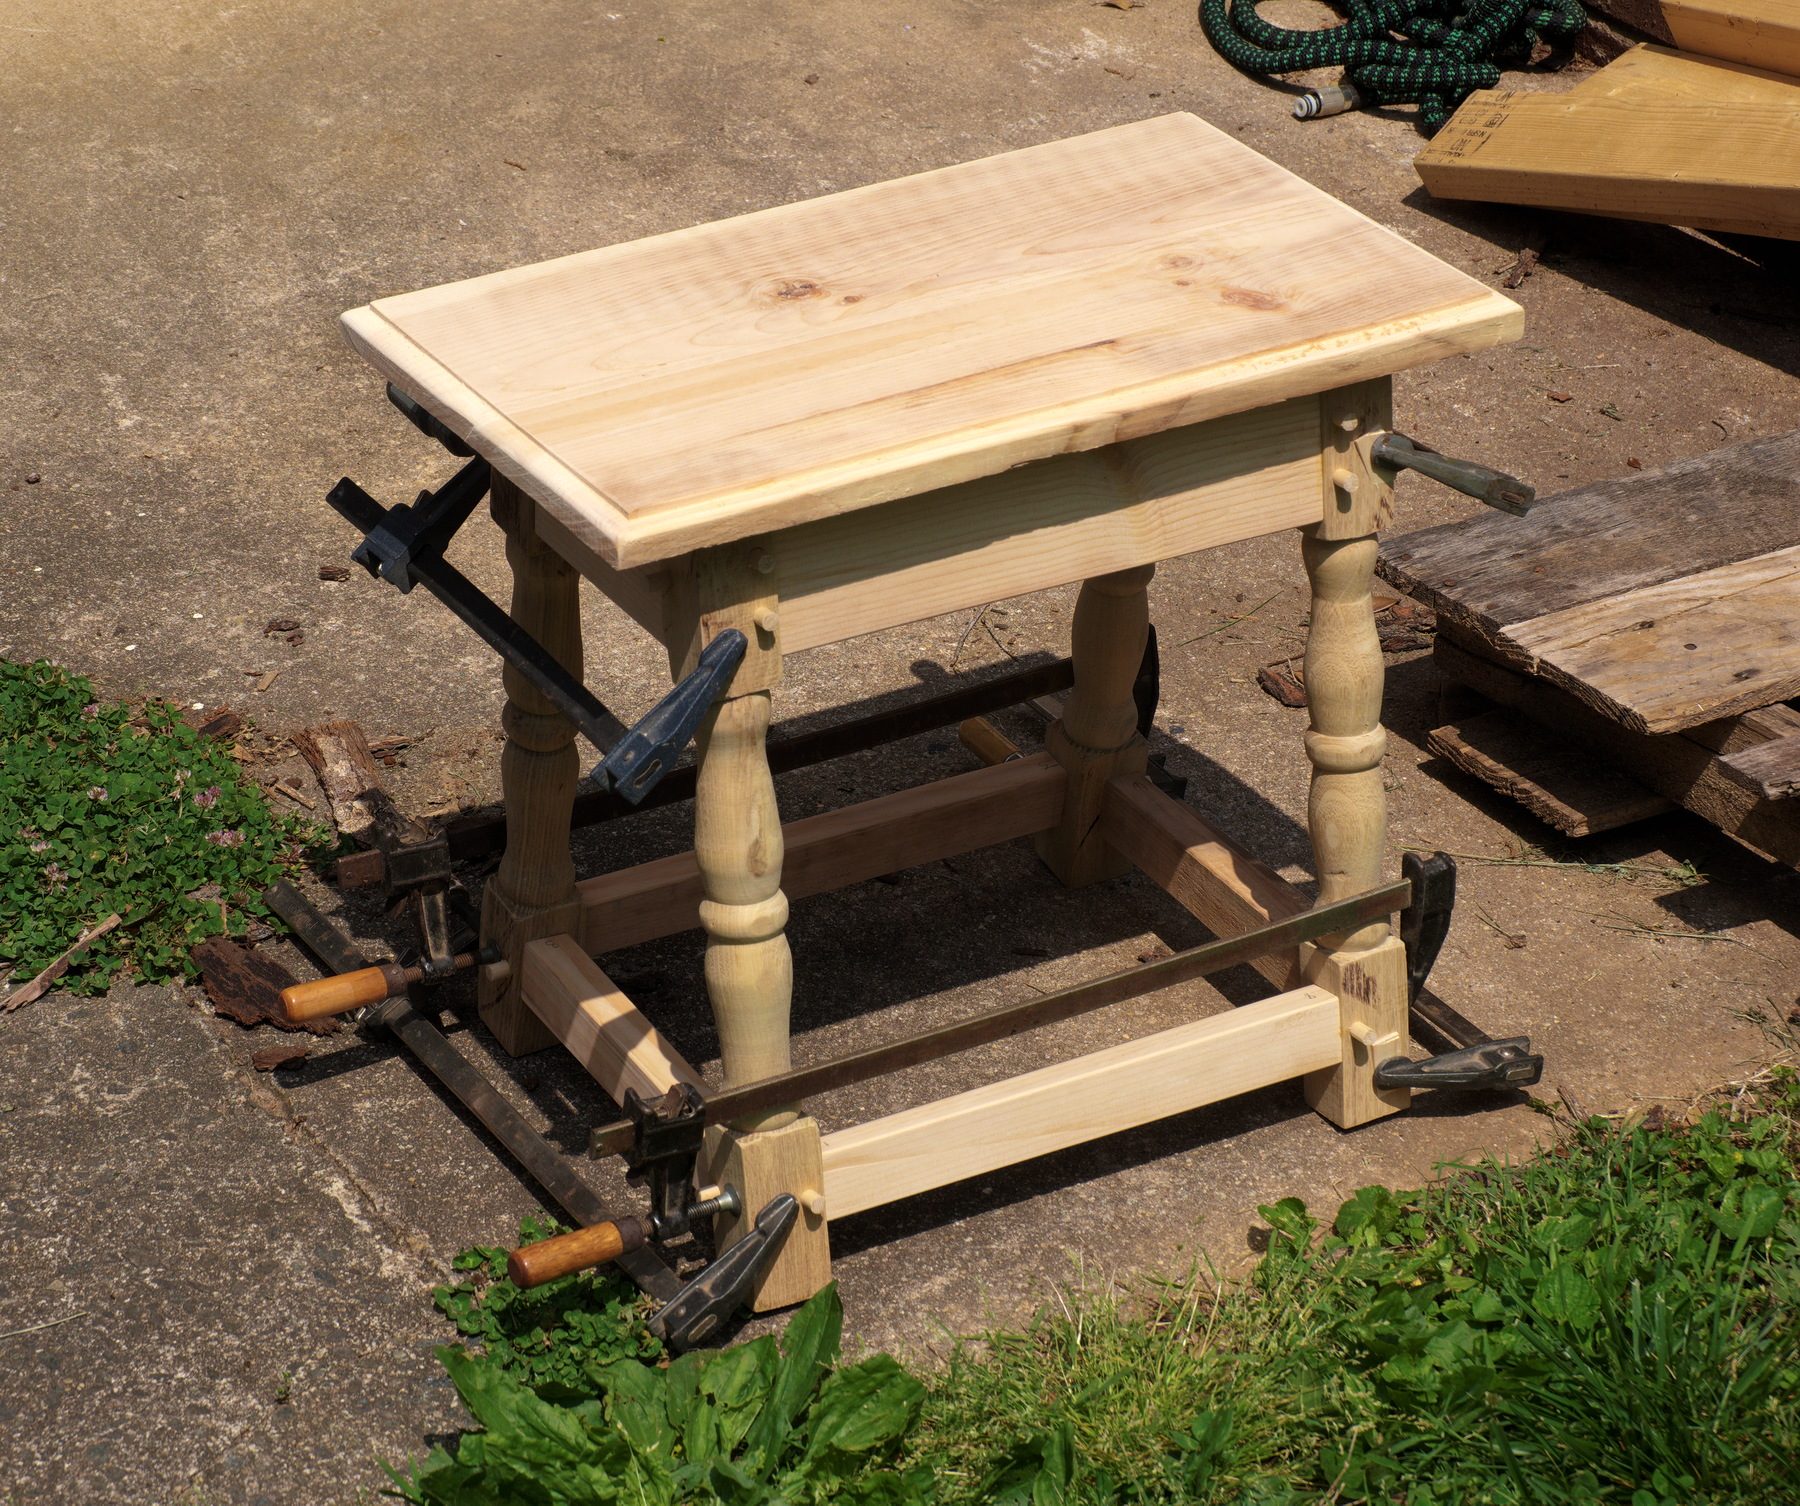
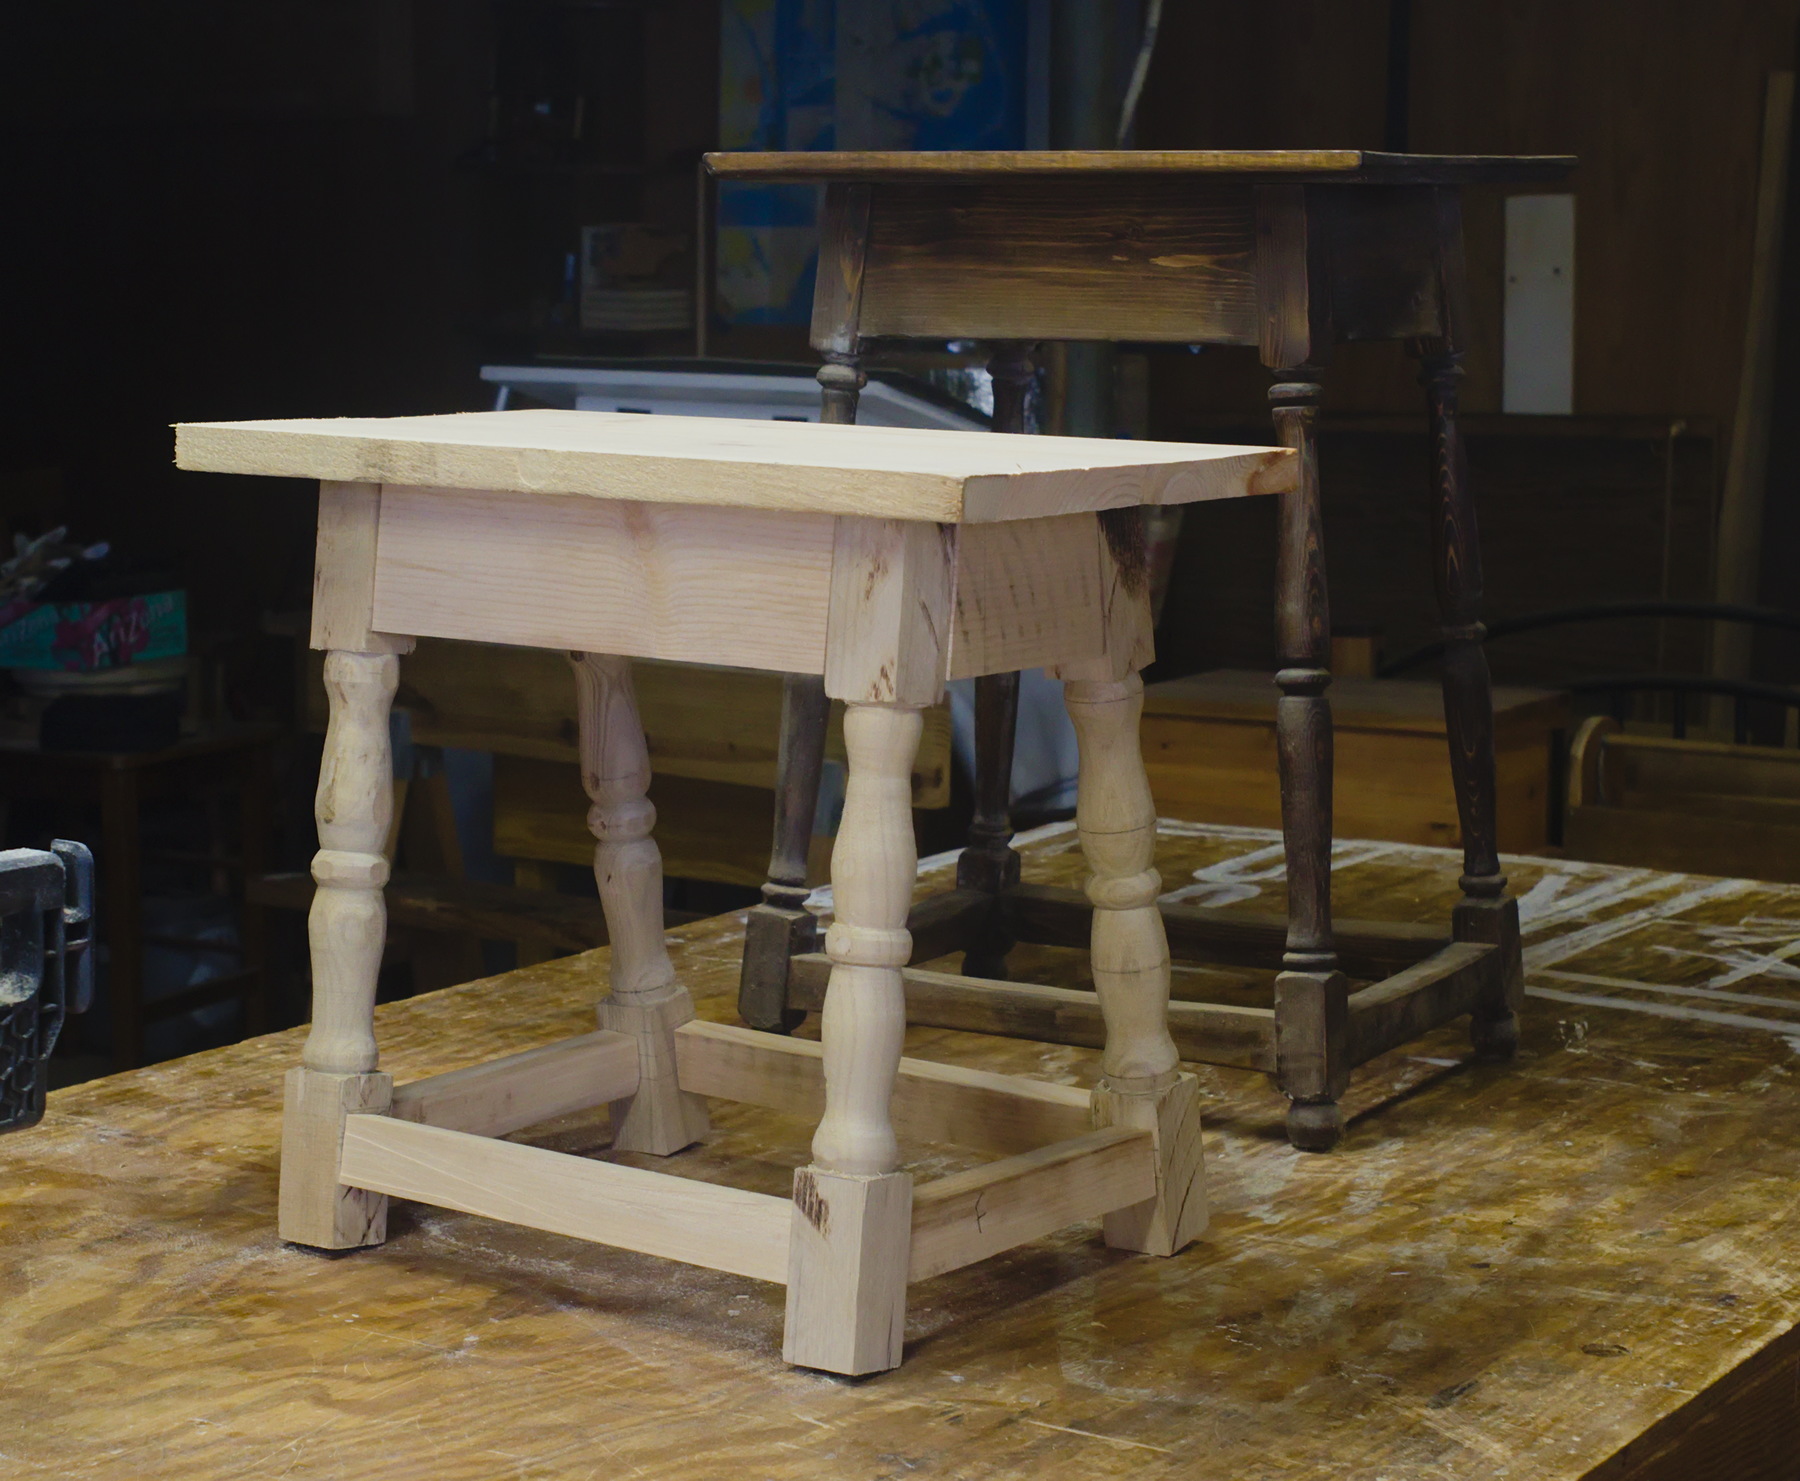
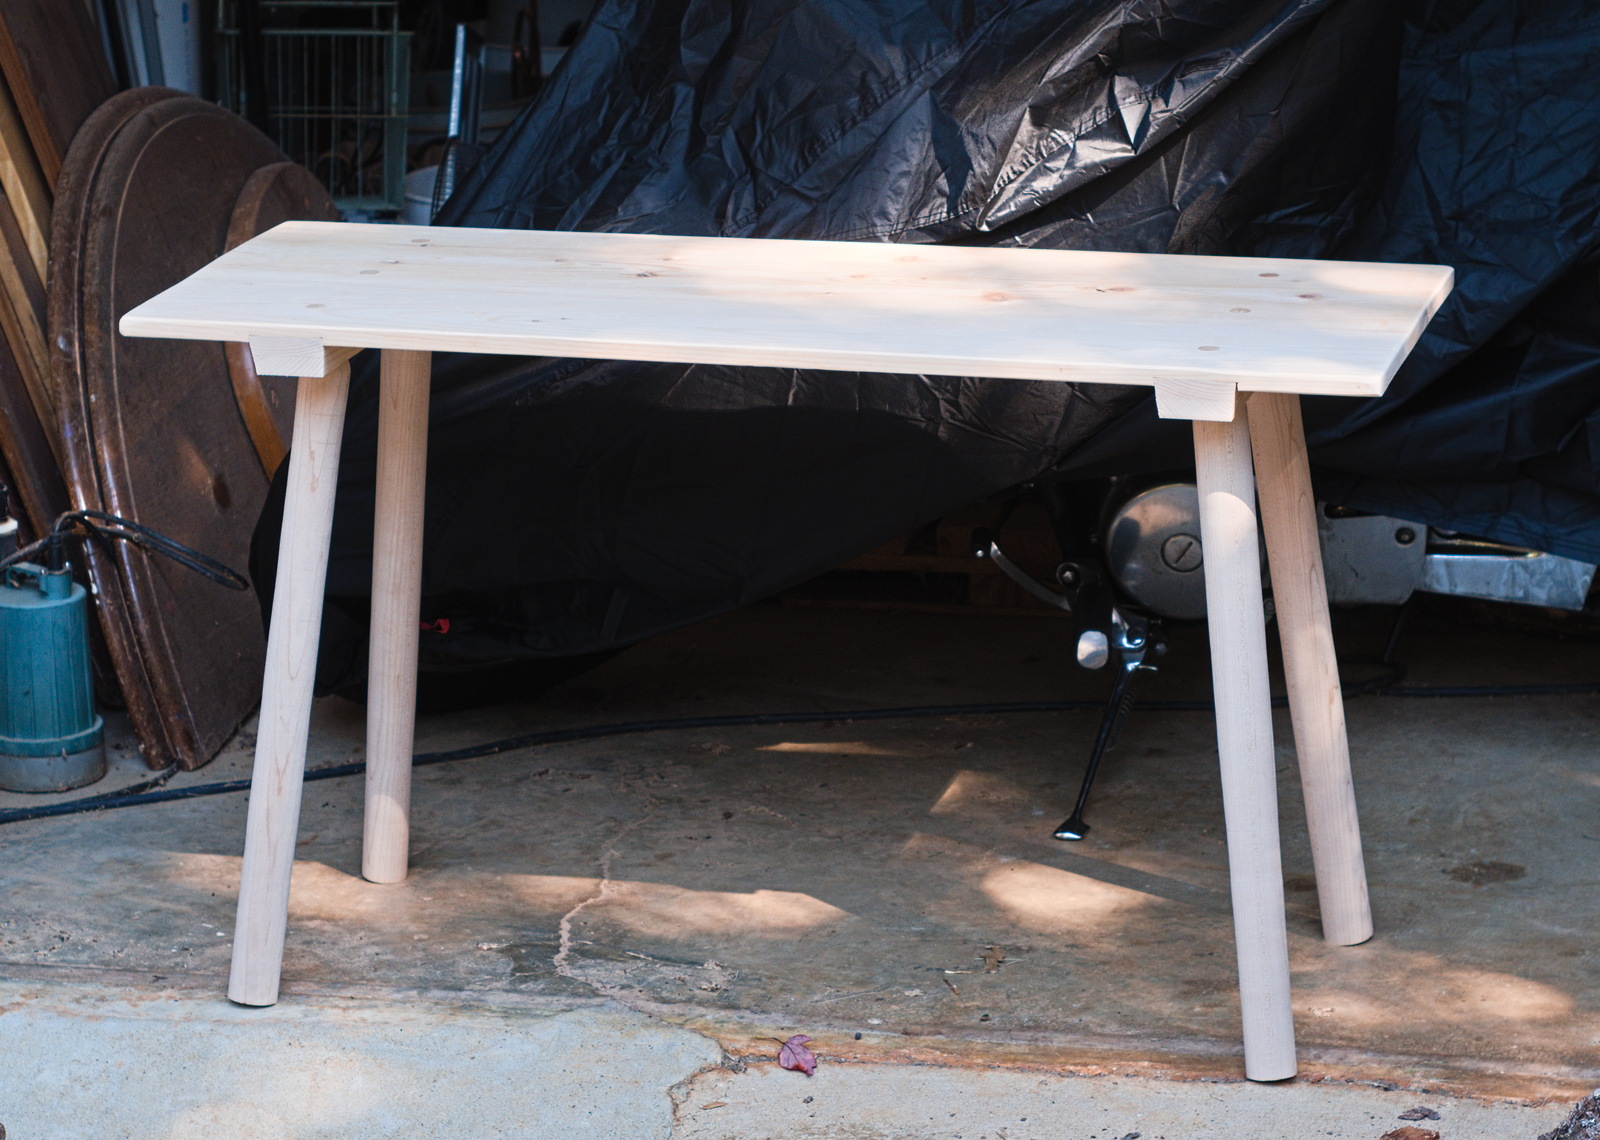
All that's left to do is to trim the pins on the top, do a little clean-up sanding and put on a couple coats of poly. Maple, birch, whatever the wood, in combination with the slight dimensions (and three legs instead of four) makes for a very light and easily moved table. It's low, more the height of an end table than a dining table, and we joked about somebody mistaking it for a stool and collapsing it. But seriously, I think someone will buy it at a charity auction and keep a beautiful lamp or vase on it, a perfect application if I do say so myself.
July 4th, 2026
Posted by Paul
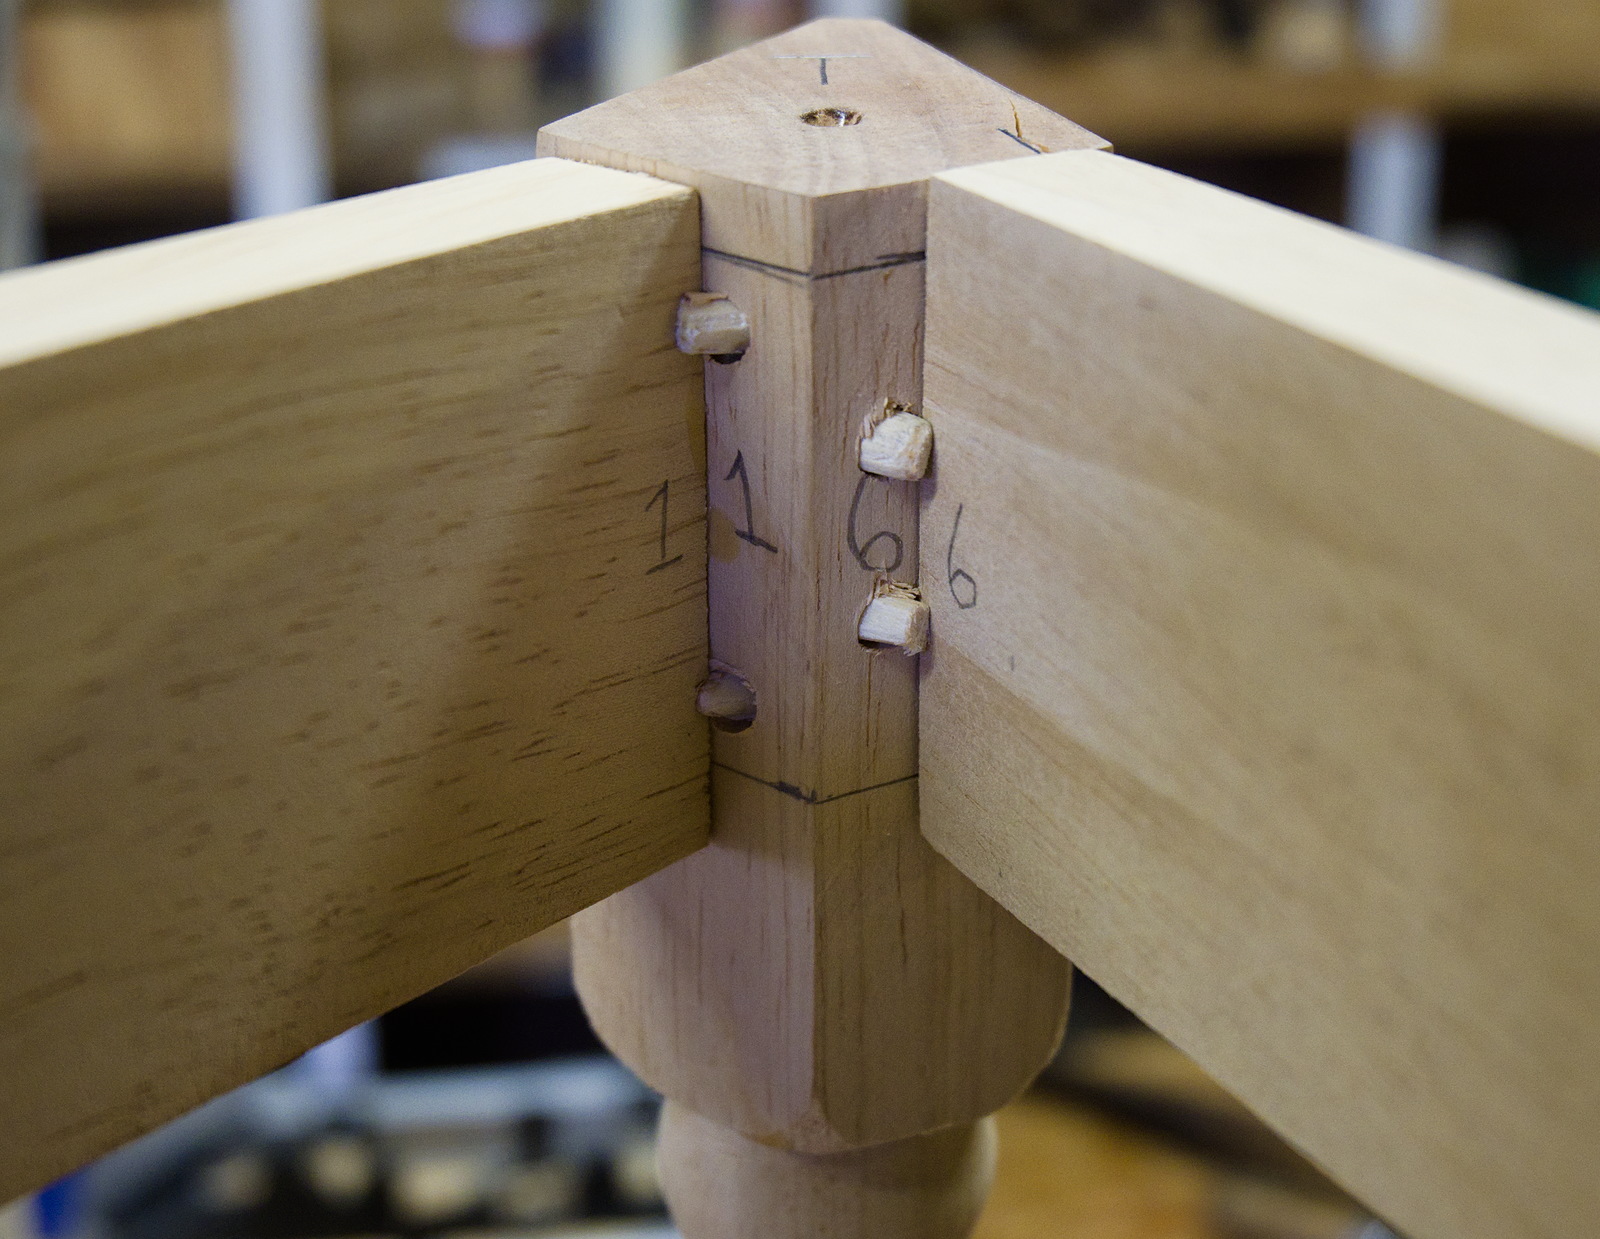
My theory about using oak pins didn't play out. We drilled all the bores and started pounding in pins but had issues with the styles and aprons splitting. In some cases it was impossible to drive the pins all the way through, although we think we at least got them through the tenons. After a while, we switched over to using commercial dowels and found they went through with no trouble and pulled the joints up tight.
This mortise and tenon, drawbore construction has been a real learning process, but I think we are close to having it figured out. I hope I can persuade Joe to do at least one more project, either another cricket table or a trestle table.
June 29th, 2026
Posted by Paul

An injury in the shop, caused by a spinning, edged tool. But not a woodworking tool...
We used walnut pins in the joint stool we built recently and found they were liable to shatter as we drove them through the drawbores. For the cricket table, we decided to use oak pins. We made 19, one extra, and got ready to start drilling holes. At this point, Joe attempted to move a running fan near the drill press and stuck his finger through the cage into the fan blade. He walked to the bench with a fair amount of blood spattered on his hand and a ragged cut. Once he had the wound rinsed out and doused with hydrogen peroxide, we bandaged it, and then he sat at the bench with his head down for a few minutes. Eventually he shook it off. We decided to leave off woodworking for the day. Fortunately we had another project, setting up an old computer for a friend to use for basic web browsing and email. Afterward we drank a couple of beers. Joe had ibuprofen with his.
June 12th, 2026
Posted by Paul
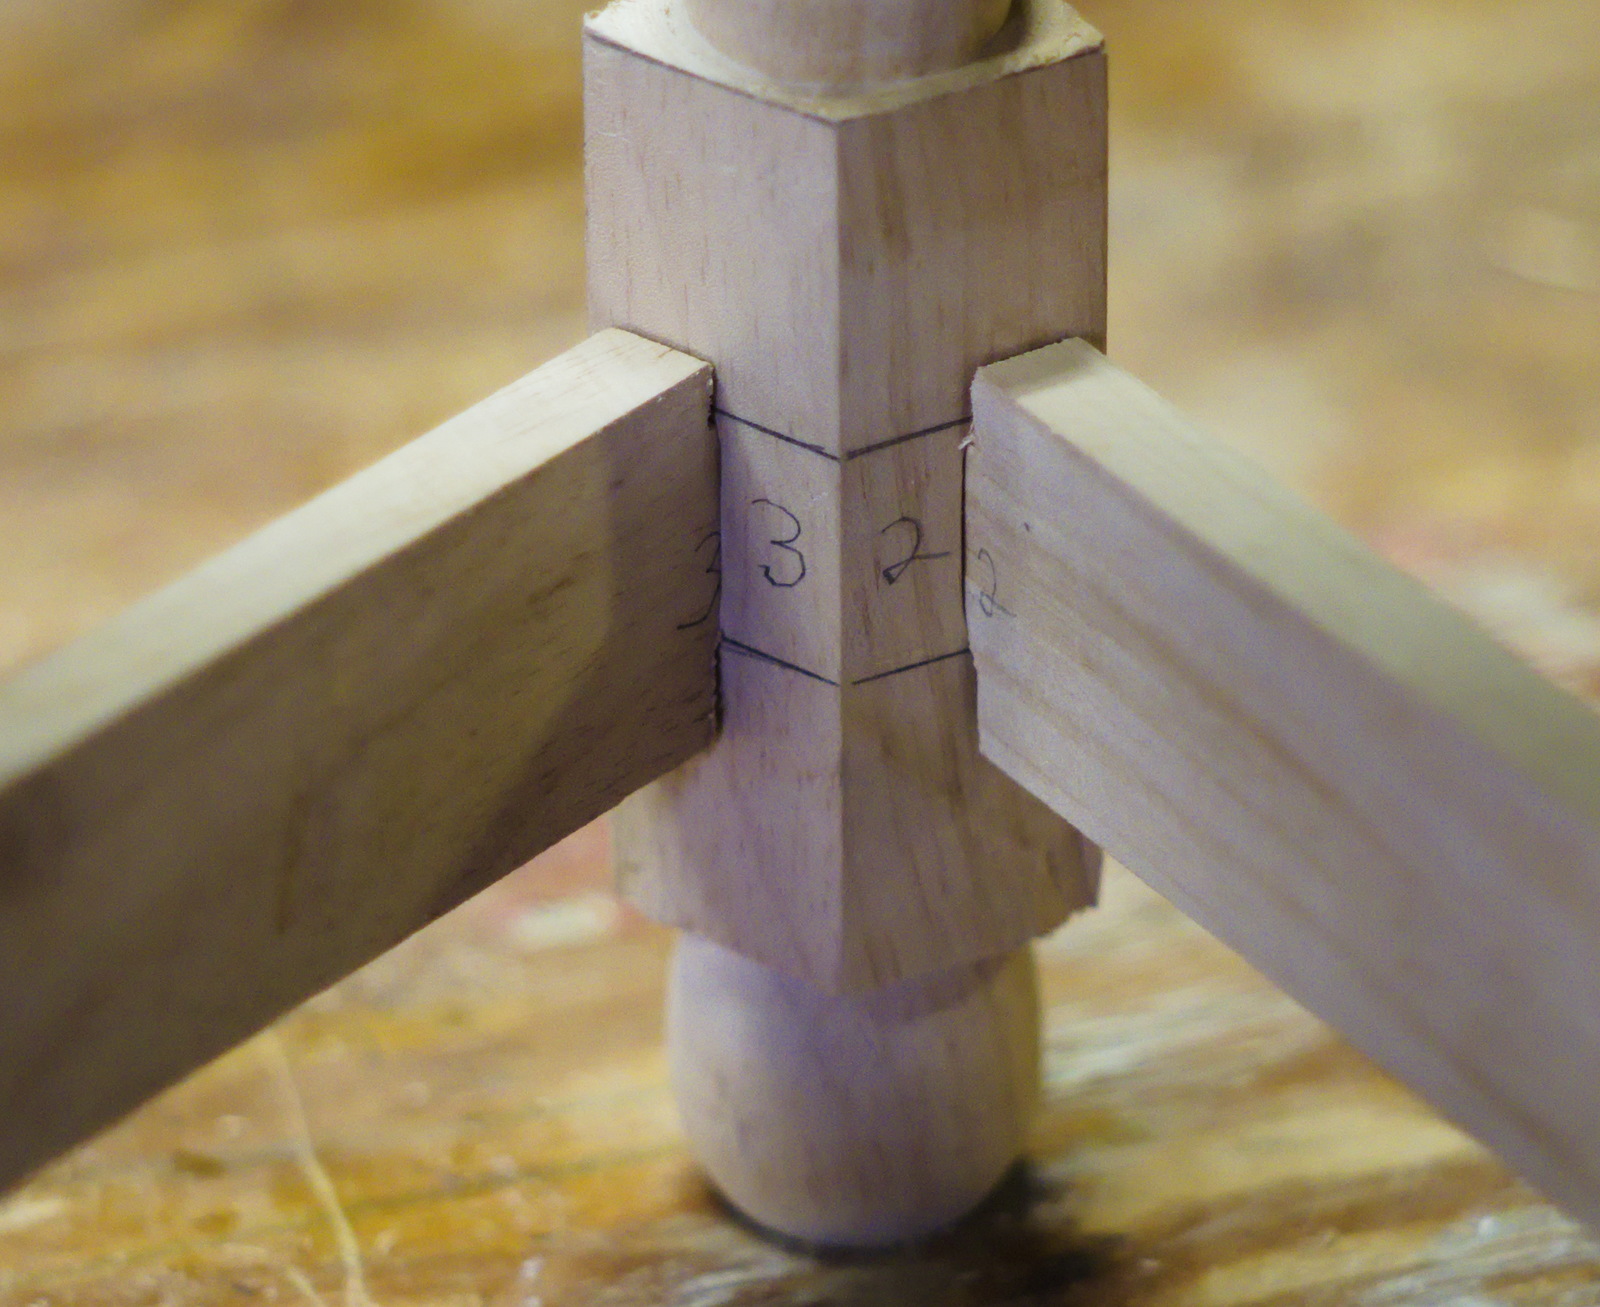
We made short work turning the final leg of the cricket table, cutting and fitting the tenons on the stringers and cutting out the round top.
There is nothing difficult about making a three-legged table once you abandon the idea that the sides all need to meet at 90 degrees. The jigs for making the kite-shaped legs on the table saw allow for easy duplication and it would be simple to mass-produce these tables. Plus, you only have to cut three legs, not four, and twelve mortises and tenons, not sixteen, and three aprons and stringers, not four.
Part of it is that we are getting used to making turned and splayed leg, mortise and tenoned assemblies, with the tavern table and two joint stools to our credit, but this project just seems to have come together much easier than any of the others.
May 28th, 2026
Posted by Paul

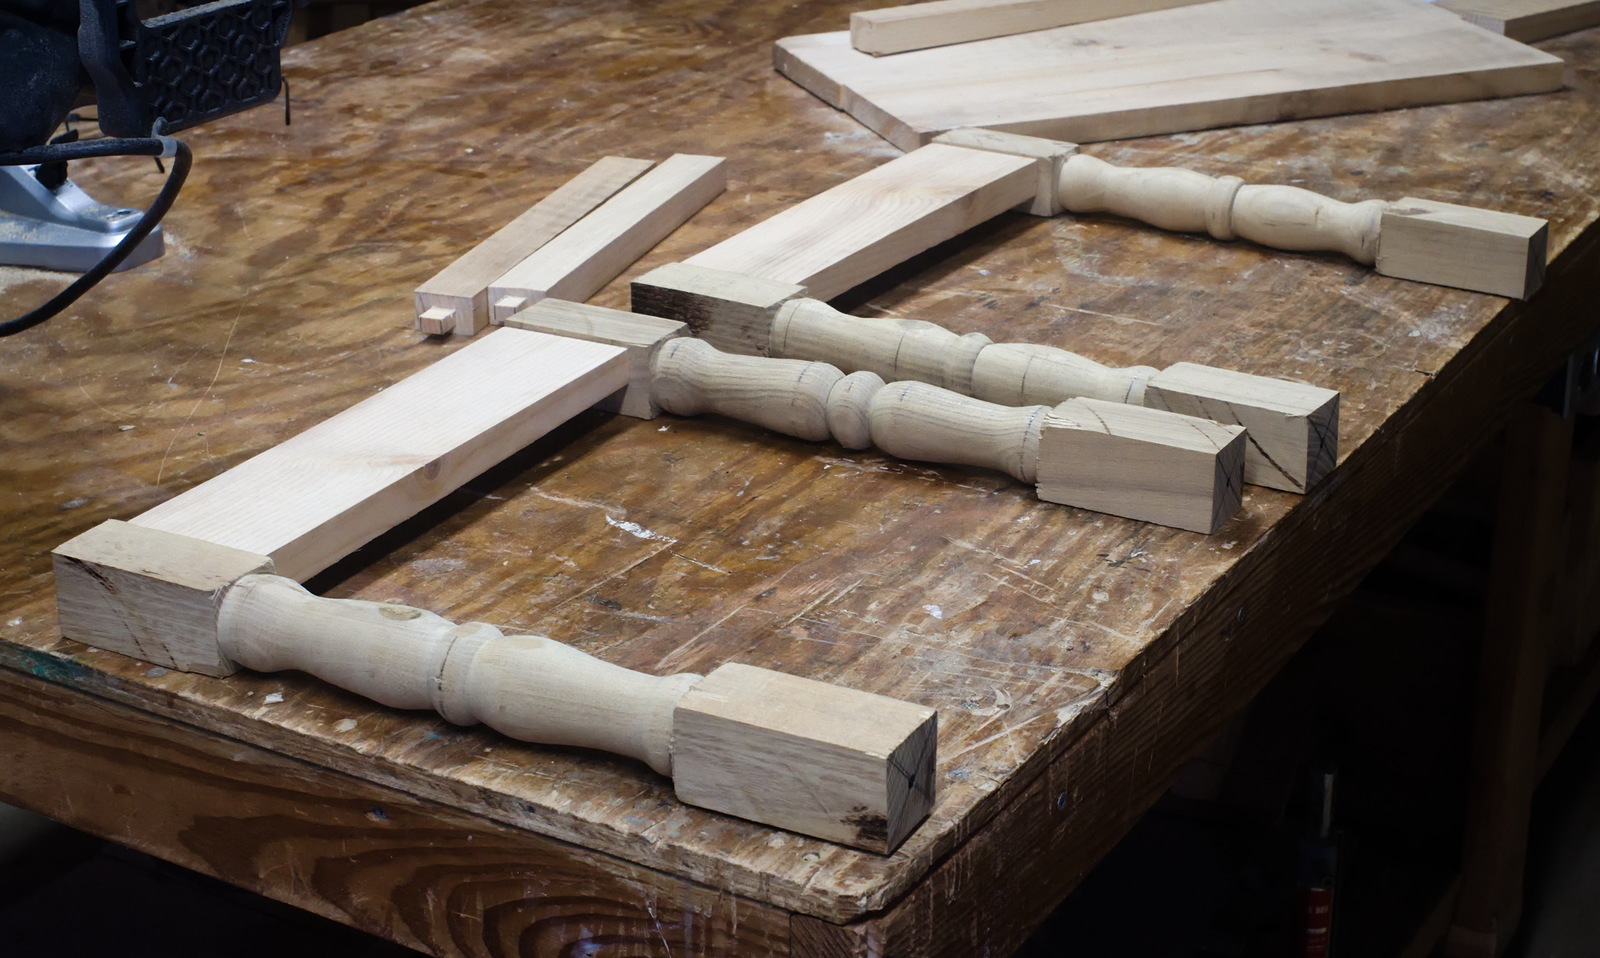
Lots of progress on the cricket table today as Joe turned two of the legs while I cut all six of the tenons on the aprons.
May 8th, 2026
Posted by Paul

The early colonials didn't have power tools, and we don't have many. What we have is more carpenter-grade than accurate enough for fine cabinetmaking. The kind of furniture the 17th century New Englanders made is a good model for us - things don't have to be perfectly four-square, table leg turnings don't have to be identical, tool marks don't have to be sanded out. Modern cabinetmakers are very concerned to get perfect mating surfaces for glue joints, but the use of mortise and tenons with drawbore pegs let the colonials make strong, lasting joints without even using glue. Most important, this kind of furniture looks good and is functional.
Joint stools were commonly made of maple or oak, though there are examples in walnut (Nutting, 2730). Like our Pilgrim ancestors, we used what we had, in our case a round section of a walnut tree that our friend Mark cut down in his yard. We rove it out, then worked what flat faces we needed with bench plane and table saw. We didn't have enough wood to built the top, so we got a plank from Wall Lumber to make that.
I had great fun doing this project and Joe didn't object. We are in the process of riving out some nice straight oak, and maybe we'll make another joint stool with part of it.
April 11th, 2026
Posted by Paul
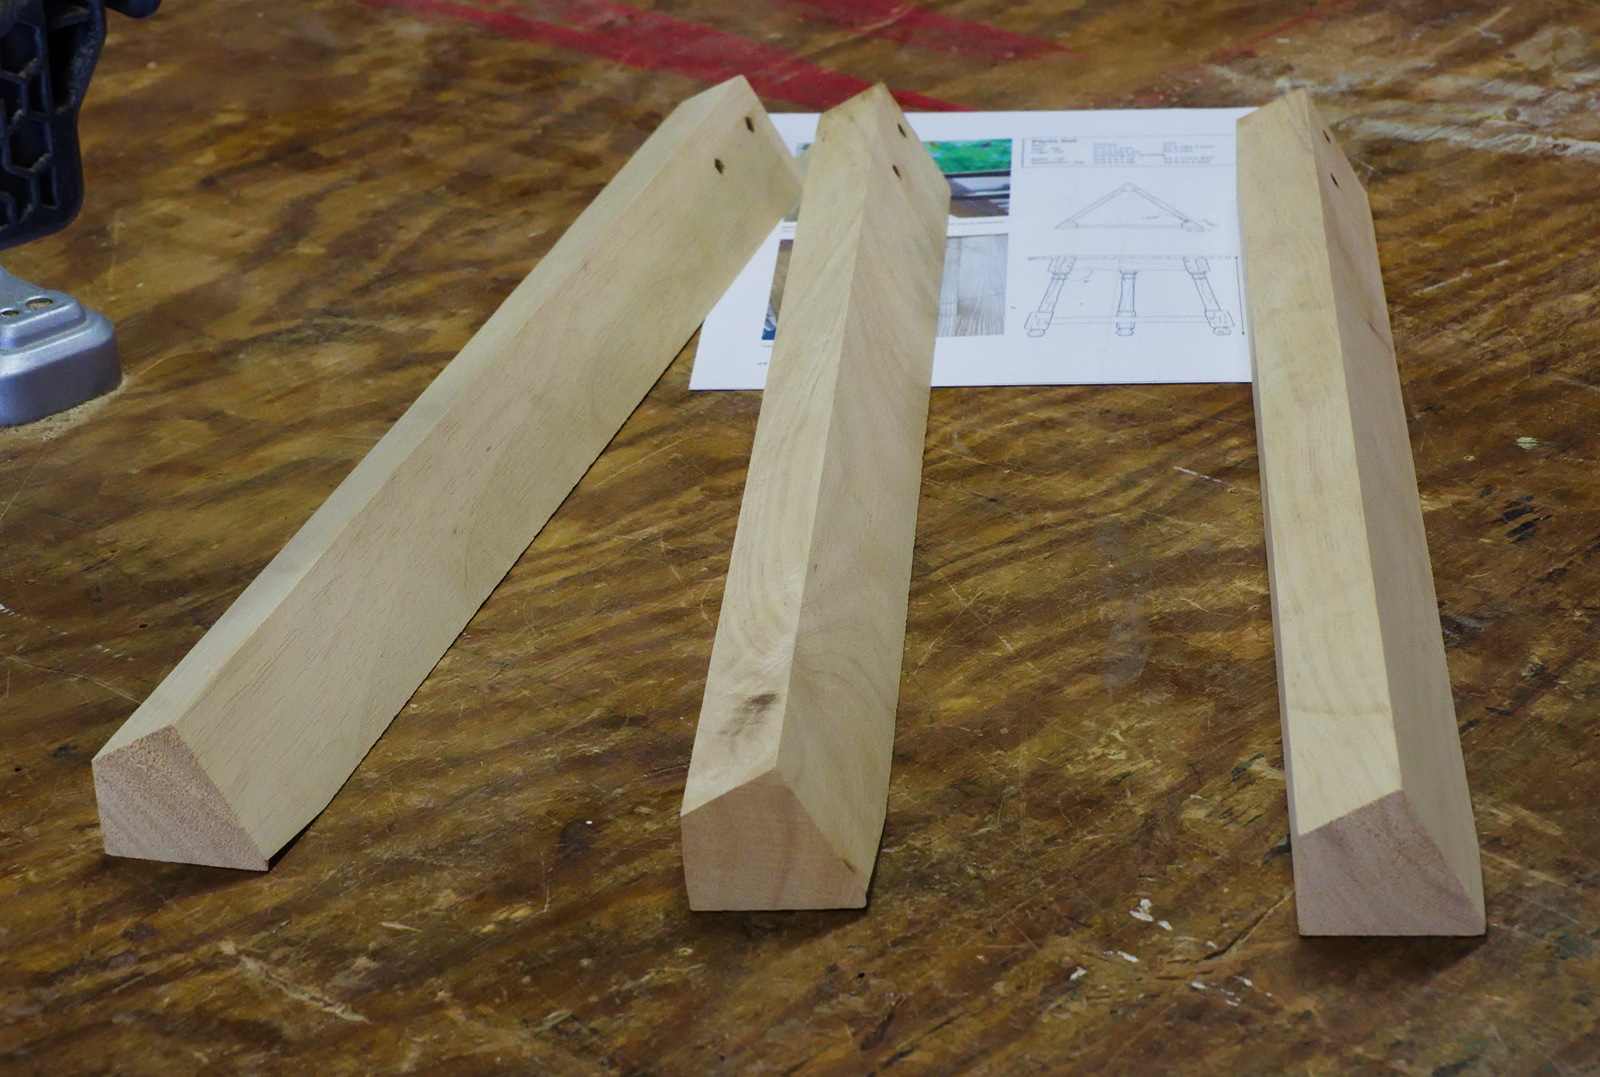
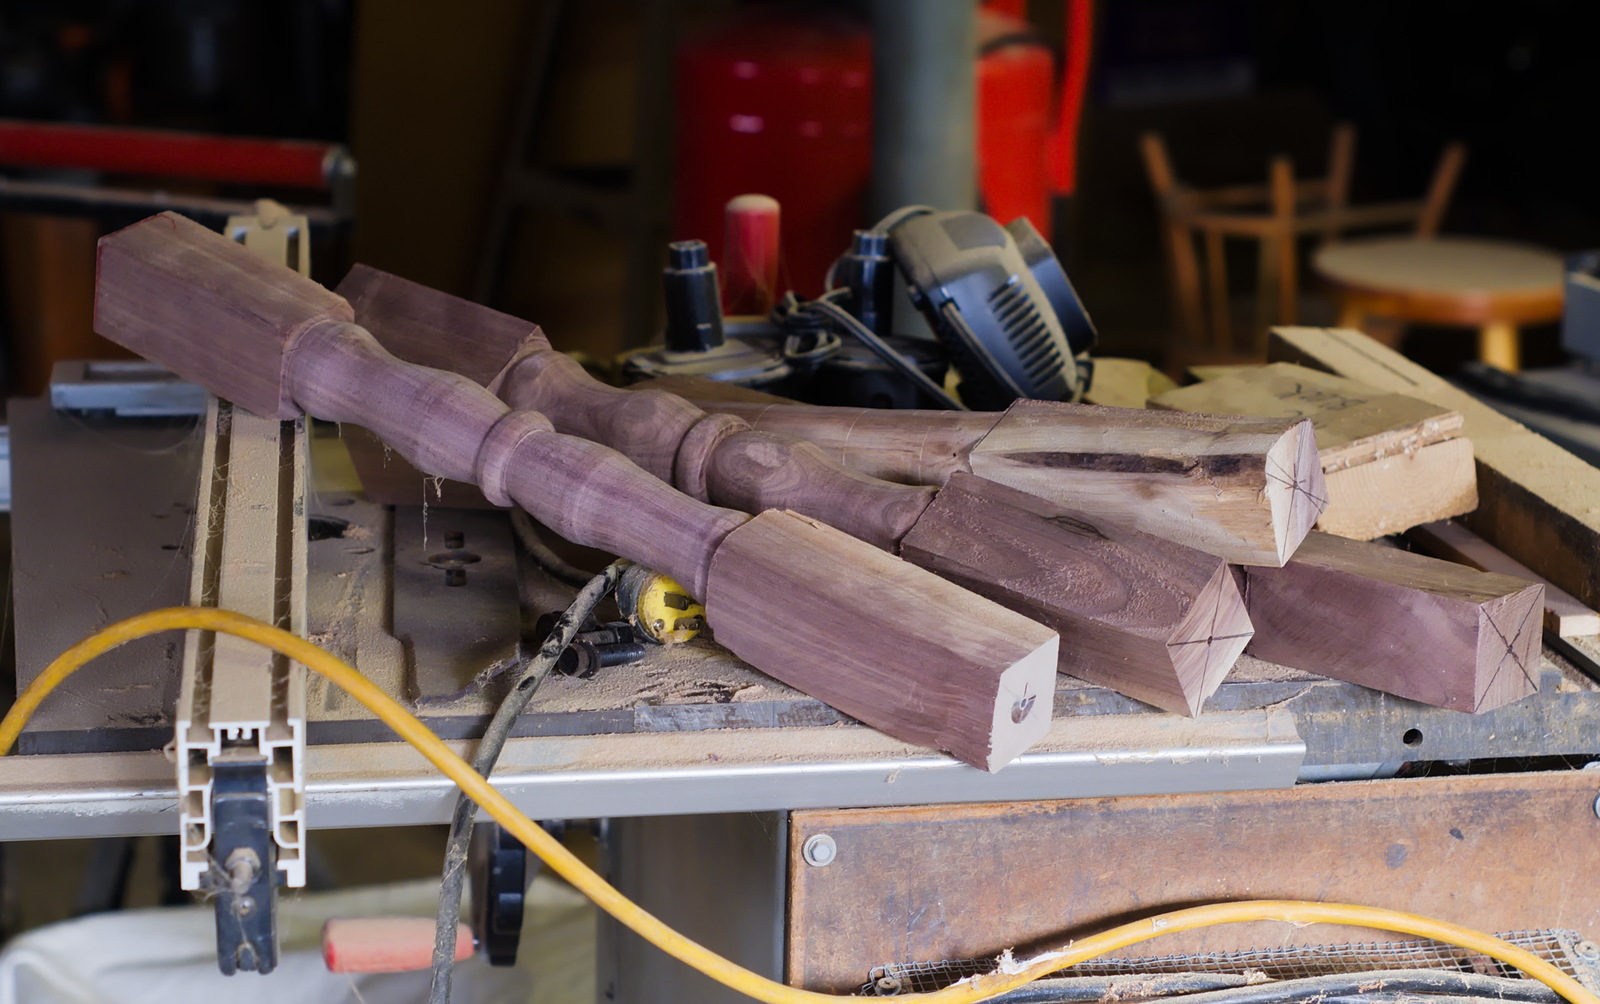
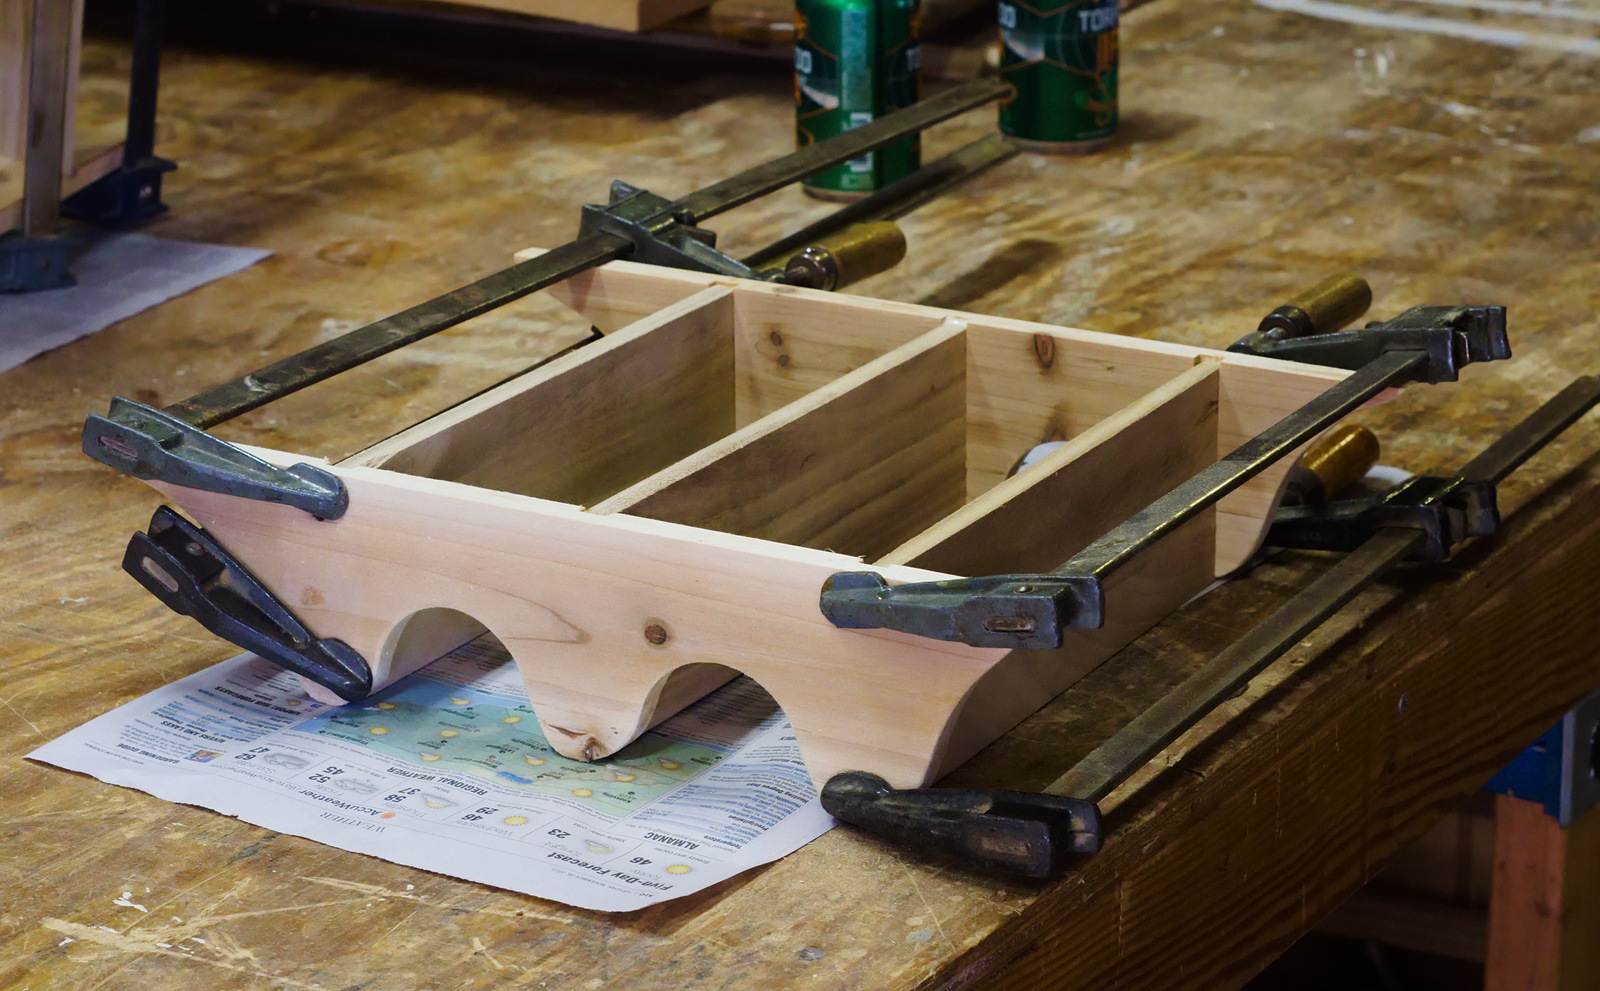
A cricket table is a relatively small, three-legged, round-topped table, and generally the three stiles have a small amount of splay, though that isn't always true. The stiles may be round or they may be four-sided with a turned section, like a joint stool. But since the stiles don't intersect each other at 90 degree angles, to make the joints square and easy to cut, the stiles need to be shaped with an included angle of 120 degrees on the adjacent sides where the aprons and stringers mortise into them. If that makes no sense, just understand that the stiles are not square like in most furniture, they're not trapezoids, or rhombuses, they are what is know in Euclidean Geometry as kites. Specifically, the stiles of a cricket table made with quadrilateral stock rather than cylindrical are right kites.
Figuring out how to cut right kites on the table saw wasn't easy, but with Derek Jones' instruction in his new book, Cricket Tables, we managed. It helped that we had four available pieces of stock and only needed three stiles, so we had one to experiment on. After a fair amount of head-scratching and adjusting the blade angles and fence location on the table saw, we produced a right kite shaped stile, and then had no trouble at all cutting the others.
Splaying the stiles, aprons and stringers shouldn't be too bad, since we have done that before on the tavern table and the two joint stools.
If you are wondering what a completed cricket table looks like, either buy the book at Lost Art Press or look at this example that is the type we plan to build.
April 10th, 2026
Posted by Paul
To complete the top, I might take another 16th or two off the thickness, or leave it alone. We still need to cut a thumbnail molding around the edges and peg it down onto the stiles. Then a little breaking of any hard corners of the base, cleanup of some of the pencil marks on the outside faces, and a few coats of polyurethane.
Next up, a three-splay-legged cricket table. Since laying out the splays of the joint stool didn't make our heads hurt bad enough. Blame it on Chris Schwarz at Lost Art Press. He just published Derek Jones' Cricket Tables, and of course I had to buy it.
April 9th, 2026
Posted by Paul
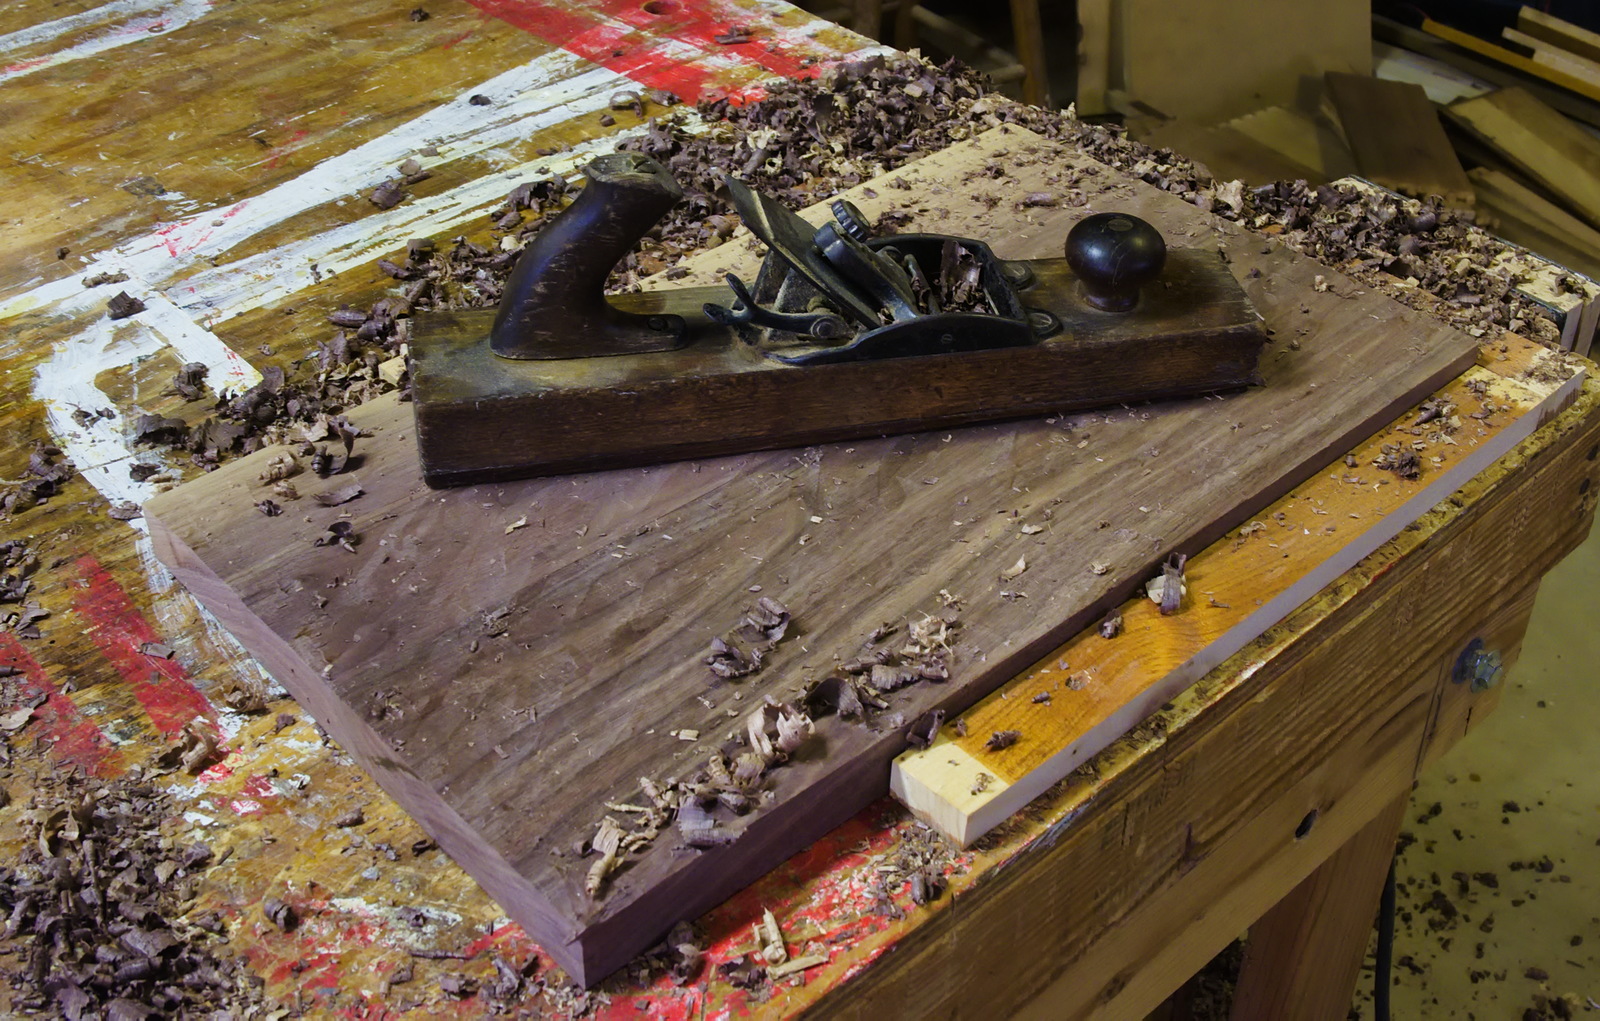
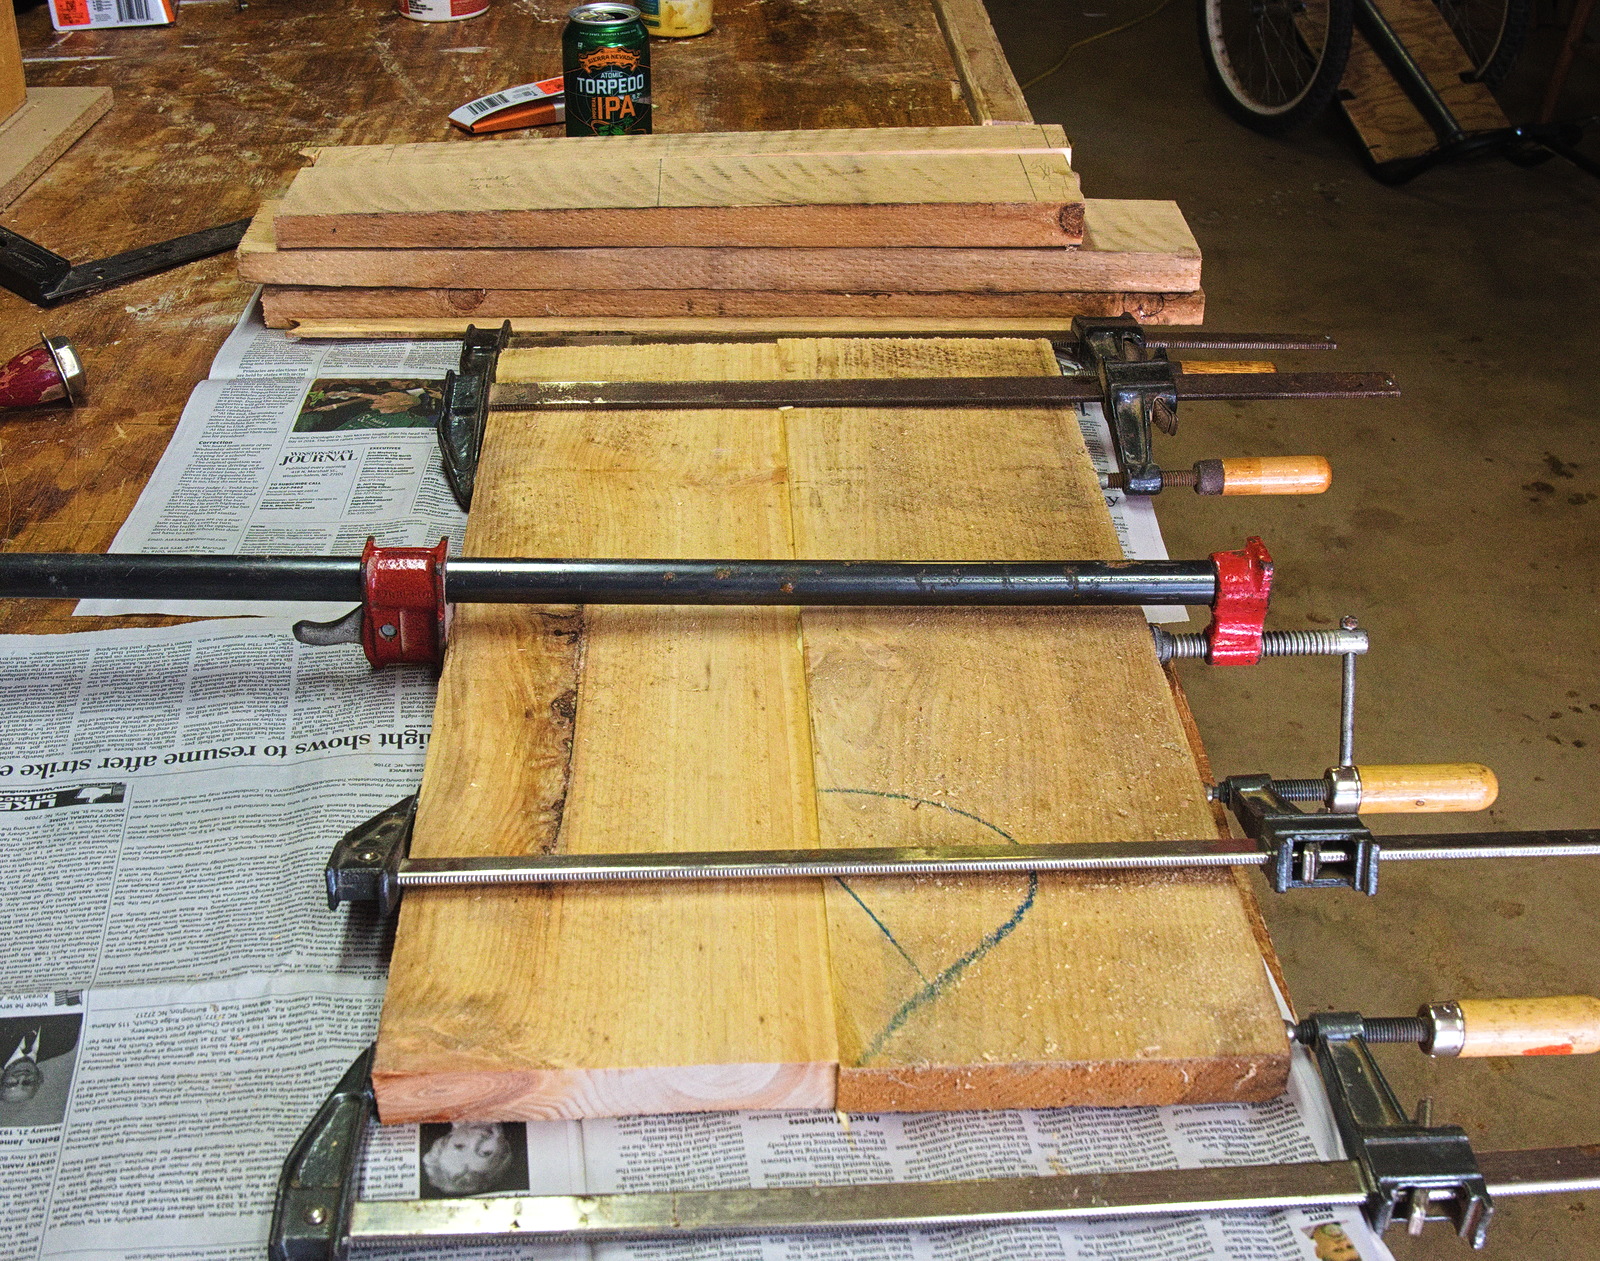
The walnut board from Wall Lumber ran thick, probably by a 1/4", which made for a lot of work getting it down to the 3/4-7/8" thickness I wanted for the top of my joint stool. If we had a band saw, we could have re-sawn it and gotten close to 1/2" of good stock, perfect for some small boxes, but instead I had to take it down with a plane. At least it made a pile of chips for fire-starting next winter. It was a tedious job, but the old scrub plane, with its heavy, cambered blade and wide throat, did it faster than any of the Stanley Baileys would have.
April 5th, 2026
Posted by Paul
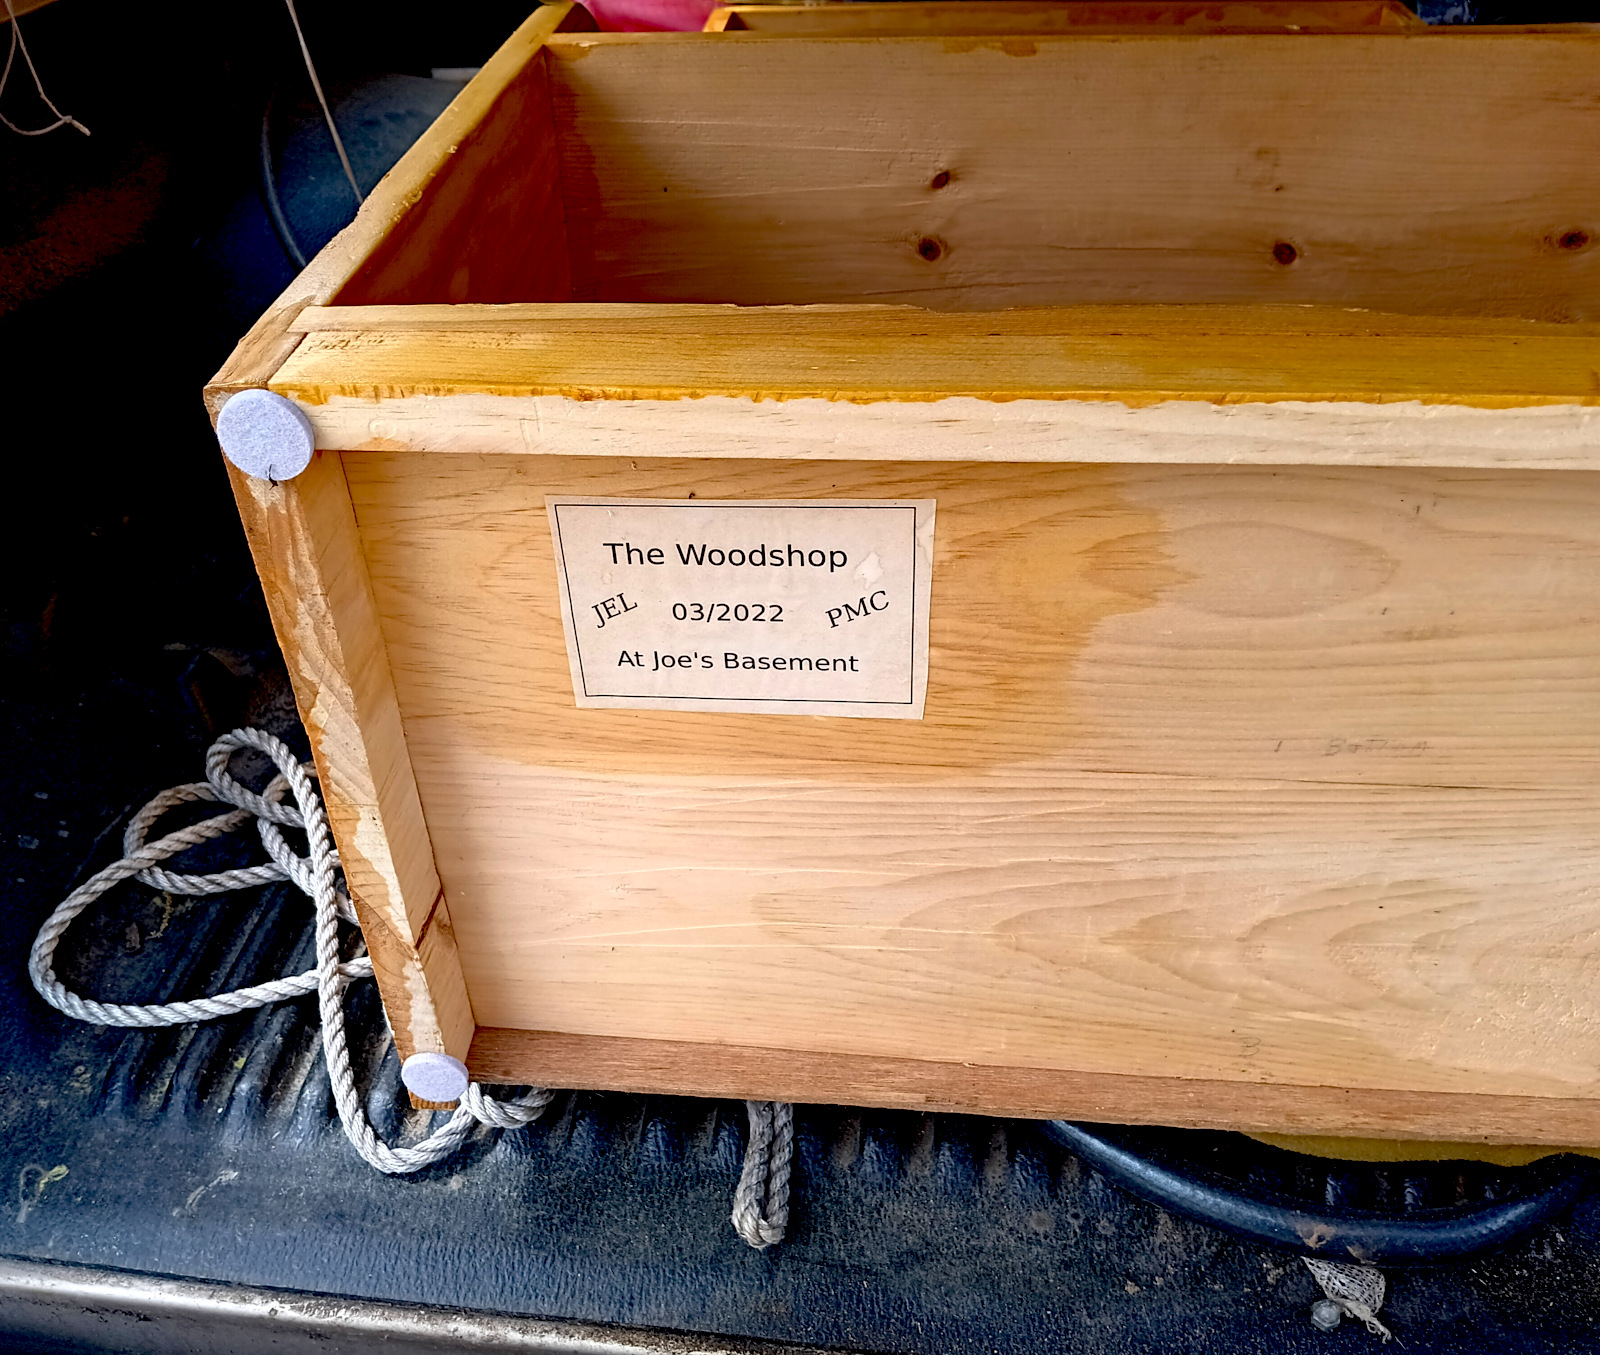
This one made it out of the shop without signatures, so I printed a label for it. We built it for Marie and she got good use out of it for several years, but she doesn't have room for it now. I kept it at my house for a while, then gave it to Ellie for her little studio apartment.
April 4th, 2026
Posted by Paul

With the base of our walnut joint stool complete, we turned our attention to making a seat. The round section that we split parts for the base from was about used up, and not quite long enough for the seat, so we made a trip to Wall Lumber for a suitable board. Admiring a straight, clear length of 8" 4/4 walnut, I mentioned that it would be a $50 board as we laid it on the cart. Joe estimated closer to $30.
We looked over the racks, choosing one especially nice length of yellow pine for a project we are considering. There was no end of beautiful stock to choose from, in many American varieties, plus mahogany, and it would have been easy to stack the cart full with butternut, red oak, poplar and maple. But there is no need to get ahead on wood inventory, since salvage turns up all the time. Before checking out, we admired the big live-edge slabs of exotics with enormous prices chalked on them, before picking three basswood cutoffs at $1 apiece out of the scrap bin, for turning trinkets.
The bill came to $25.65 for nine board feet of yellow pine, $3.00 for the cutoffs, and $50.00 for six board feet of walnut. I had an advantage over Joe in guessing the cost, since I had checked the Wall Lumber price list earlier in the day, and knew walnut was going for $8.35 a board foot. We only used half the board to glue up the seat, so our costs for my joint stool will be -0- for the base, all parts split out of a round that Mark gave us, and $25 for the seat (plus trifling costs for incidentals).
April 2nd, 2026
Posted by Paul
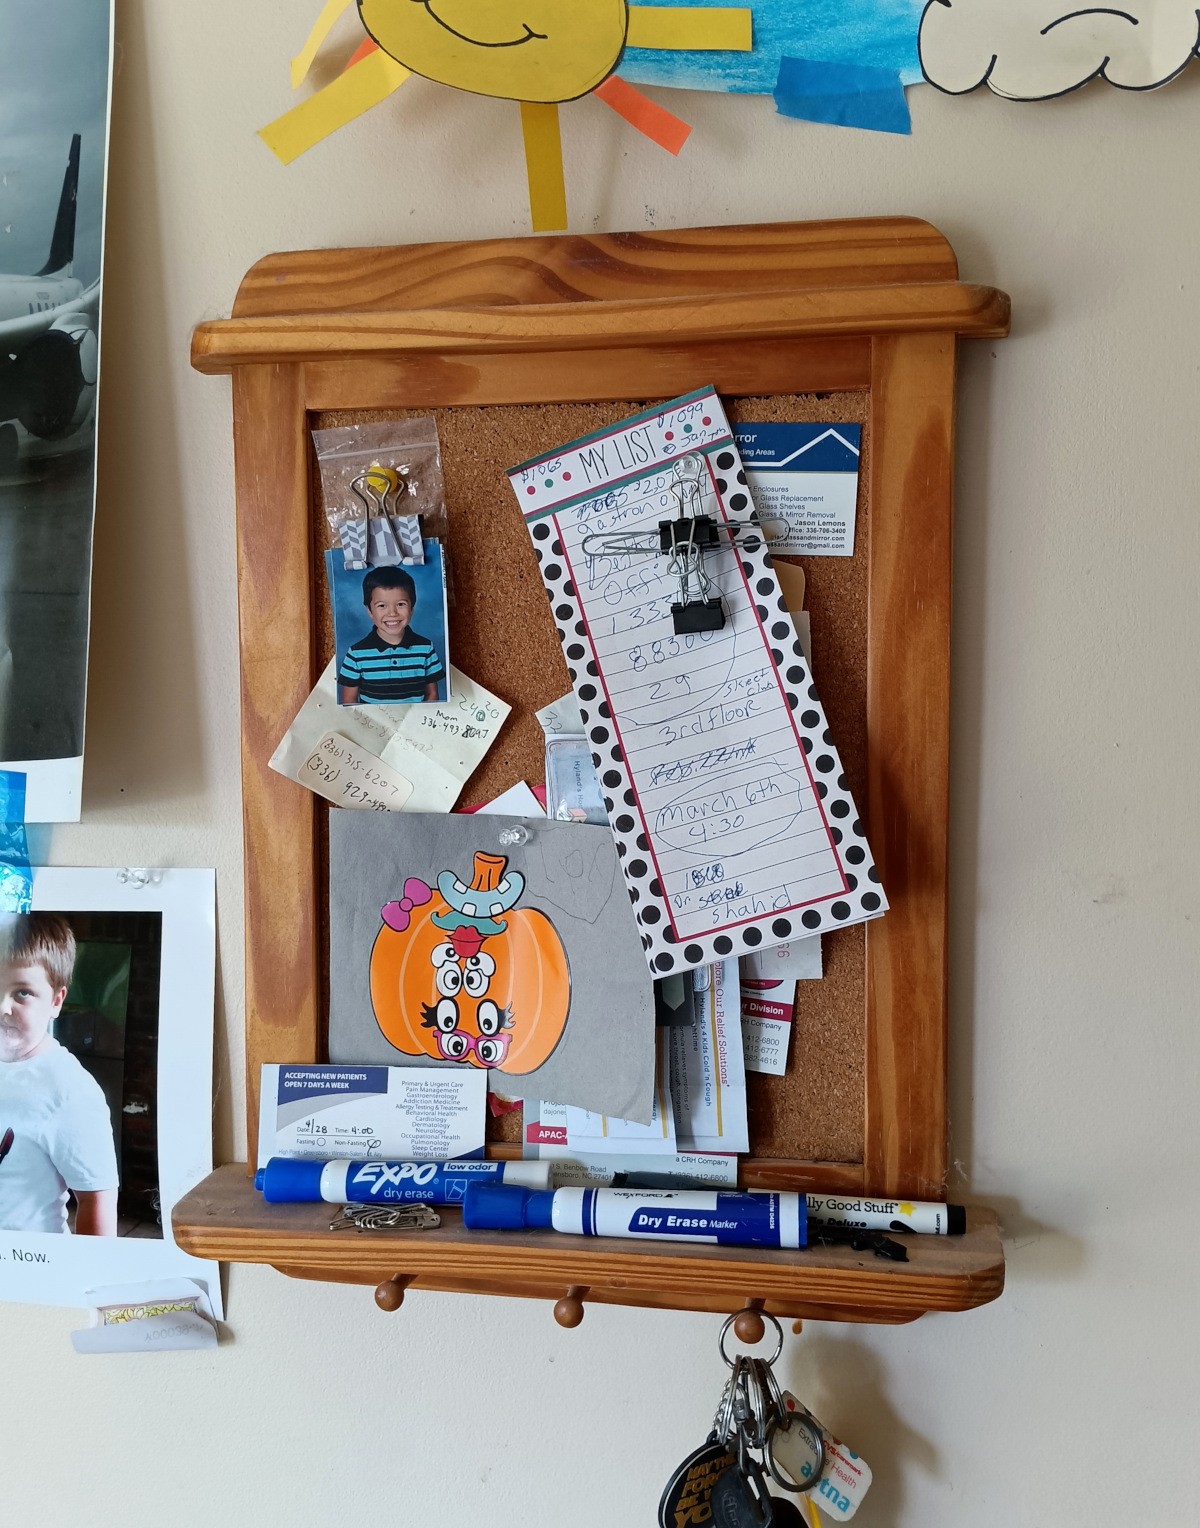
We made this little pinboard for the Smiths in May of 2017. It has served them well for almost nine years.
March 21st, 2026
Posted by Paul
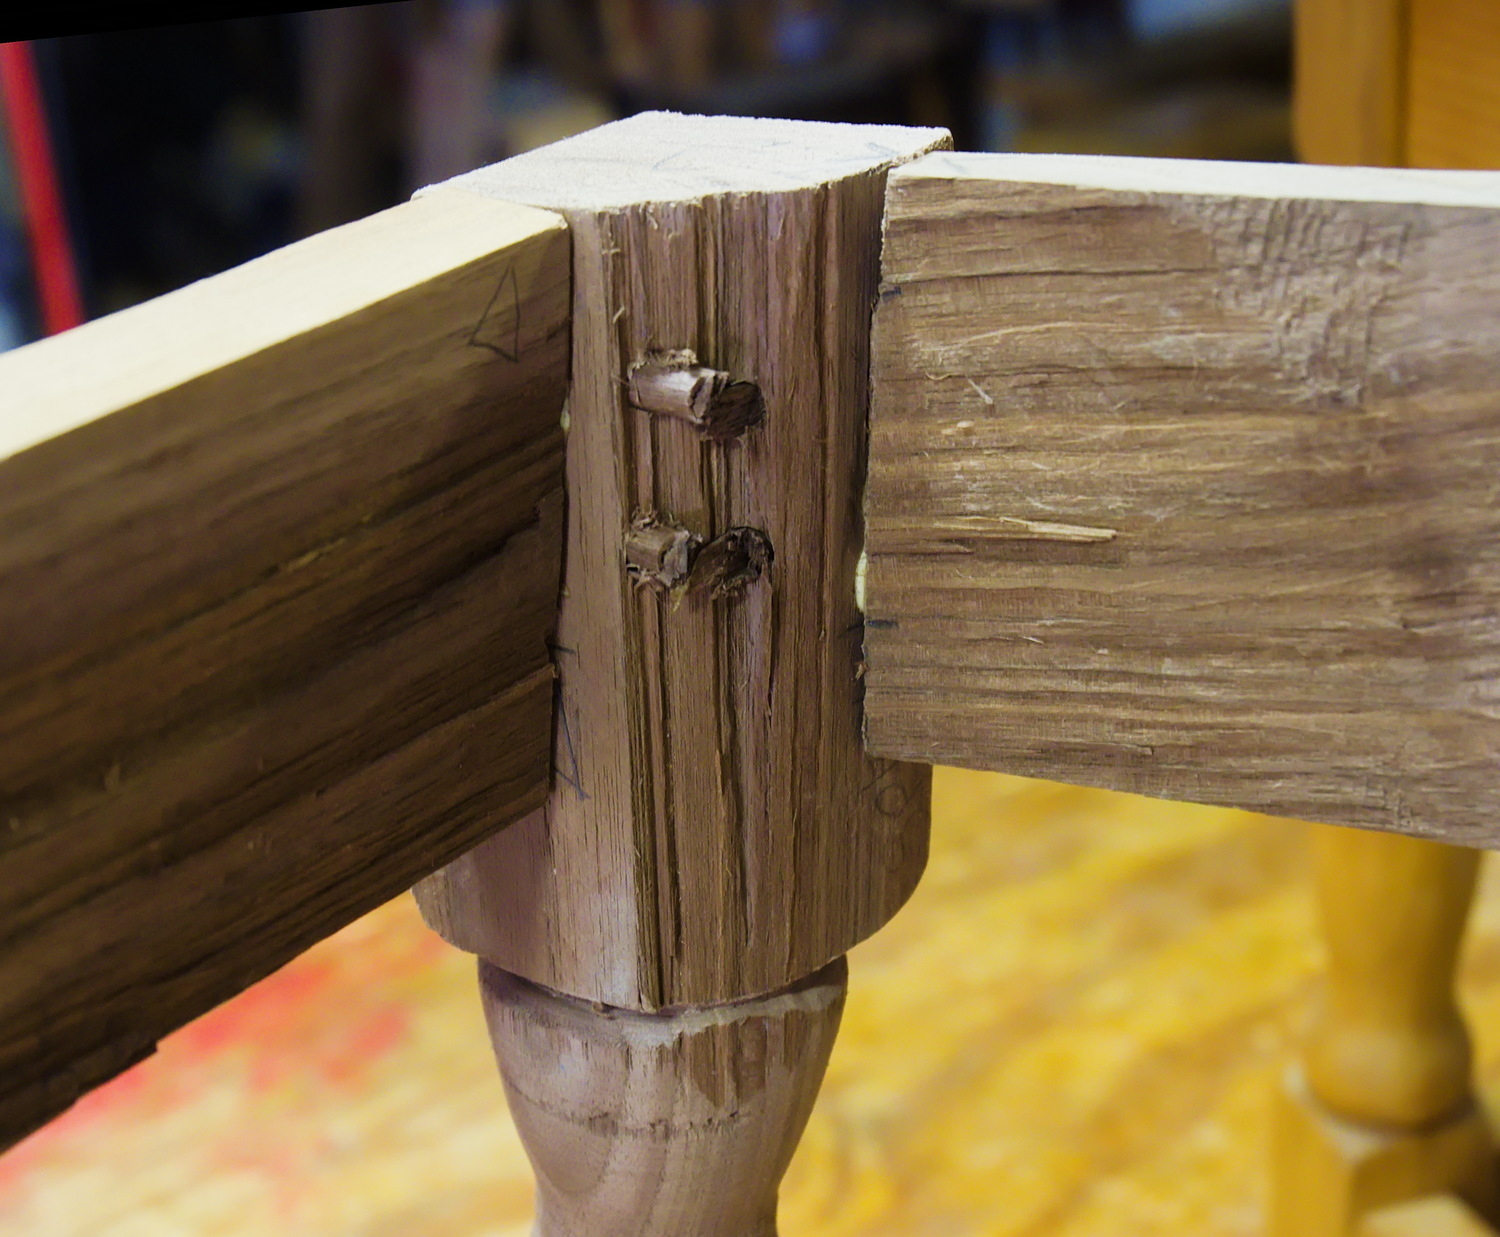
Hidden details of Colonial-style joinery. We couldn't quite make out a 2" square length to make one of the stiles, so we turned the scant corner to the inside. Likewise, the aprons were too thin to plane completely flat. One shows a taper on the bottom edge and the other is splintered and torn, a vestige of the splitting wedge. The Colonials didn't worry about whether everything was square if it didn't affect the solidity of the item, and they didn't waste time on making the surfaces pretty if they weren't going to be seen.
March 20th, 2026
Posted by Paul
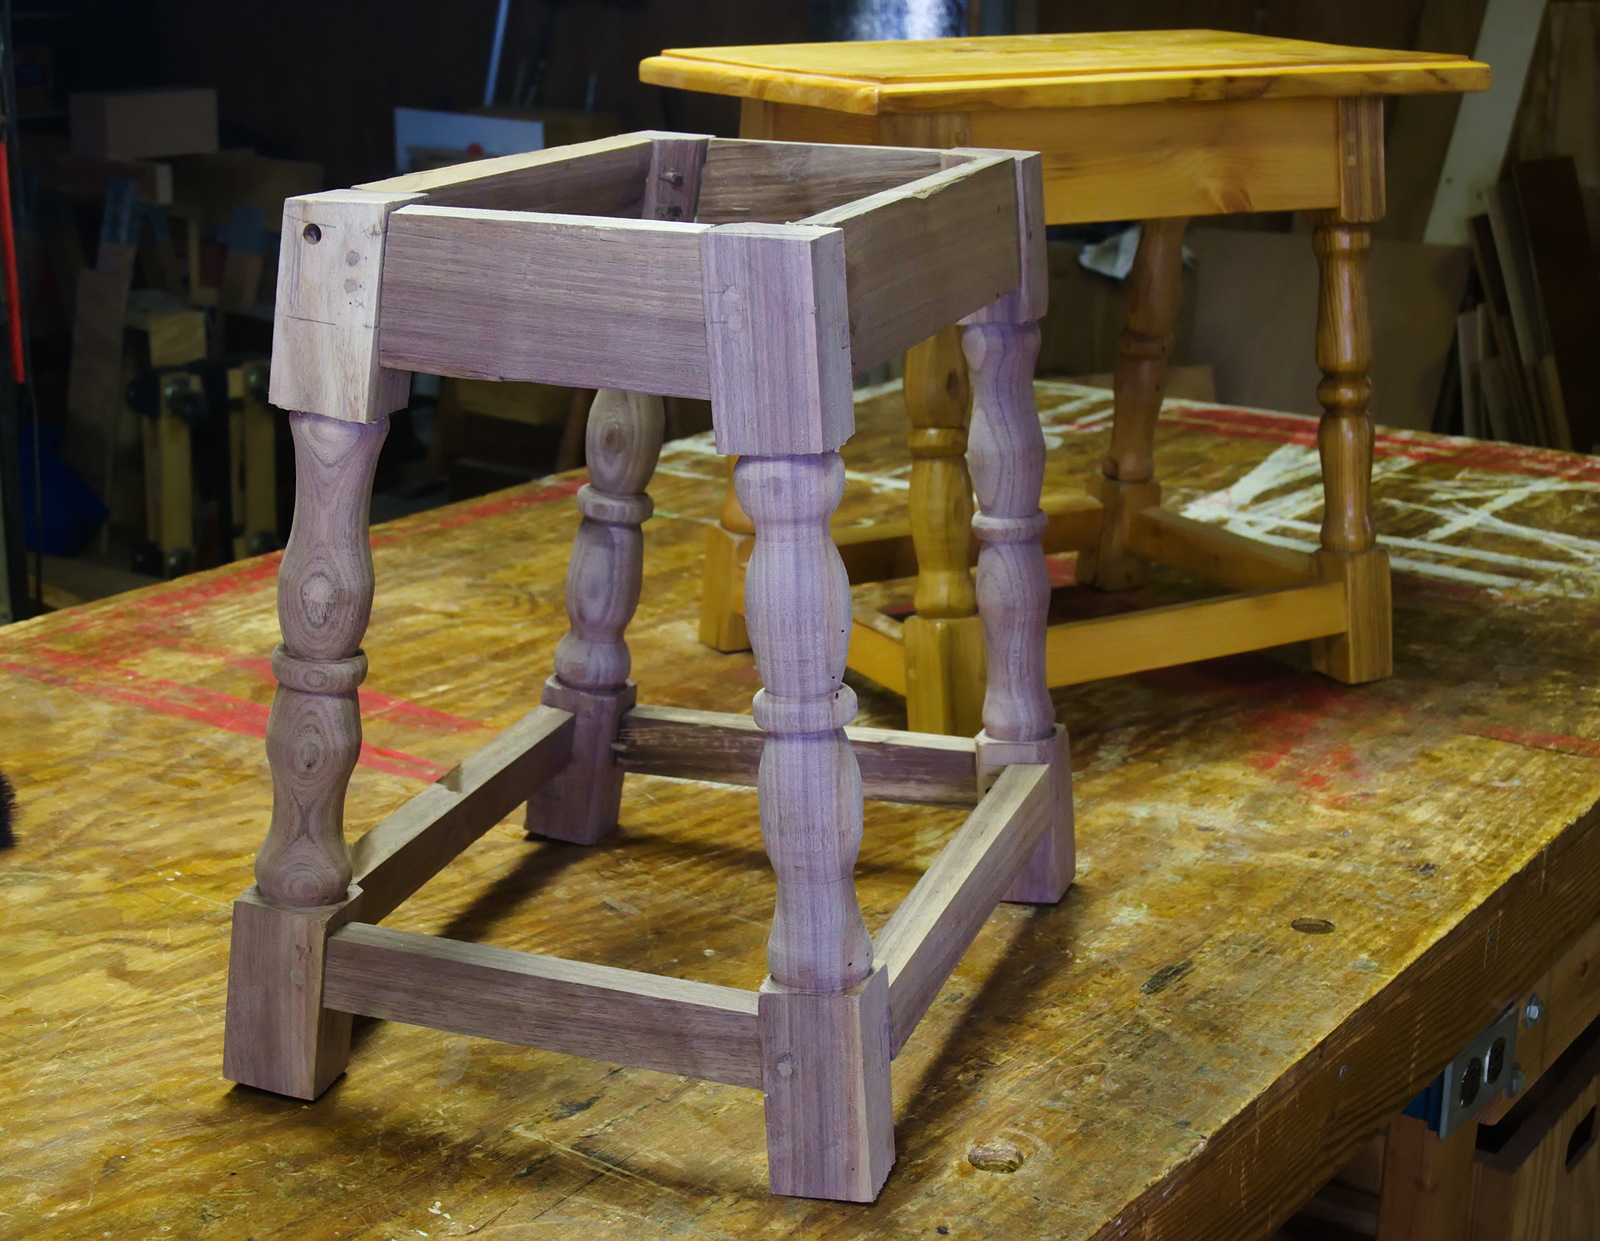
Last week we assembled one end of the joint stool and watched with admiration as the drawbored pins pulled the joints up tight. This week we got all the remaining bores completed and assembled the rest of the stool in one fell swoop. We broke off a few pins unfortunately, but all had snaked past the drawbores in the tenons before they broke, so in combination with the inauthentic glue we got secure, tight joints all around. All that remains to complete this project is detailing, and of course making and applying the top. For that I will have to buy a board from Wall Lumber since we don't have enough wood left from the round that Mark gave us to make it.
This joint stool as well as the one we made last year are both a bit larger and heavier than what would have been made in Colonial days, but then, so are most people. I frequently grab the completed one to sit on while we drink beer after shop work is complete for the day, and I can vouch that its height, top size and solidity make it a comfortable seat.
The random hole in the top of the left stile is where we started drilling a mortise in the wrong face. We considered plugging it but decided to leave it alone, since it will be up close under the top and not too visible, and also in association with the Colonial-built form illustrated on page 10 of Alexander and Folansbee's "Make a Joint Stool From a Tree", in which the 17th Century craftsman overcut his mortise and came through the front of the stile.
March 12th, 2026
Posted by Paul

Joe made repairs on this rocker. One of the arm rungs sheared off at the seat, so he drilled out the broken tenon and inserted a dowel from under the seat. He also reglued most of the other joints, and this rocker is now as good as new.
March 1st, 2026
Posted by Paul

Some of the mortises have been drilled out and tenons cut. The top apron shows the unfinished riven inner surface that was often found on Colonial-era furniture. The inner corners on the stiles are chamfered to aid in orienting the mortises.
February 20th, 2026
Posted by Paul
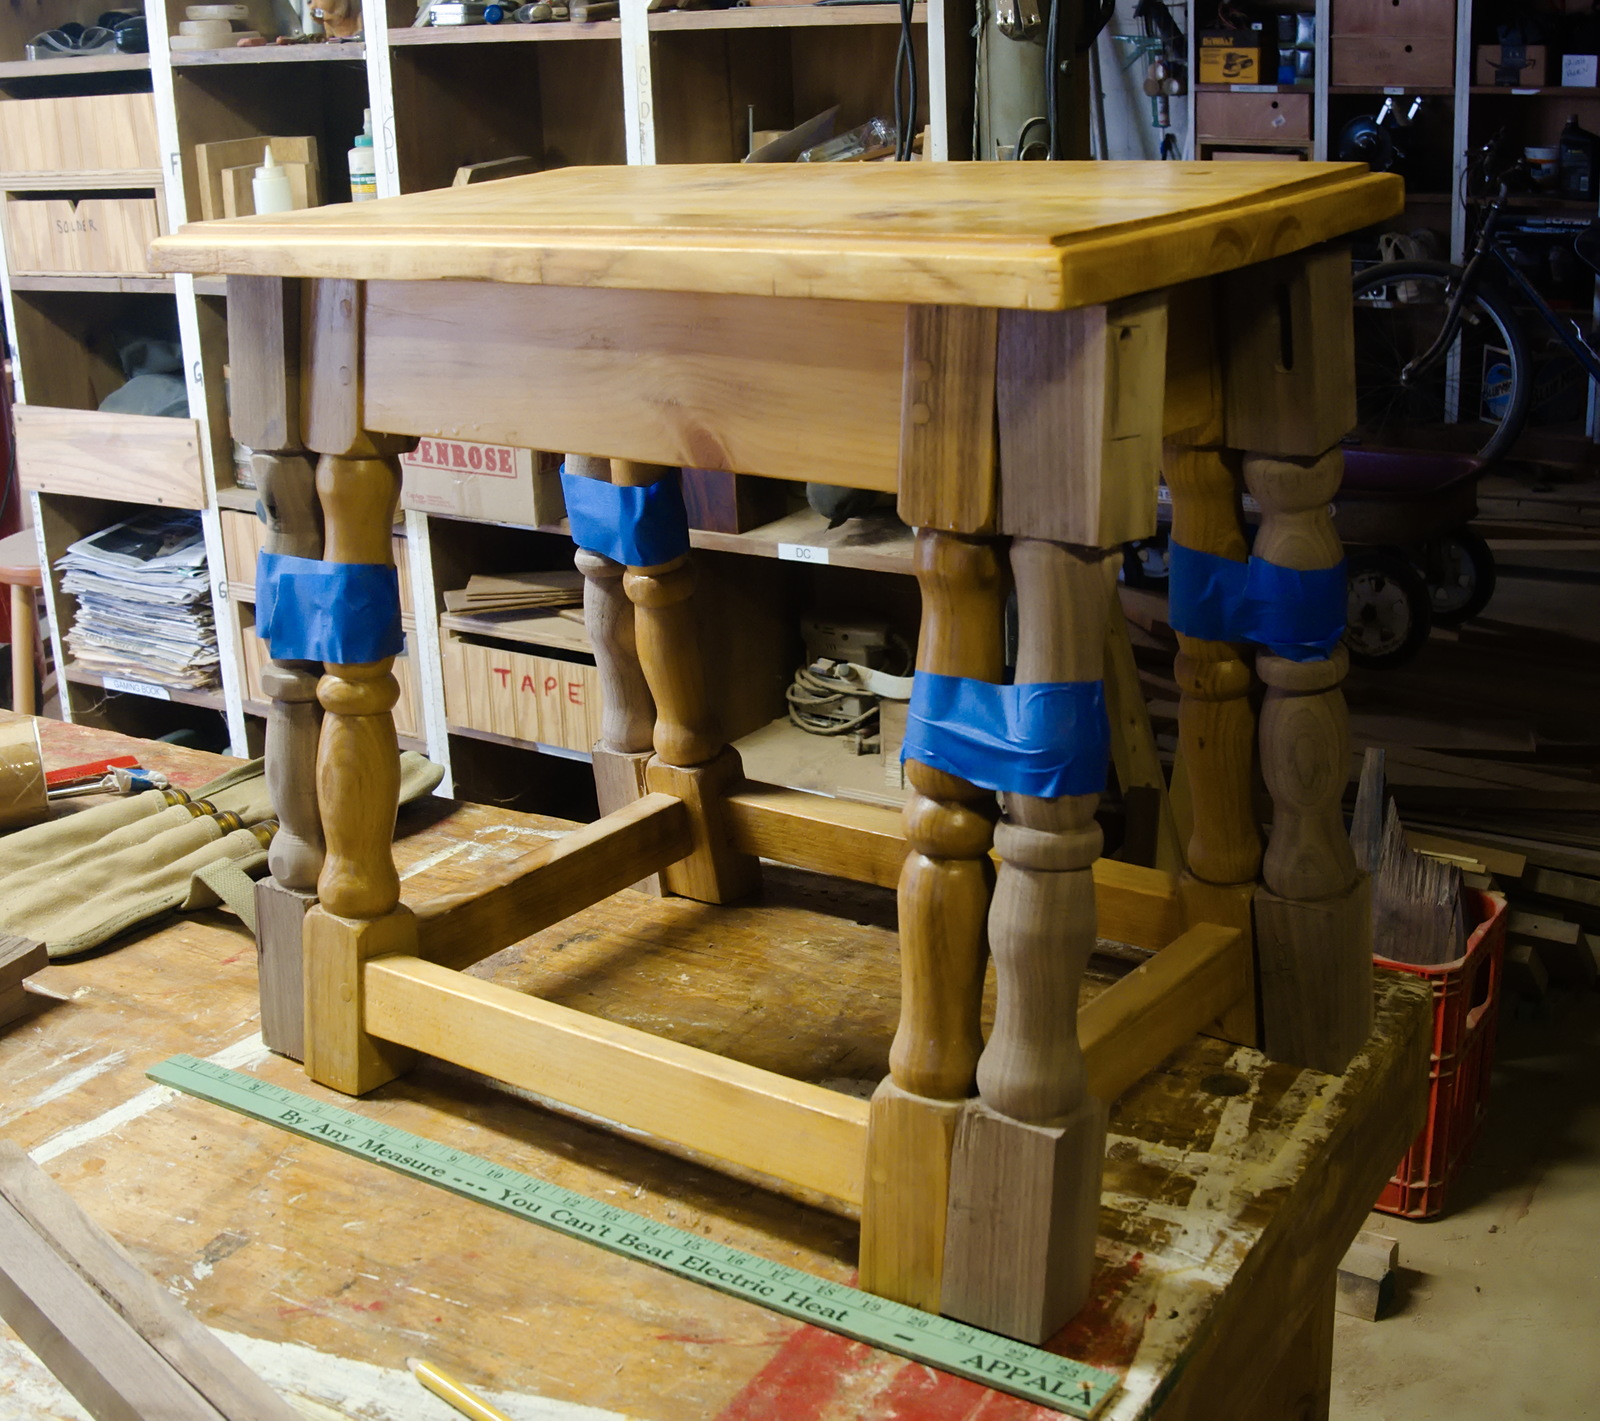
The walnut joint stool has the momentum now and we made good progress yesterday. Most of the parts were cut to dimension and a start was made on drilling the mortises. It took us a few minutes to figure out how to jig the 7 degree angles on the end mortises but we got that done, and then I started laying out the straight mortises on the long sides. Unfortunately I layed one out on a wrong face and we started drilling it, but Joe realized what had happened and stopped, leaving just a shallow hole that will have to be plugged. At that point Joe had the brilliant idea of taping the stiles to the ones on the stool we completed last year so we could compare and get all the mortises laid out on the right faces. We got the aprons laid out and a start on the stringers, but in truth all the math and spatial reasoning hurt our heads so bad that a few minutes after 3:00 we called it a day and drank beer for the rest of the afternoon.
February 19, 2026
Posted by Paul
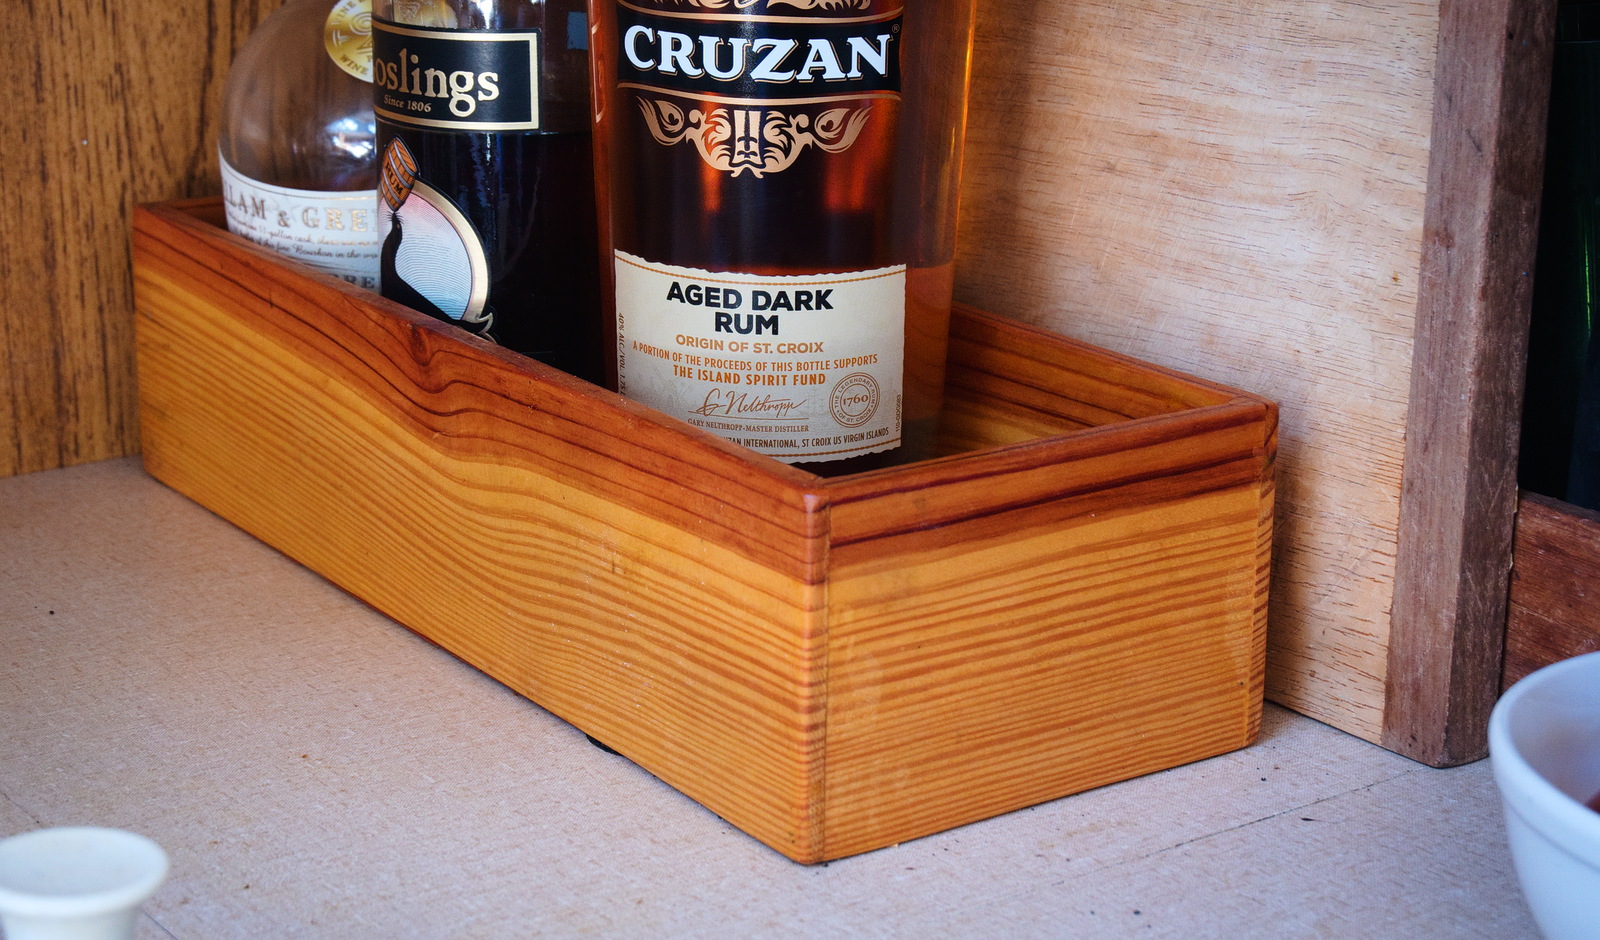
In March 2020 we built a small tray to hold rum supplies in the galley of my Alberg 35 Terry Ann. Joe christened it "the liquor cabinet". It continues to serve me well.
February 17th, 2026
Posted by Paul

Way back in April 2017 we made a shoe rack for the Smith residence. It is still there, but now they just throw their shoes in the general vicinity rather than carefully putting them in place.
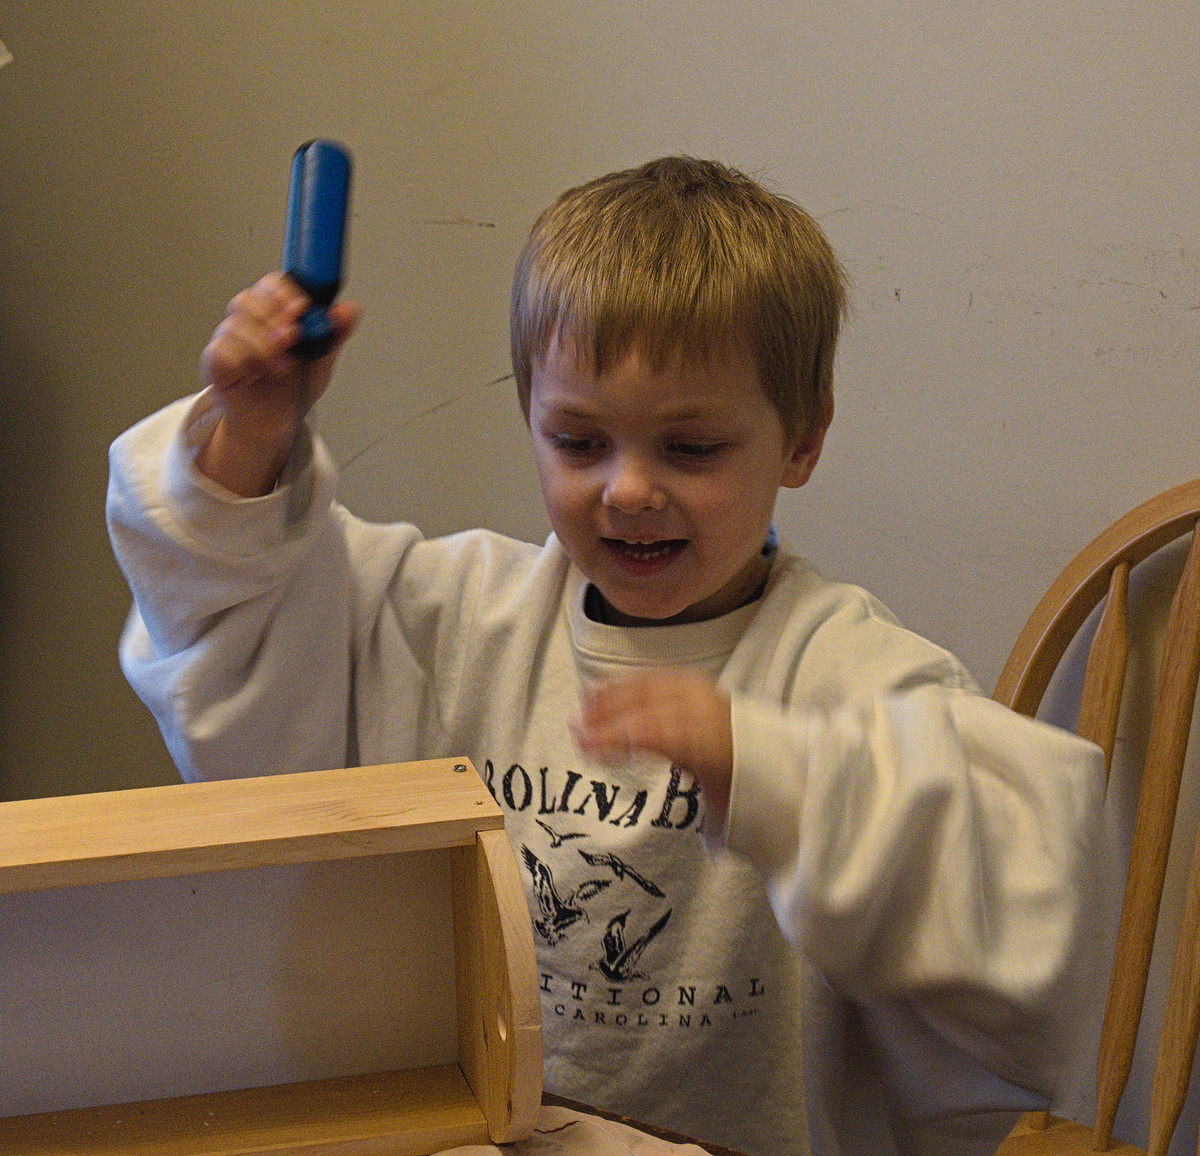
February 8th, 2026
Posted by Paul
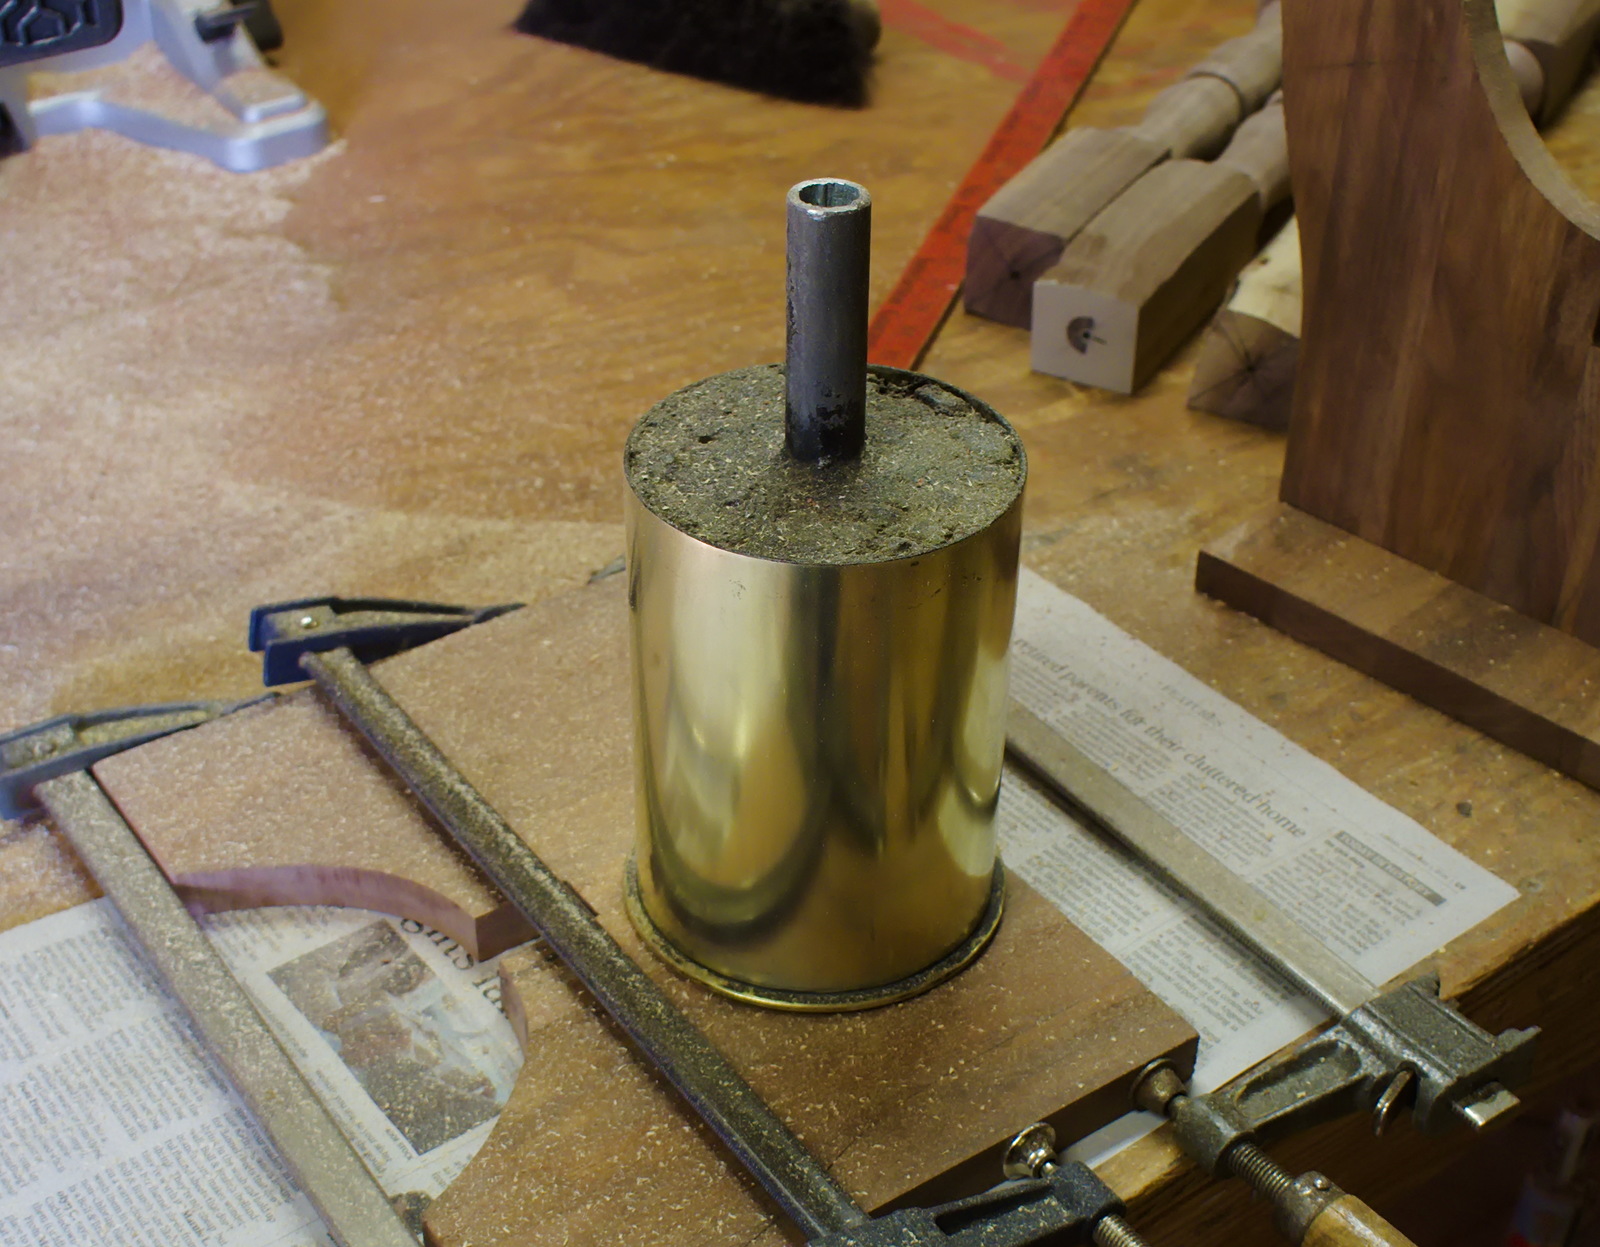
Somebody made a set of barbells by filling up two 105mm artillery shells with concrete and inserting a steel rod to connect them. Ron obtained this after it had been cut in two, for reasons unknown. He and his wife are in the process of removing stuff from their house in preparation for moving to smaller digs, so he gave them to Joe. One of them will serve as a shop weight, as shown, while Joe is drilling the concrete out of the other so Ron can keep the empty shell, as a souvenir of his army service.
January 30th, 2026
Posted by Paul
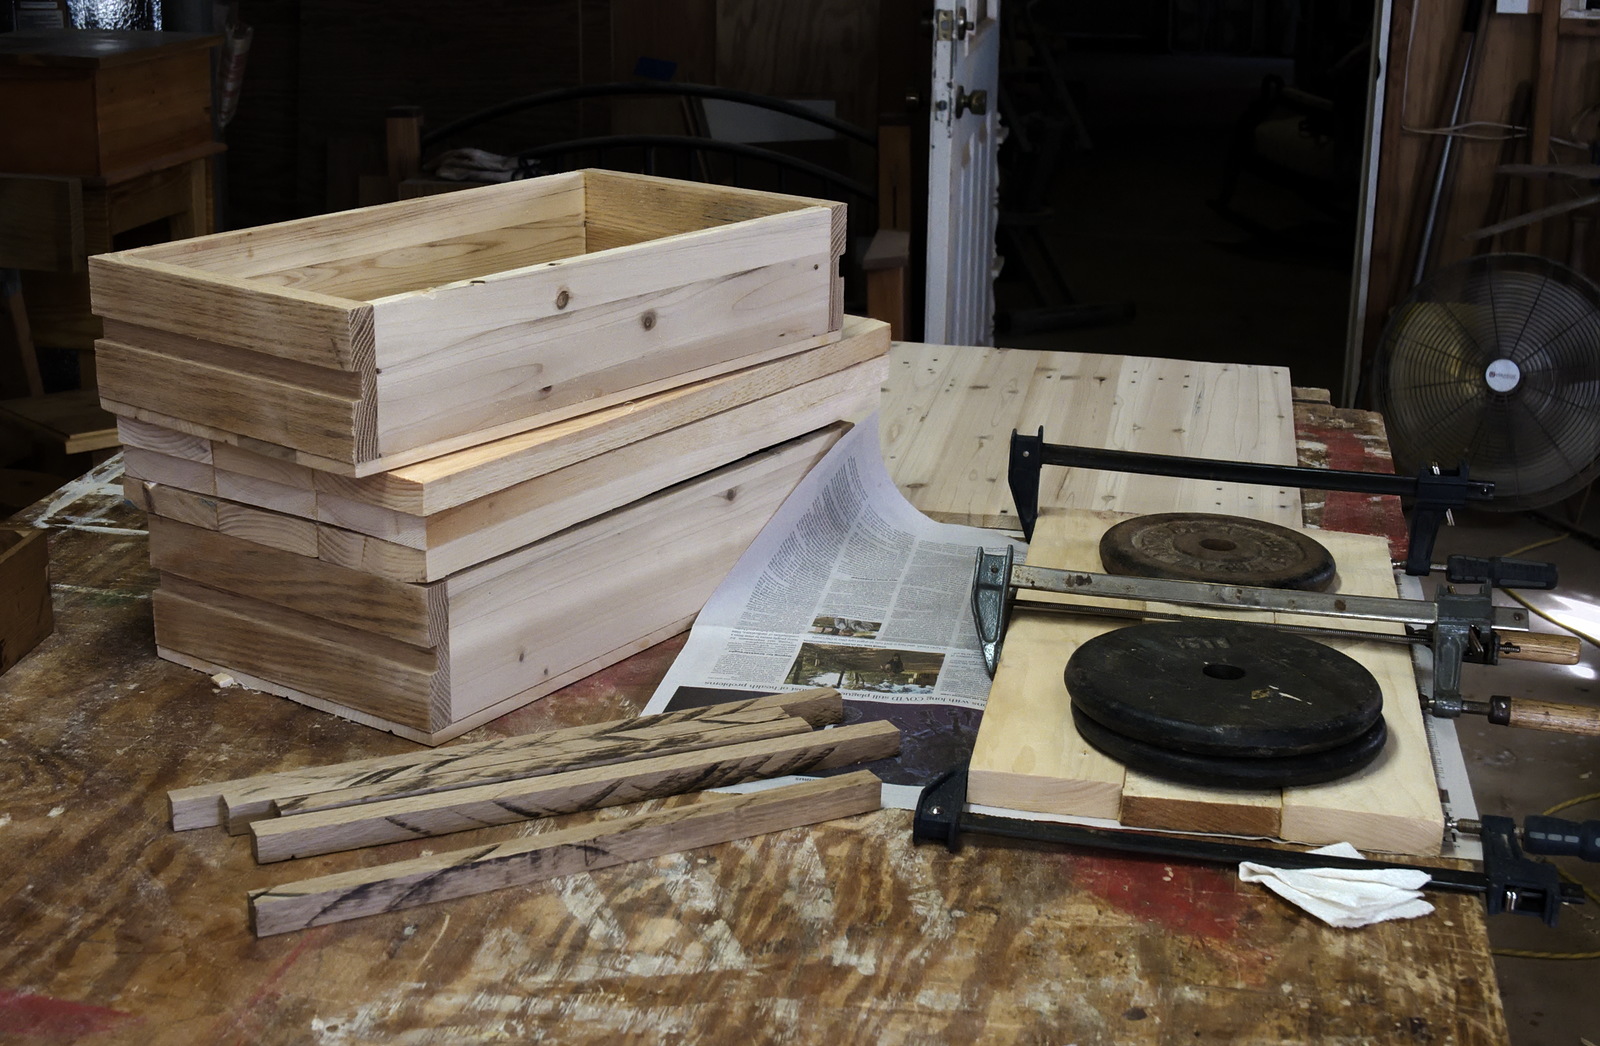
We quickly cut out parts for a step stool, glued up the top and legs, and set aside for next time we work. With plenty of time left, Joe started turning legs for a joint stool. We milled the blanks out of a walnut round that Mark gave us last spring. All the other parts can come out of this wood except the top, and I will have to buy a board from Wall Lumber to make that. While Joe turned, I worked over the Stanley #5 and got it to where it would cut decently. It was way out of fettle after long use planing oak, ash and cocobolo, all notably hard woods that are wearing on planes. Finally, we put second coats of poly on two boxes.
January 22nd, 2026
Posted by Paul
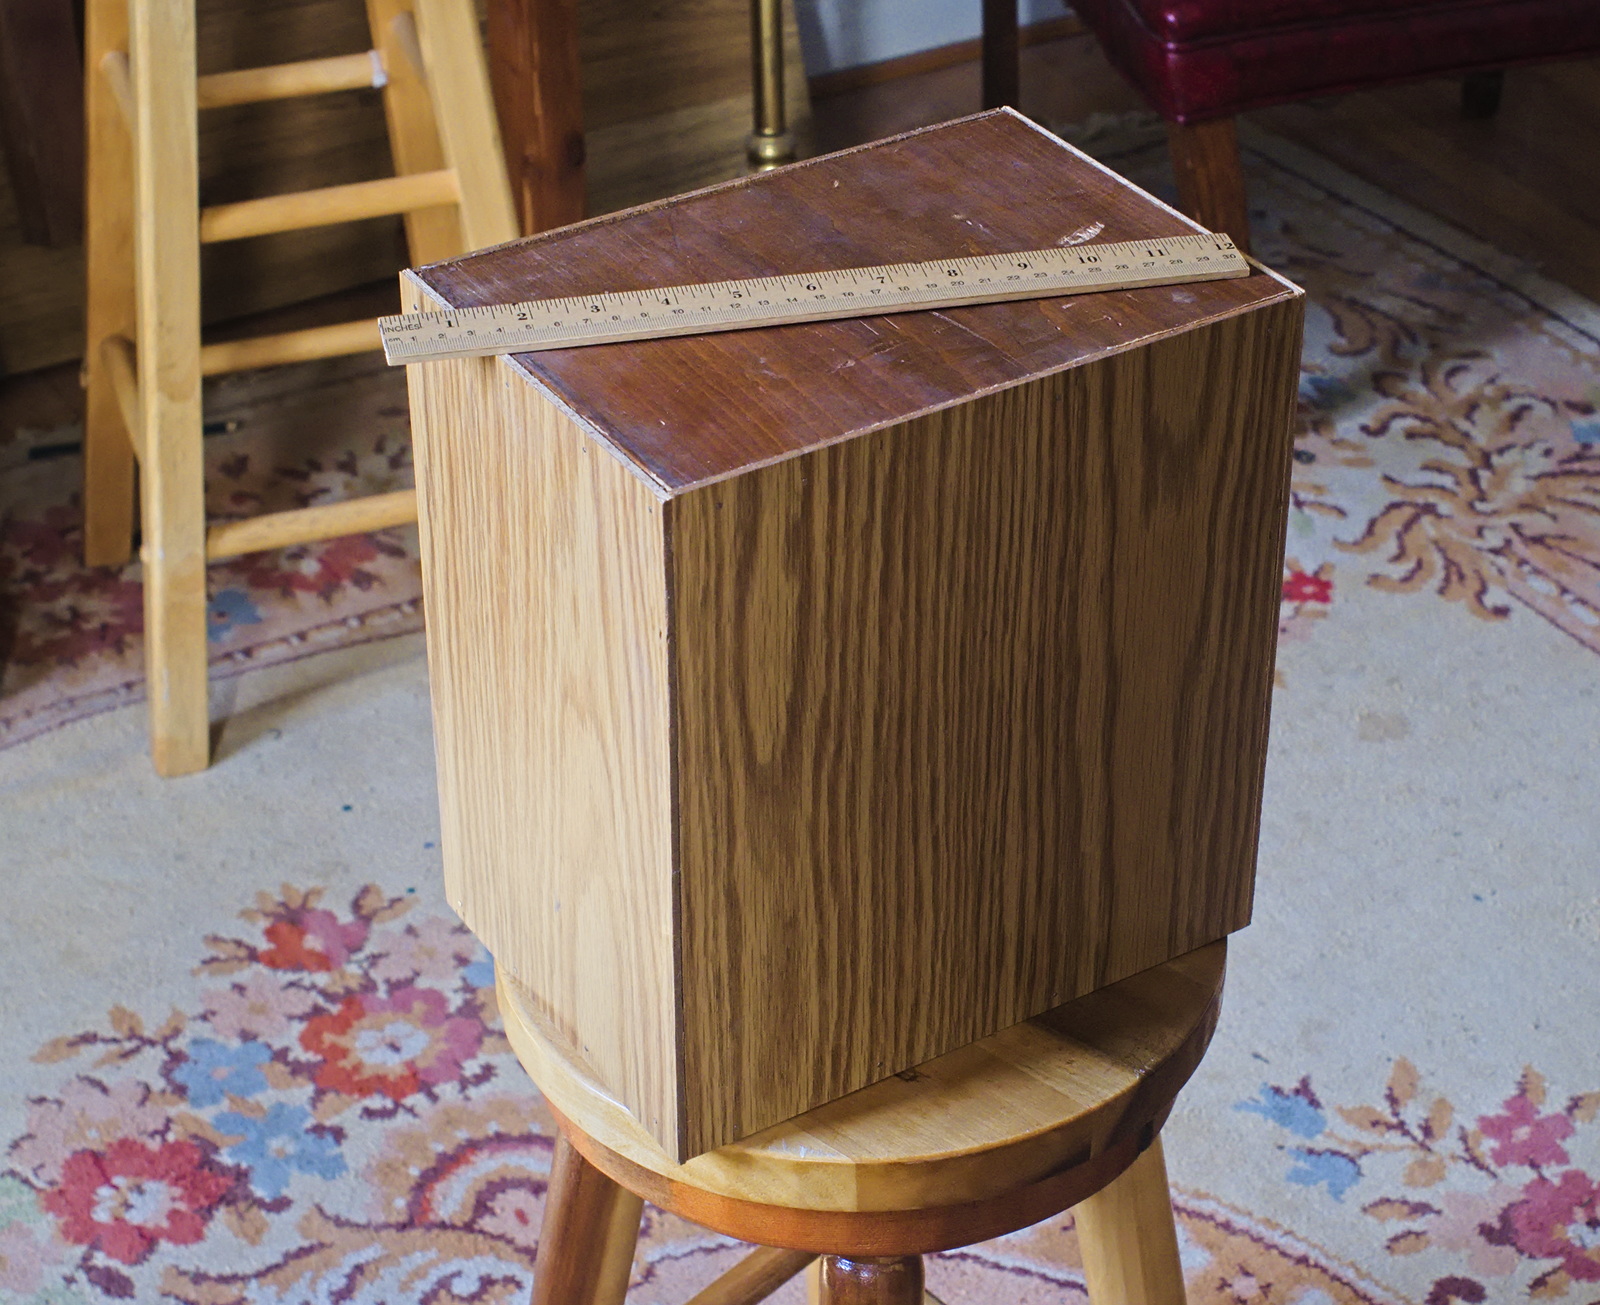
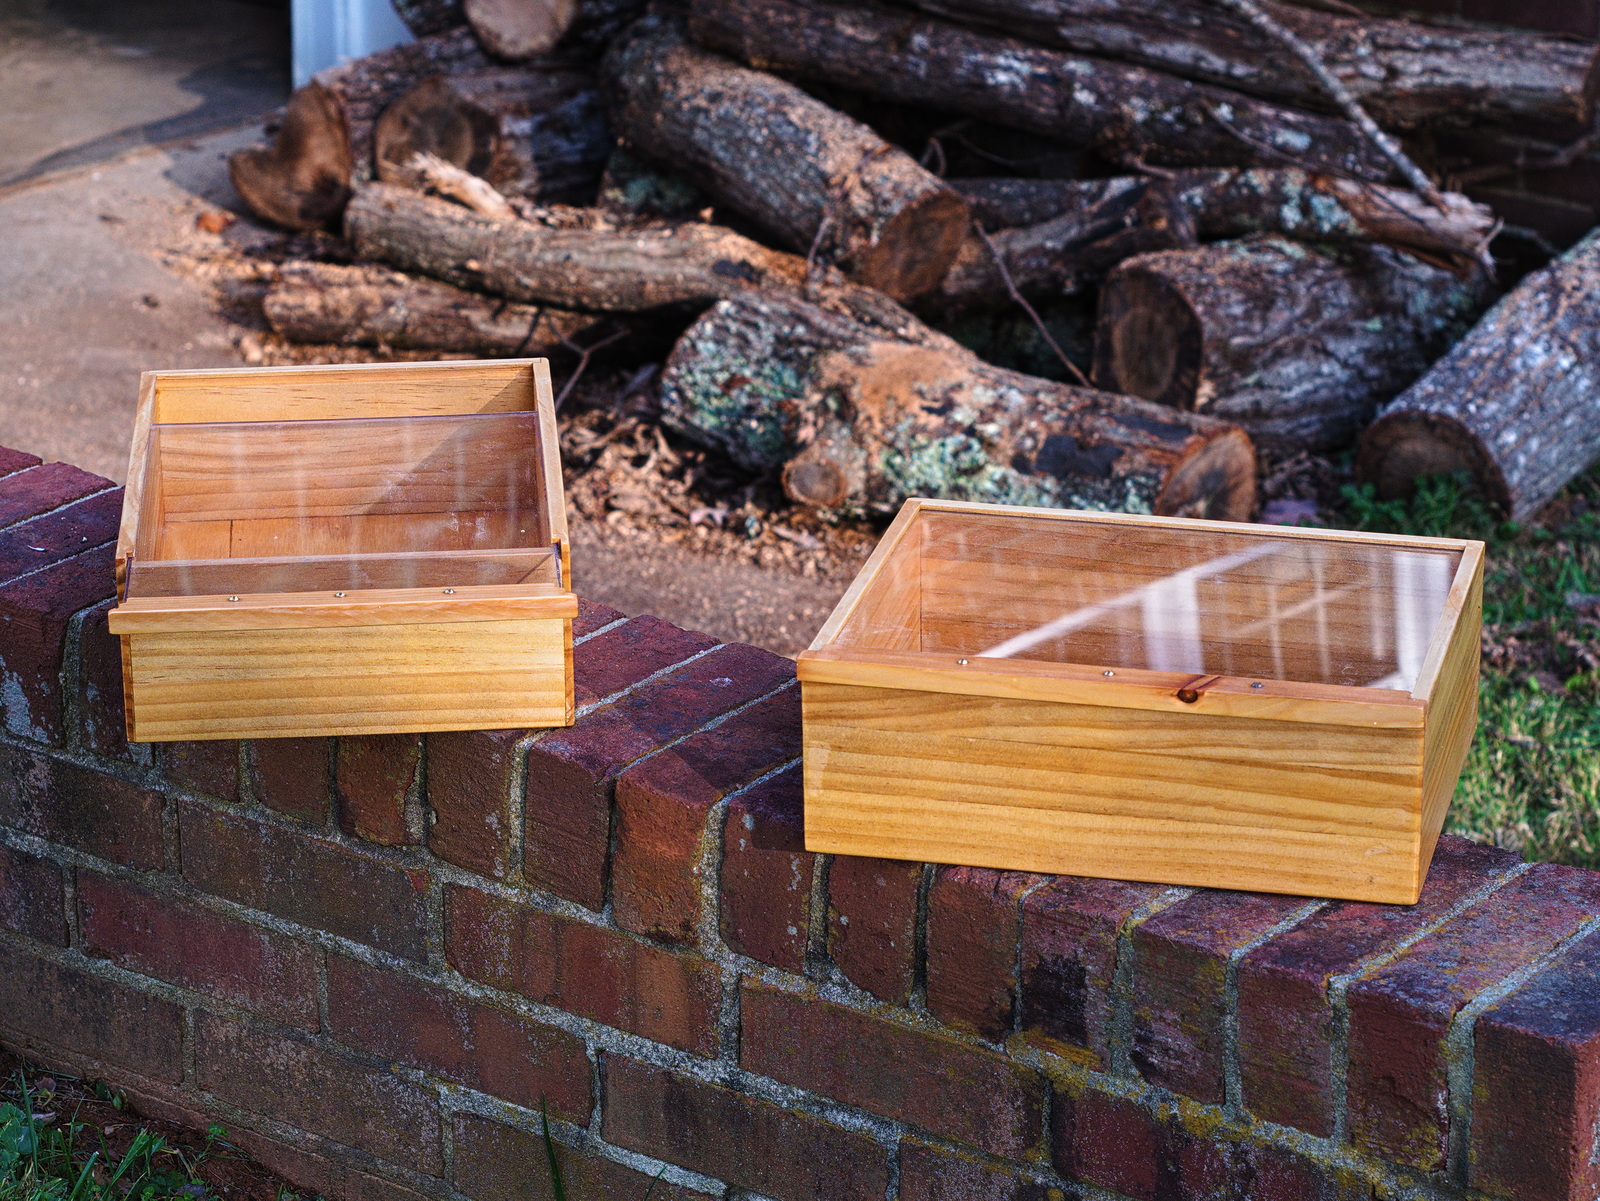
We don't have any major projects underway, for now we are just making step stools and boxes. Today we finished work on two boxes and gave them first coats of polyurethane. The pictured one is made from butternut, a close relative of walnut, but lighter in color and in weight, and softer. The stock is old salvage, obvious from the many nail holes that have left black rust stains, a sure sign of age.
January 16th, 2026
Posted by Paul
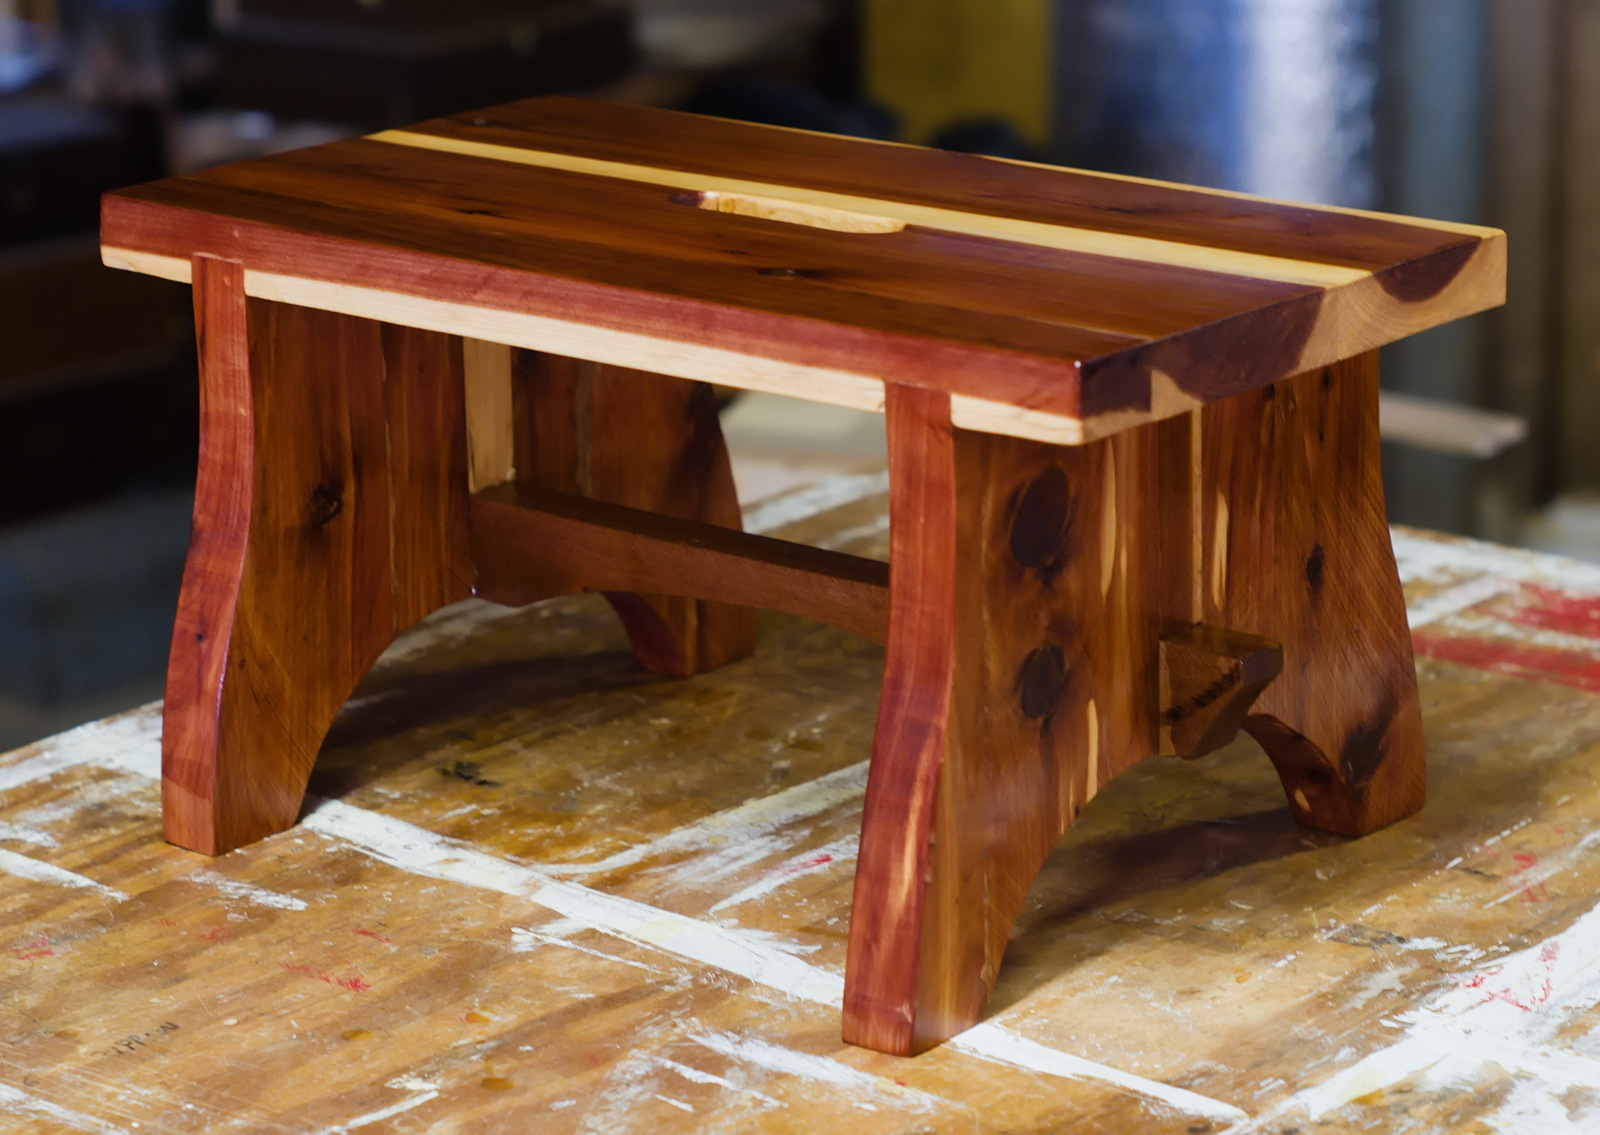
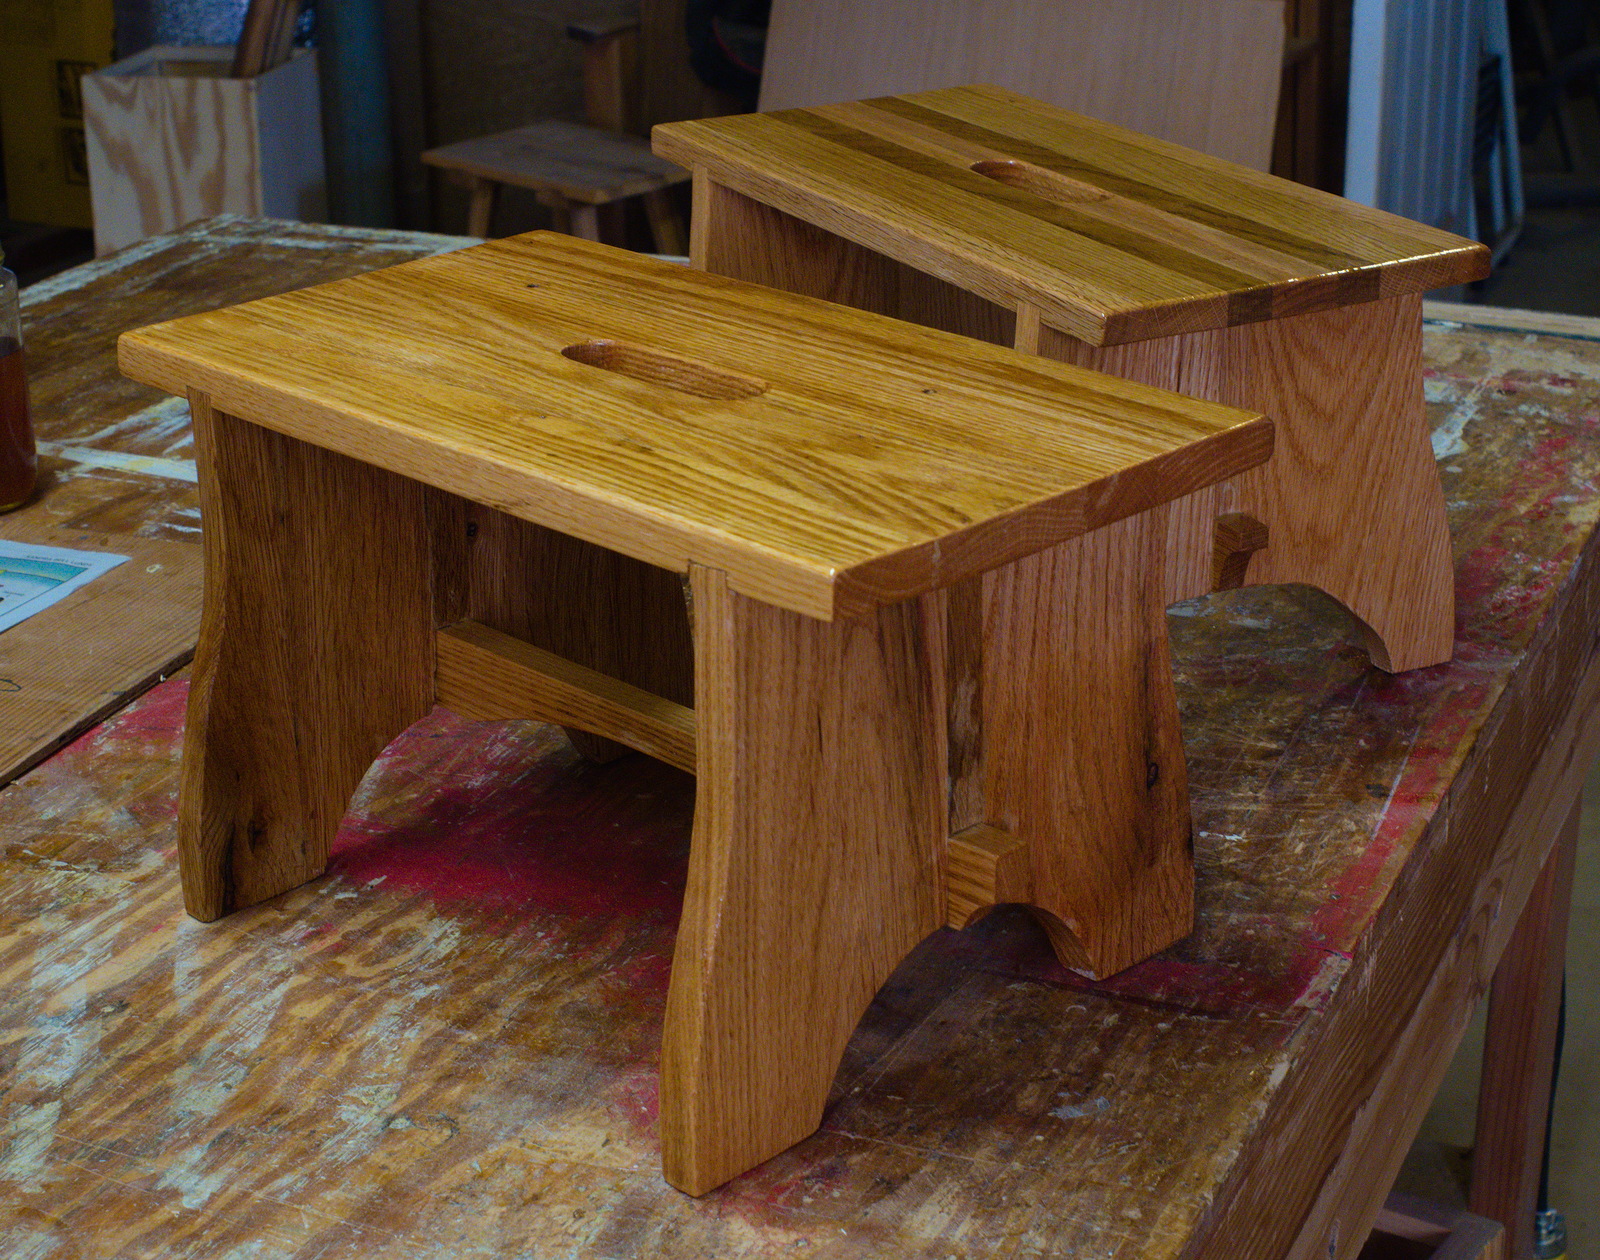
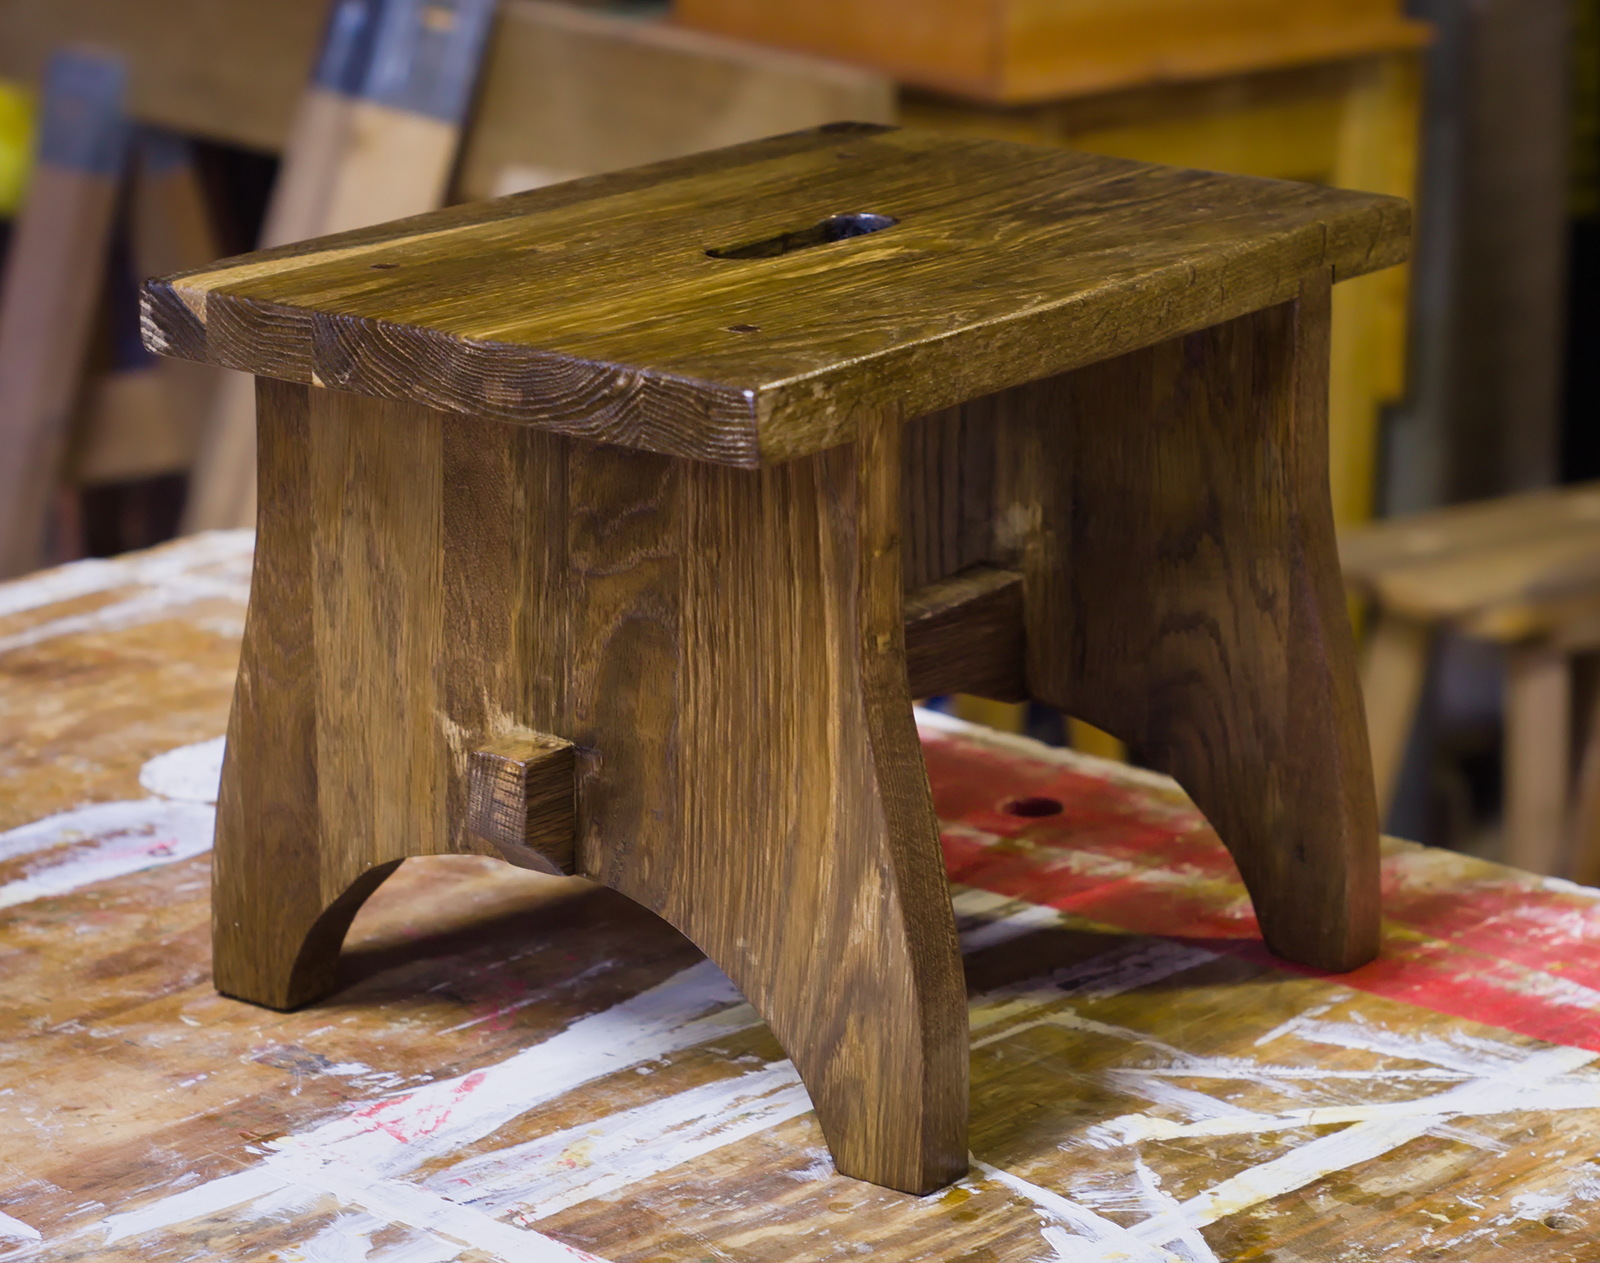
After making dozens of these step-stools, we have settled in to using heavier stock and slightly larger dimensions - no taller, just wider tread and base. The original plan was plenty solid and stable, but these heavy ones give an exceptional sense of sturdiness, so the user can feel completely confident using one.
Most people like the colors in cedar, and this step-stool should garner a good price when it goes to a charity auction.
January 11th, 2026
Posted by Paul
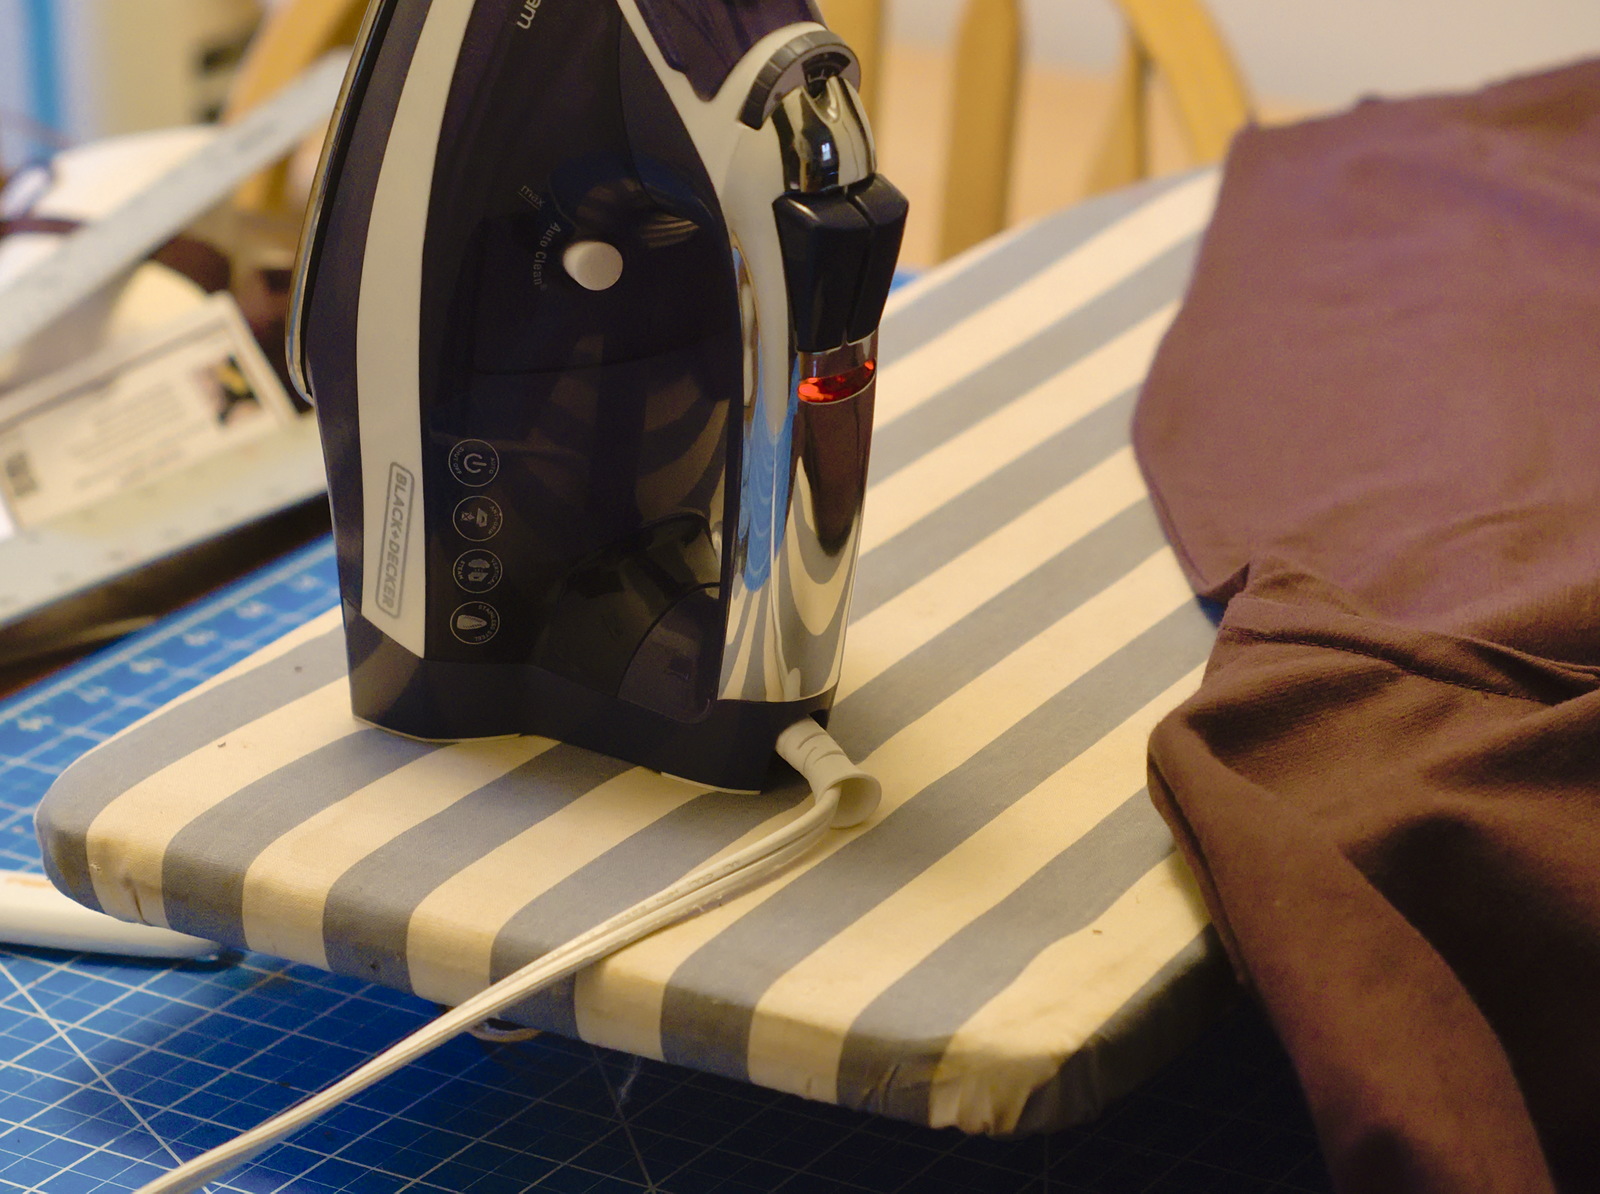
My old table-top ironing board that I use to press fabric for sewing started developing a sag, so I brought it with me to the shop. We took it apart and found the glue holding the pressboard together had started to dissolve, so we cut a new board out of a 1/2" sheet of salvage plywood to replace it. With the supports screwed back in place and the cover re-installed, it was back in order and ready to serve for a few more years.
January 9th, 2026
Posted by Paul
Ron gave us a nice piece of wood, not for the first time, and we decided to work some of it into the top of a box we are making for him. He and his wife are trying to remove things from their house in preparation for moving to smaller digs, but on a net basis, one box will be far less volume than the quantities of milled lumber he has lavished on us.
Looking at some photos on the internet, I'm fairly certain that the wood is cocobolo, a Central American variety that is critically endangered. It is very expensive, and Ron's gift will probably be the only sample we get to work with. It is extremely hard, oily, with a strong perfumy fragrance when worked.
January 2nd, 2026
Posted by Paul
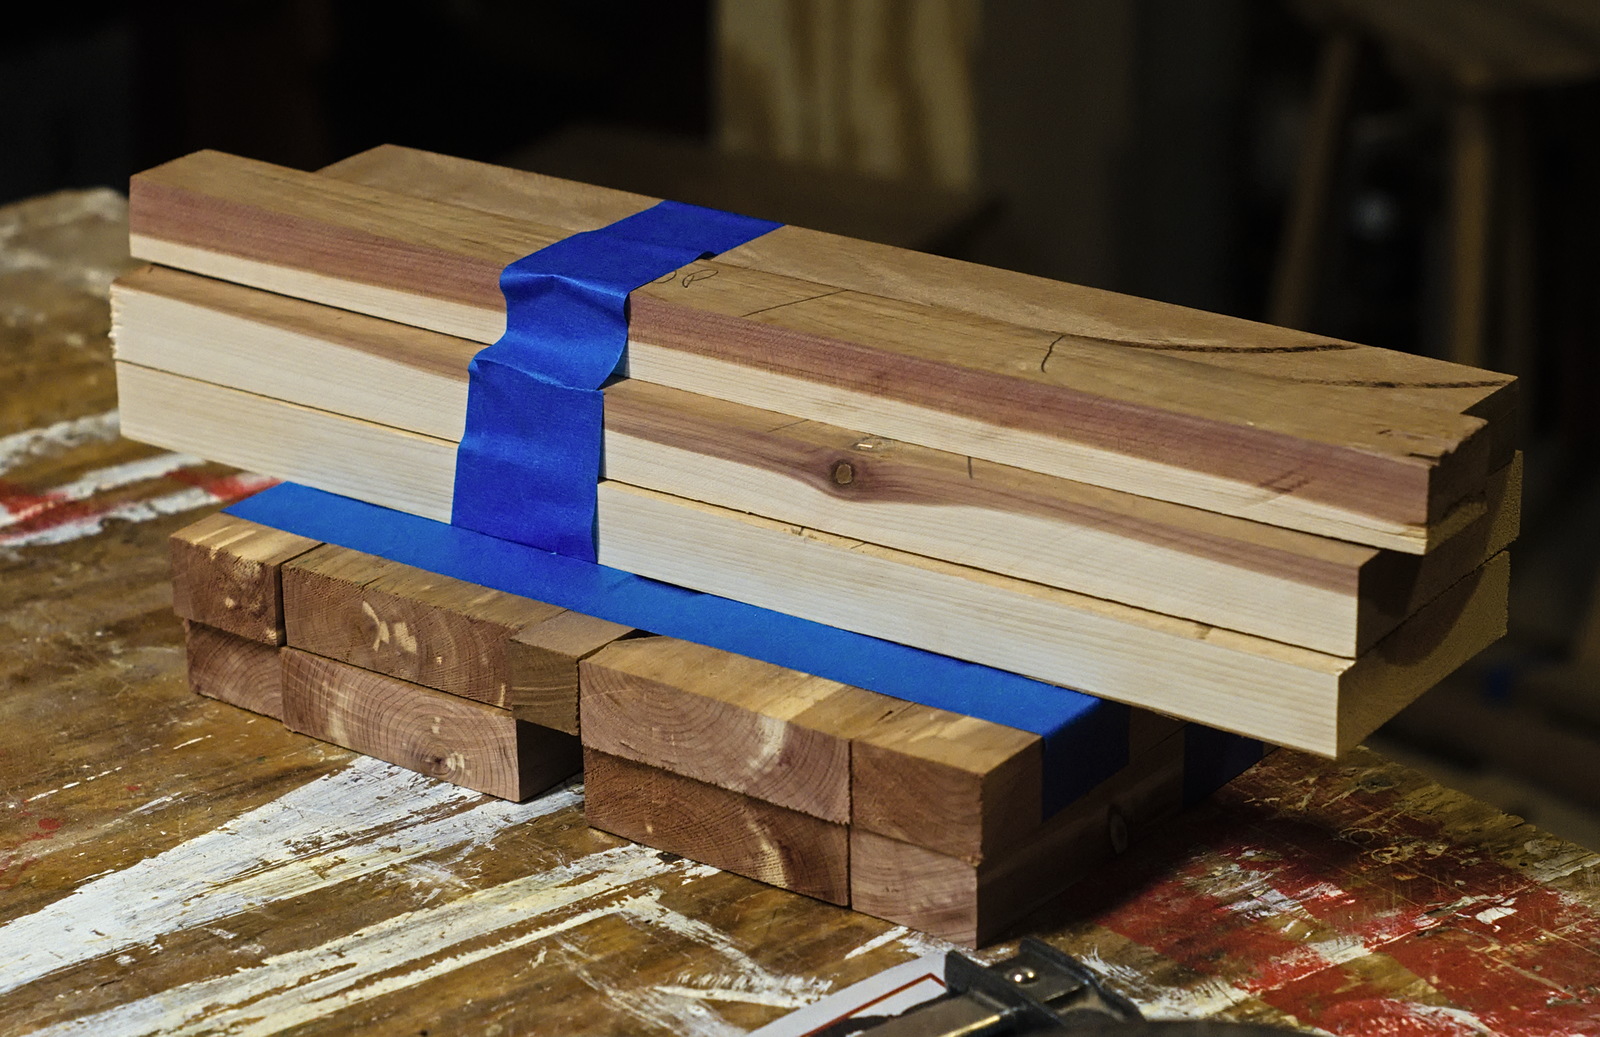
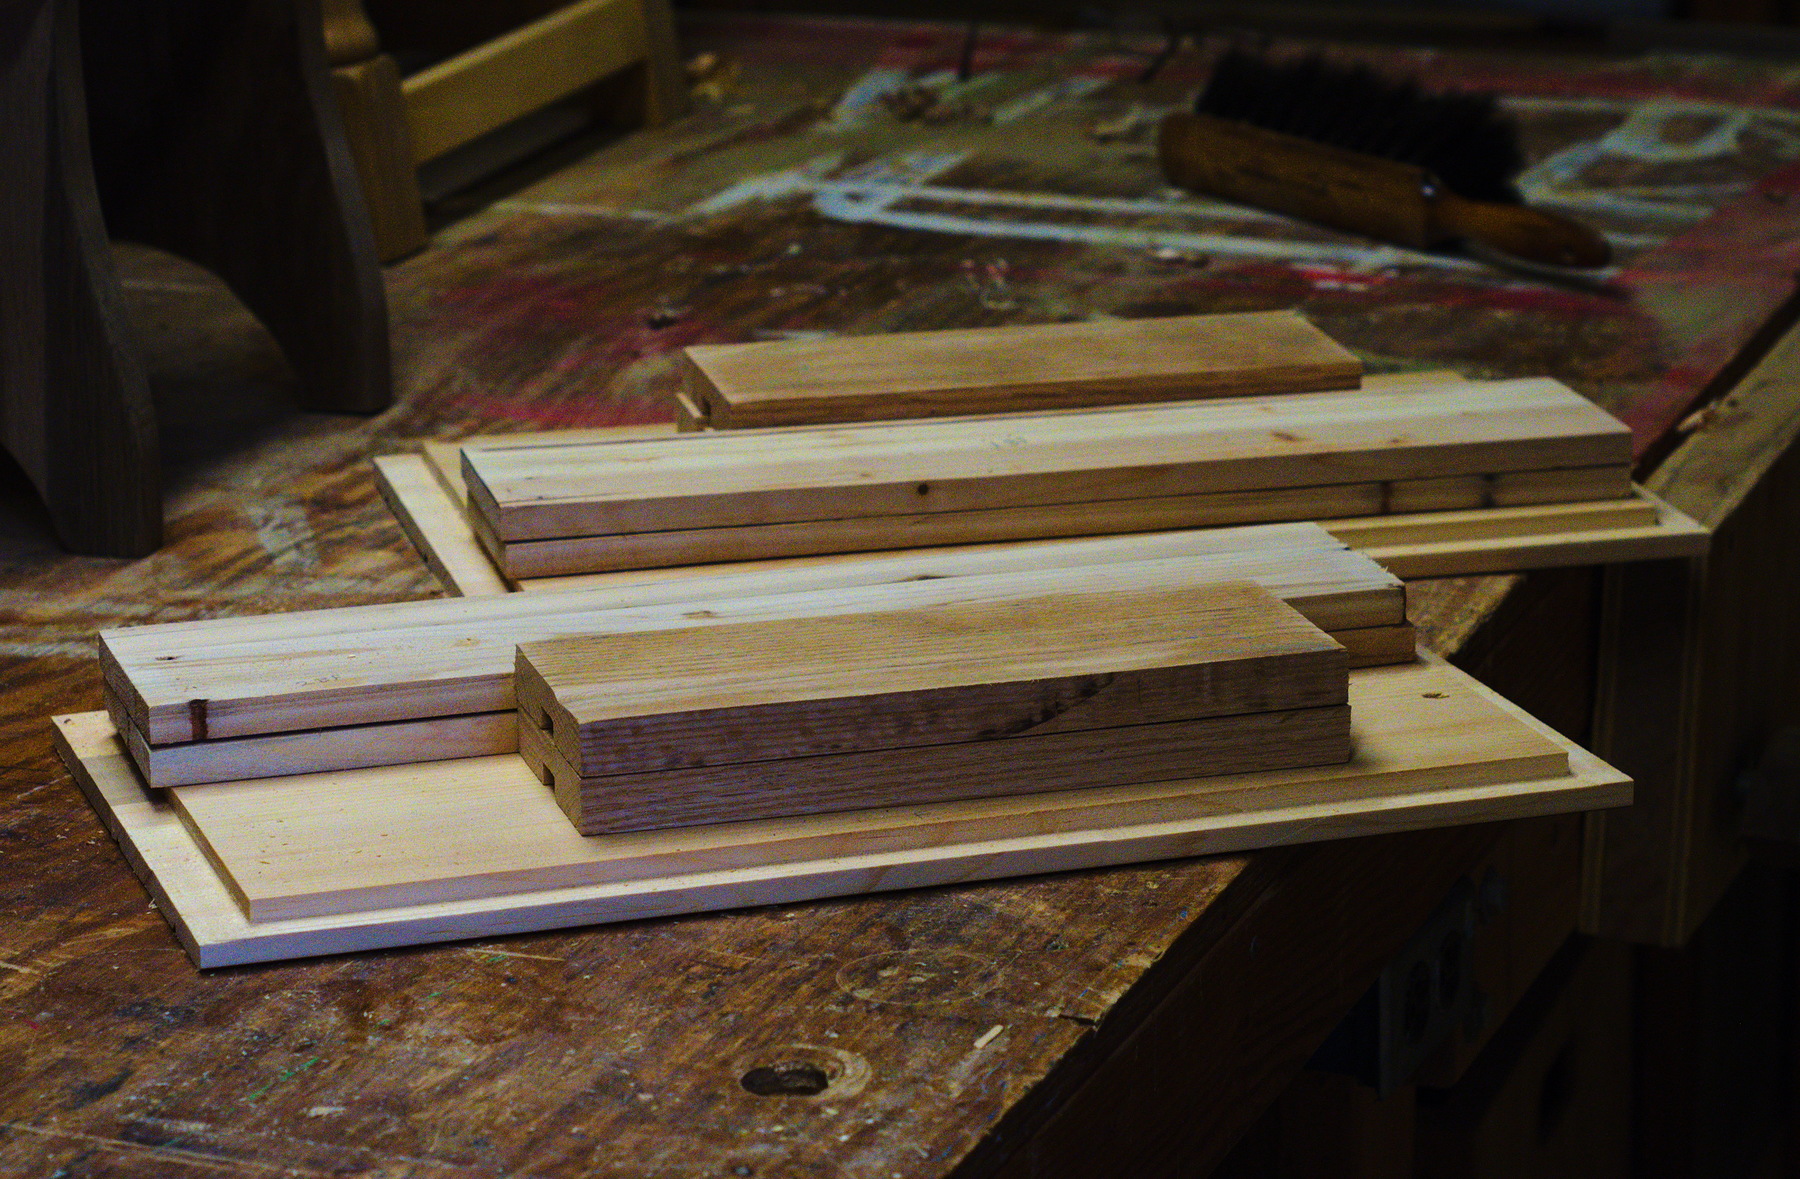
Close to the last of the 100 board feet of cedar we bought way back in November 2013. We milled out wood to build a large step-stool on the pattern of the two mahogany ones from last July. All the clamps were in use on other projects, so we bundled the parts together and will glue them into top and legs next time.
December 12th, 2025
Posted by Paul
Two more step stools in oak.
December 11th, 2025
Posted by Paul
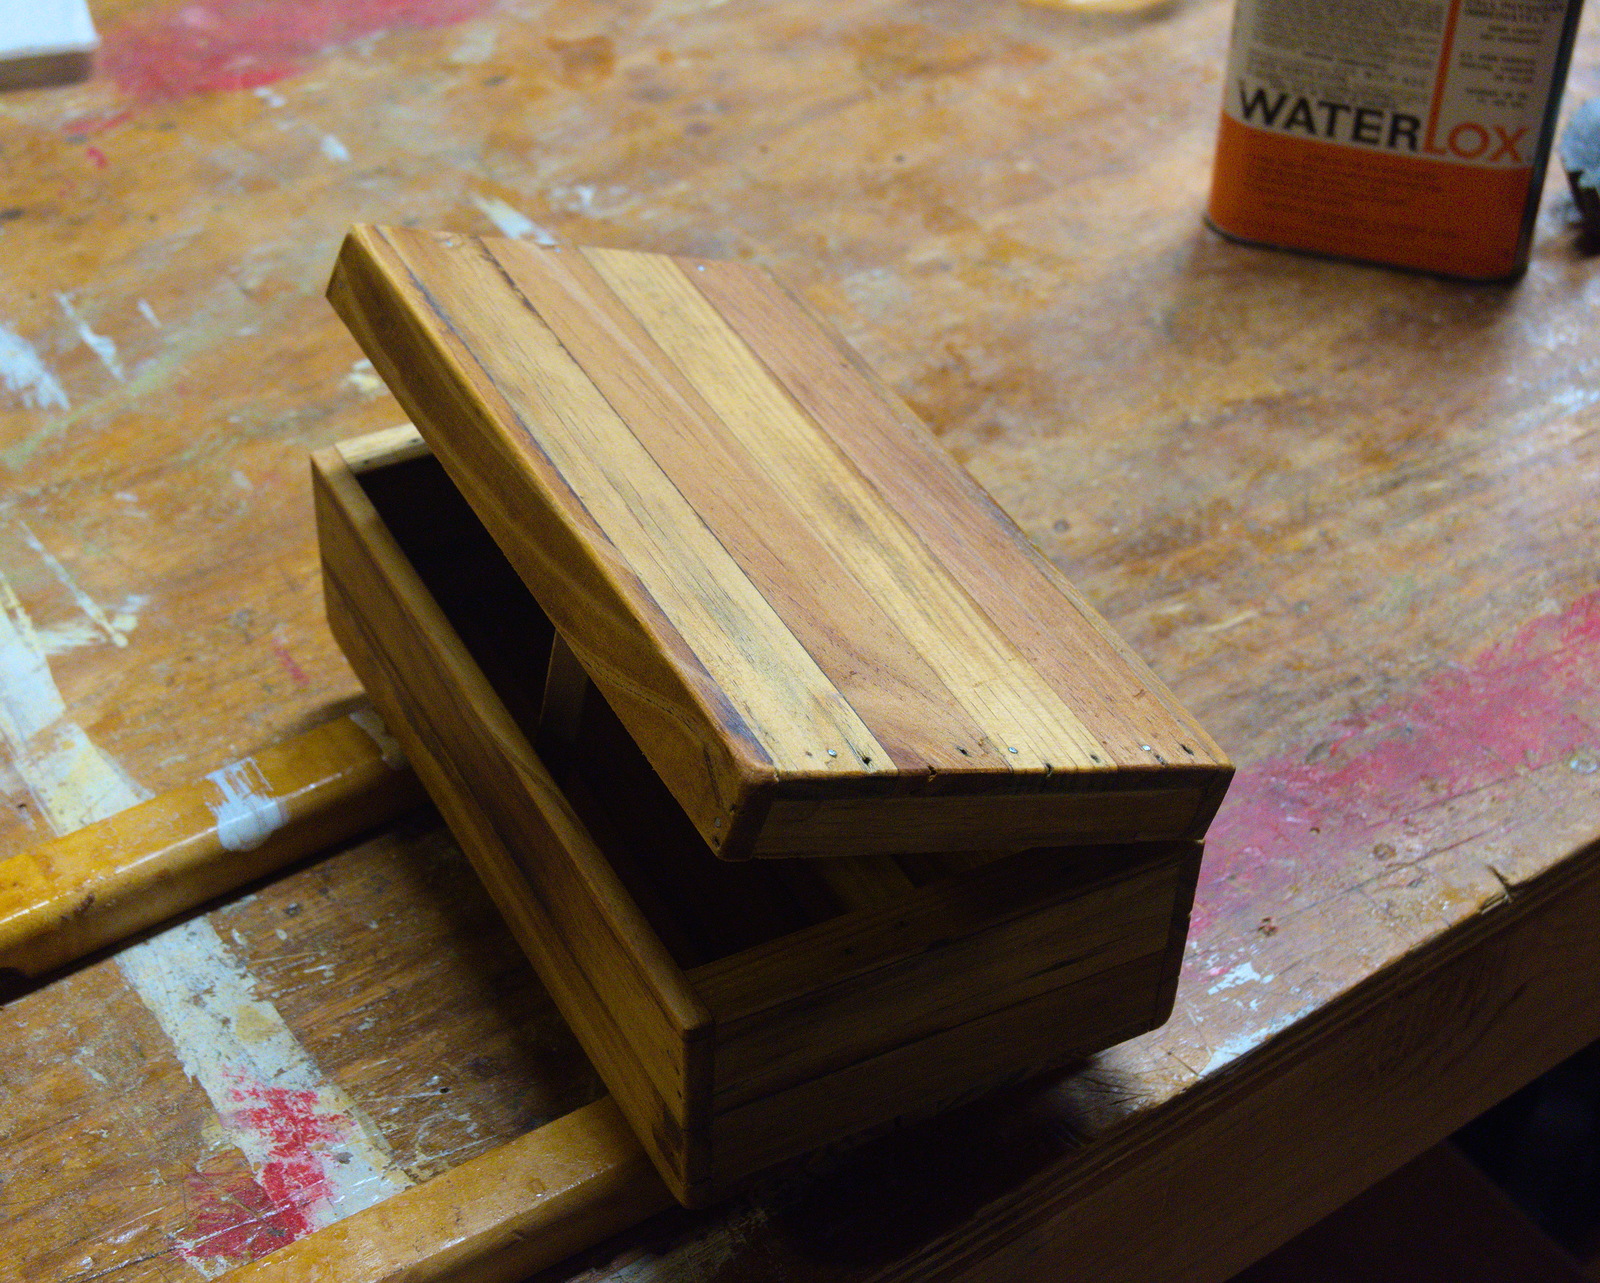
Joe built two of these small boxes and coated them with Waterlox.
November 11th, 2025
Posted by Paul

We built a couple more boxes out of oak and Joe ammonia fumed them. Last work day we cut them open and put on the hinges and hasps, and then put them back in for more fuming. Gustav Stickley would be proud.
September 28th, 2025
Posted by Paul
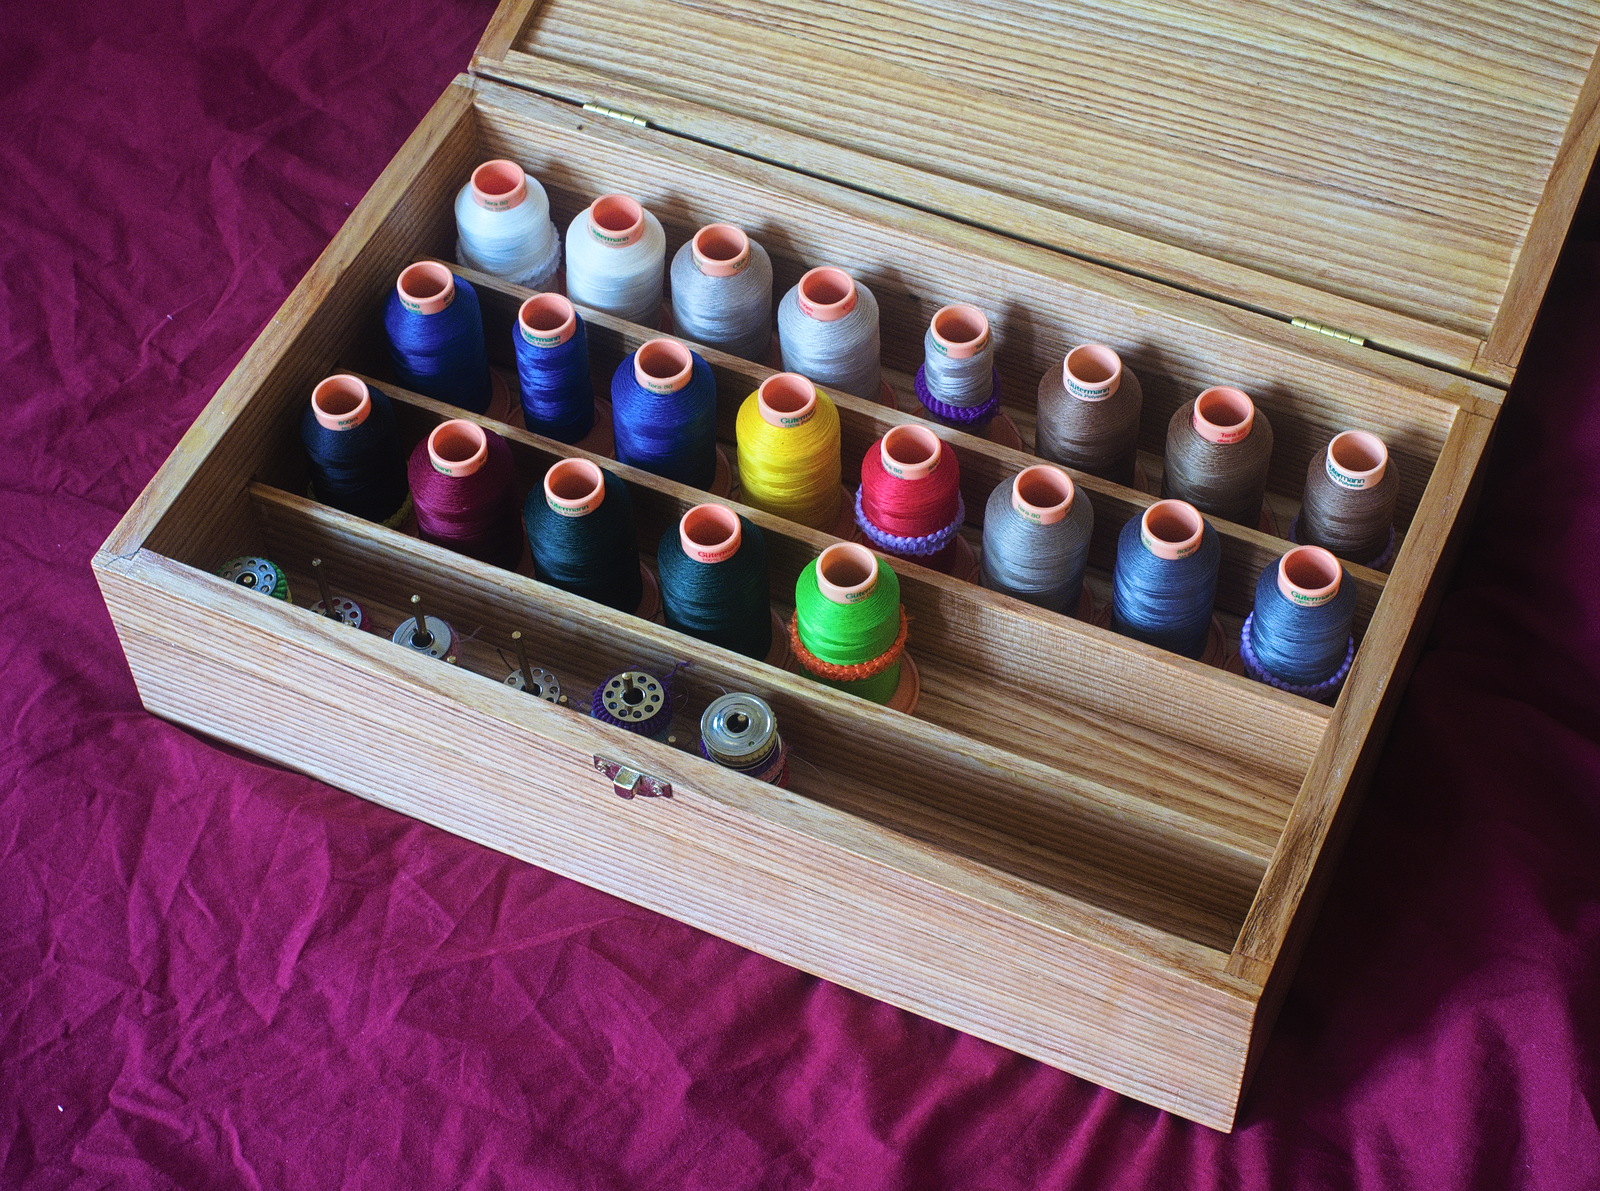
To have easy, organized storage for my Tera 80 thread cones and bobbins, we built this 10"x16" box out of ash bought at Wall Lumber years ago for some forgotten project. It is still lacking one final detail - I have ordered a length of chain to make a lid stay.
This was an easy and fun project. We have started milling oak to make at least one more to the general pattern.
September 25th, 2025
Posted by Paul
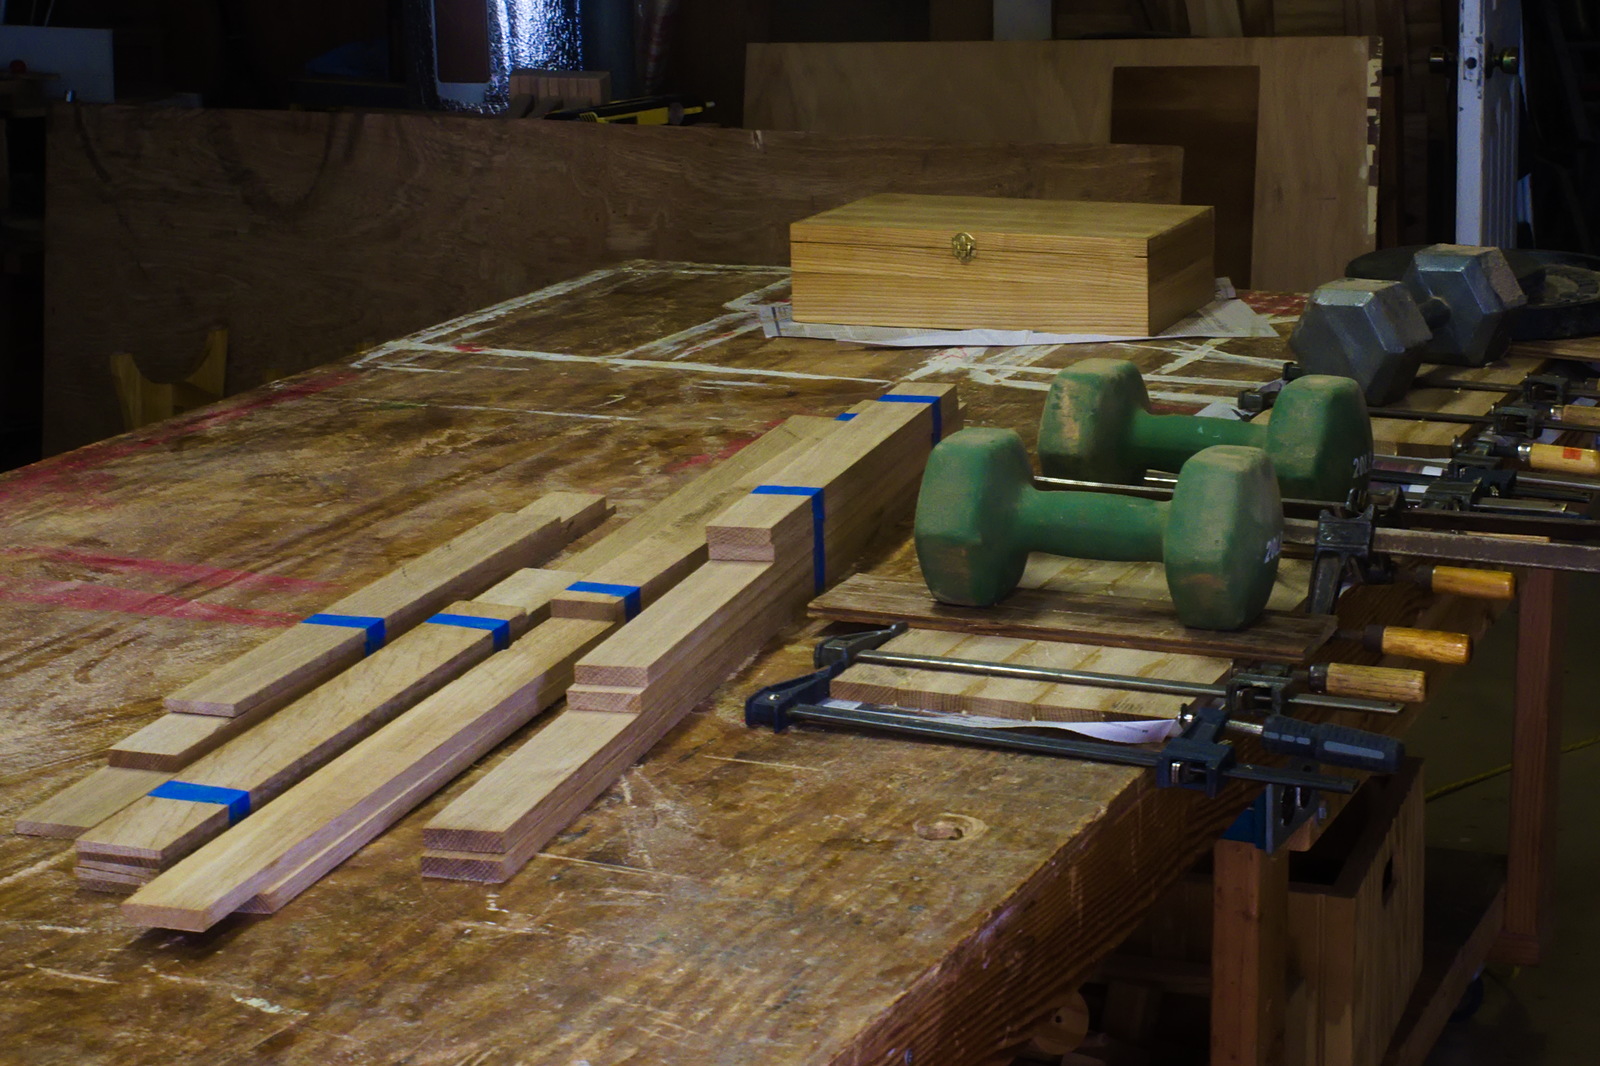
The ash thread box looks really good, so we decided to mill out some 8/4 oak into 2" slats and build another box. By the end of the day, we had enough milled to make three or four boxes, and slats glued up to make the first one.
September 19th, 2025
Posted by Paul
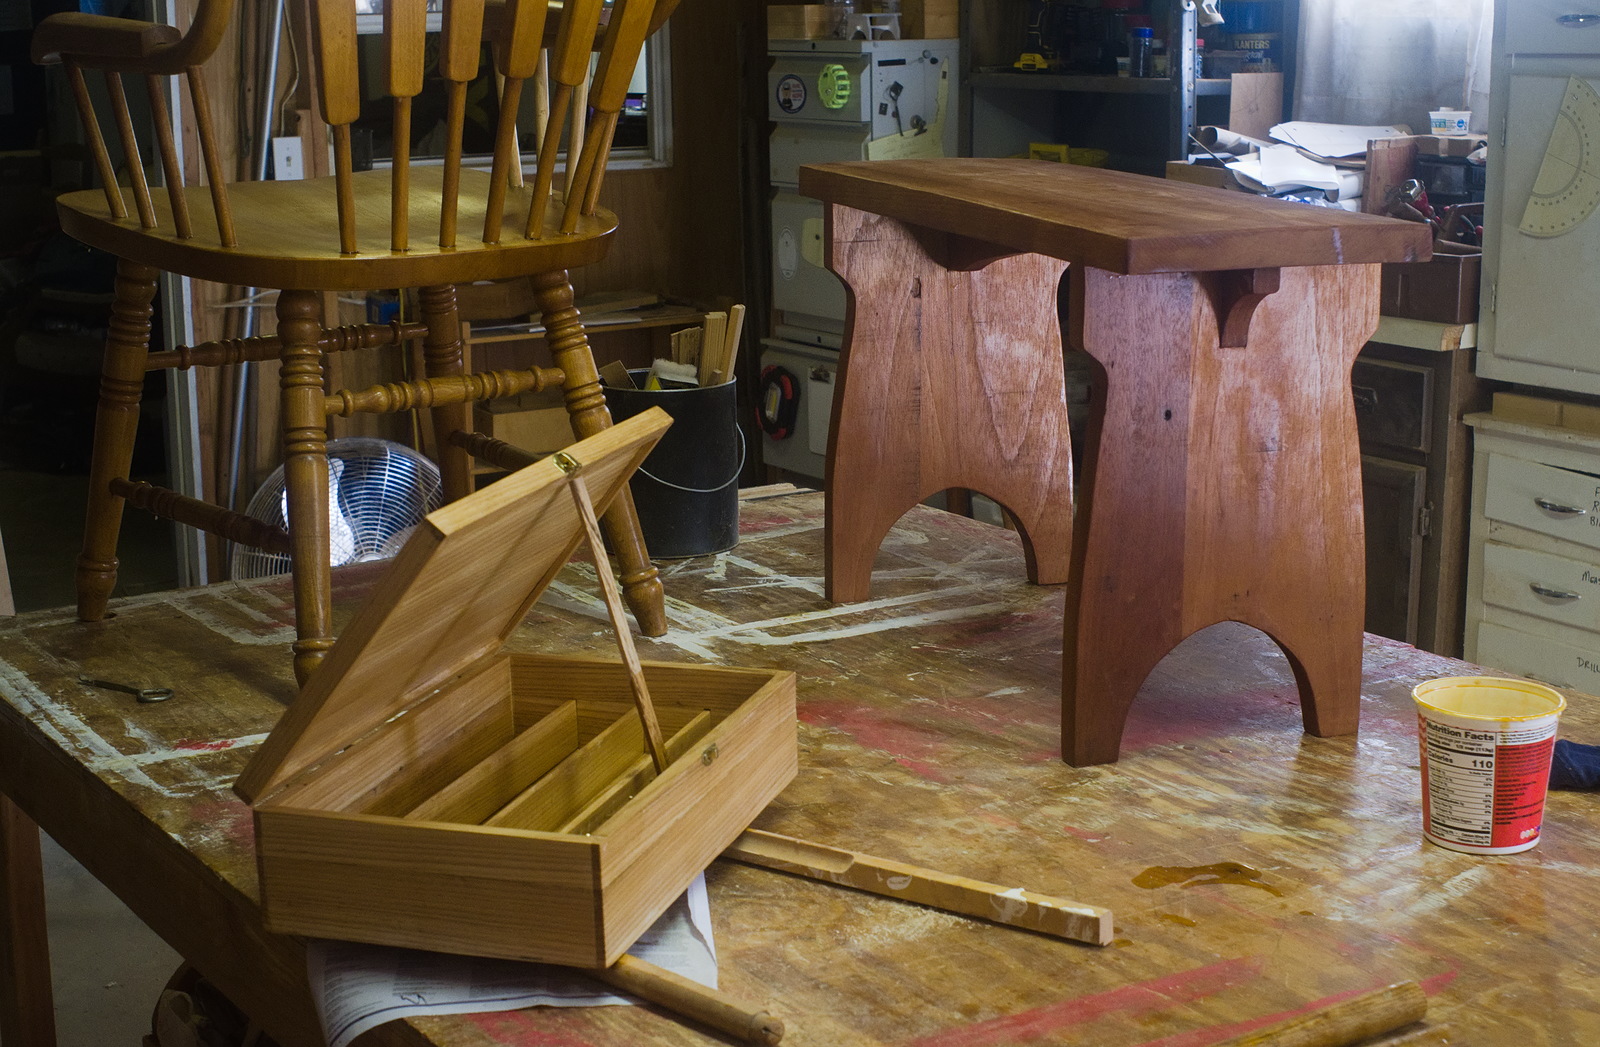
The ash box in the foreground is to hold my cones of Tera 80 sewing thread, to the right is a Seller's Bench of mahogany, and behind is a commercial chair that Joe repaired.
September 4th, 2025
Posted by Paul

Back to box-making. I need something to hold all my Tera 80 thread, so I drew up a plan for a 10x16" box just tall enough to fit the cones and hold them neatly in place. The top, bottom and sides would be cut from 1/2" stock and the dividers from 1/4". We milled the stock out of edge cuts from an 8/4 board of hard maple that had been laying around the shop for several years, creating 2x1/2" strips that we glued up to form the walls of the box. We dadoed the lower halves of the ends to accept the dividers before glueing them to the top halves to blind them, and rabbeted the wall pieces to allow the top and bottom to fit in place. A technique we have developed for making boxes with sawn-off lids is to build them upside down from the top up, which makes it easier to get the upper part of the box perfectly square so that it will be easier to hinge. We glued up the four sides around the top and then dropped the dividers loose into their dadoes. Joe marked the bottom edge with pencil so that with the bottom glued in place we will know where to make the cut to remove the top. The picture shows the box ready for the bottom to be glued in, after a final check to make sure no weights had been overlooked.
July 30th, 2025
Posted by Paul
We recently completed four stepstools. Joe can find a place for three of them and I took one home, put the last two coats of finish on it, and plan to keep it. These are valuable to have because they keep you from doing stupid things like standing on a chair to reach a high shelf.
July 25th, 2025
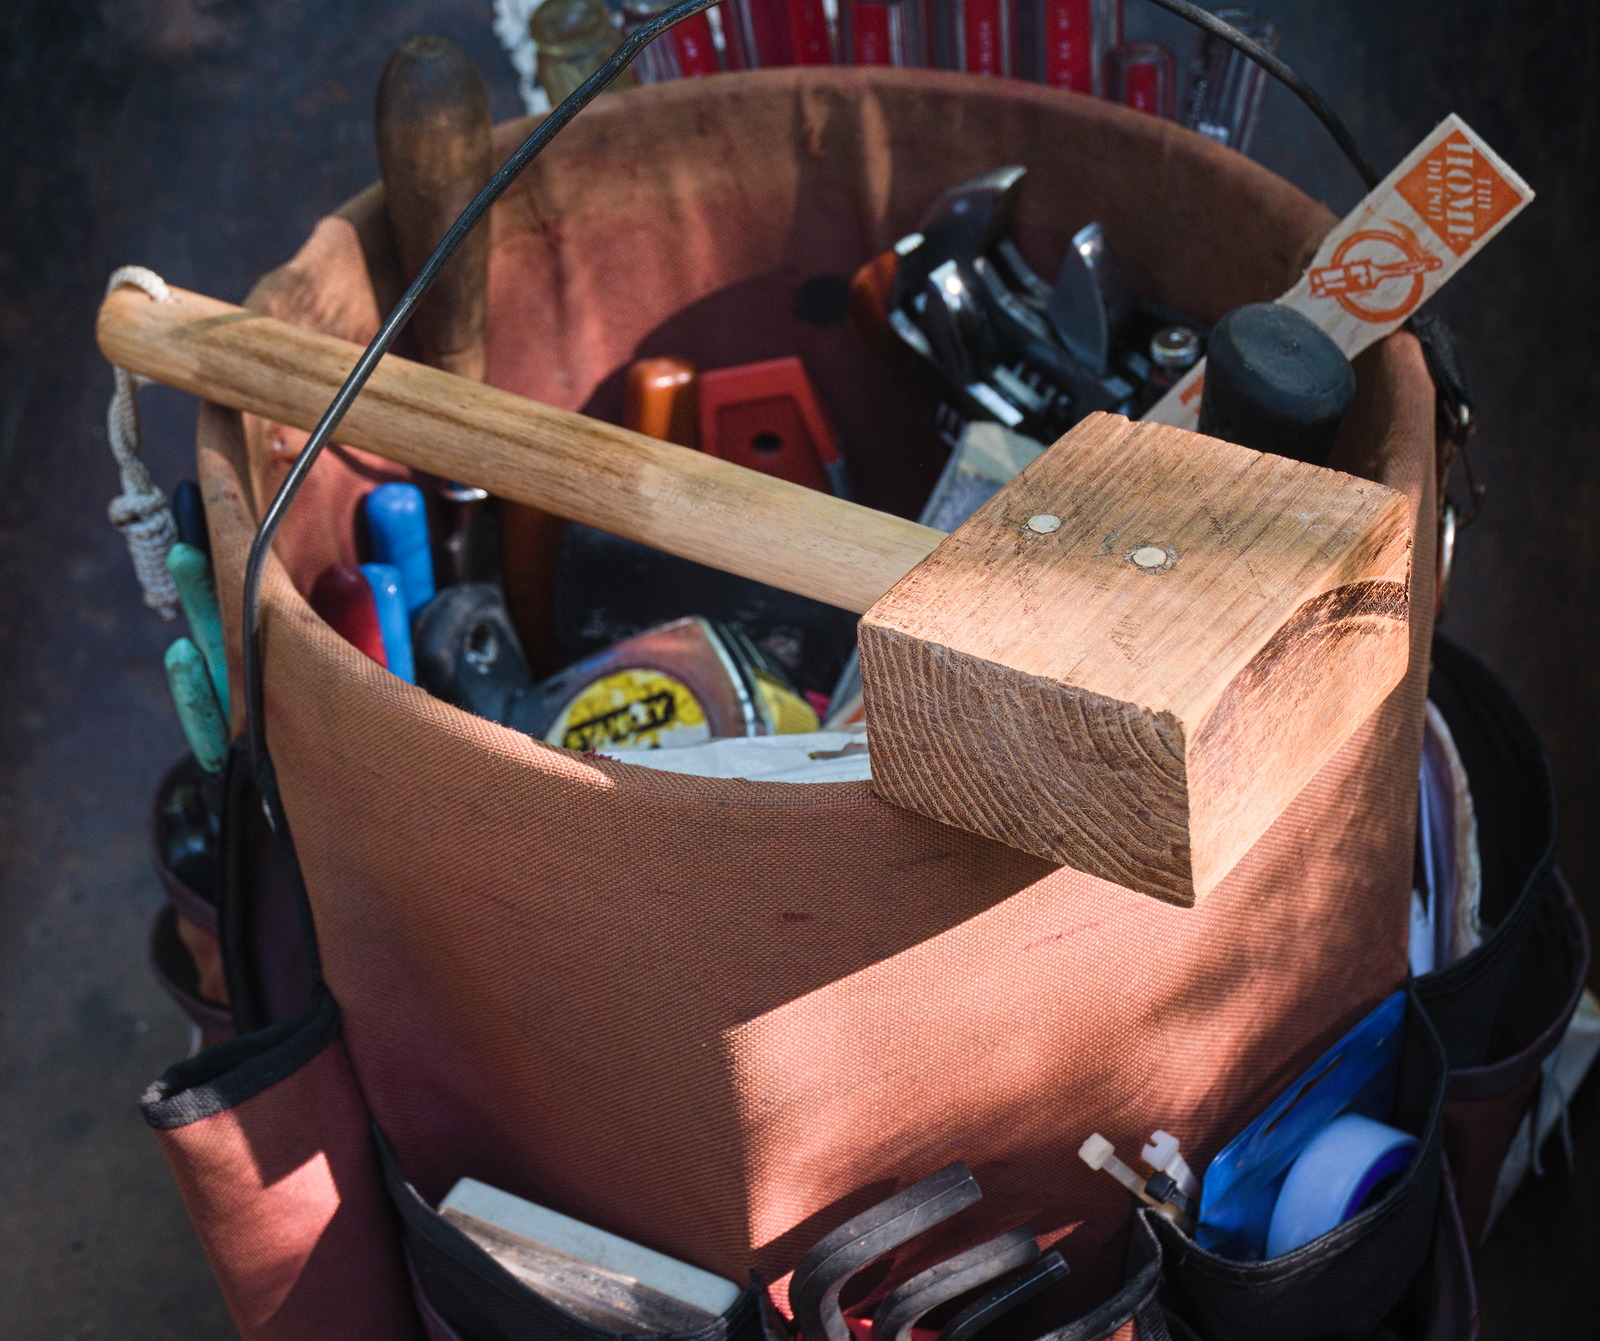
Posted by Paul
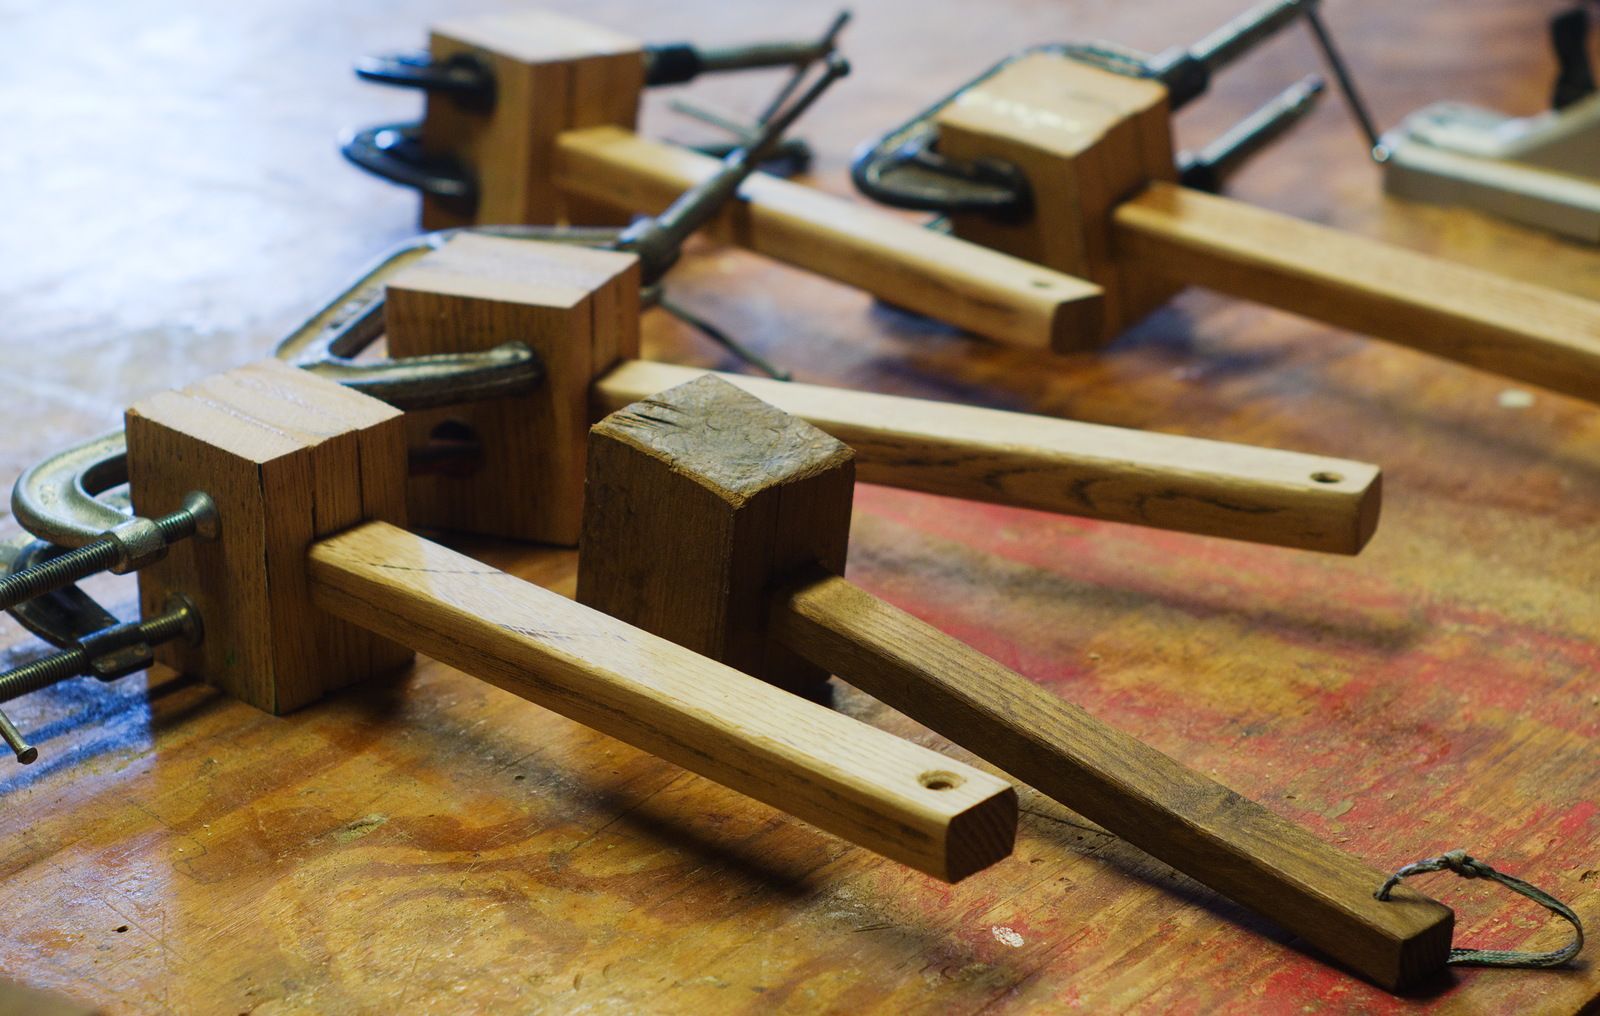
We're in between projects so we decided to build a few wooden mallets. There are at least two ways to make them - to bore a hole through the head and then insert a handle, or to build up the head out of parts around the handle. Either way works fine, and we have broken mallets made either way. Looking around the shop, we didn't find any good large pieces of hardwood to make solid heads, but we did find plenty of good oak to make built-up ones. Using a good, seasoned shop mallet as a pattern, we cut out parts to make four new ones, and completed them in a couple of hours. With time left over, we put a second coat of finish on some step-stools that we completed last month.
June 15th, 2025
Posted by Paul

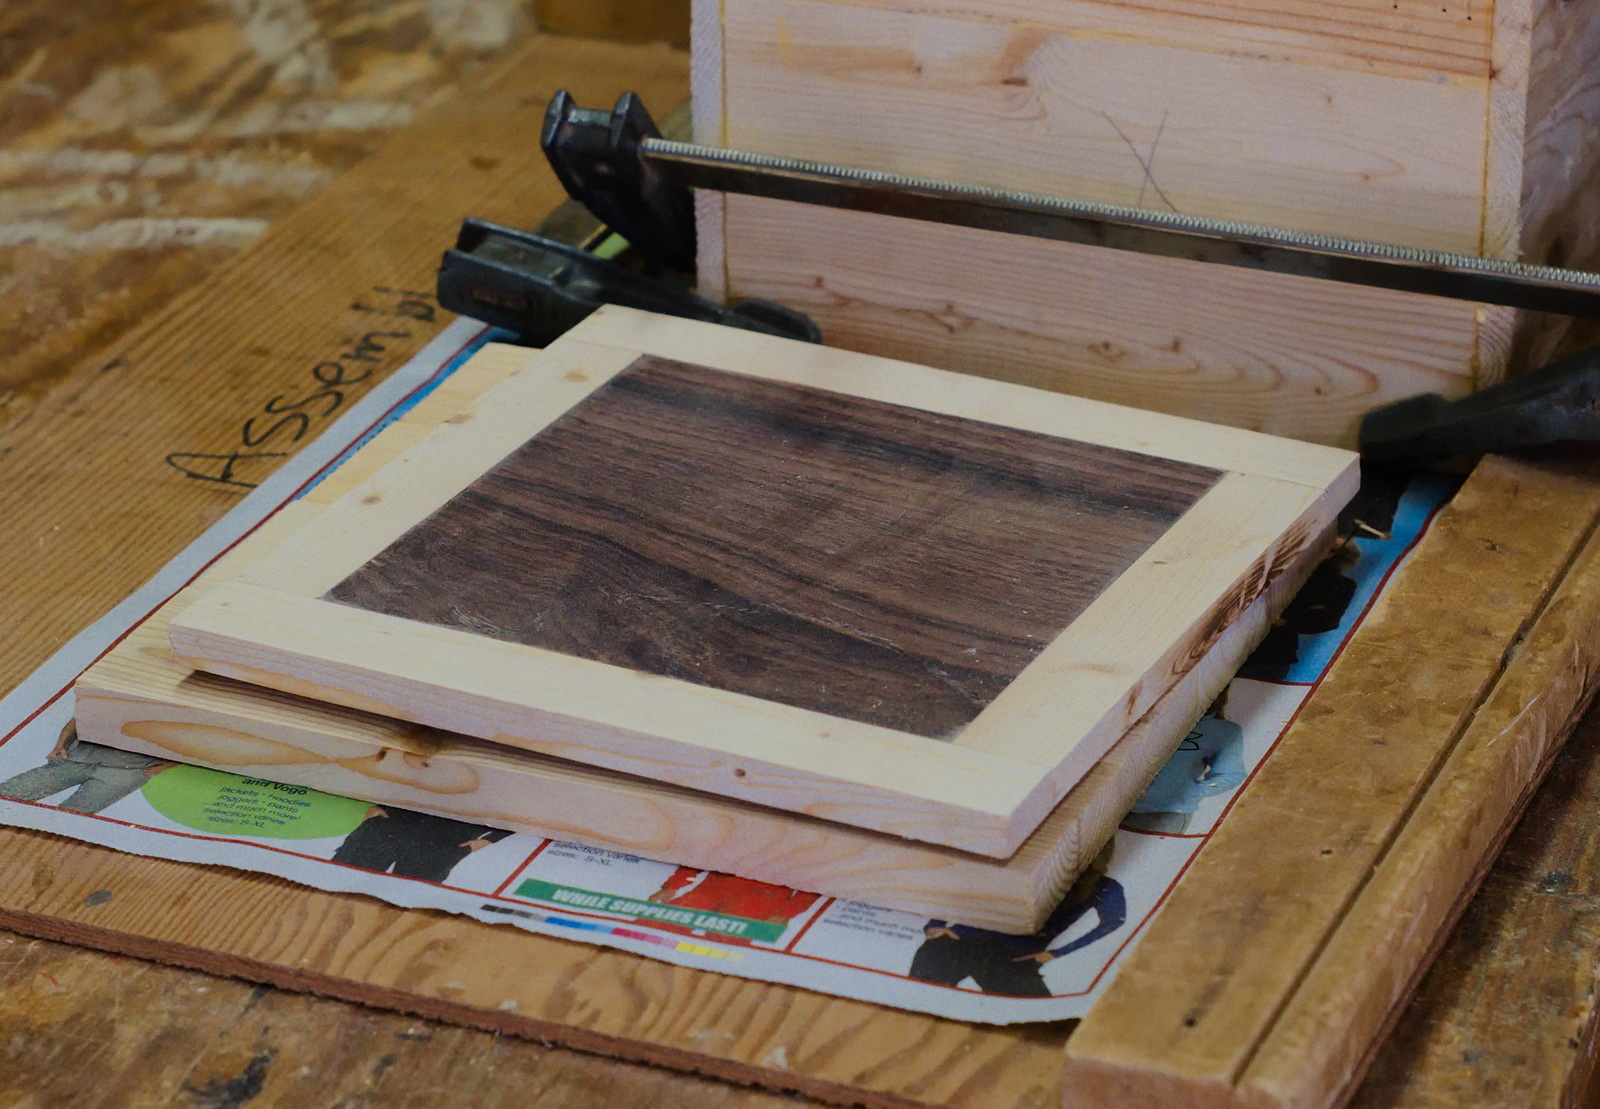
The pegs may add a little strength, but they are mainly decorative. Once the glue sets, they will be cut off flush, and then there will just be a little cleanup and sanding before these two step stools are ready for finish.
June 14th, 2025
Posted by Paul
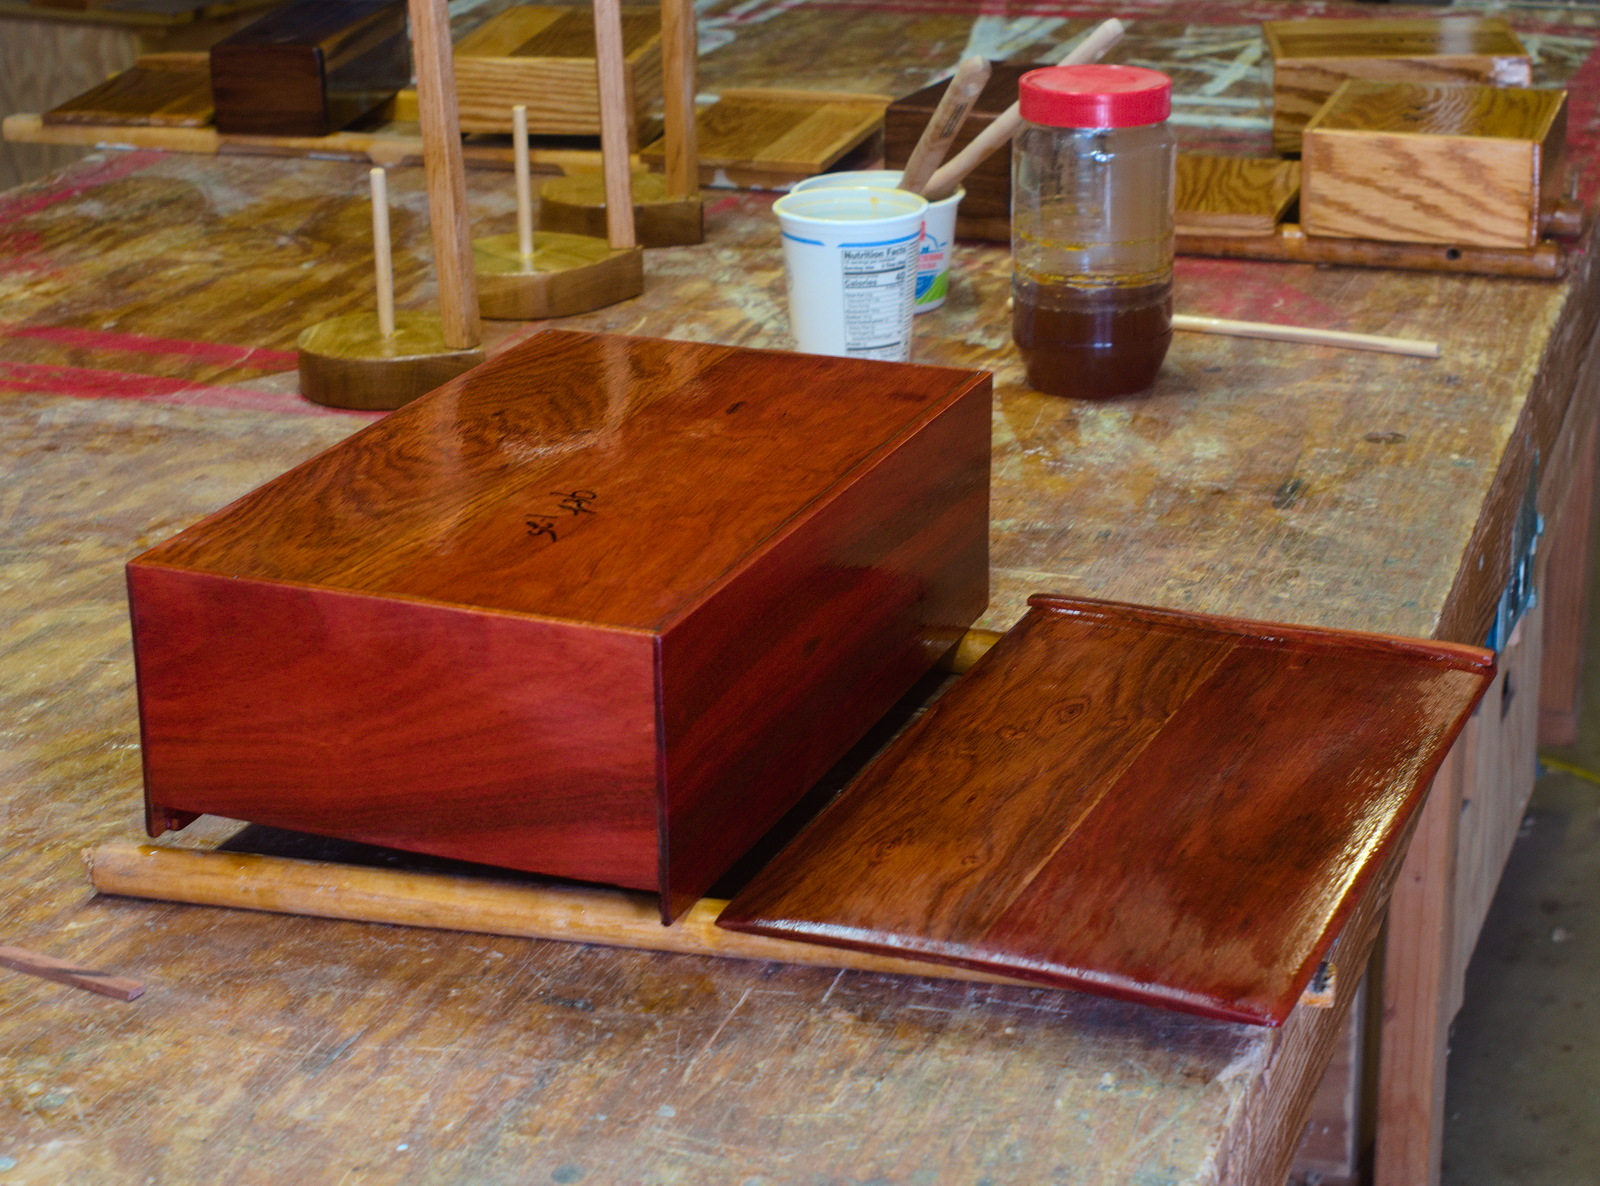
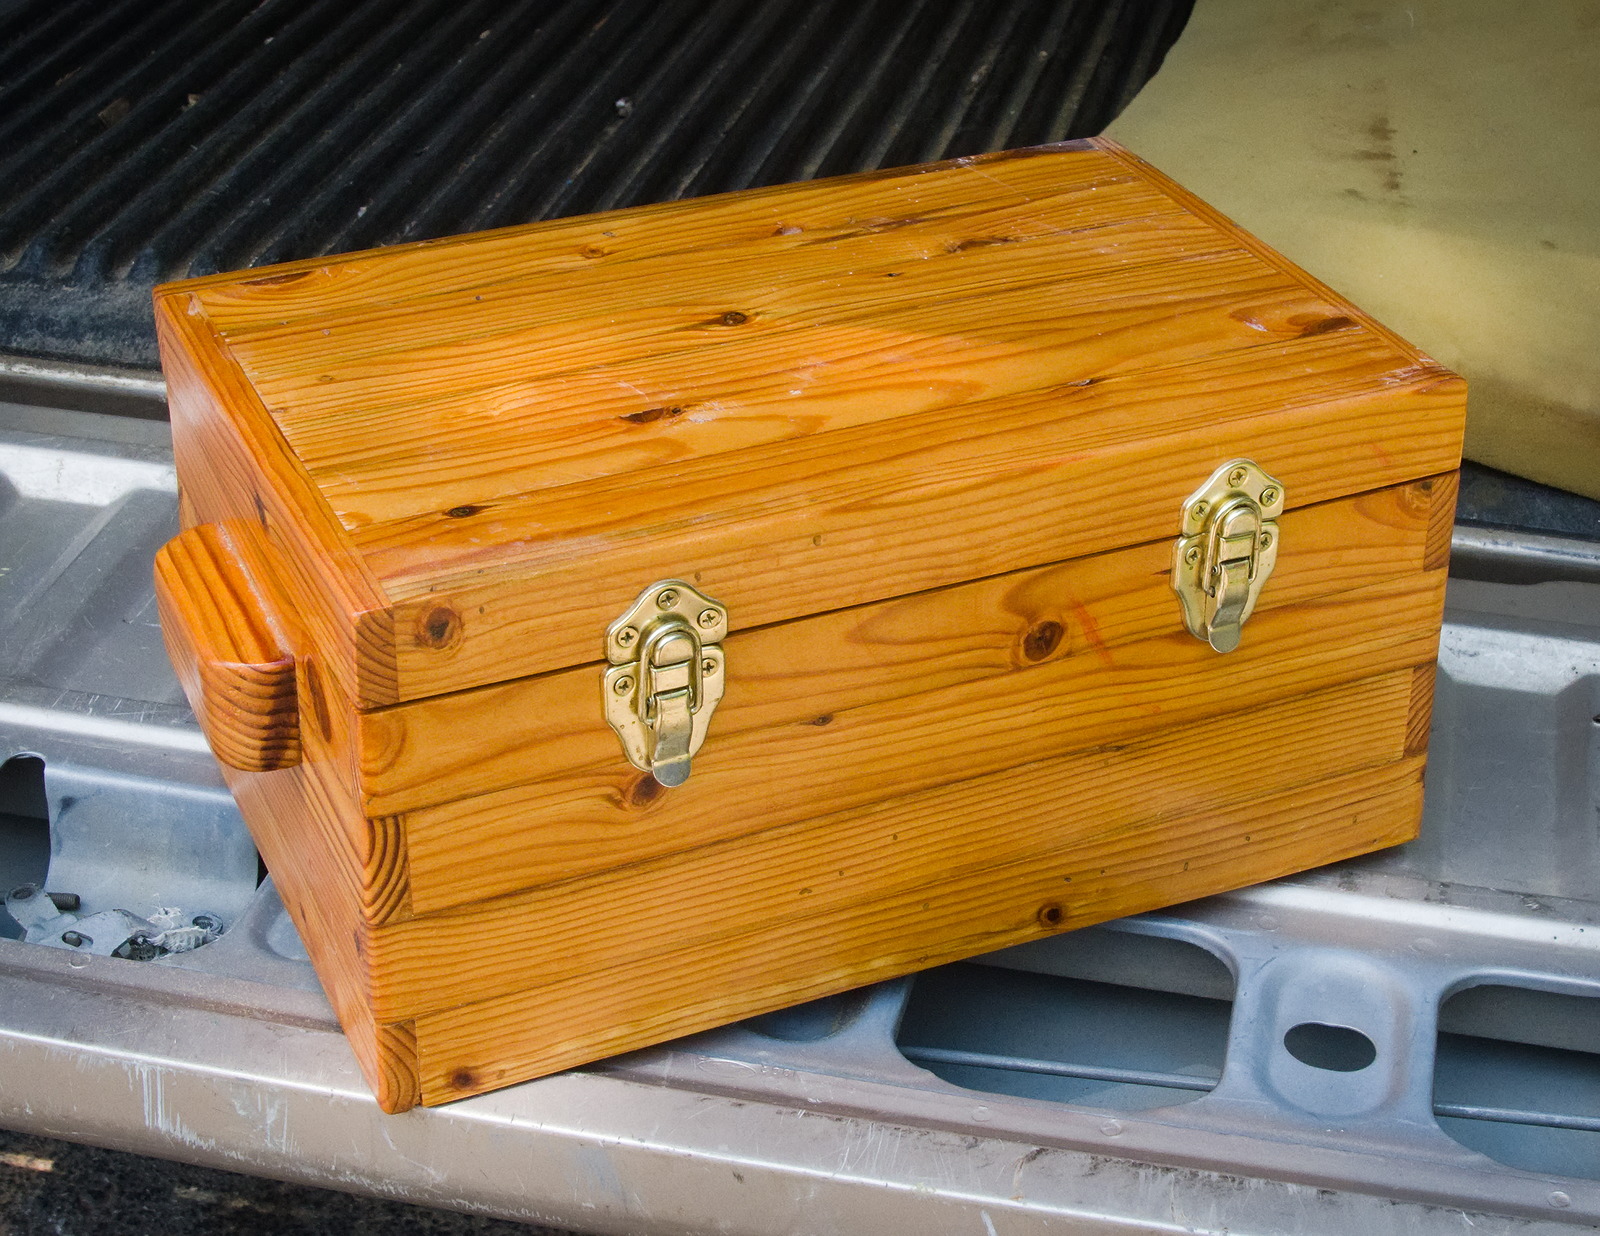
With a coat of spar varnish over four coats of interior polyurethane, I think this chest can be considered complete. I might wax it.
May 25th, 2025
Posted by Paul

It doesn't look like much, but this is all the wood milled out to dimensions to build two step-stools. Kyle gave us a stack of crate-wood, most if not all mahogany, that he found in the attic of the house he bought. It is unfinished, fat 4 quarter thick, so we decided to make the step-stools scaled up slightly to account for the heavier 7/8" thickness of the stock after surfacing. Joe built one like this years ago out of the same stack of mahogany and it looked good. Also in the shop are two more step-stools built to standard dimensions from salvage wood, some sort of clear-grained, tough hardwood, maybe hickory. So we will have four to dispose of. I will probably keep one and Joe can keep, give away or send to a charity auction the other three.
May 21st, 2025
Posted by Paul
Here's mine. I took it home and rubbed a couple more coats of finish on it. I left the inside unfinished as is traditional. I haven't waxed it because I may decide to bring the spar varnish home from the boat and put a coat of that on. Spar varnish has more solids in it and would make a deeper color.
May 9th, 2025
Posted by Paul
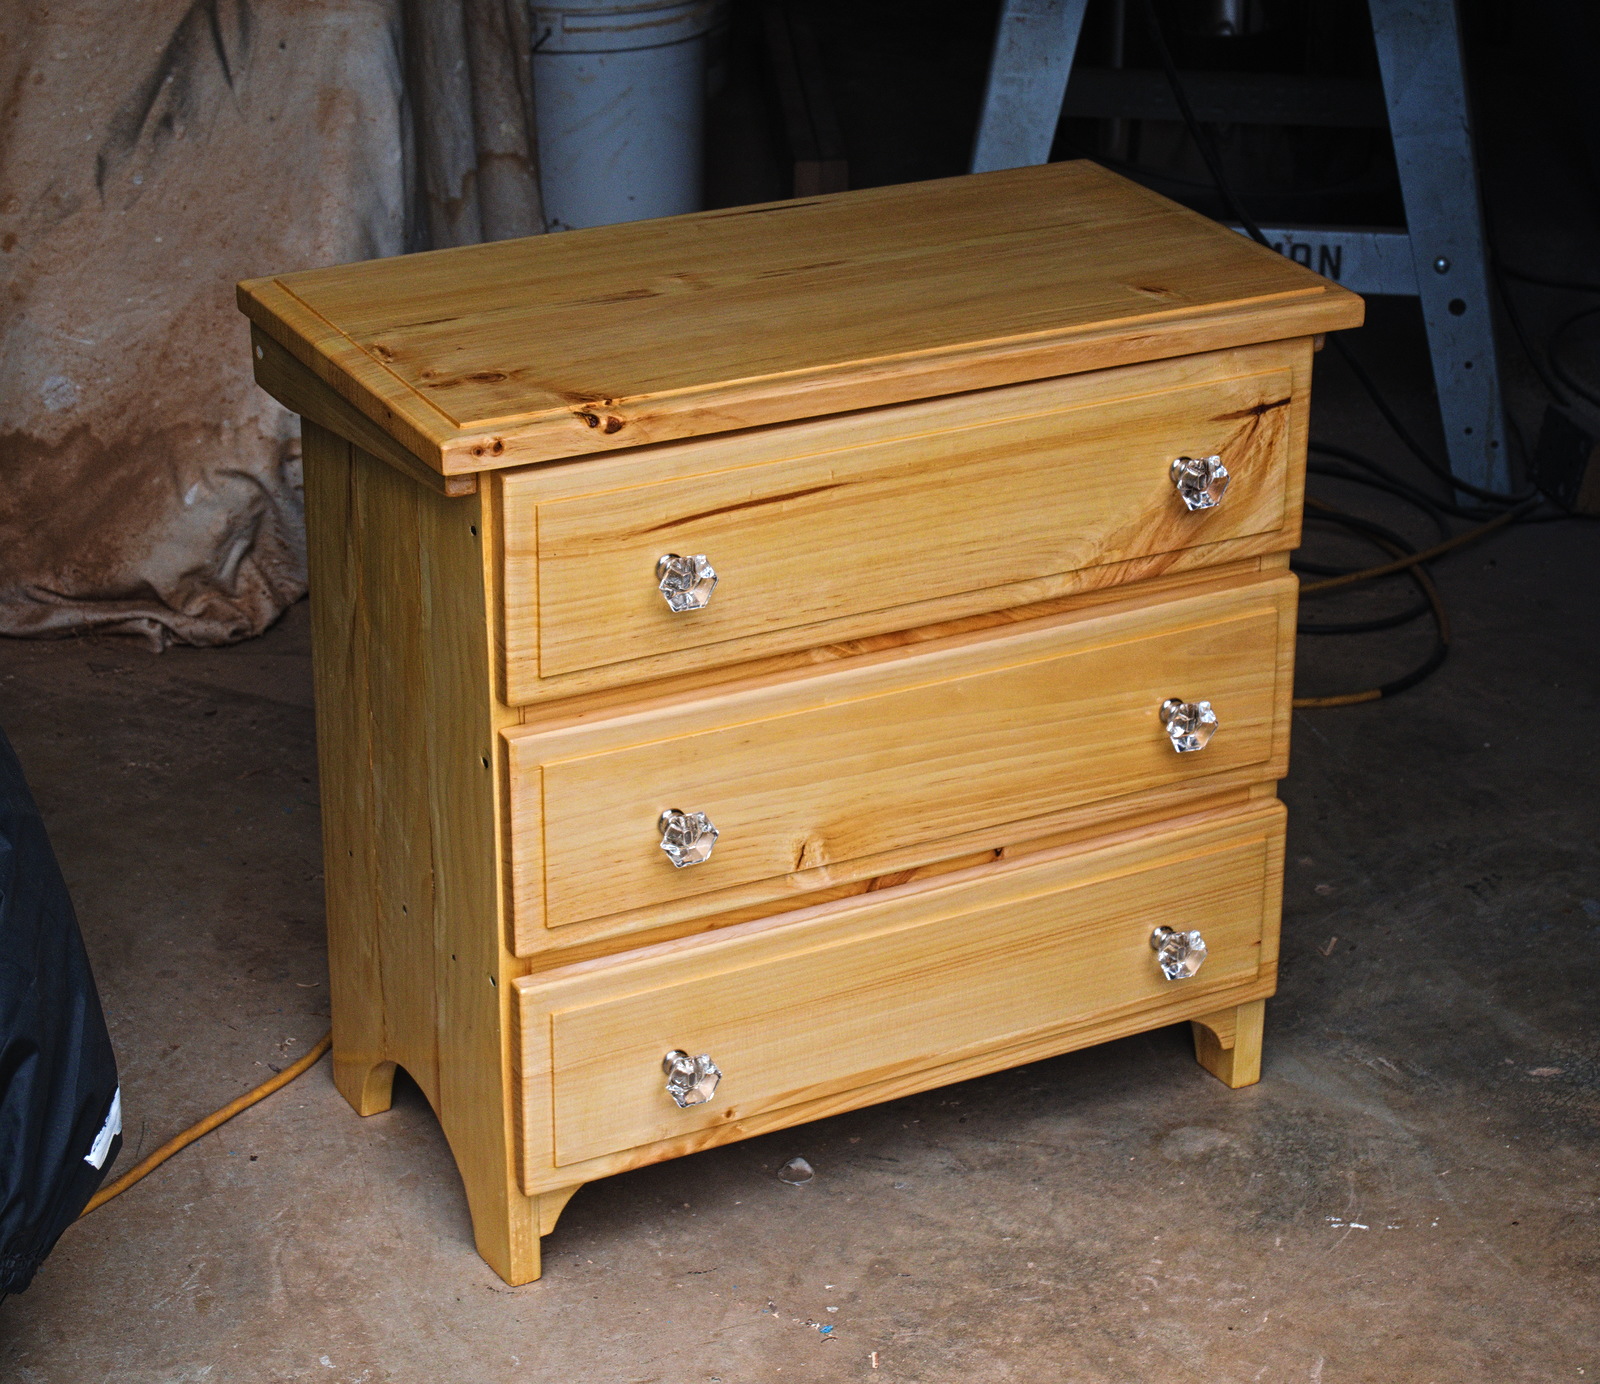
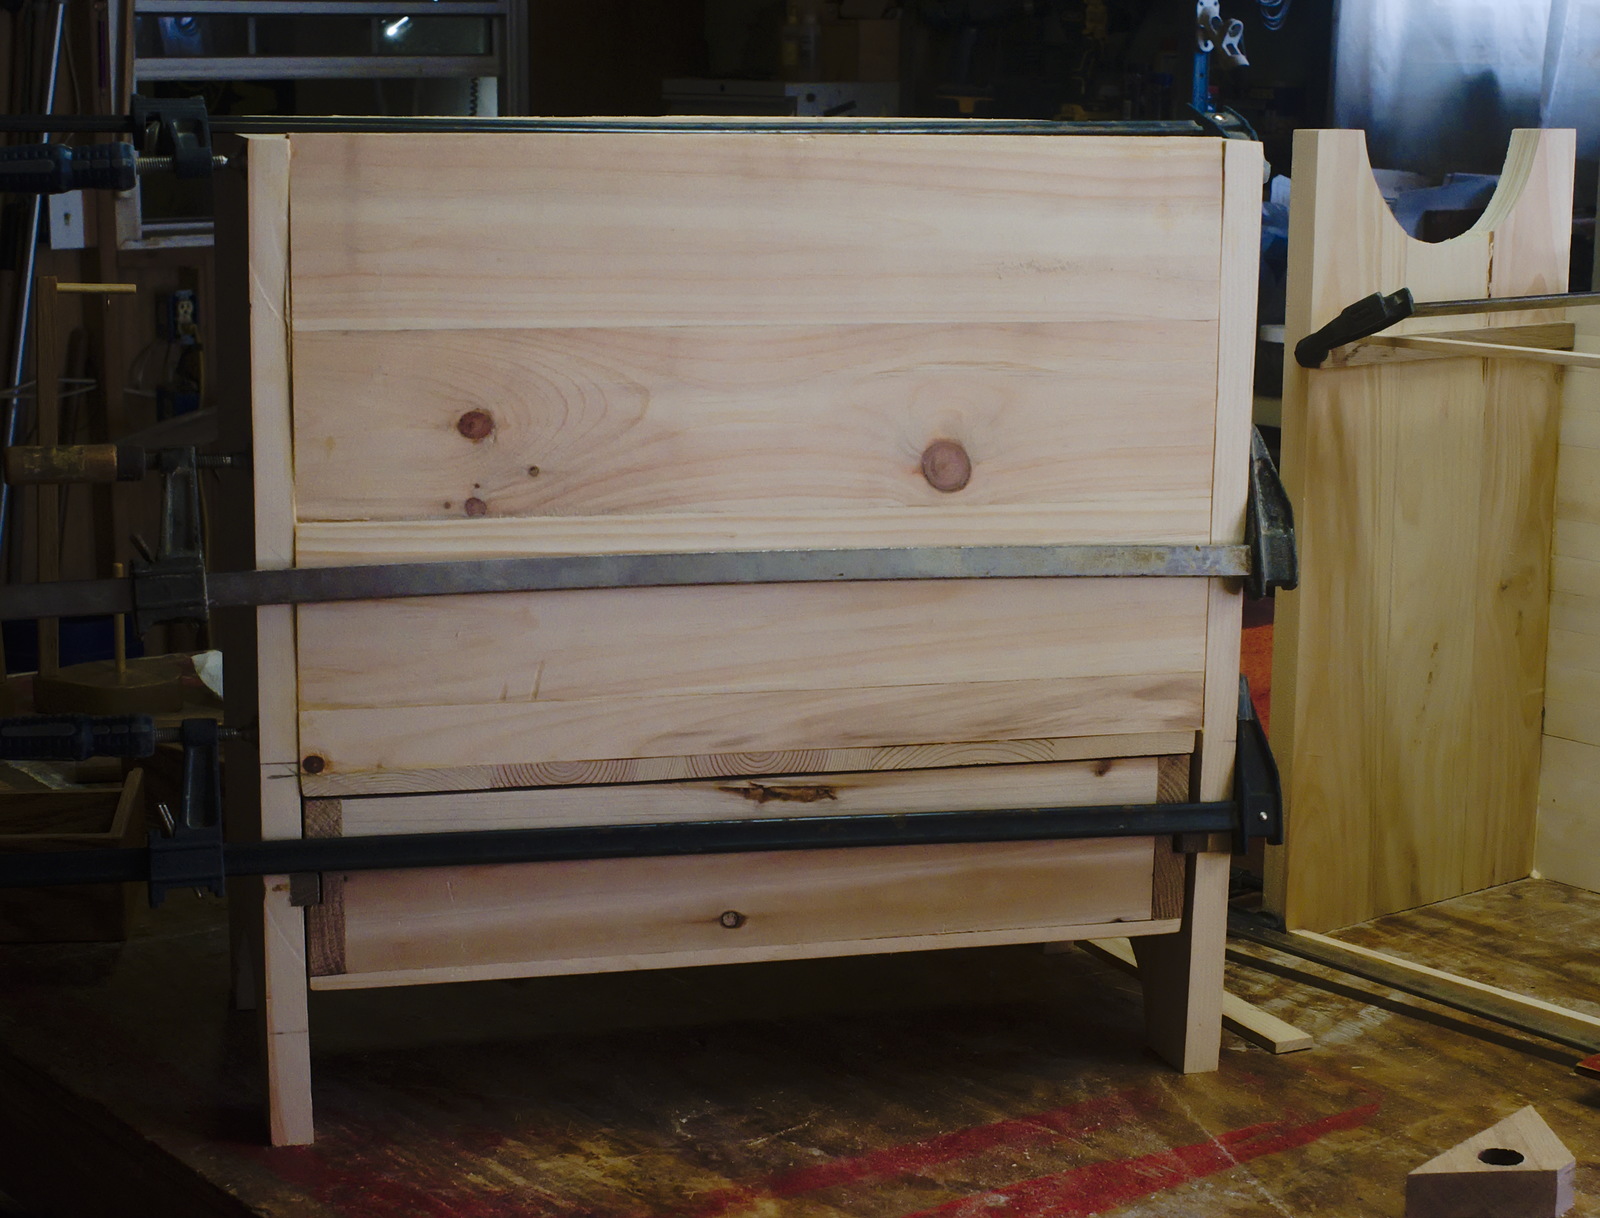
We built two of these little gems over the course of the last ten months. This one is Joe's. Mine is almost identical, the main difference being that mine has wooden drawer handles. The slow build time is mostly due to us having to do a large amount of hand resawing, as the 4/4 white pine we bought from Wall Lumber ran a bit thick. It was resaw or plane off 3/8", so we decided to resaw. That meant that we salvaged some 3/8" pieces for another project that otherwise would have been converted to wood chips.
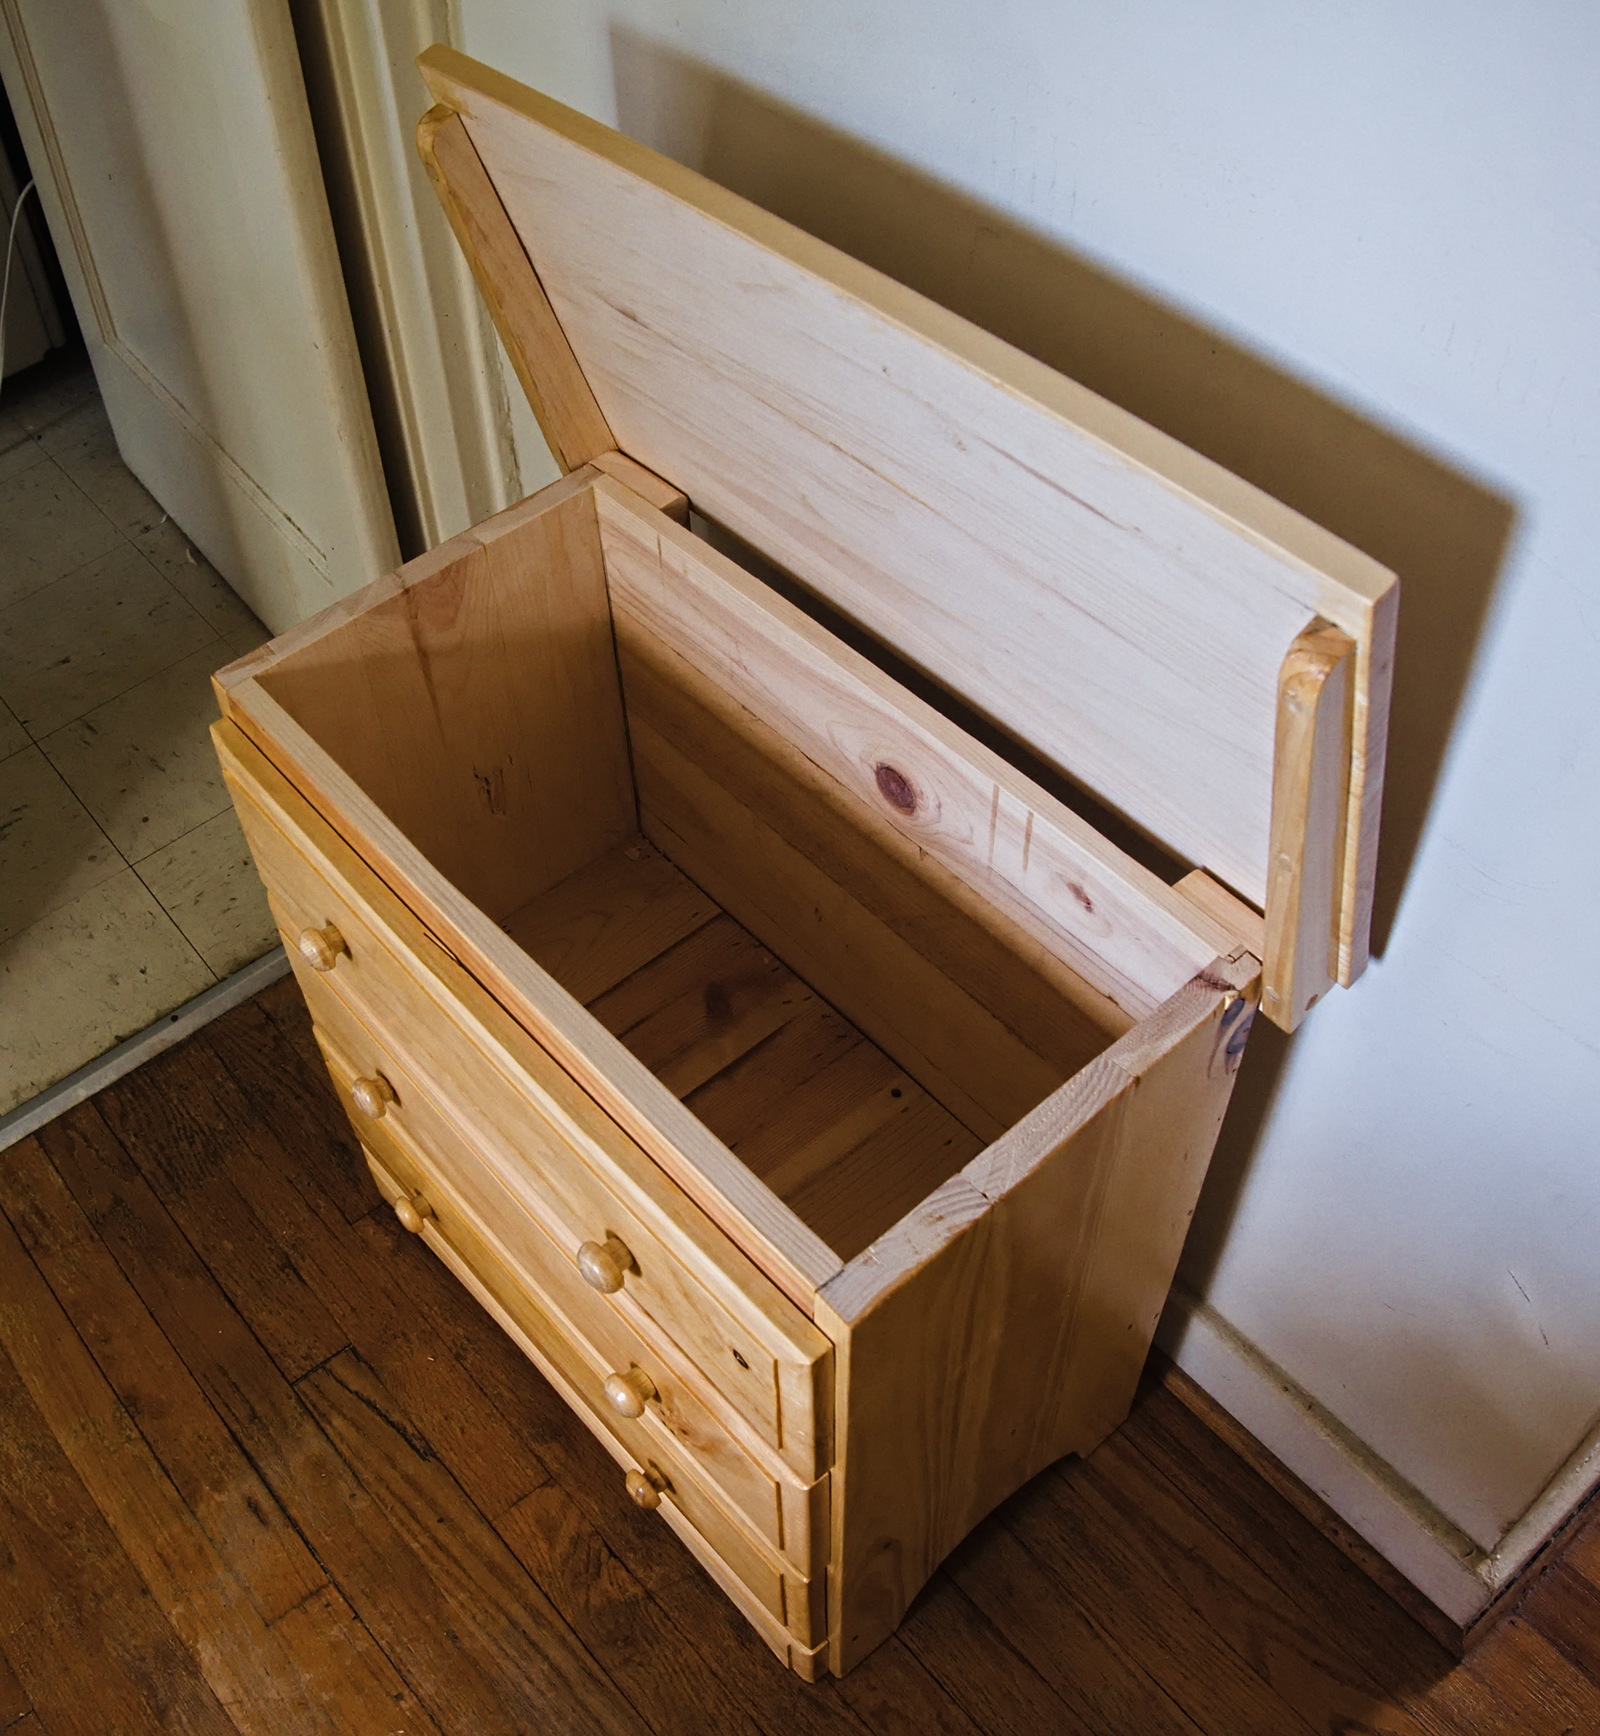
These are chests with a single drawer at the bottom and false drawer fronts to make them look like full chests of drawers. This style was common during the early 1700s so that conservative country folk could have furniture with the appearance of the new modish chests of drawers but still retain the functionality of an old-fashioned chest. Ours are scaled down from full size, another fairly common mode in Colonial furniture. They are approximately 26" tall, 25" wide and 14" deep. I drew the plan using Plate 33 in Kettel's The Pine Furniture of Early New England as a rough guide. It is what a farmer or tradesman might have built or bought from a small-town cabinetmaker for his own home.
May 5th, 2025
Posted by Paul

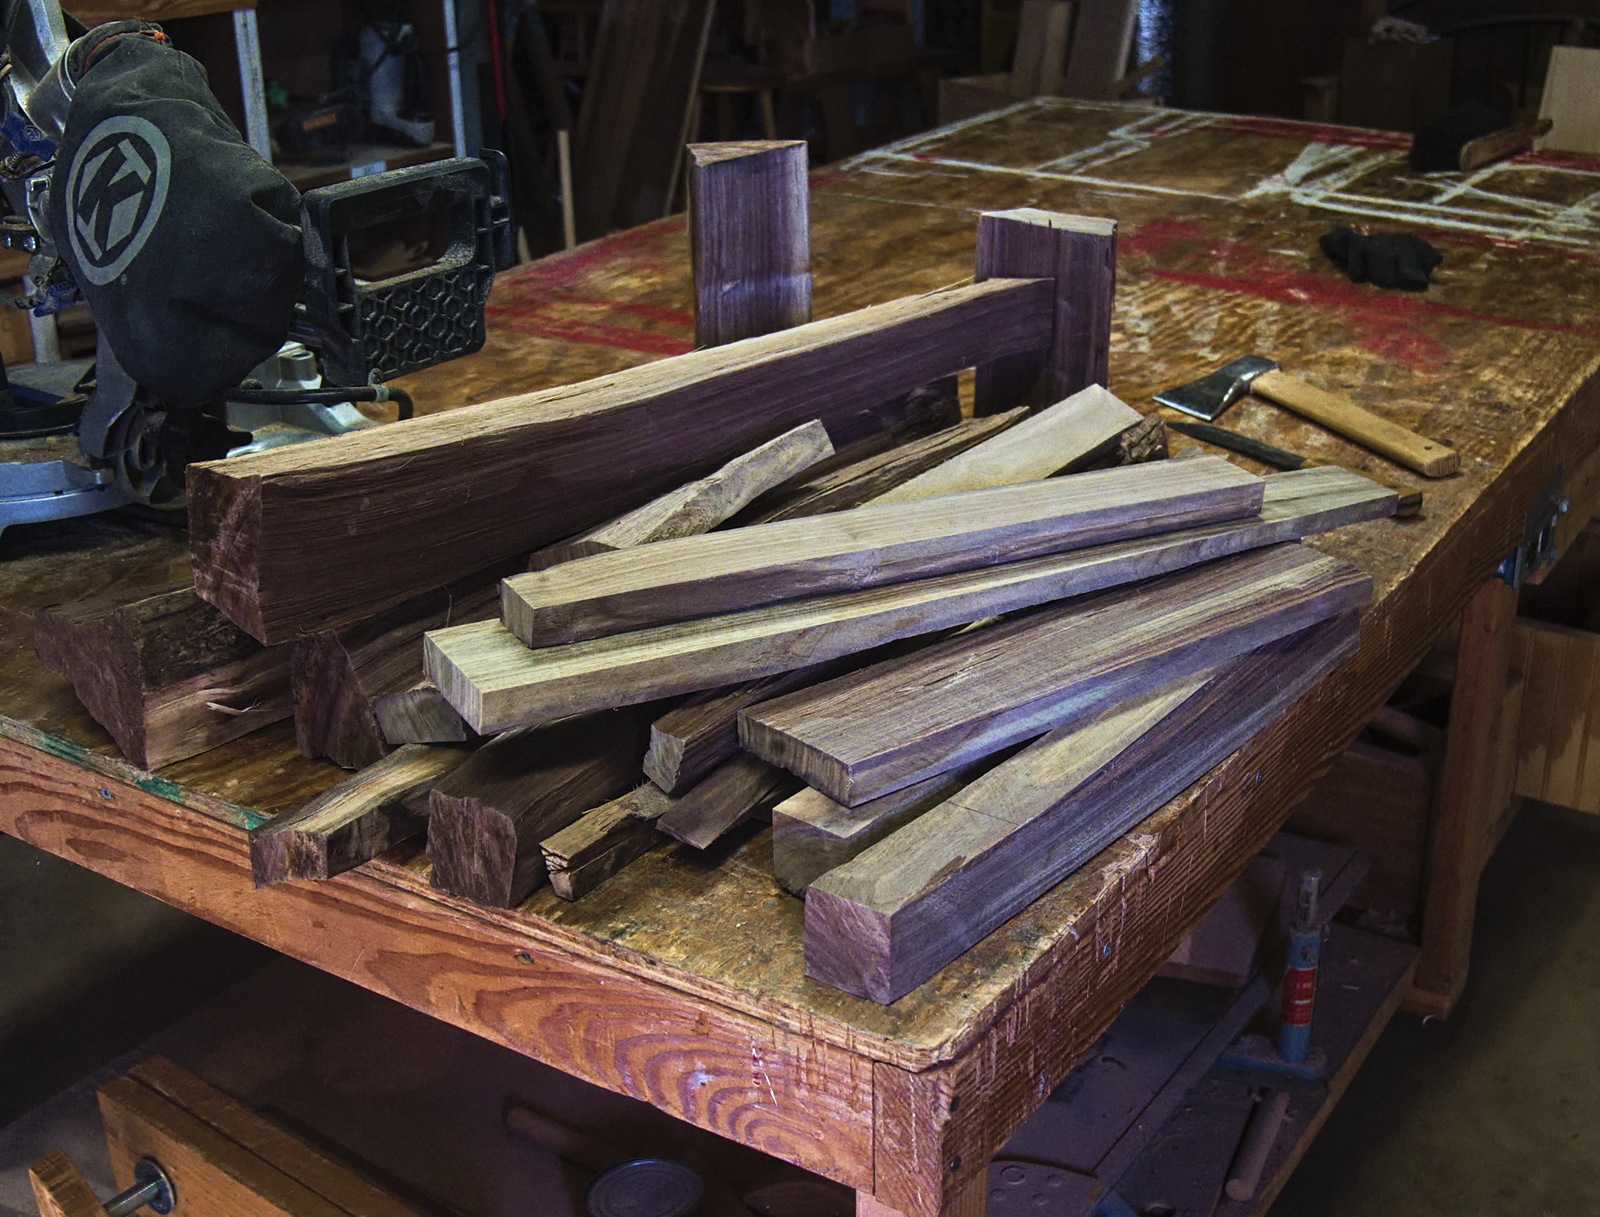
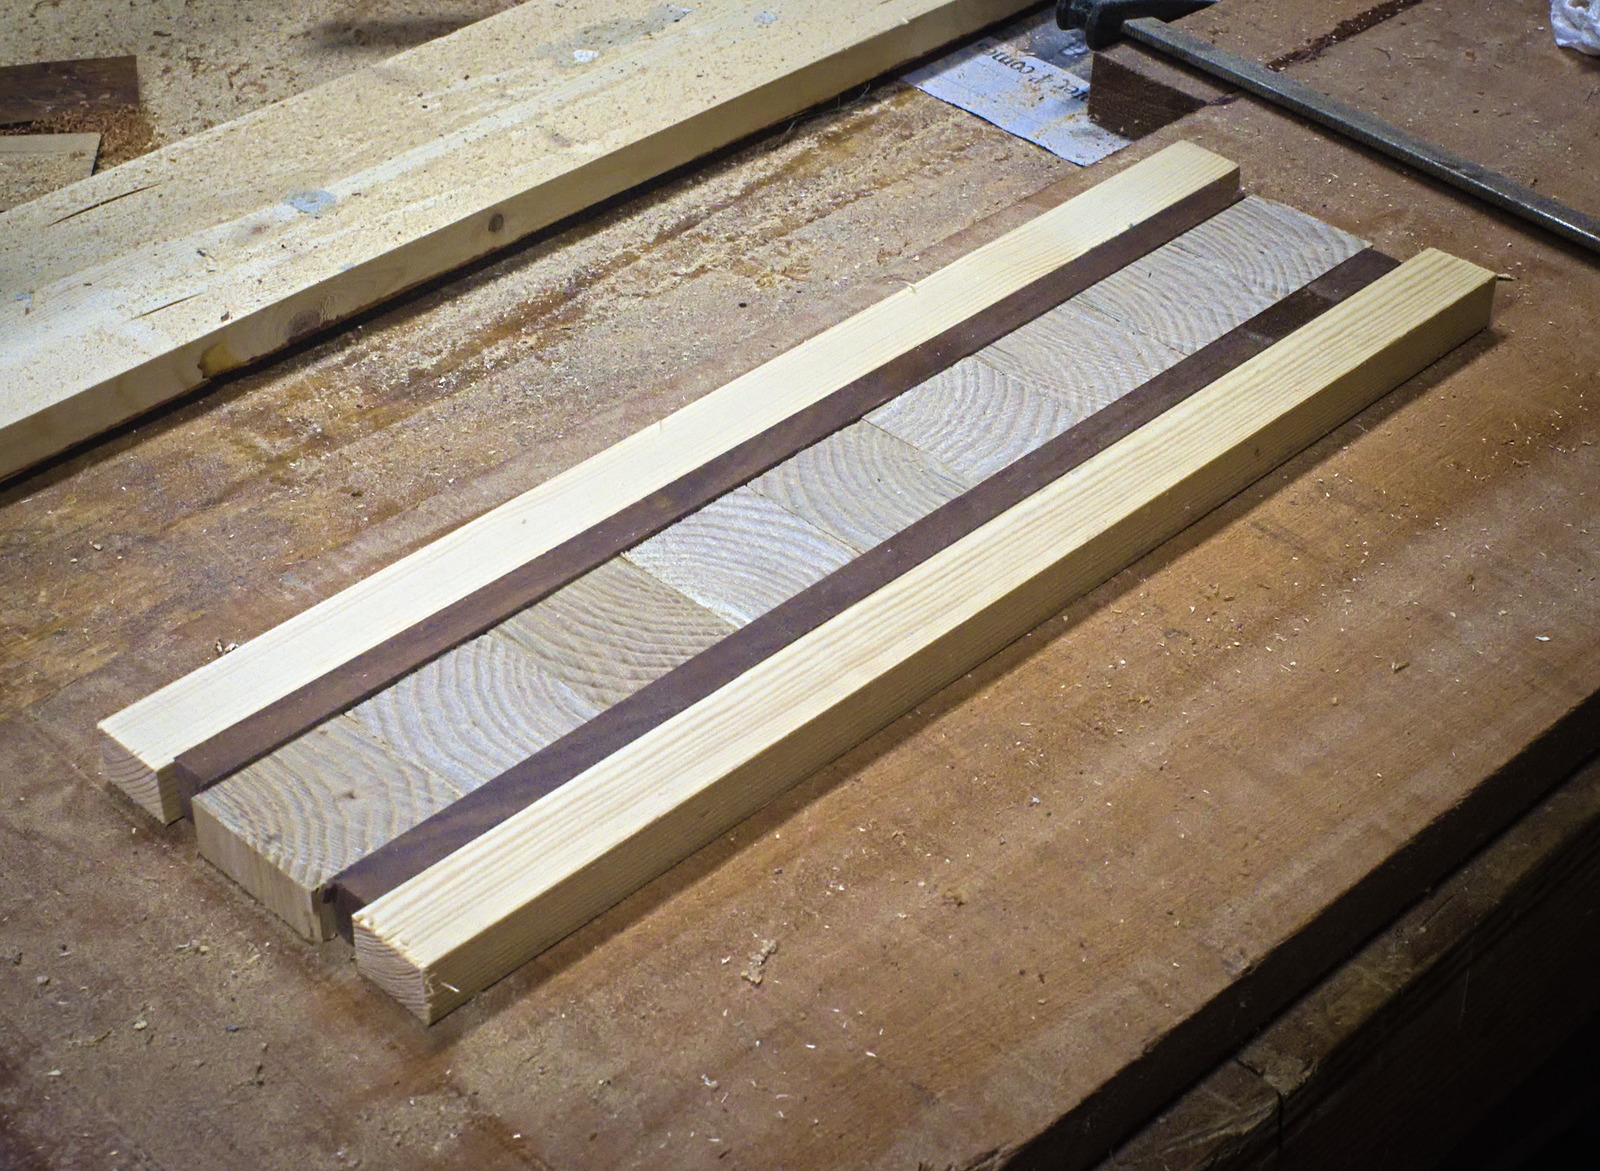
Three walnut turning blanks worked up from splits.
April 19th, 2025
Posted by Paul
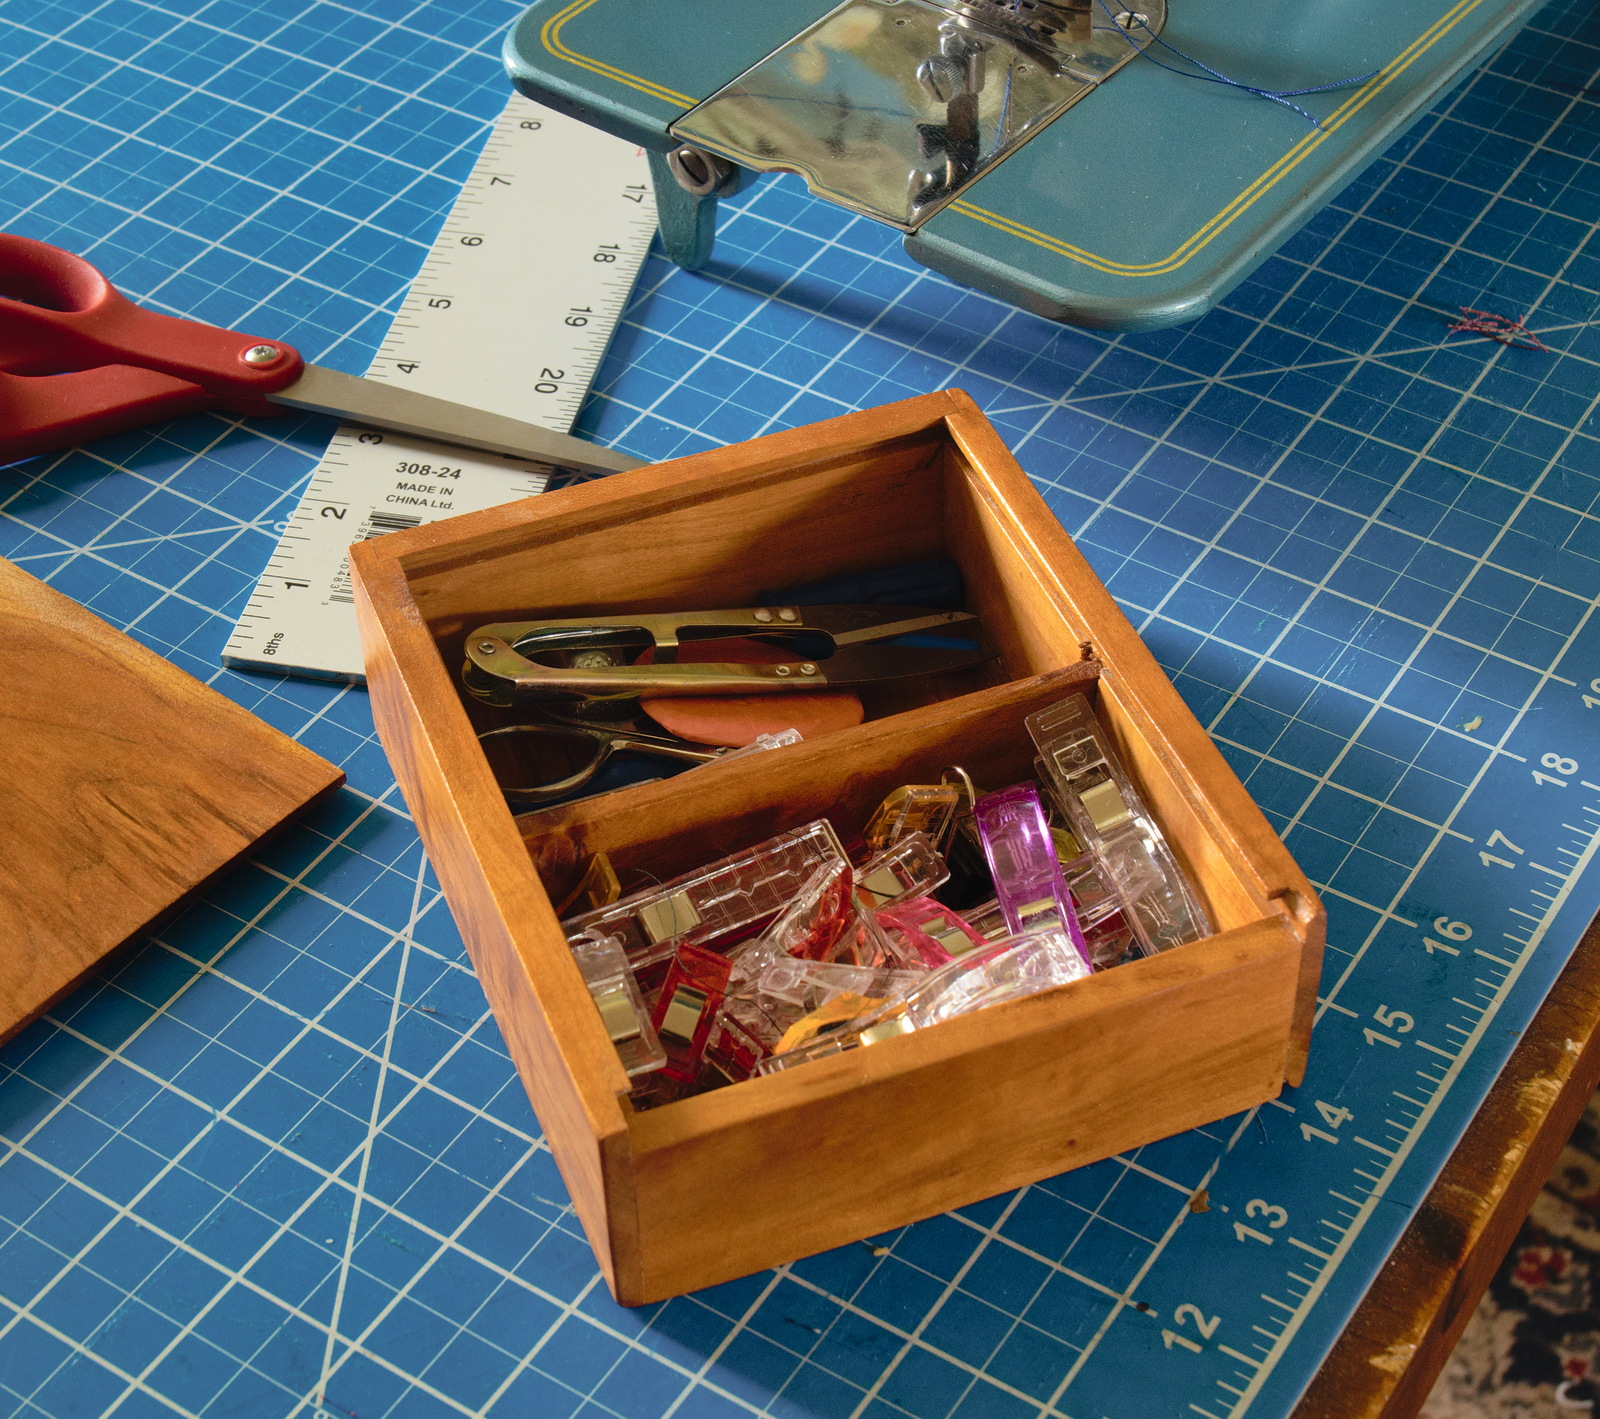
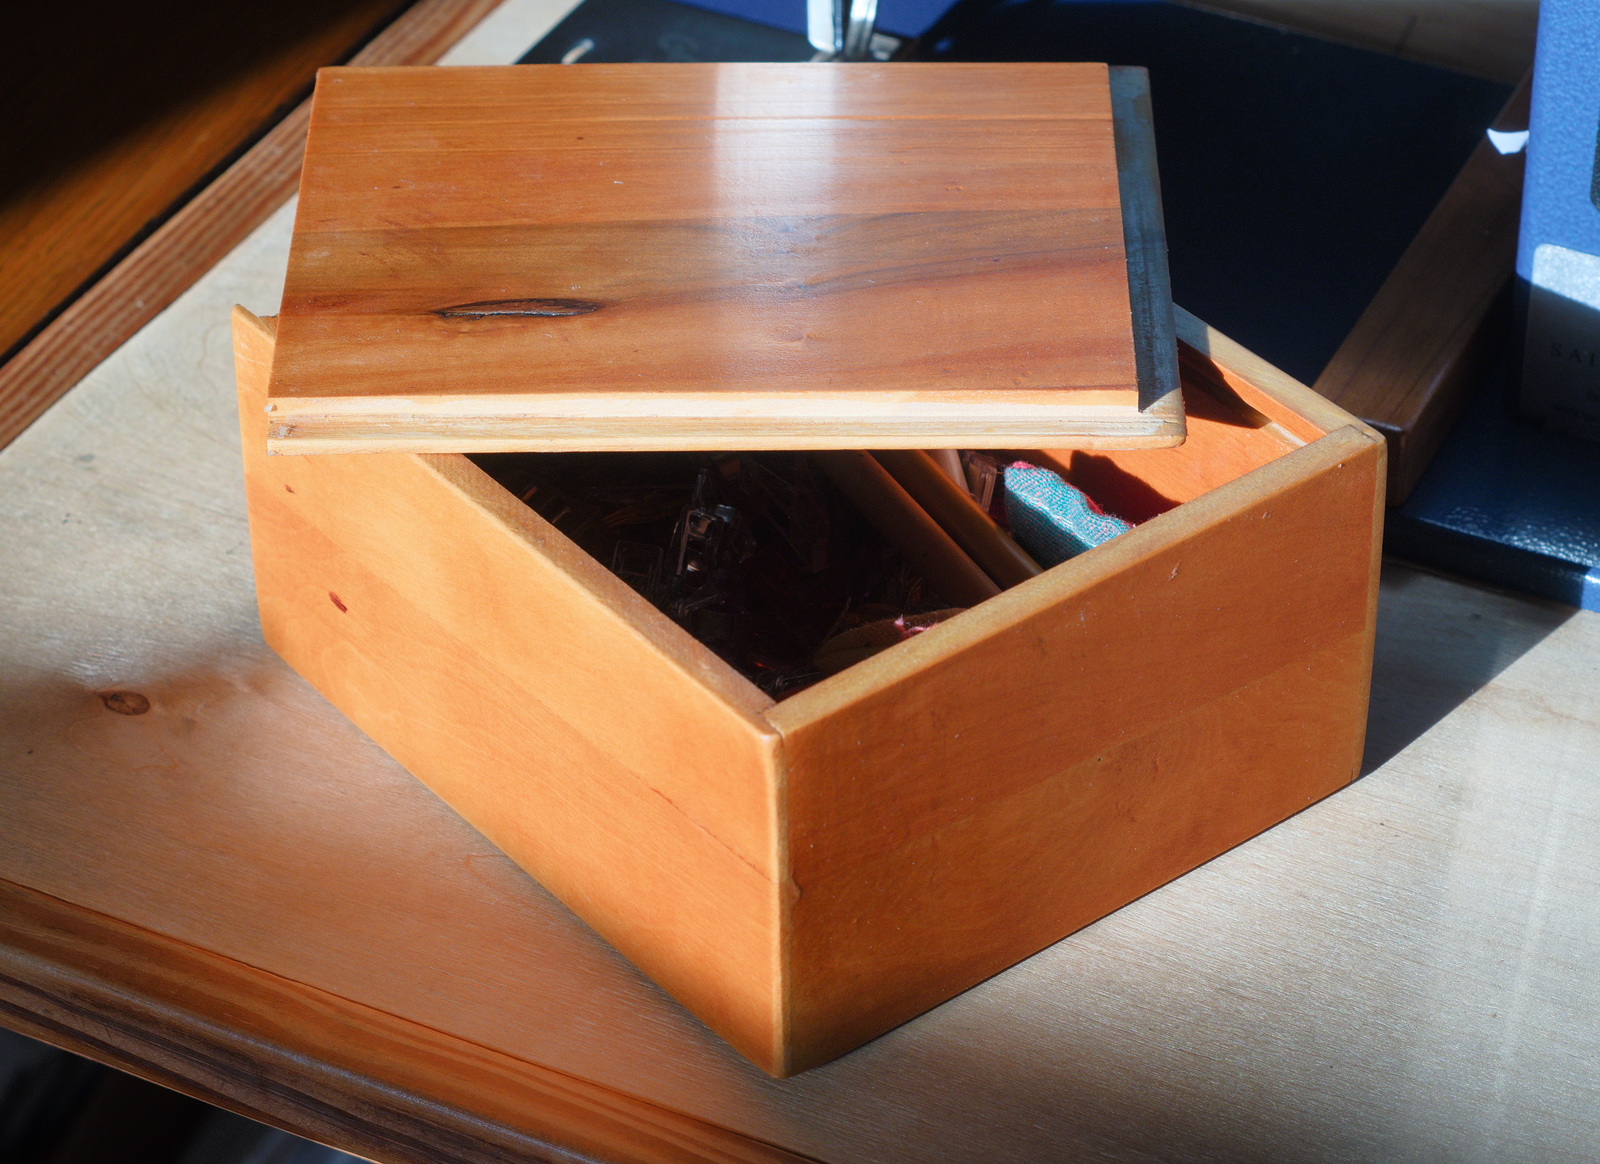
If I am doing some simple sewing task like putting a hem in a pair of jeans or fixing a ripped seam, I don't want to have to dig around for tools. That is why I have this box with a minimal set that is usually what I need - clips, thread scissors, chalk, and a few other basic items. We made the box in 2019 out of cherry scraps left over from a bigger project.
April 5th, 2025
Posted by Paul
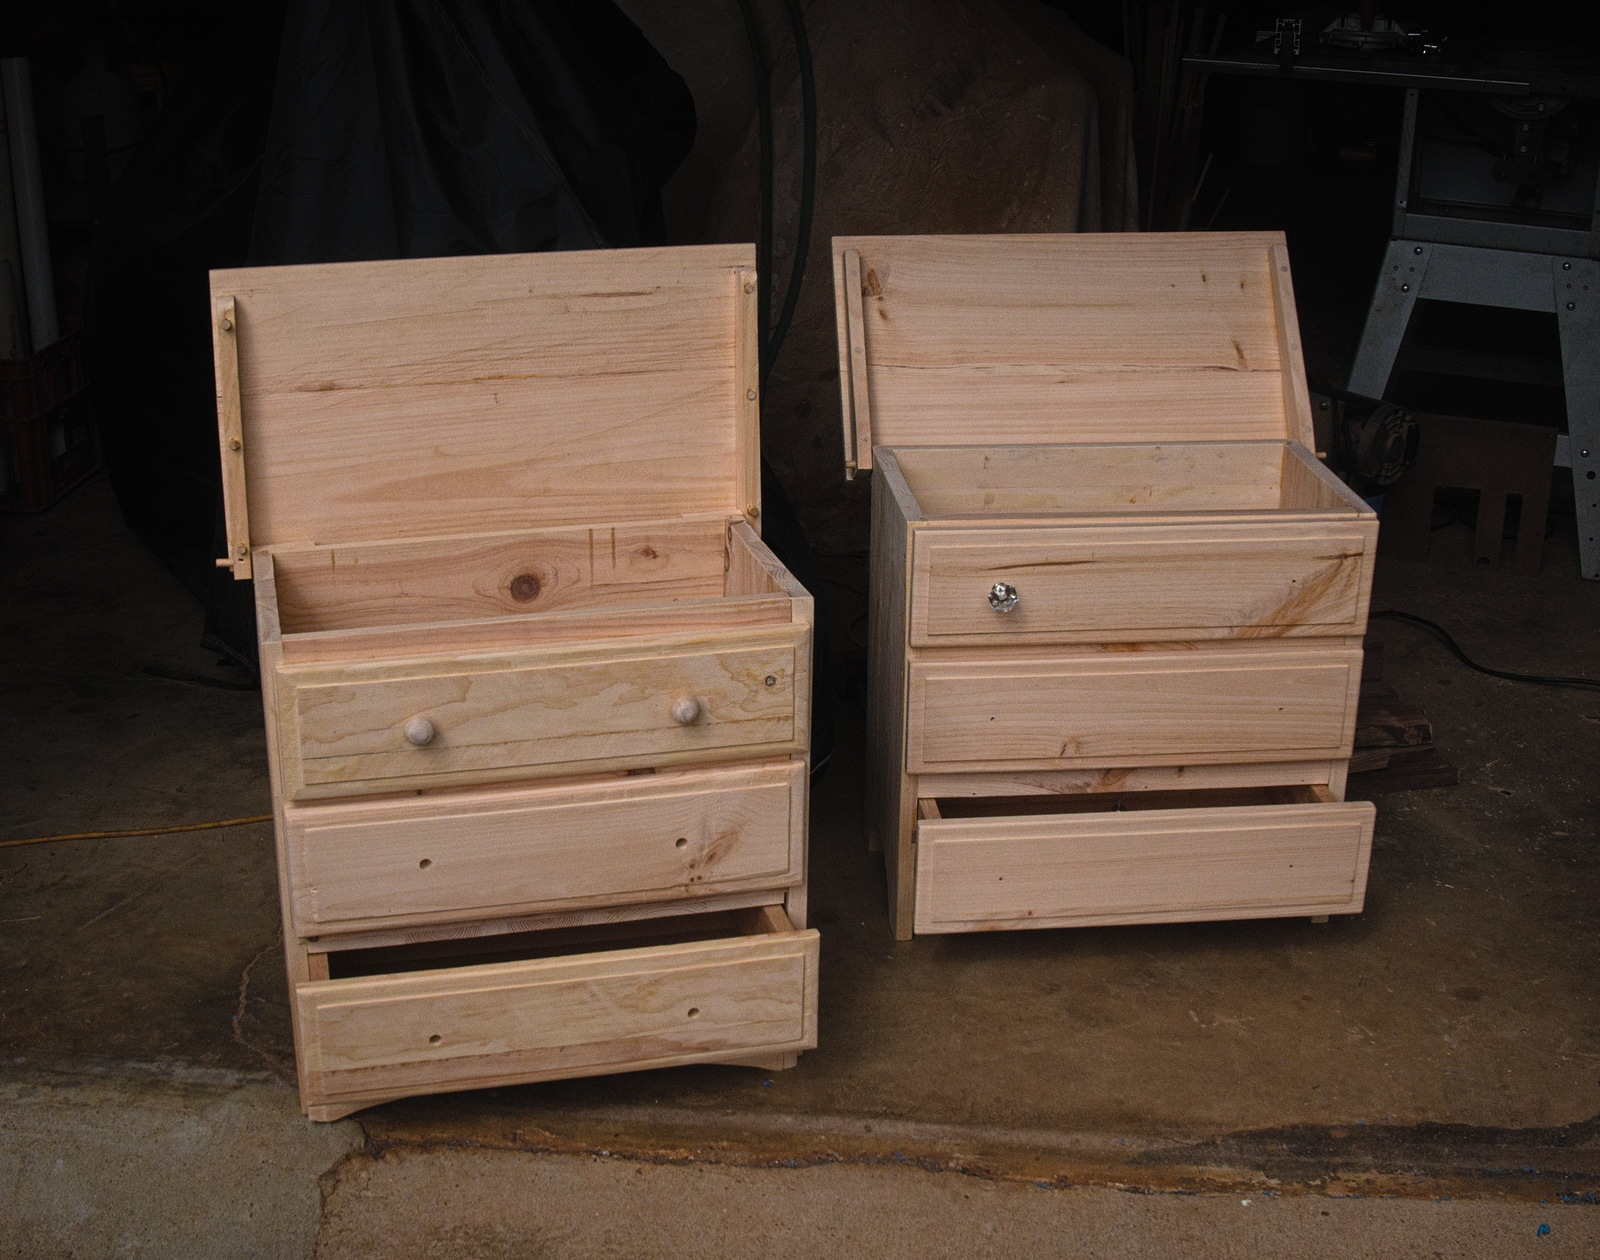
Joe found some nice crystal knobs for the box he is finishing. I am turning wooden ones for mine. This picture is a good illustration of the character of these boxes - the upper chest with a lid, the lower drawer, and the false drawer fronts to make it look like a trendy chest of drawers, not a chest with drawer. This style was made during the Colonial period, when chests were going out of fashion but the old, conservative farmers and their wives still wanted the function of the traditional type.
March 30th, 2025
Posted by Paul
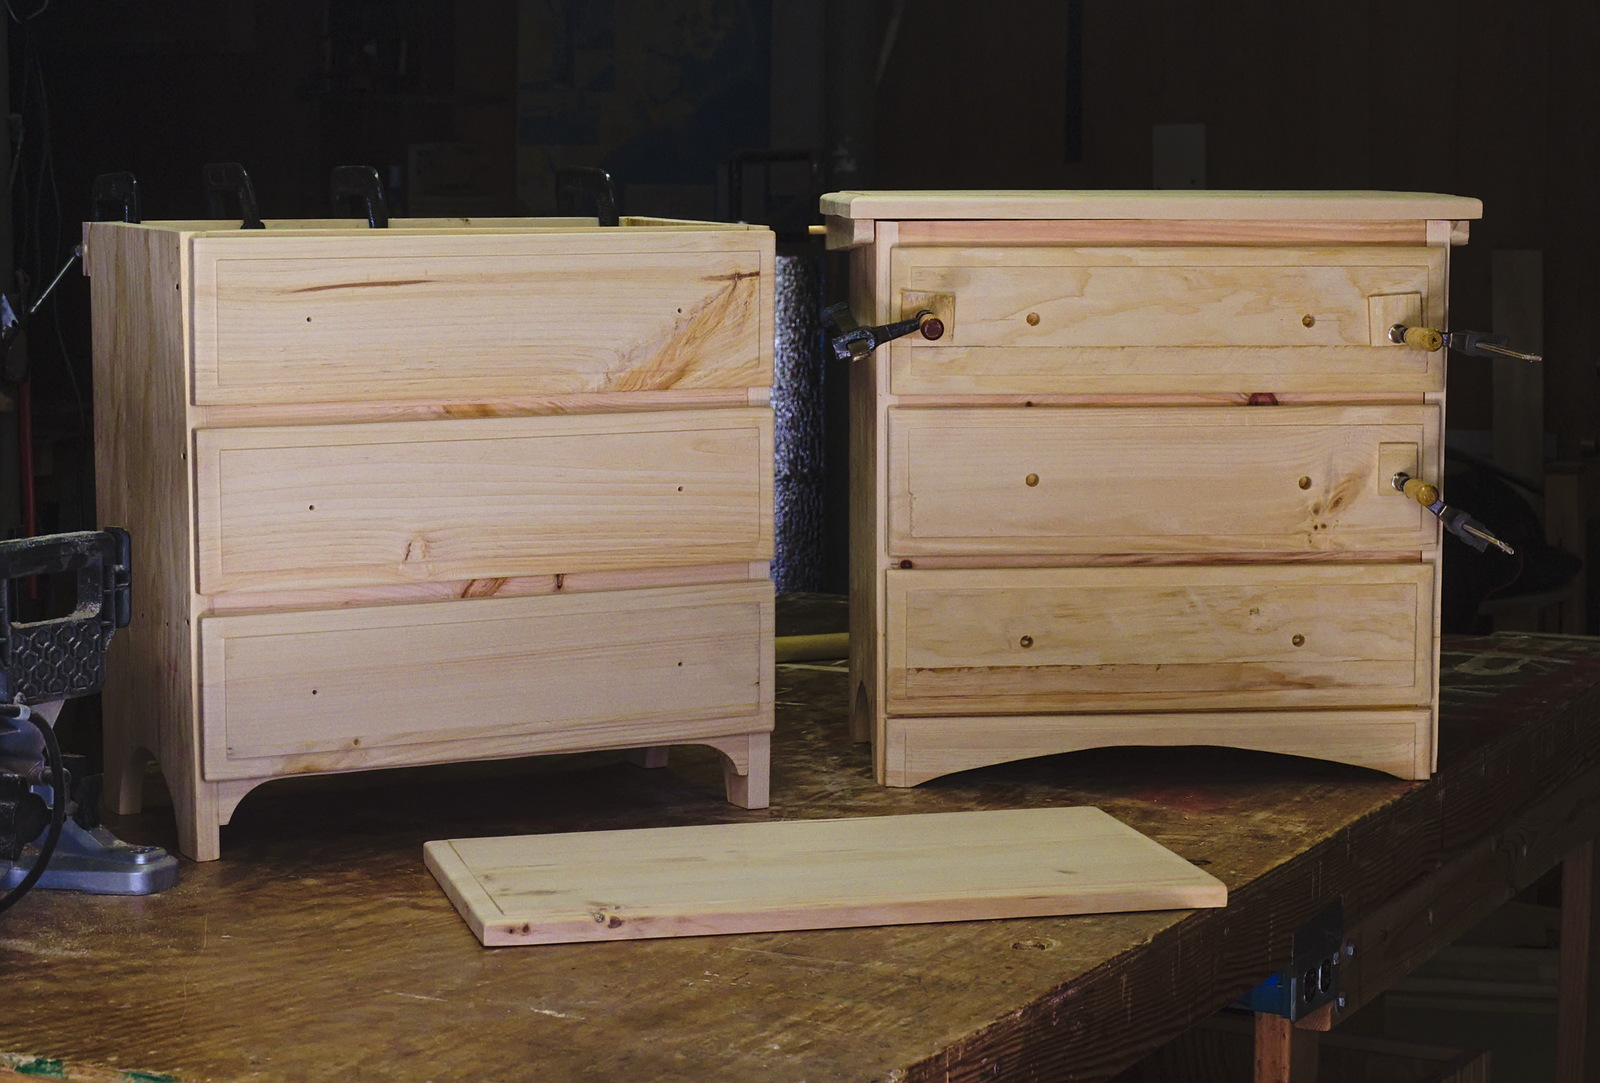
Getting closer...Some of the minor differences between the two examples are starting to show up, like the skirting at the bottom and the spacing of the false drawer fronts.
March 26th, 2025
Posted by Paul
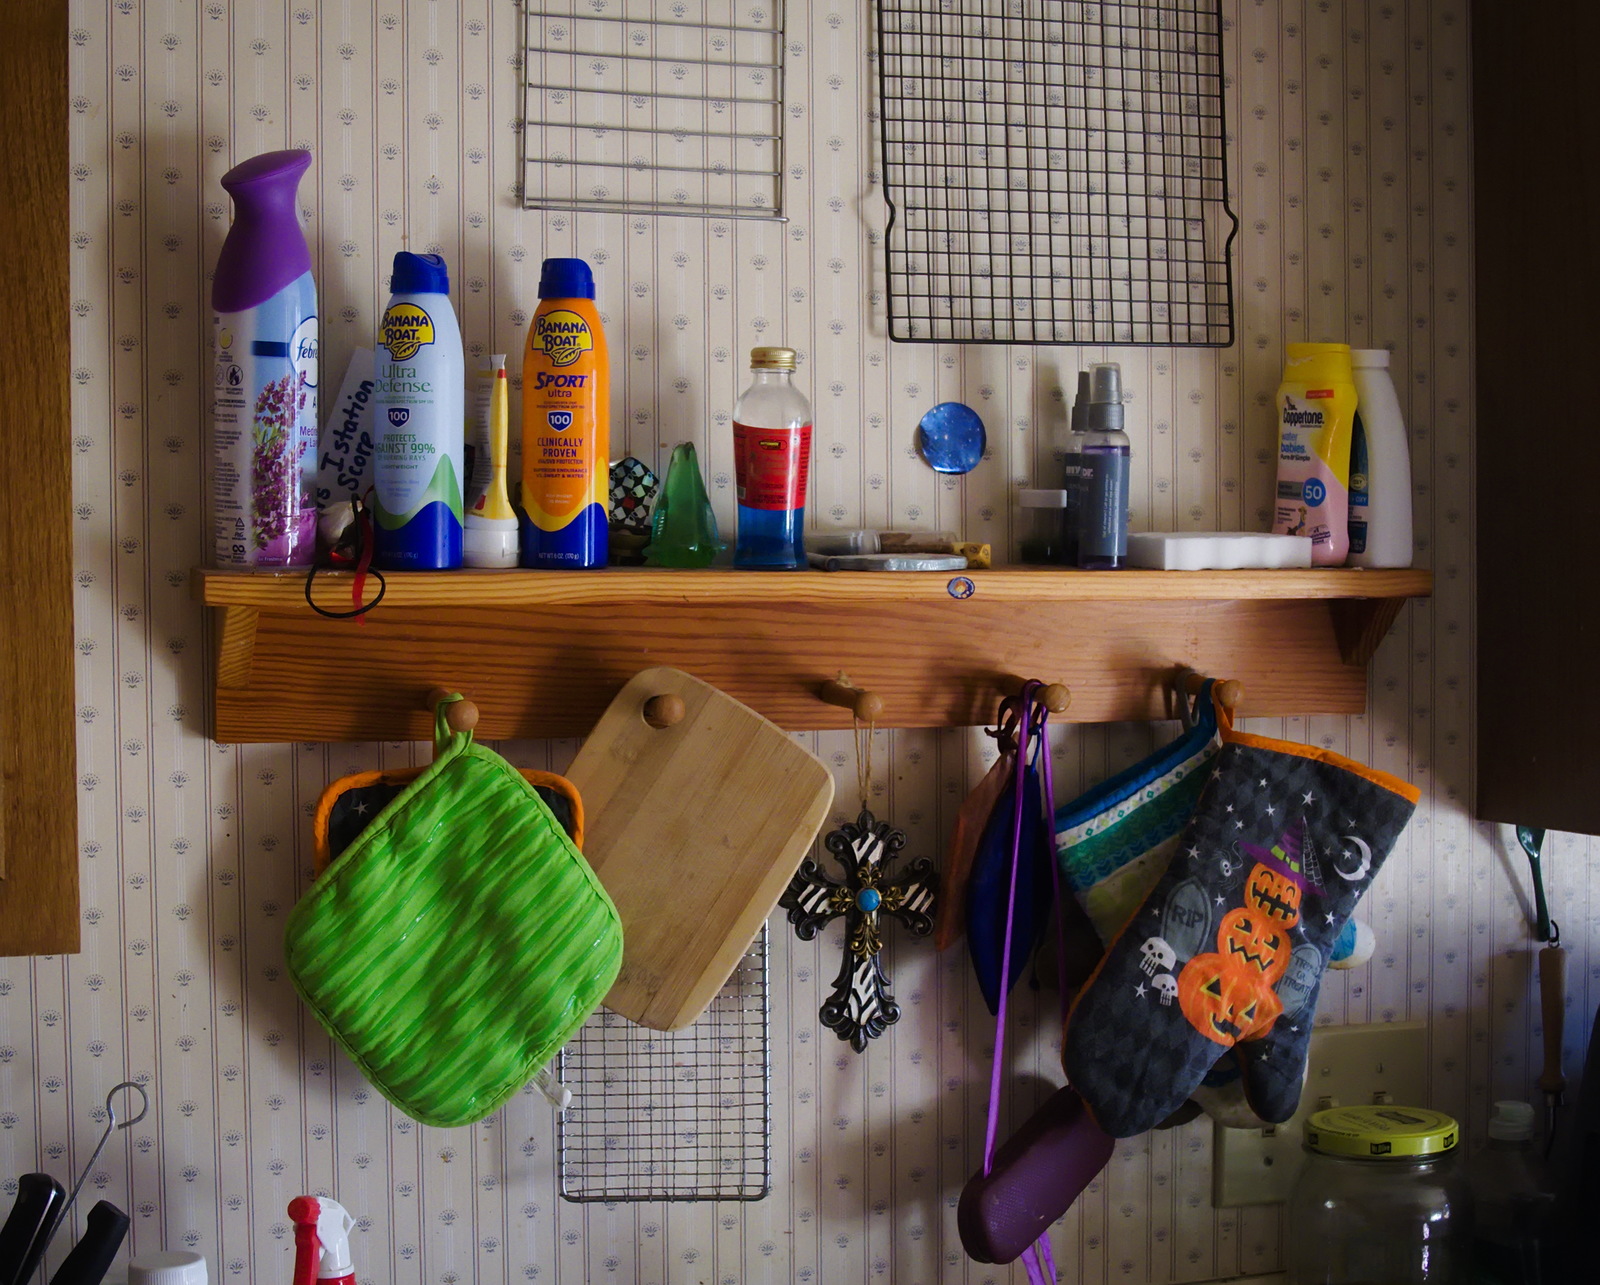
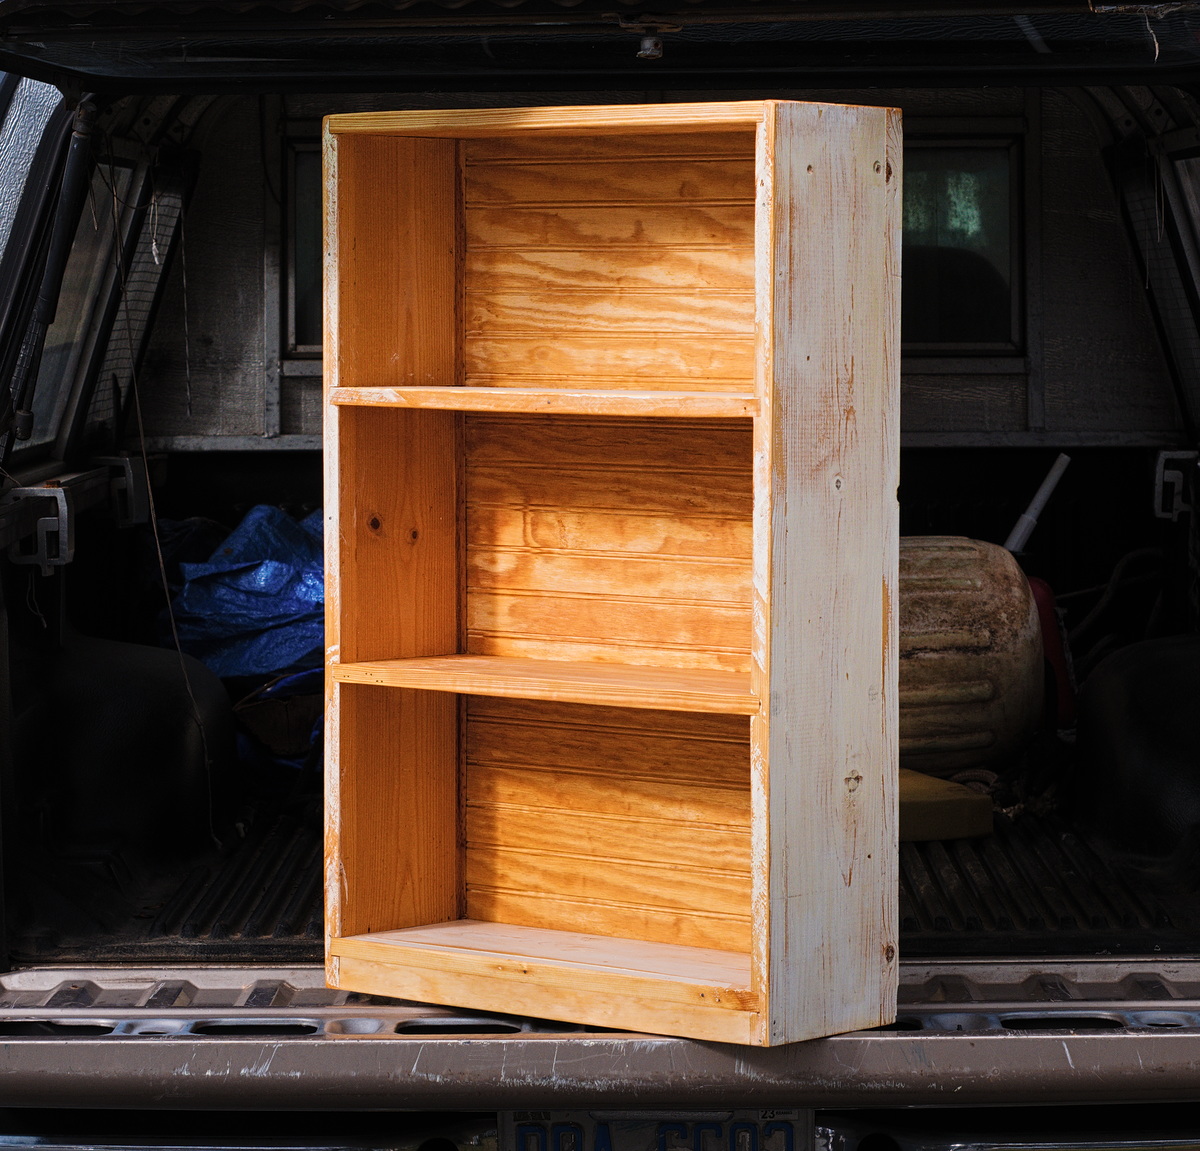
This shelf is something Joe built for Marie and Levi back in December 2014. They used it as a coatrack at first but the last few years it has served in the kitchen. Maybe someday someone will remodel the kitchen and throw it out, but it's never going to wear out.
March 21st, 2025
Posted by Paul
The miniature chests are getting closer to completion. The main jobs still left to do are applying the false drawer fronts and lids. Then they will be ready for any minor details, sanding and a few coats of polyurethane.
Joe hobbled around the shop on a cane after tearing a muscle.
March 6th, 2024
Posted by Paul
Recently I bought Lost Art Press's book, Make a Joint Stool from a Tree, Alexander and Follansbee. When Mark cut two walnut trees that were overhanging his house, I saw an opportunity to do some of the green wood joinery described in the book. Mark and I cut a round out of one of the tree's trunks and split it into sections, and today Joe and I started working the splits into wood that we can use to make furniture. It was interesting working with the green wood, which splits and planes easier than dried wood. With the intention to build another joint stool, we worked a couple of splits into 2x2 inch lengths that can be turned on the lathe to make legs, and others into flat boards to make aprons and stretchers.
February 22nd, 2025
Posted by Paul
We are headed down the home stretch with the two chests with drawers. Over the last week Joe brought the second one up to the same level of completion as this one, which should save some time on machine setup going forward.
February 9th, 2025
Posted by Paul
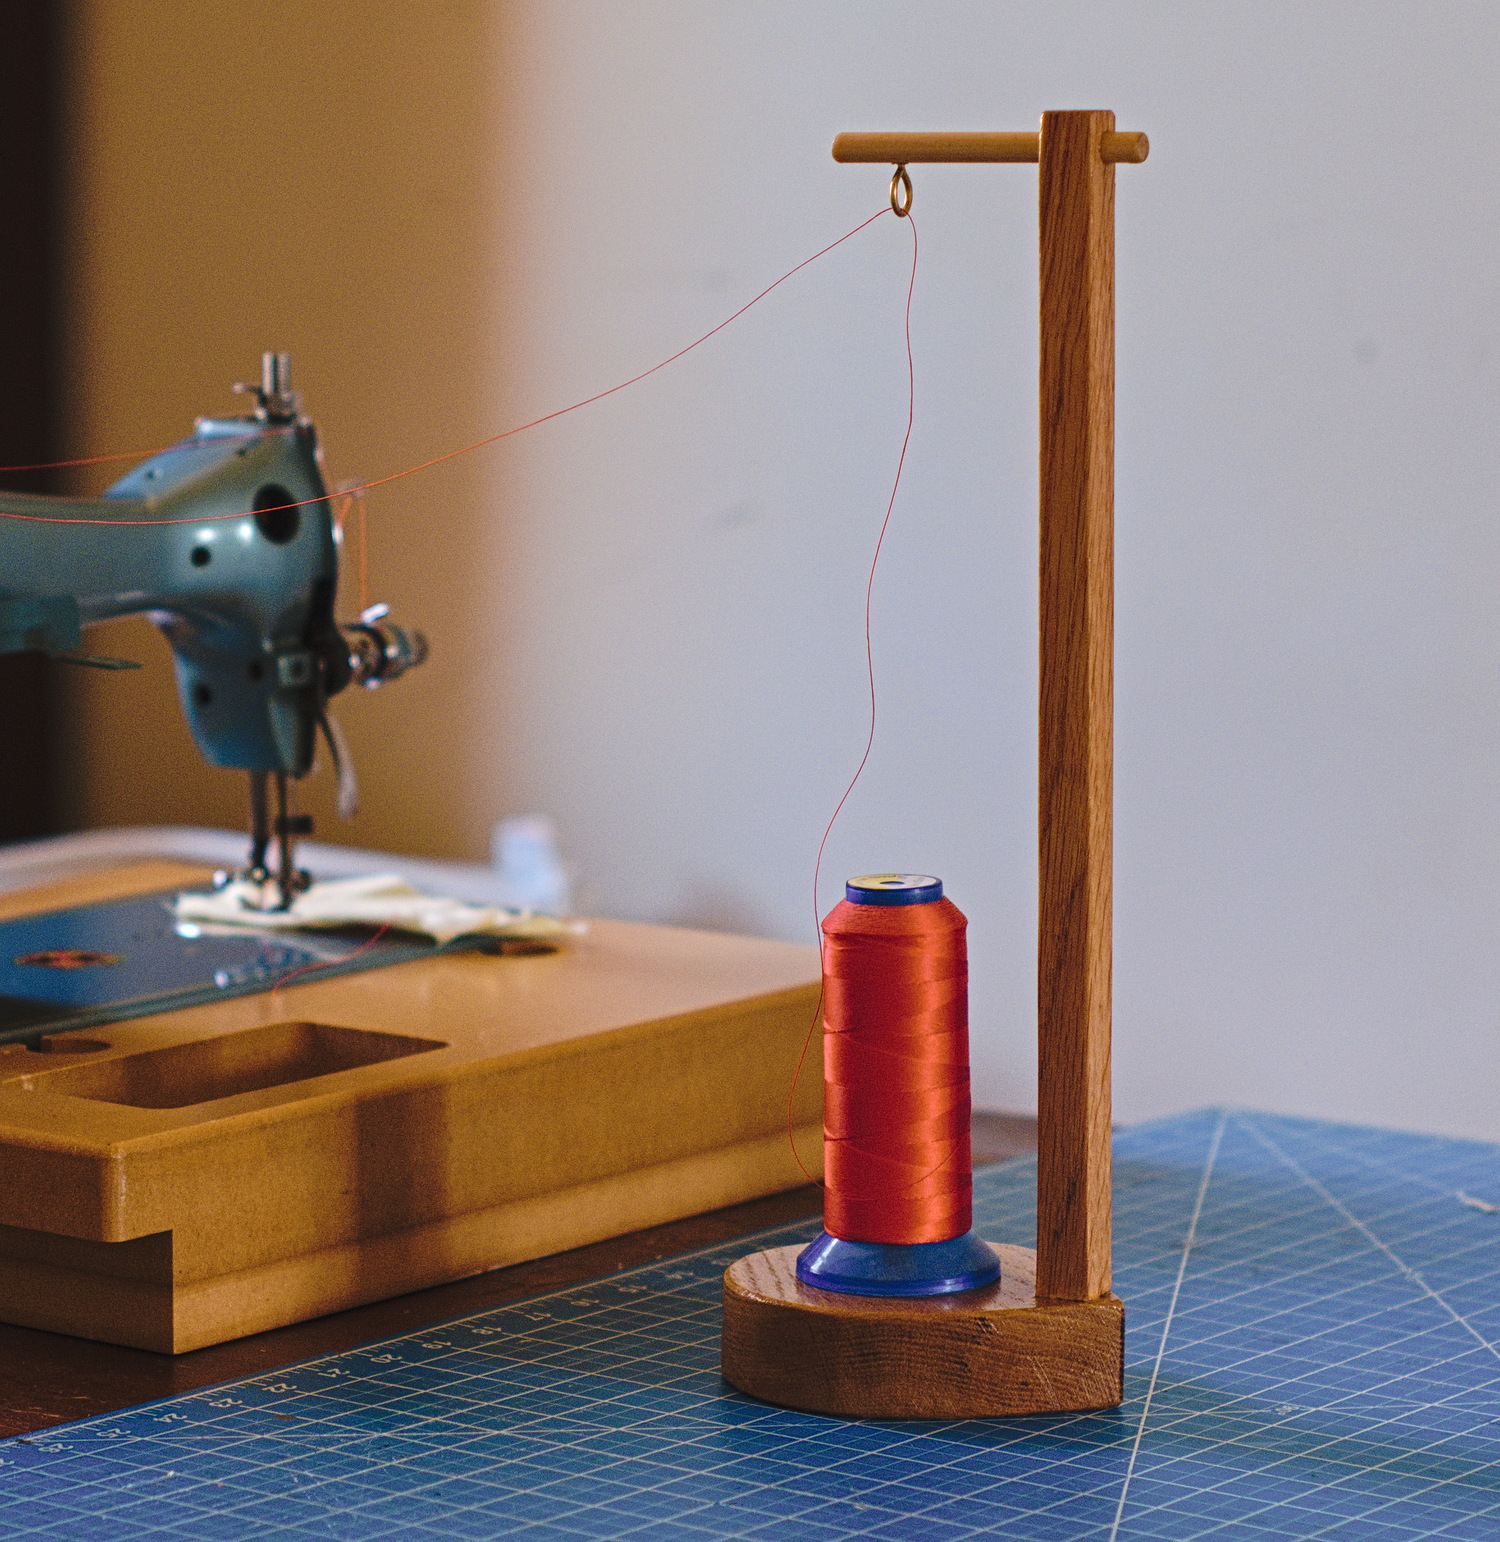
Our thread stands work just as well and look ten times better than commercially available ones made from plastic and coat hangers.
February 8th, 2025
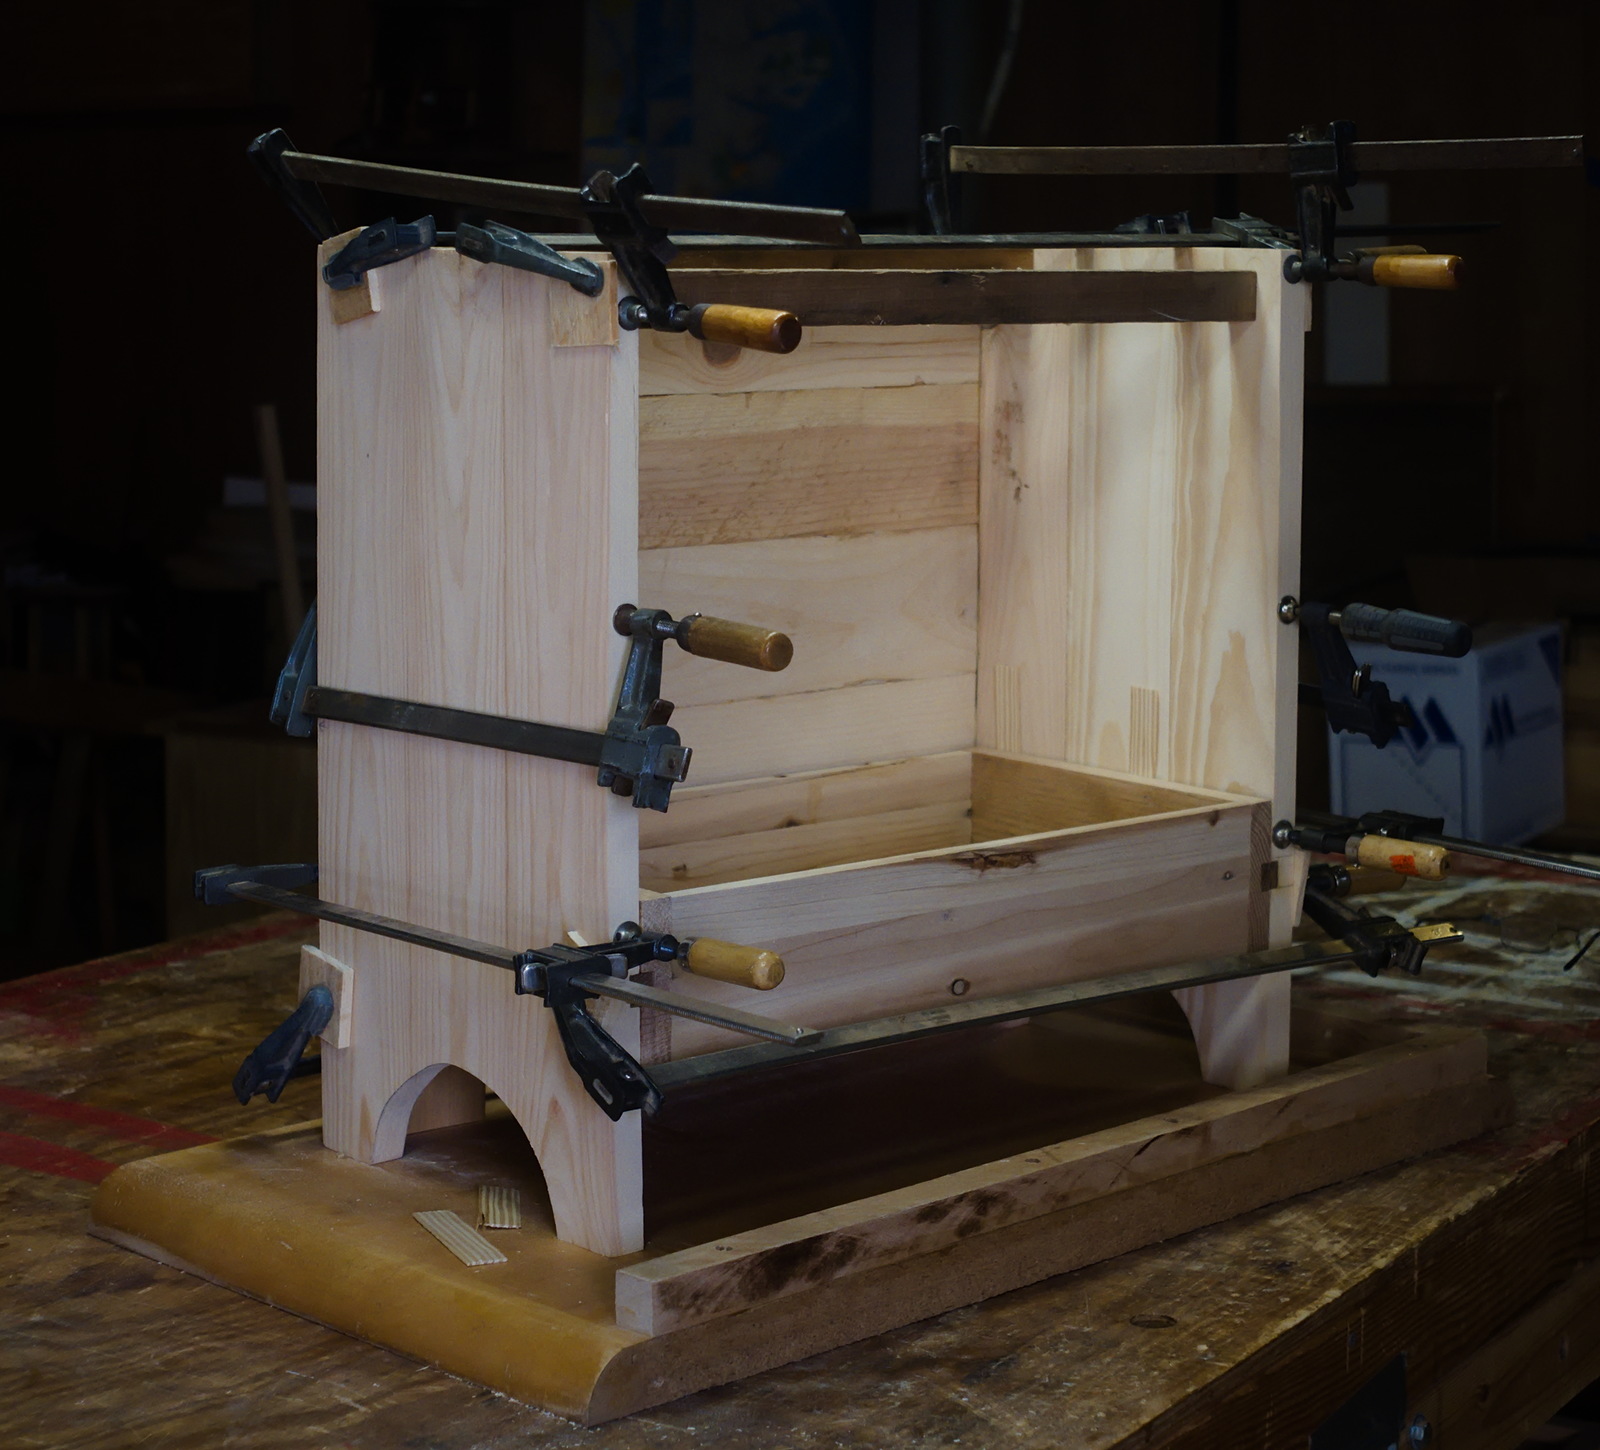
Posted by Paul
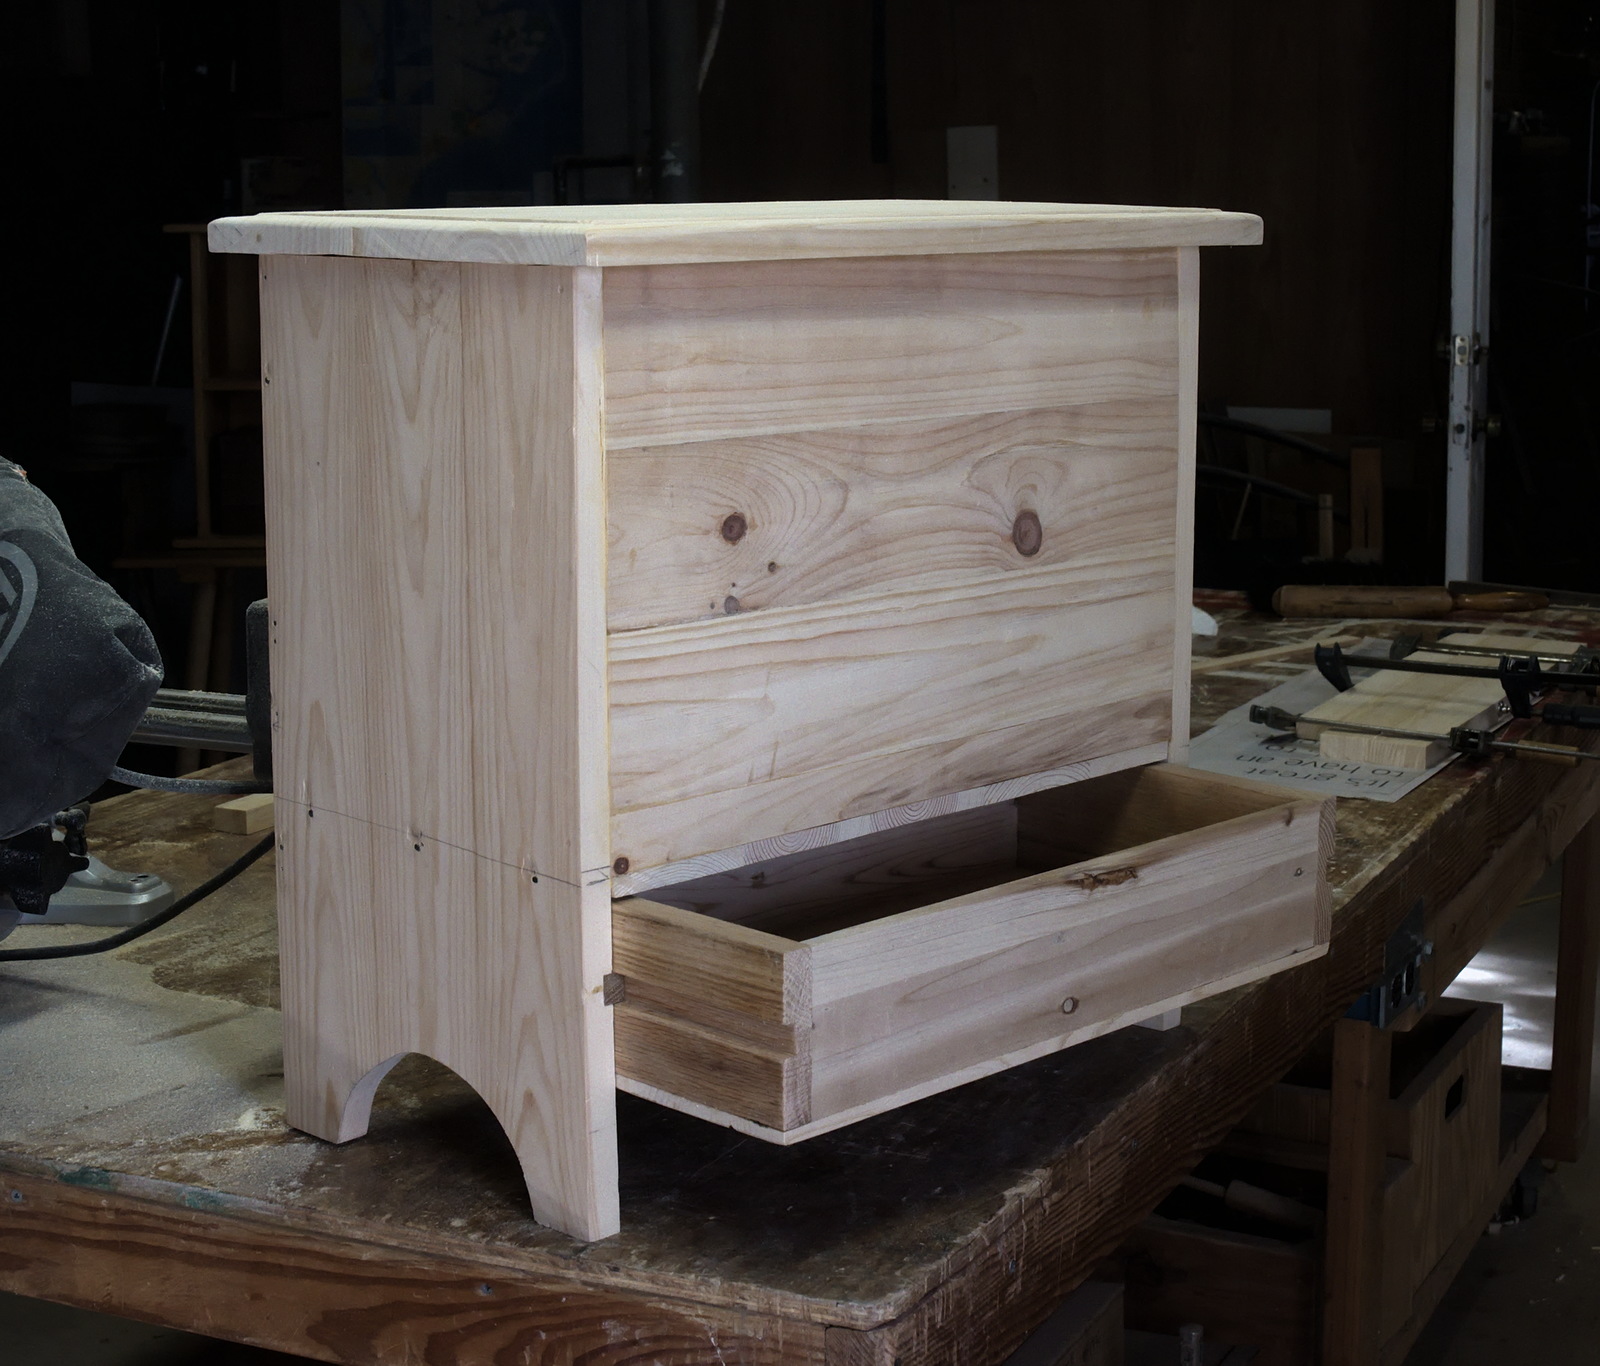
Much more identifiable as a chest with drawer now that the front has gone on.
January 31st, 2025
Posted by Paul
Joe found some wood around the shop (probably from Wall Lumber) and built this nice slide-top box. He said the stock was extremely hard, which along with the color makes me think it is bloodwood, also known as satine.
January 29th, 2025
Posted by Paul
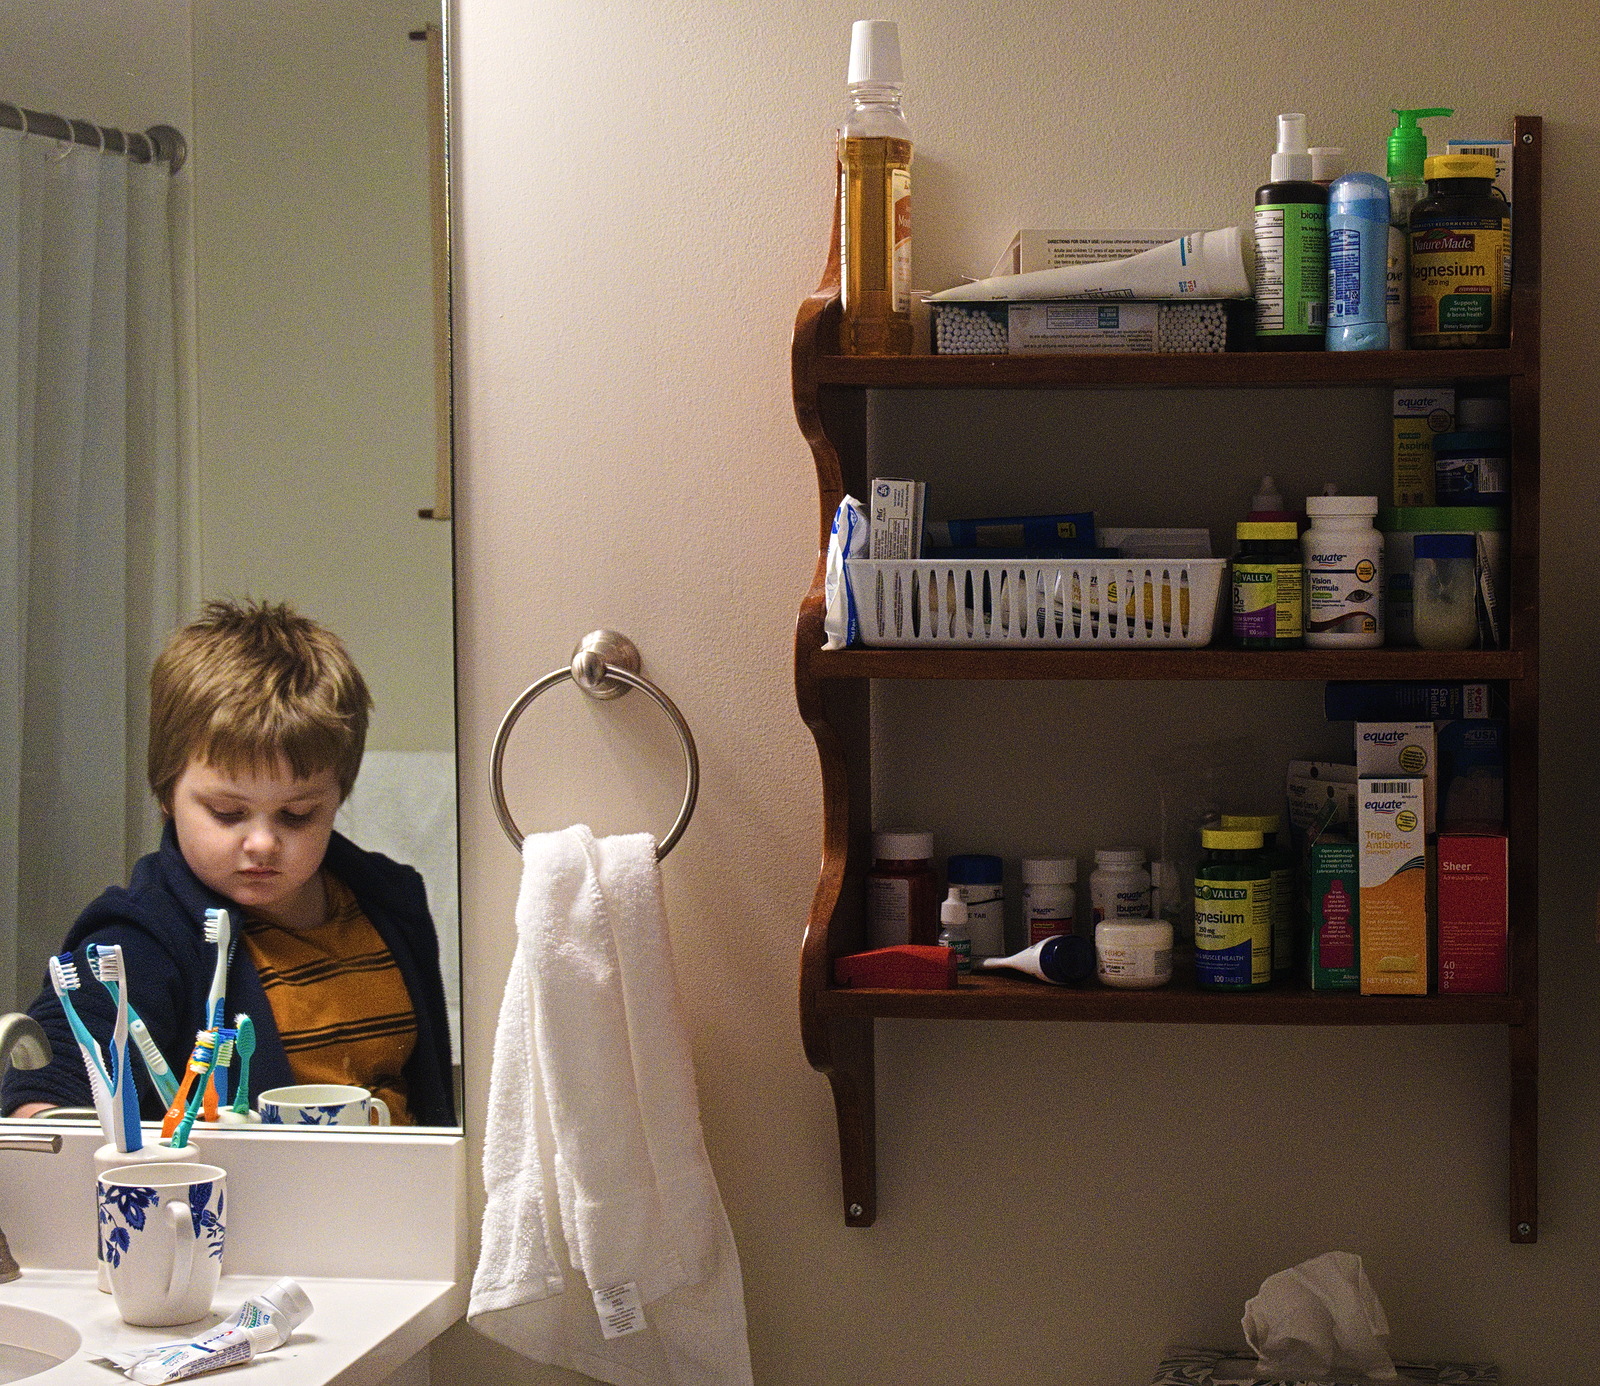
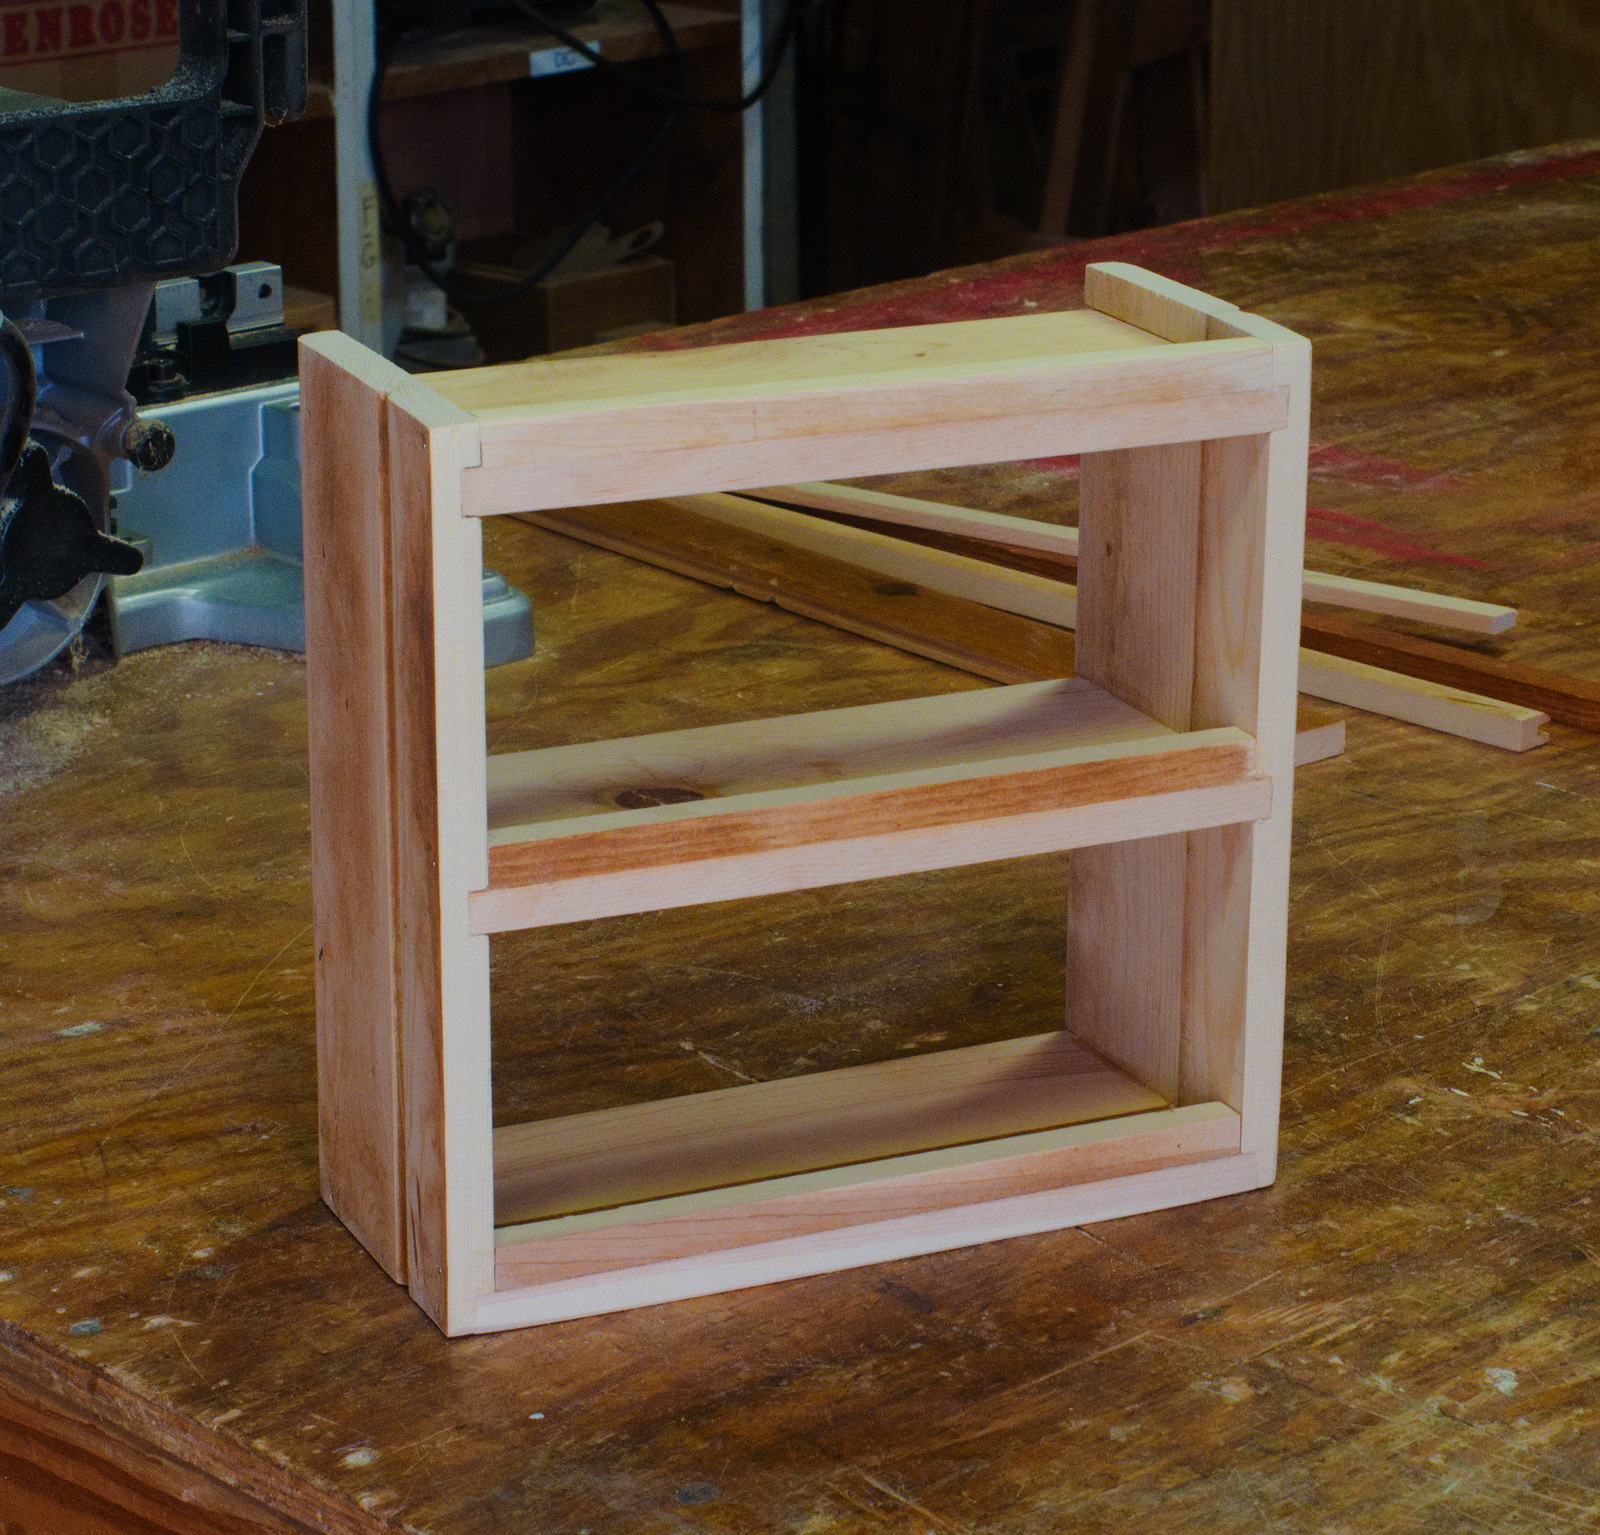
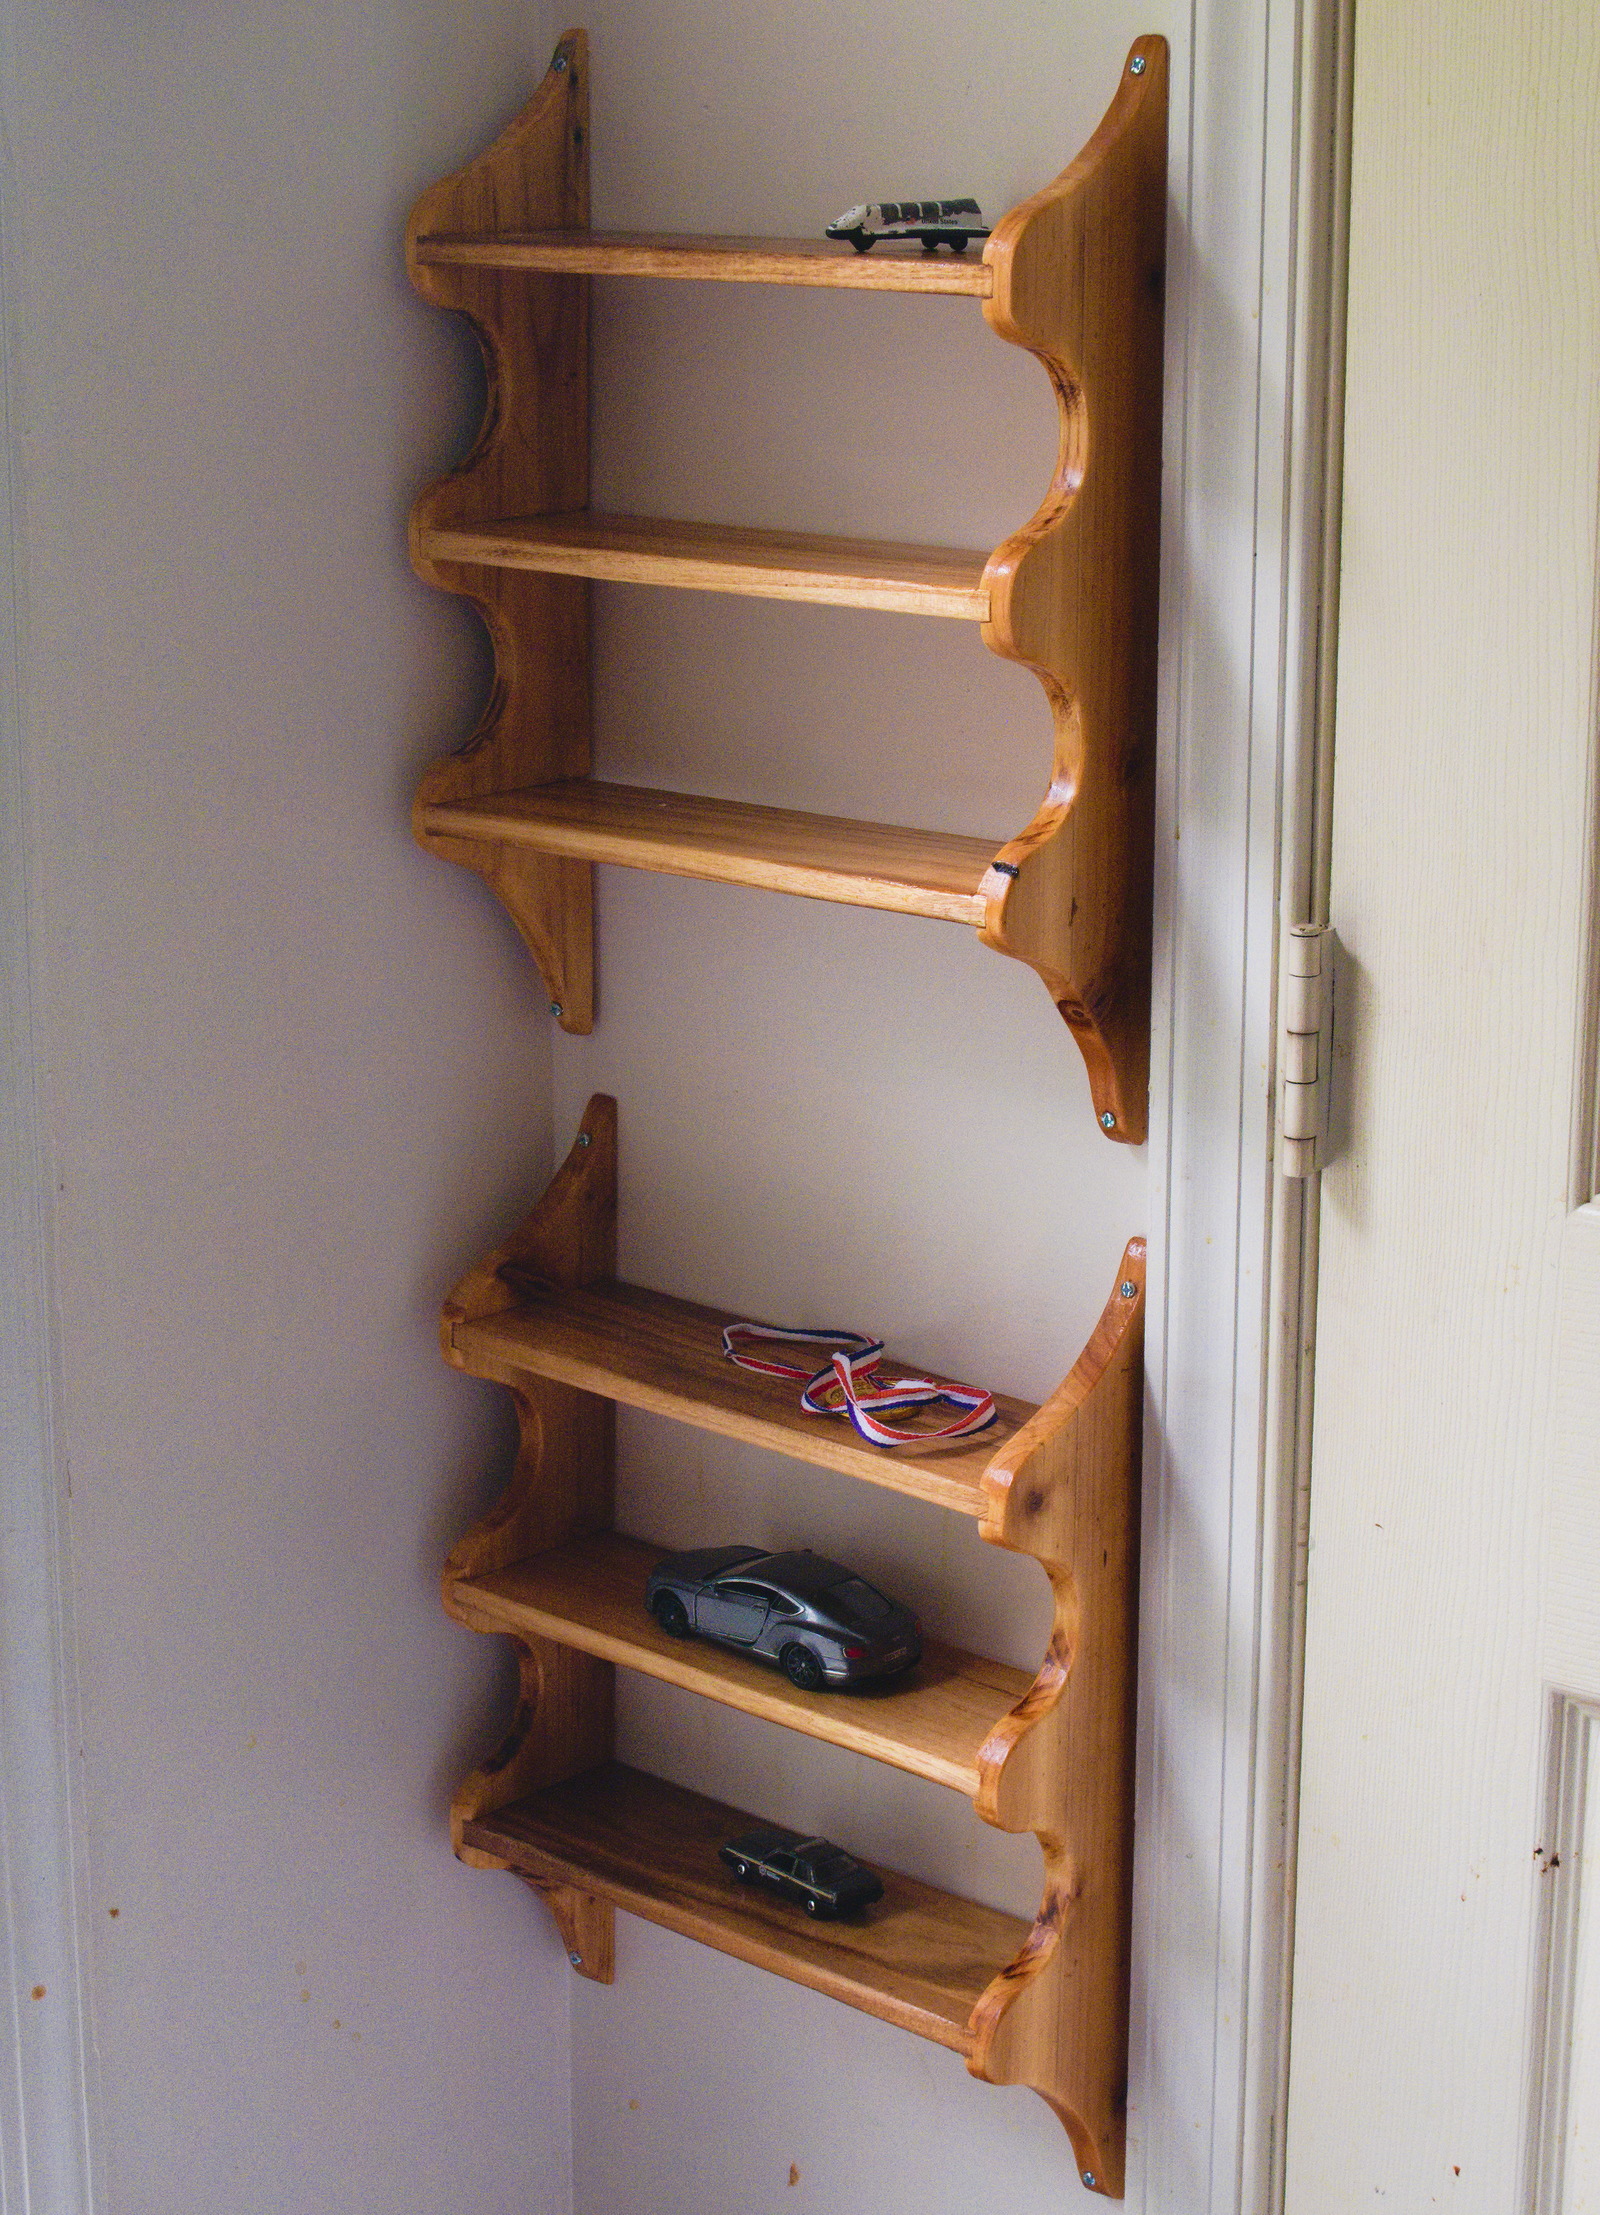
Colonial style in a modern setting. The hanging shelves are based on Plate 128 from Kettel's "The Pine Furniture of Colonial New England". We built them in May 2022.
January 26th, 2025
Posted by Paul
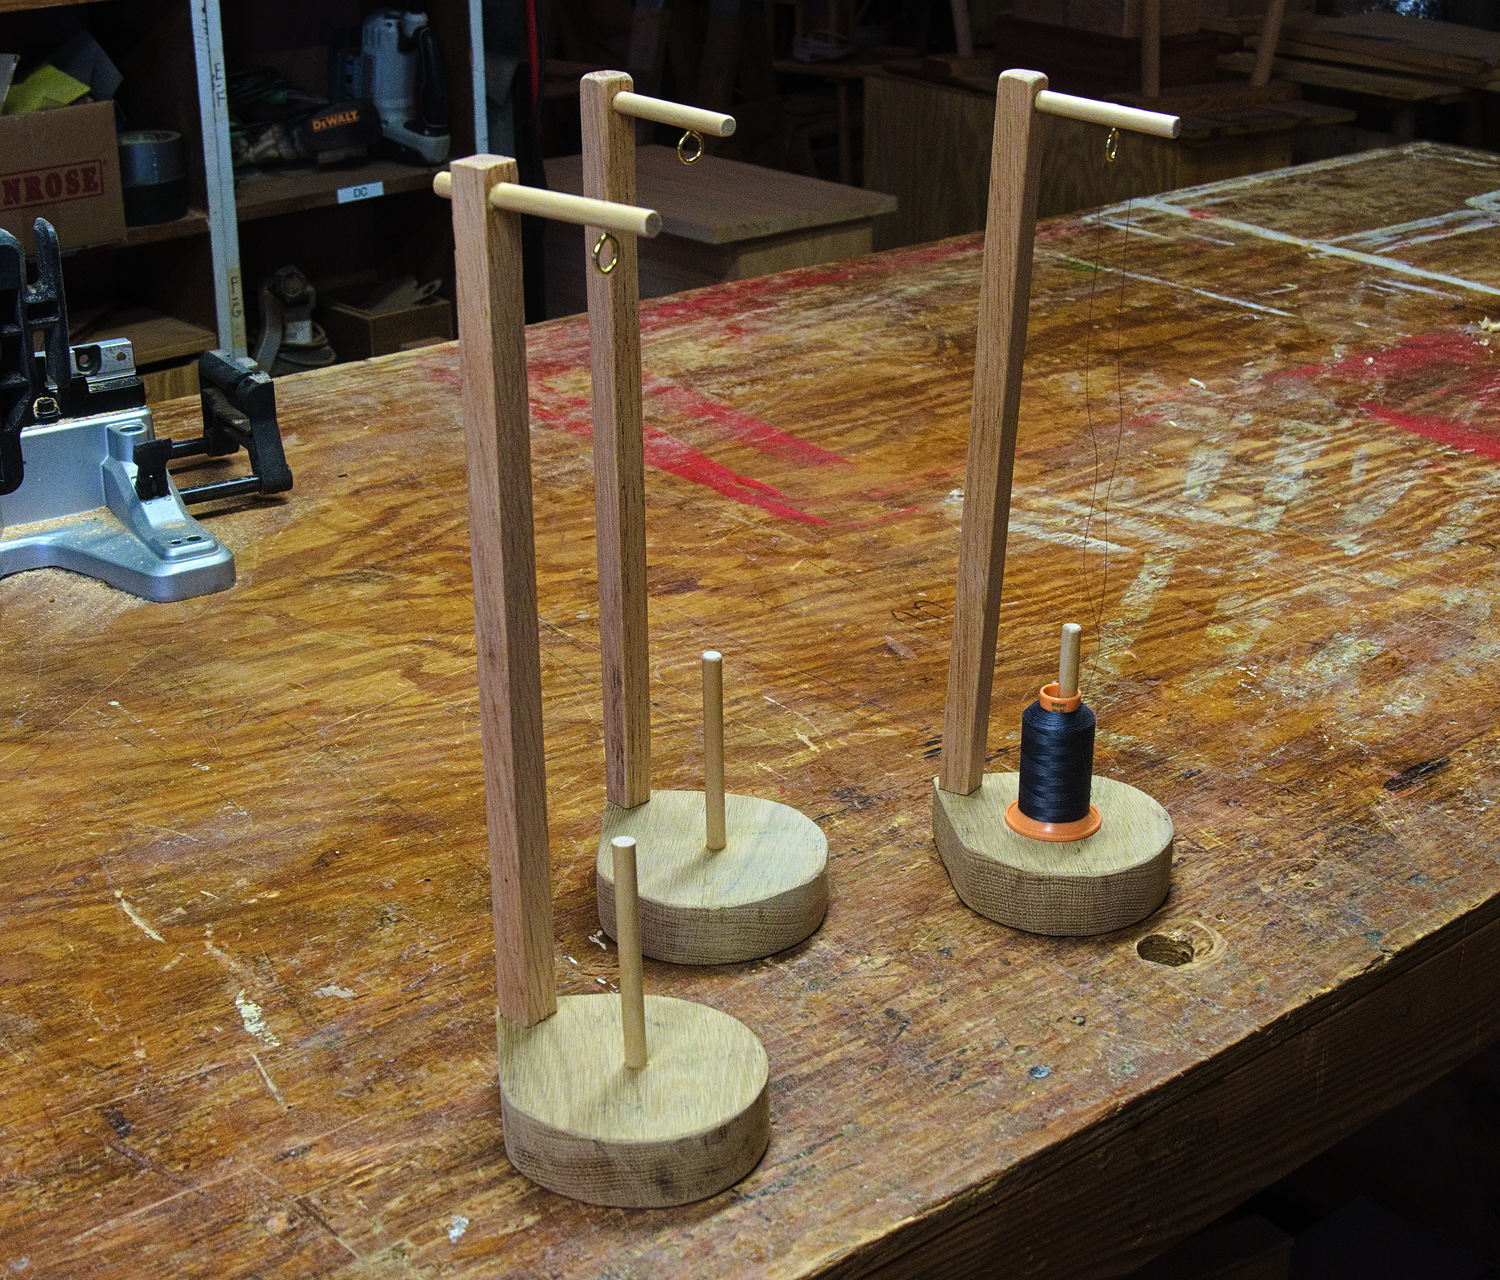
Stands for thread cones, a quick project.
January 10th, 2025
Posted by Paul
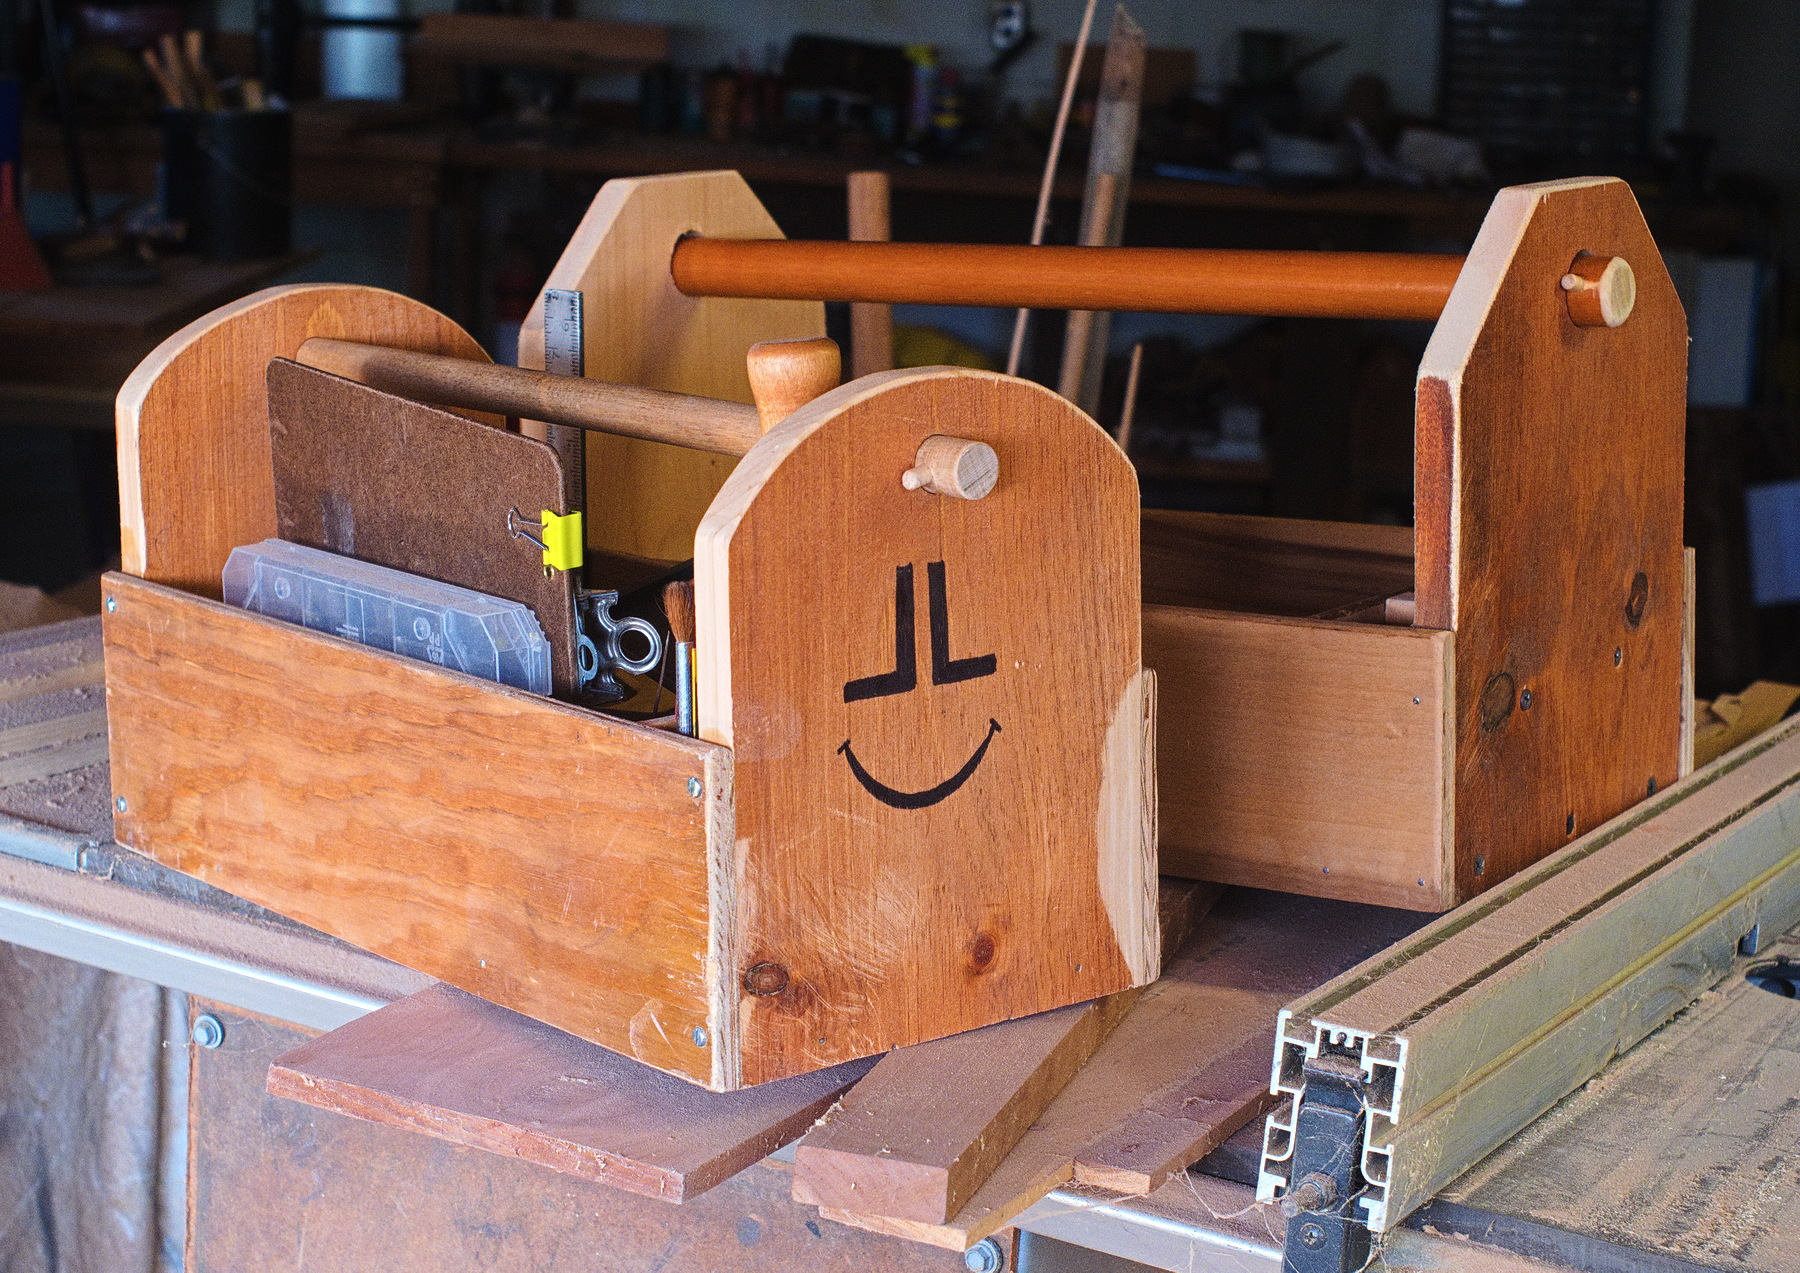
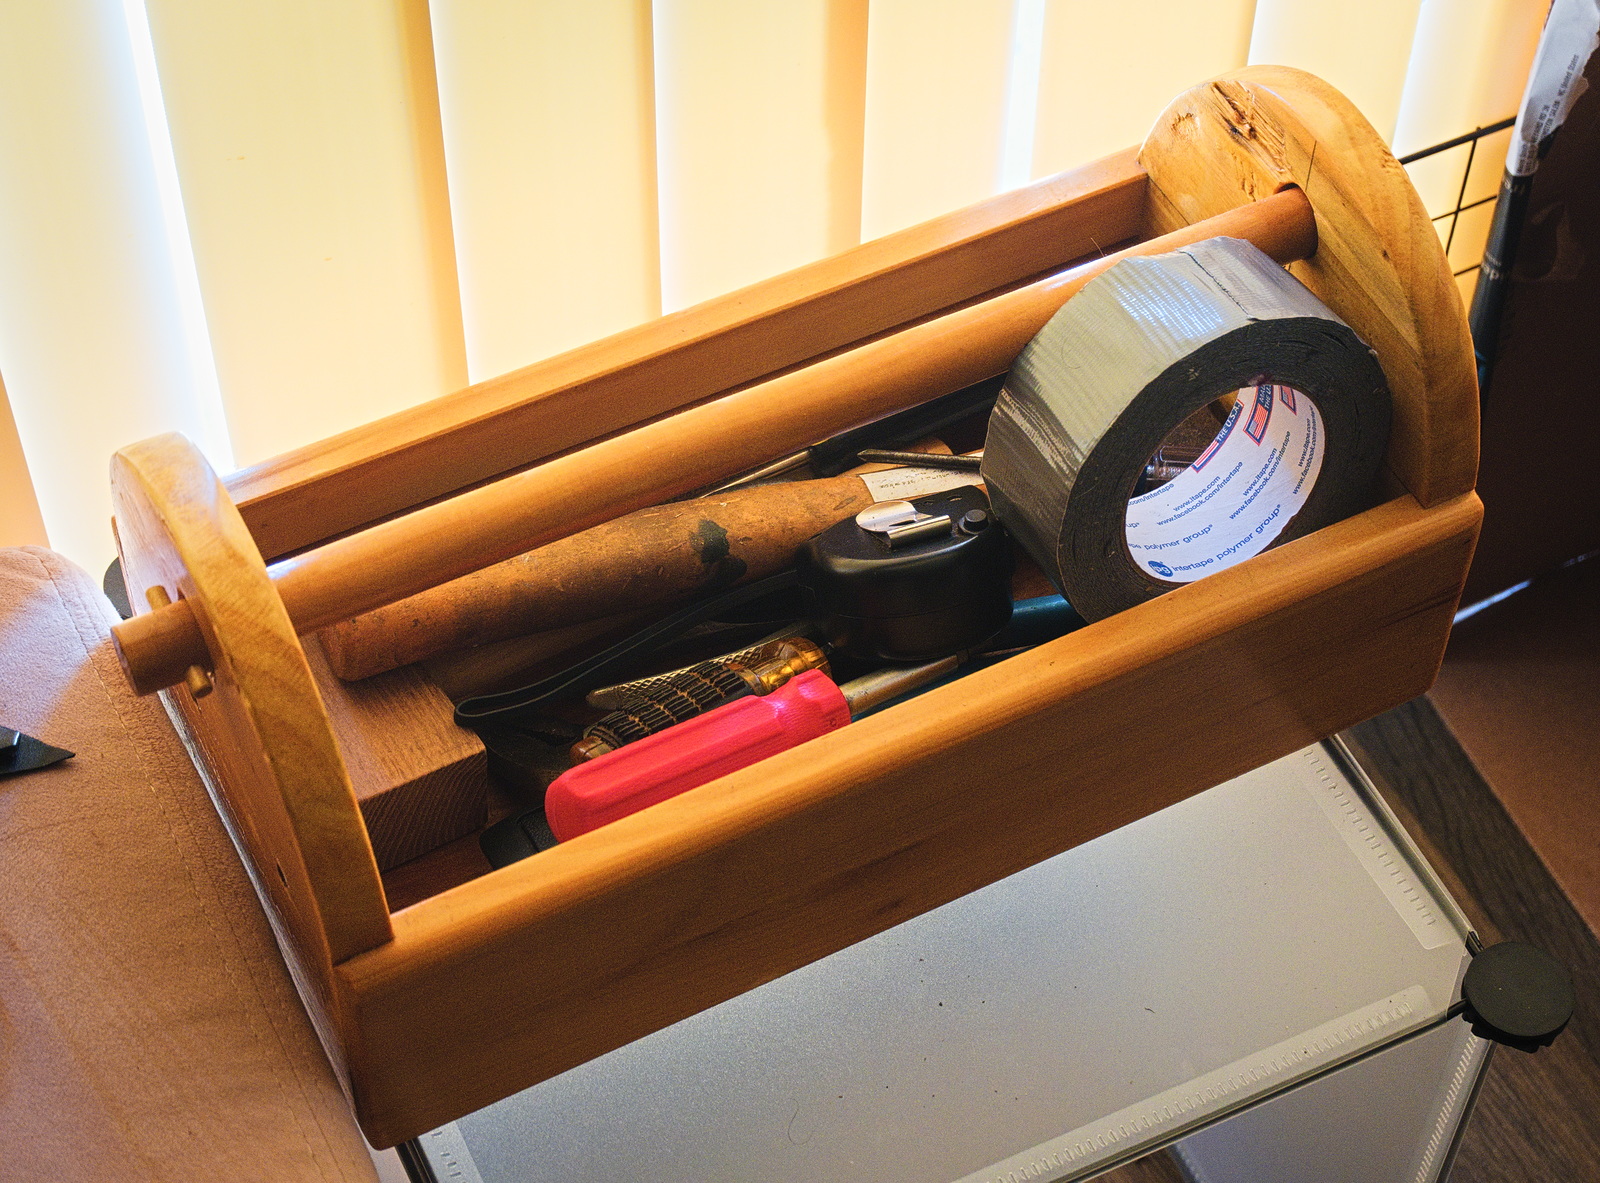
Joe has been putting his builder's trade skills to work on the Cope family houses and has found that his old tool tote is too small for all the tools he needs to carry. So he built a slightly larger one. I think the stylized JL and Amazon swoosh must have been on the salvage wood he used to build the first tote, but I think he should trademark it and put it on the end of all his totes going forward.
January 4th, 2025
Posted by Paul
The two small chests with drawer that we started in July (Kettel, Plate 33) are slowly progressing. One box is in the clamps, having the back installed. Finally we can get something of an idea of how the completed pieces will look.
The main reason this project is going so slowly is that I am having to resaw a large amount of wood by hand. We don't have a bandsaw, and while I did plane some of the stock to thickness, the time required and waste of wood convinced me that resawing was a better option. We bought 4/4 white pine for this project, at least it came out of the 4/4 rack and that's what we paid for. I thought once I cleaned both sides of each plank with the plane we would have something around 7/8", which would be perfect for a heavy colonial style chest, but the planks that Wall Lumber sold us at the 4/4 price were actually closer to fat 5/4, necessitating a lot of thinning. The second thing slowing us down is that we are having to figure this out as we go. I have never seen a set of plans or instructions for building a box quite like this. Third, the second half of 2024 Joe and I both had heavy schedules that kept us away from the shop. Doesn't matter, they will be done eventually. We're amateurs doing this for fun and experience, not as a livelihood.
December 5th, 2024
Posted by Paul
We built this small shelf to go in the hanging locker in the forepeak of my sailboat Terry Ann. I will wire a USB charging station next to it so we have a convenient place to charge phones and other gadgets.
October 12th, 2024
Posted by Paul
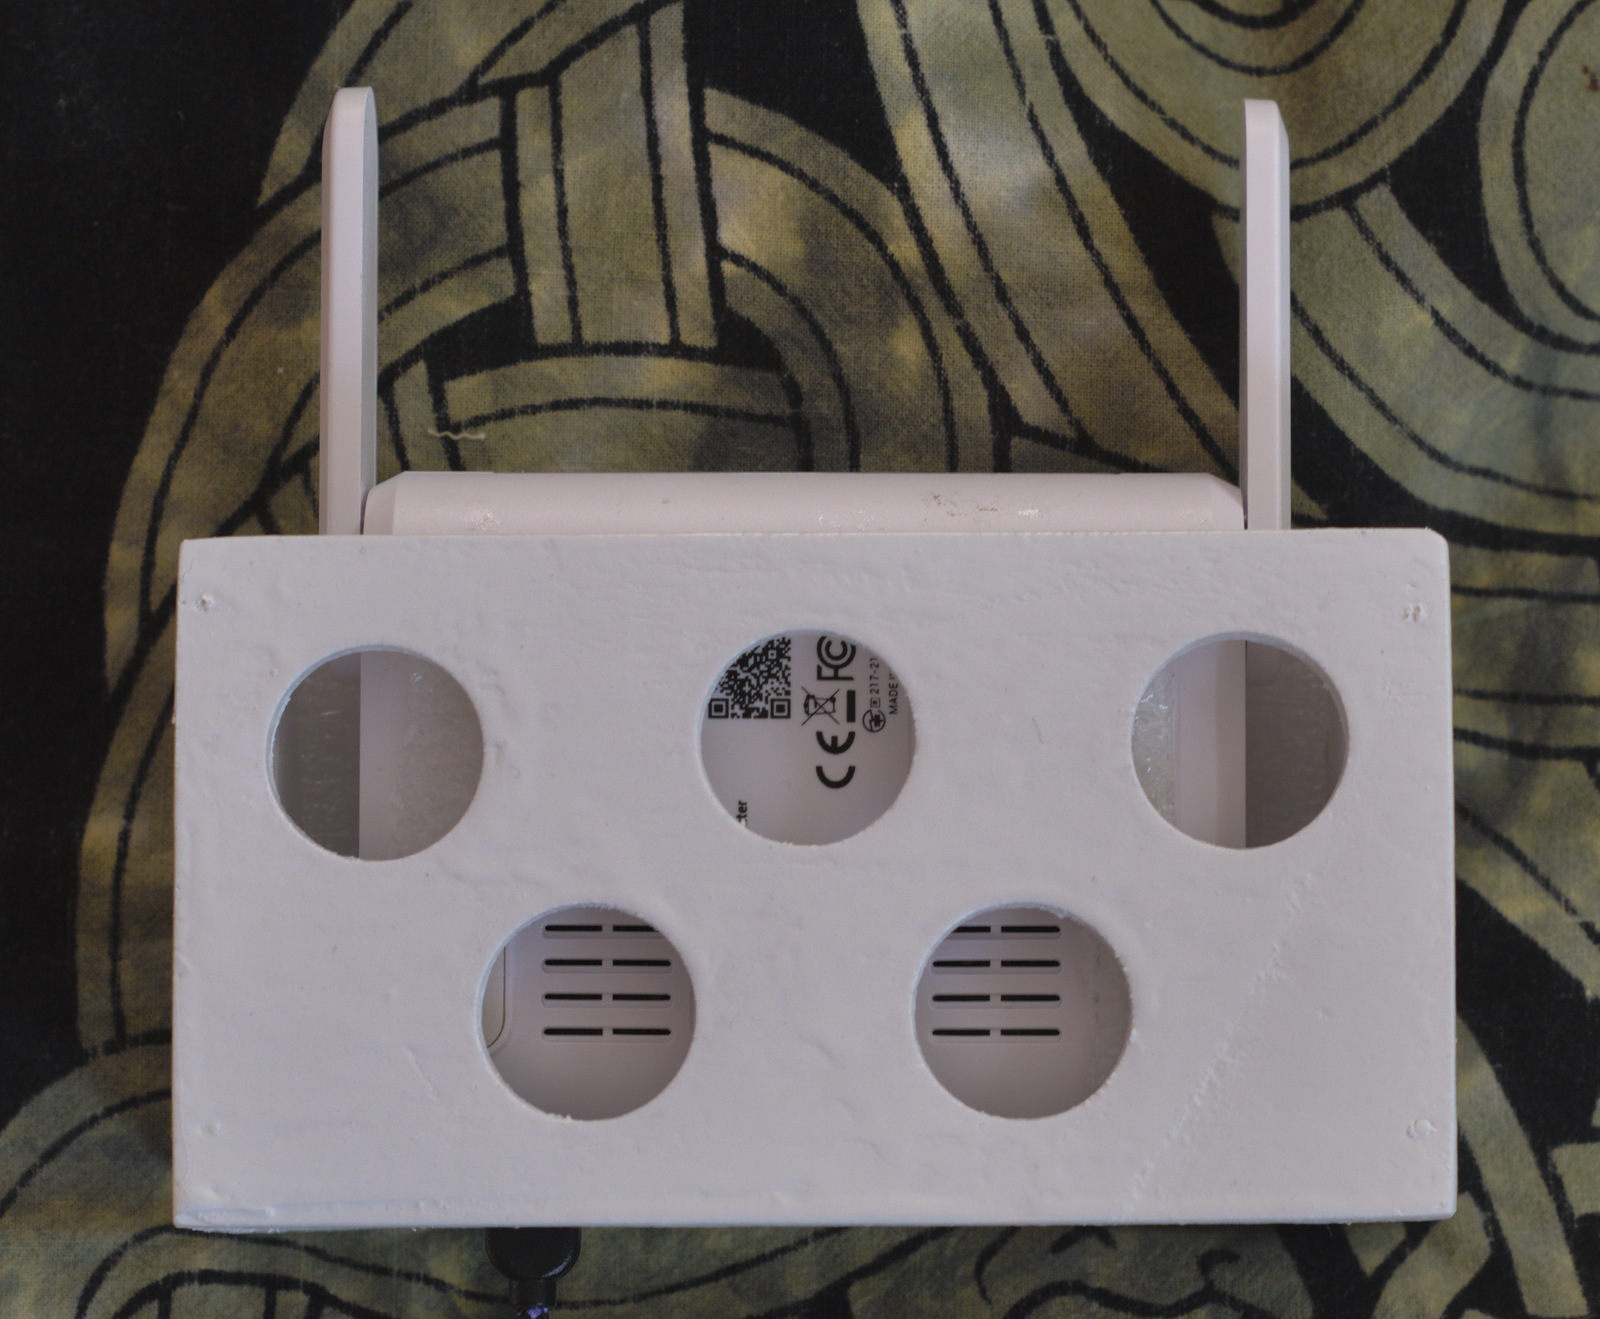
One small pleasure I get out of the woodshop is being able to make simple utility items like this box to hold a small router which will be mounted on a bulkhead in the boat. The router will allow me to set up a LAN aboard, so I can use VPN to view my chart plotter running on a computer below deck with an android phone or tablet in the cockpit, to transfer files between devices, or share an internet connection. Joe and I built the box in less than an hour, and I spent a few minutes at home painting it.
August 24th, 2024
Posted by Paul
A stack of parts and sub-assemblies for our latest project, building two miniature chests with drawers, loosely based on Kettel, plate 33.
August 3rd, 2024
Posted by Paul
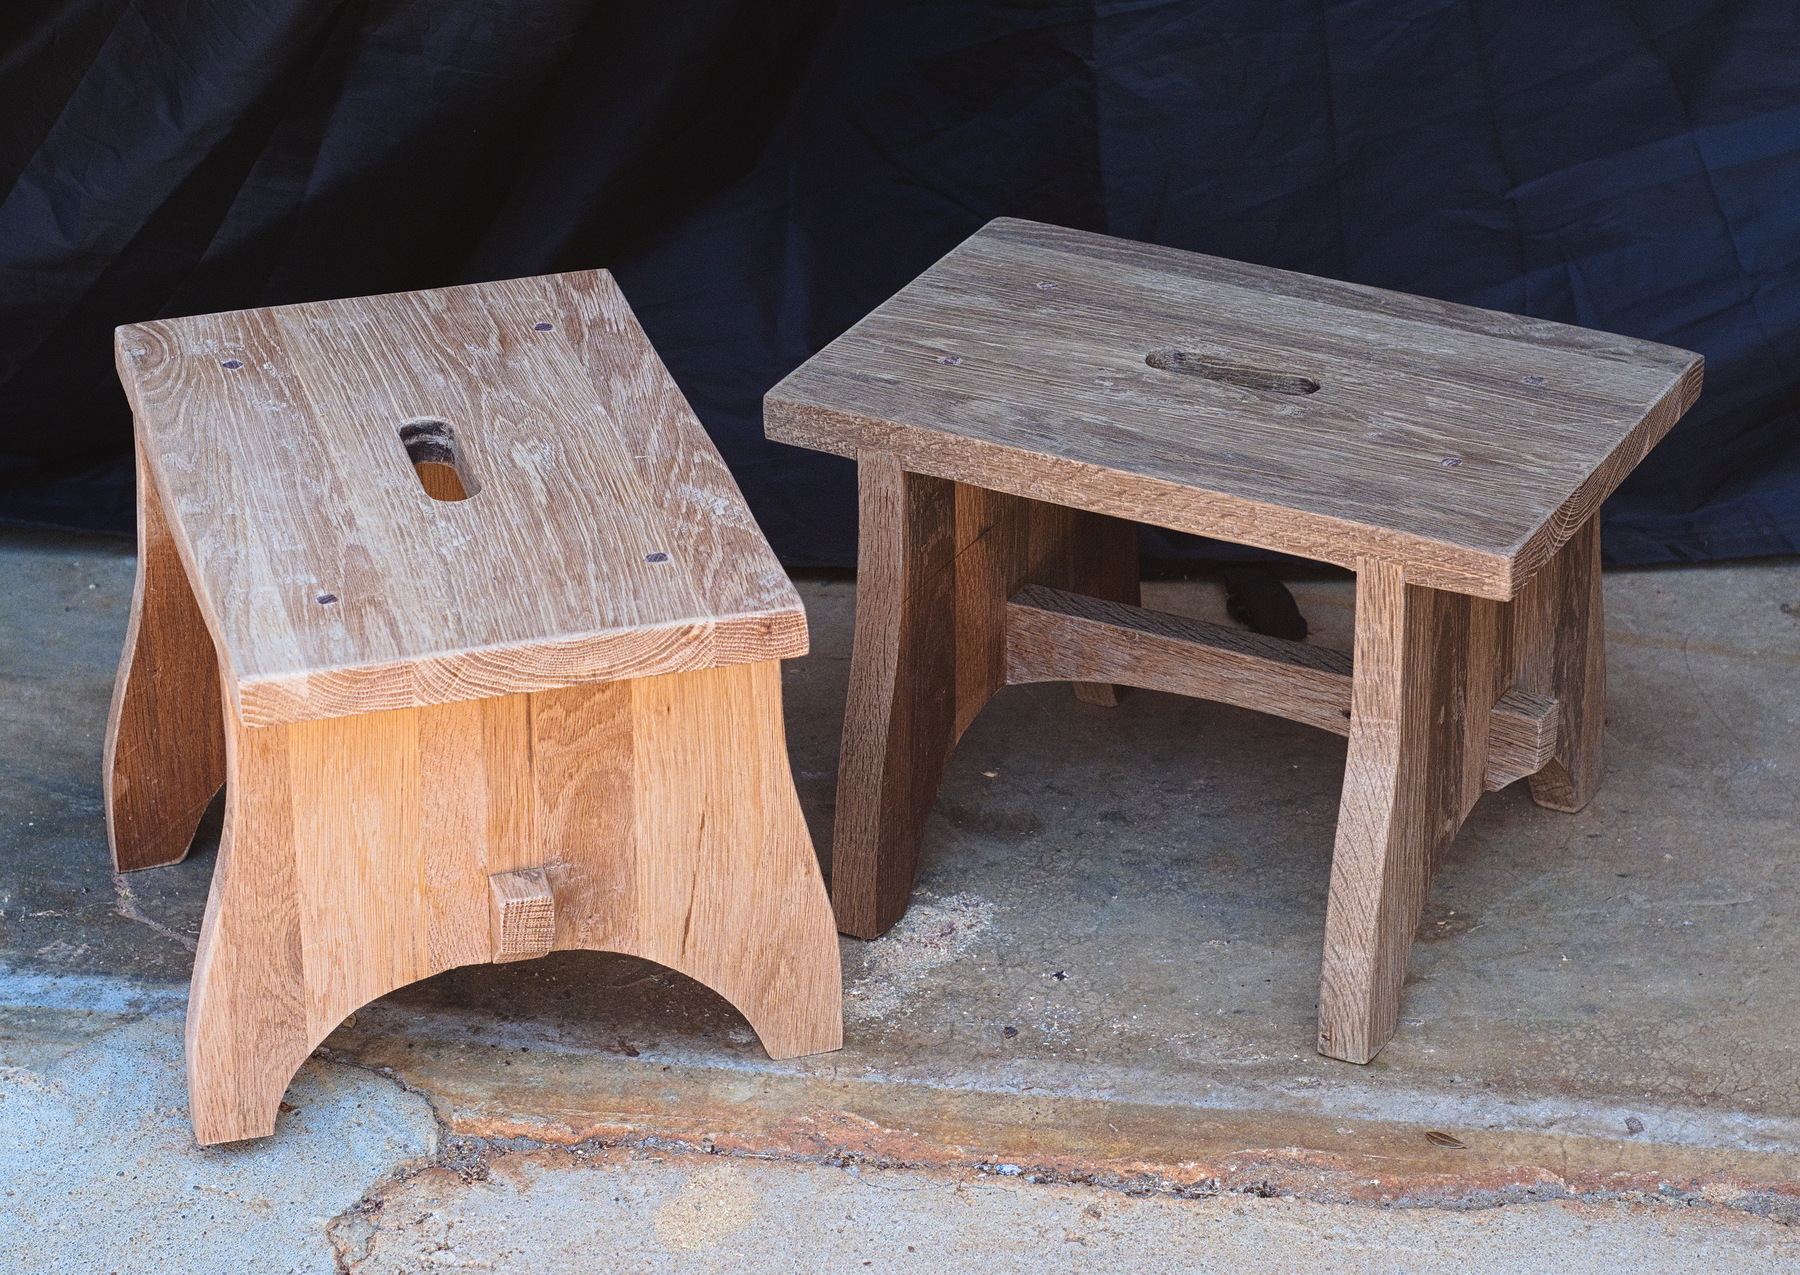
The two ammonia-fumed oak step-stools are ready to give away. The plan is to donate one to an upcoming local charity auction, and the other will go to whoever we can find who needs it.
July 20th, 2024
Posted by Paul
I took one of the ammonia-fumed step stools home to work on the finish and try to get a good picture. We had brushed on two coats of poly in the shop so it didn't need more buildup, just to get all the nibs and runs out. I gently sanded it and then applied two thin coats of spray polyurethane. If you get the second coat on within two hours you don't have to sand between them, but if you wait any longer you have to give it 72 hours and a sanding before recoating, so I got the second coat on promptly. Then I gave it 72 hours to thoroughly cure and lightly sanded with 1000 weight paper. After this I coated with Johnson paste wax and gave it a good buffing.
In my sunny living room, the golden-brown tones characteristic of fumed oak, so well-known from the works of Gustav Stickley, manifested themselves, making for a pretty picture.
July 12th, 2024
Posted by Paul
The second oak step-stool is done with ammonia fuming and has a first coat of poly. Joe cycled new ammonia into the fumer after three days and gave it more time, so it came out slightly darker, which we both like. We are going to try fuming samples of other wood varieties to see what effect we get. My reading suggests that fuming has the most effect with high tannin woods like oak, walnut, cherry and mahogany, and less effect with maple, birch, pine and poplar. I'm looking forward to seeing what our tests reveal. The natural effect of ammonia in the air reacting with tannins is one of the factors that gives centuries-old medieval oak furniture its dark, verging on black, color.
July 11th, 2024
Posted by Paul
A chest is a large box with a lid, a chest with drawer has a drawer below the box and a chest of drawers is all drawers and no box. Frequently a chest with drawer has fake drawer fronts on the box to make it look like a chest of drawers.
Scaled-down furniture was built, and it is not uncommon to find miniature chests with or without drawers. For example, Kettel, Plate 33, a chest with drawer and fake drawer fronts on the box. I drew up something roughly similar and we are going to build two of them. So far we have cut out and milled most of the parts for the drawers.
July 2nd, 2024
Posted by Paul
After five days of ammonia fuming, the treated step-stool, the one in the back, is noticeably darker. We both like the effect, so the other one will now get fumed.
June 29th, 2024
Posted by Paul
We've had the woodshop for over ten years now. It's been a lot of fun, we have built boxes and crates by the hundreds and larger pieces by the dozen, and learned a lot. We have confidence that we can build almost anything in wood, and if we wanted to, we could buy some expensive equipment, a few hundred feet of exotic hardwoods from Wall Lumber, and start making beautiful high-end reproductions to sell to wealthy people to pay for it all. But that's not why we started this, and it's no more attractive to us now than it was back then. Our goal is to make useful, interesting and good-looking things out of wood that we can give away.
Some young people move out of the familial home with a few nice older pieces that have been stored away in the attic, but most of them have to scrounge furniture from other people's castoffs or buy a pressboard bookcase and dresser from Walmart. We like to make them a solid wood table or inlaid box or a useful bench or step-stool just so they will start to recognize that there is something better. Levi's friends used to be astonished that he would have something as nice as the simple cedar-topped trestle table we built for him and Marie way back in the early days of the shop.
Most young people and even older people move a lot these days, so one of our principles is to make furniture that is light enough and small enough to handle without having to call in a moving crew. Even a substantial piece like my trestle table can be easily moved if it can be disassembled.
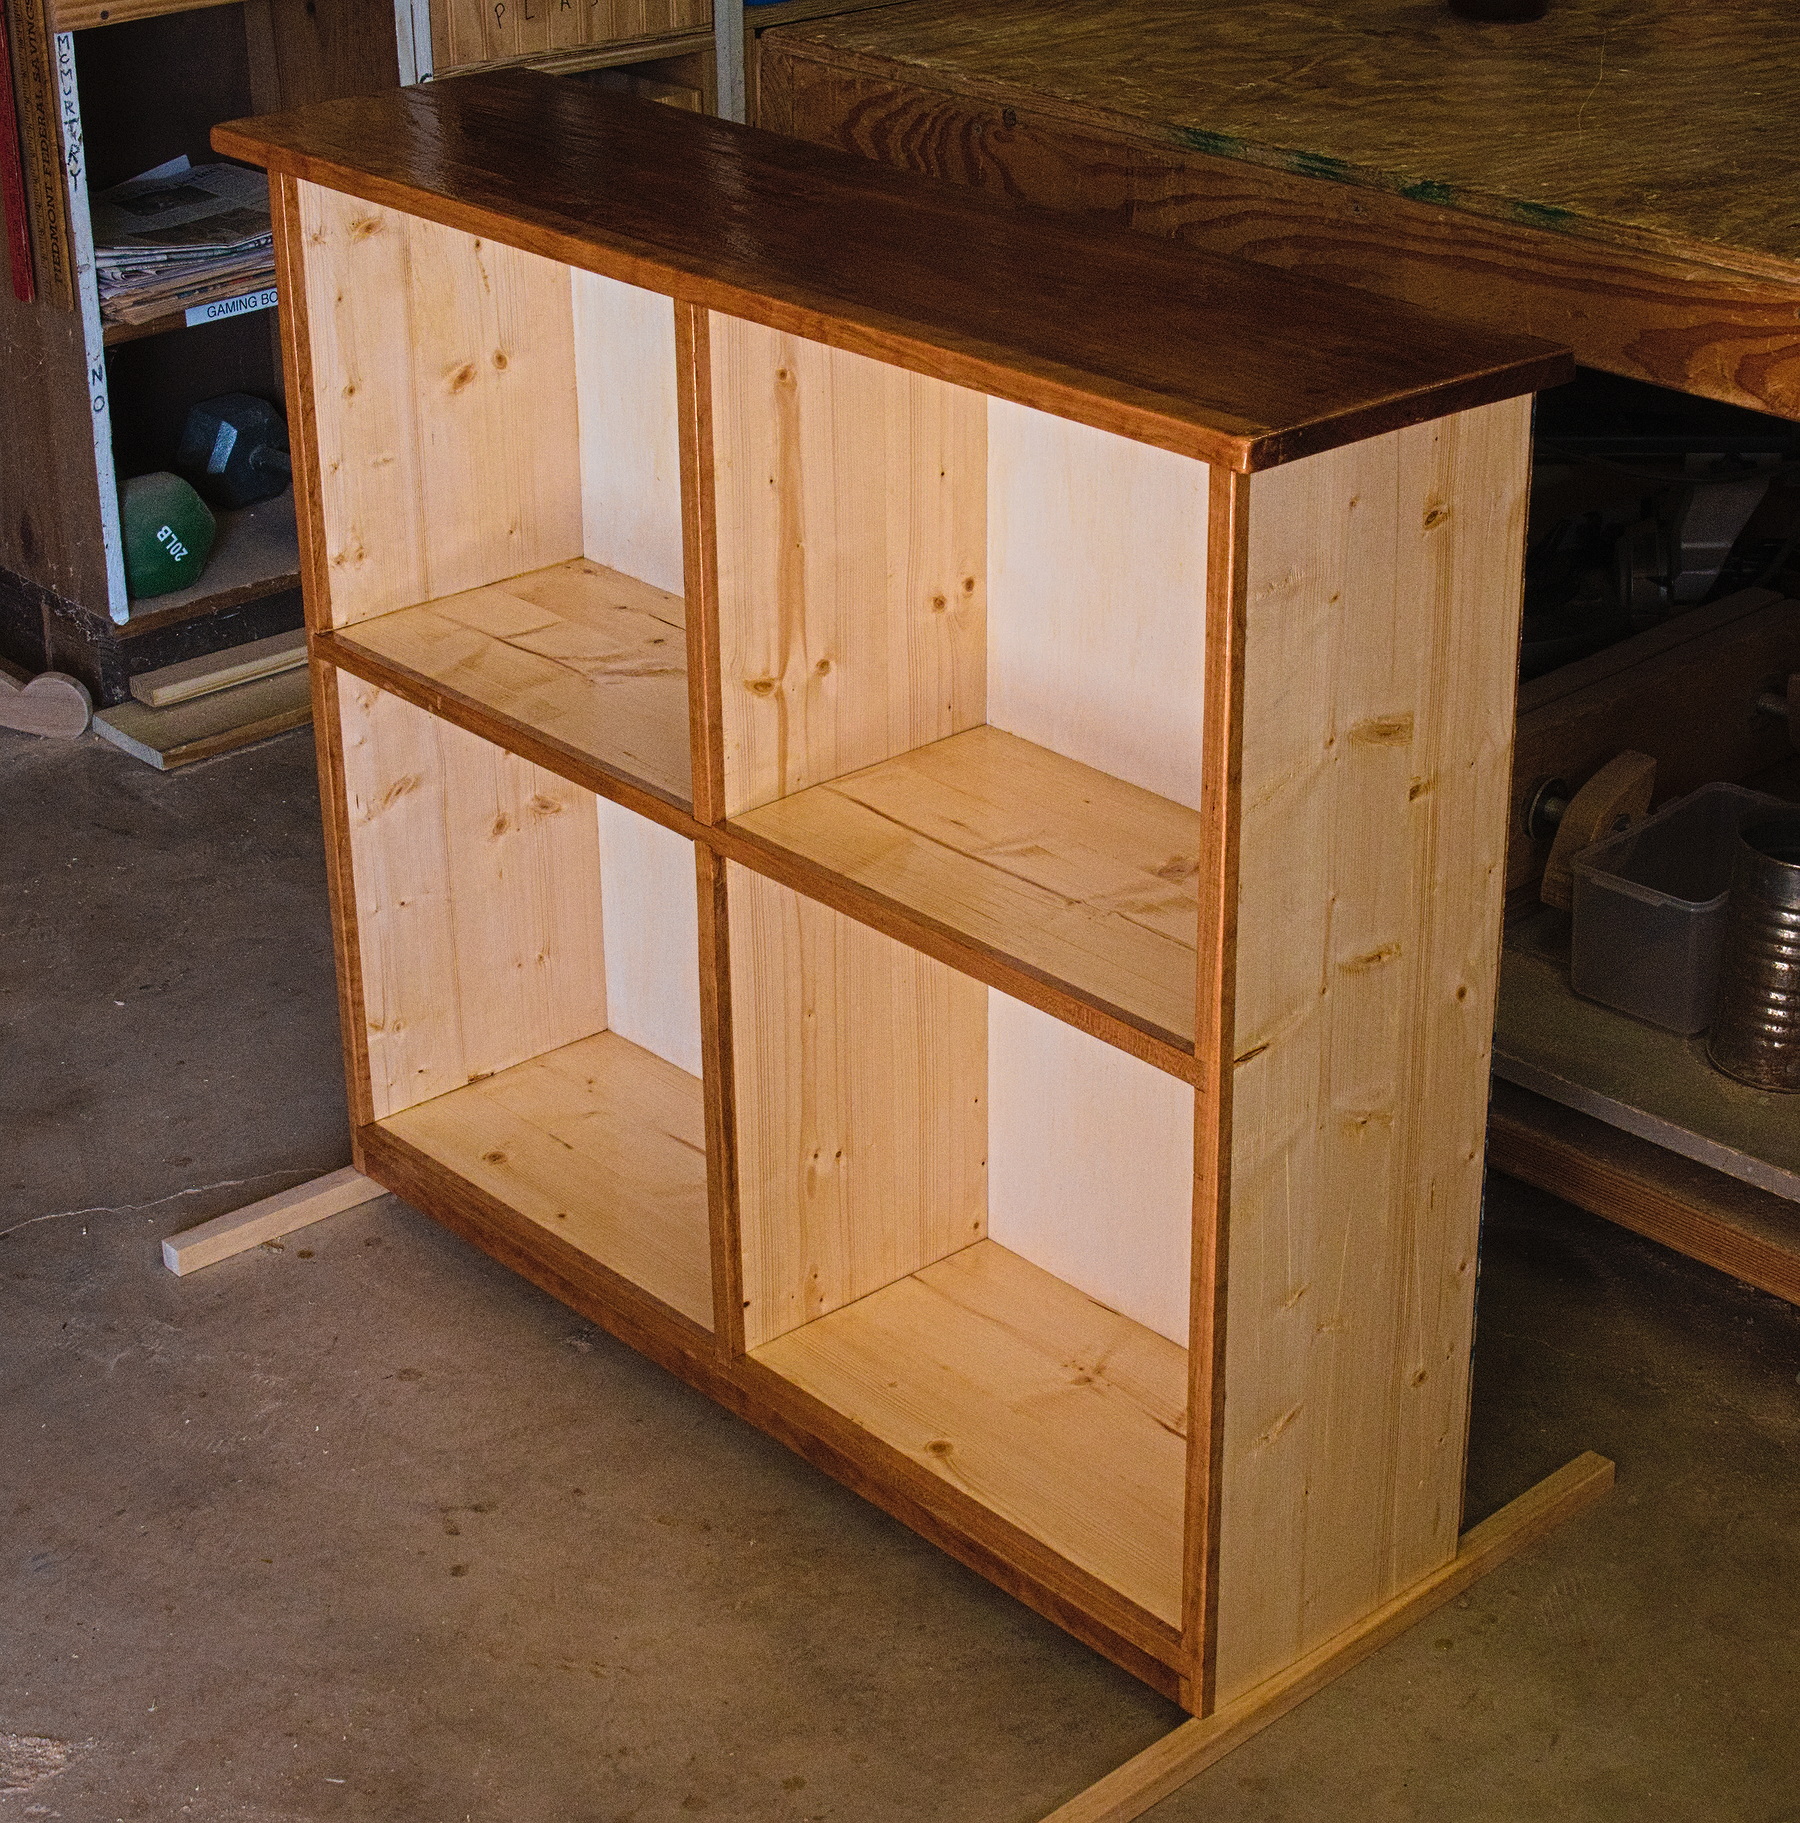
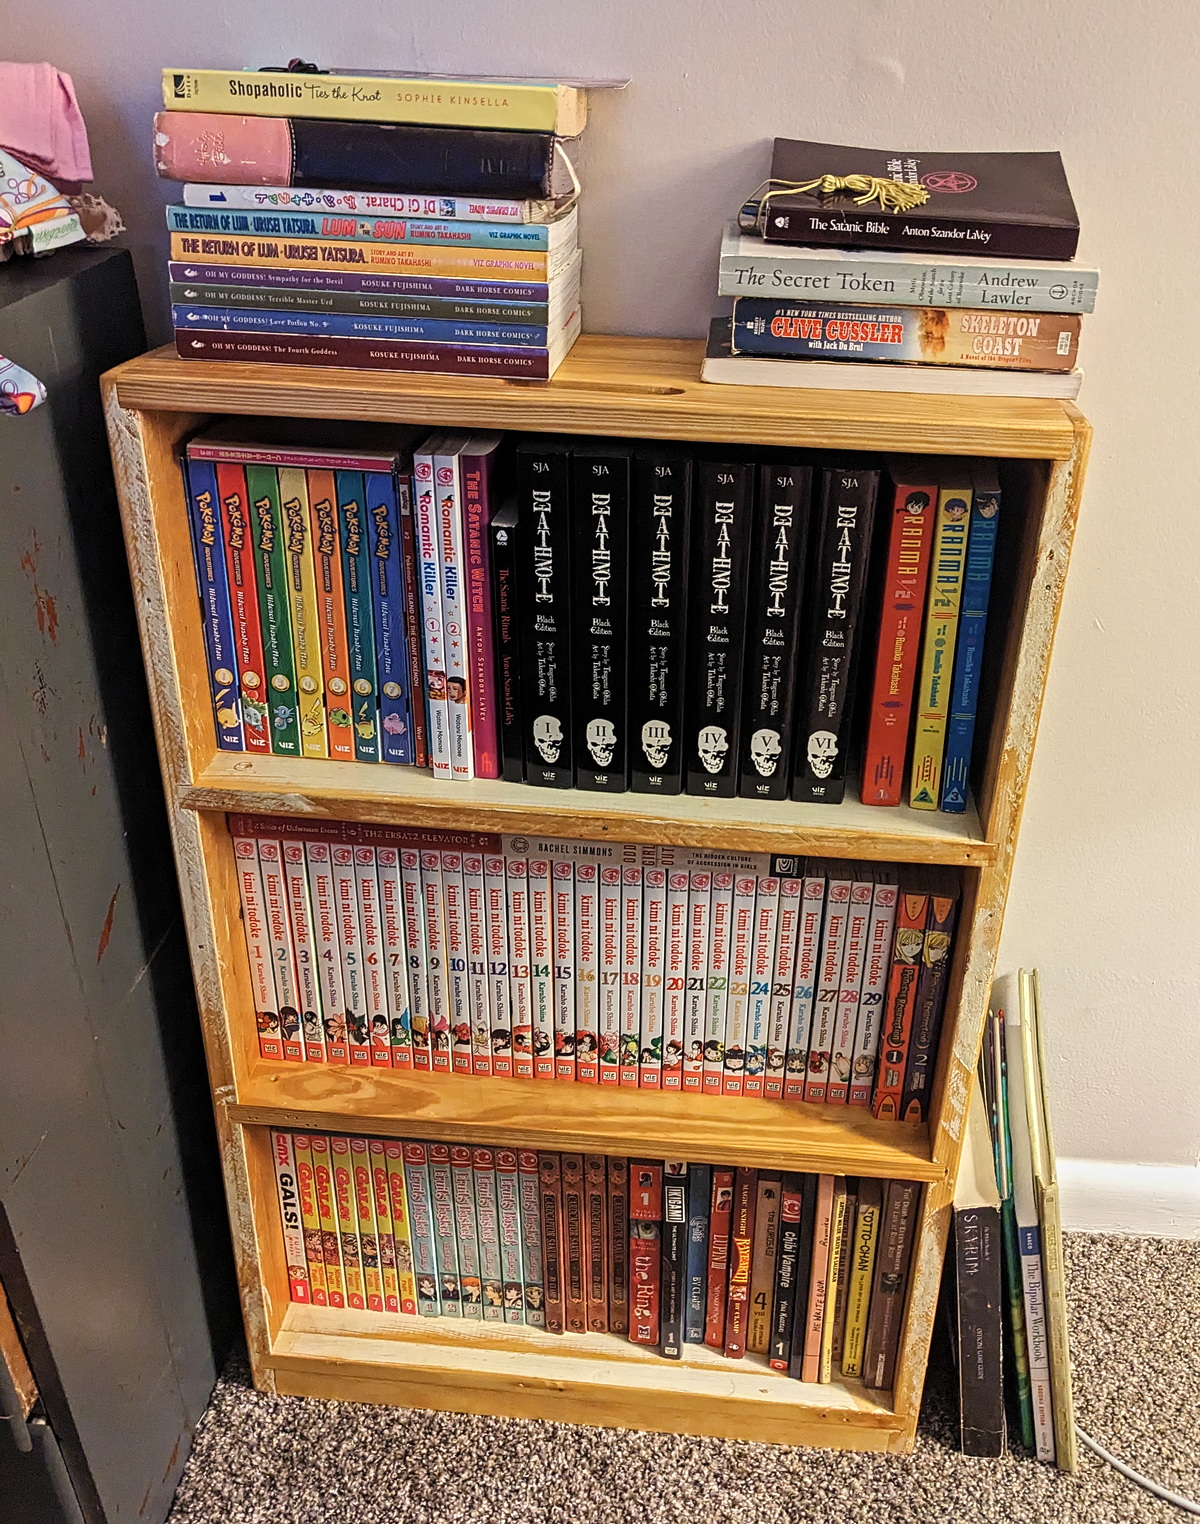
Joe got a request for a packing box from one of Marcia's grand-daughters, so he built one out of nice cypress lap siding. It can serve as a bookshelf in between moves. We developed that idea into a small bookcase with a finger slot in the top and a kickboard with a batten behind it for a grip that would look good in the house and could be tipped back and moved without even removing the books. We have built several, including this one for Marie.
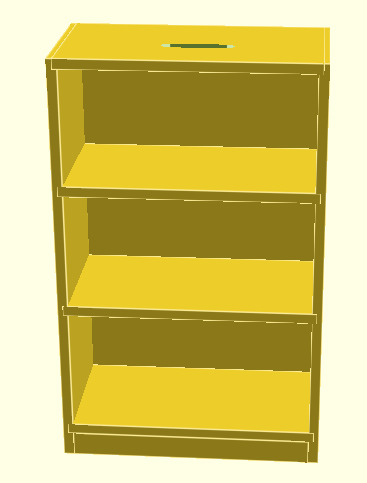
I drew up a bookcase/packing box in OpenSCAD so that we would have a drawing and dimensions to work from the next time we build one. Anyone with OpenSCAD who wants the drawing can find it here. It is parameterized so you can change the major dimensions to make it fit a particular spot. Looking at the drawing makes it clear how simple this piece is to build. All stock is 3/4". The sides and top are 10" deep. The sides are 30" long and the top is 18". The sides and top all have a 1/2" deep rabbet along the back edges to accept a plywood back, so start off by ploughing the rabbet 1/2" deep and 3/8" wide on all of them and you won't have to reset the saw later. The sides have a rabbet along the top edge for the top to set into, and three dadoes, 9" down from the top, 18" down, and 1 3/4" up from the bottom, for the shelves and the bottom. The top and shelves are all 18" wide. The top is 10" deep, and the sides are 9 1/2" to allow the back to set in its rabbet. The kickboard fits between the sides and is 1 3/4" tall. There is a lip attached to the back of the kickboard to allow a good grip when the case is being used as a packing box. I would glue and screw these parts so there won't be any risk of them coming apart under a heavy load. As drawn, there is a central slot in the top, far enough back to allow plenty of wood in front of it for strength, but forward of the half-way mark to provide good balance. The slot could be replaced with two spaced more towards the sides to allow a two-handed grip. Like the kickboard, the top should be glued and screwed, and the back should be attached firmly with glue and screws or nails.
This post has explored some facets of our philosophy and technique at the woodshop. We have a few other principles, including using salvage wood whenever possible, finishing bright and not painted, and probably the most important of all - we don't cut dovetails.
June 26th, 2024
Posted by Paul
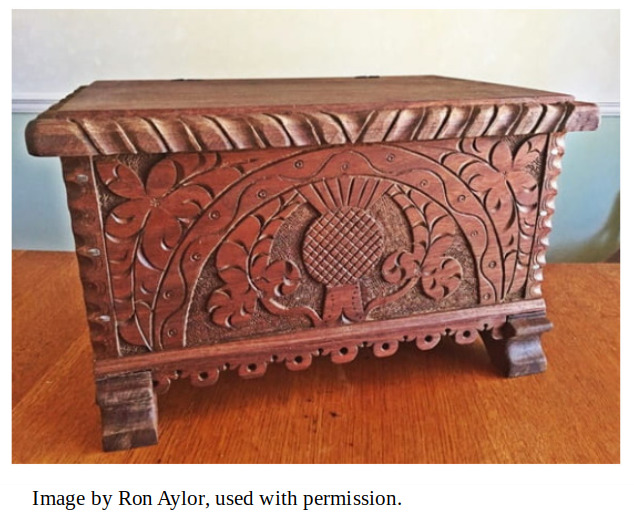
With two completed oak step-stools, we decided to try the ammonia-fuming technique that was popularized in America by Gustav Stickley, the famous early 20th century promoter of the Arts and Crafts movement. I read about Ron Aylor's use of it in his book "Art and Craft of an Unplugged Woodworker" and suggested to Joe that we fume one of the step-stools. Then we would be able to compare the two and see if we liked the result.
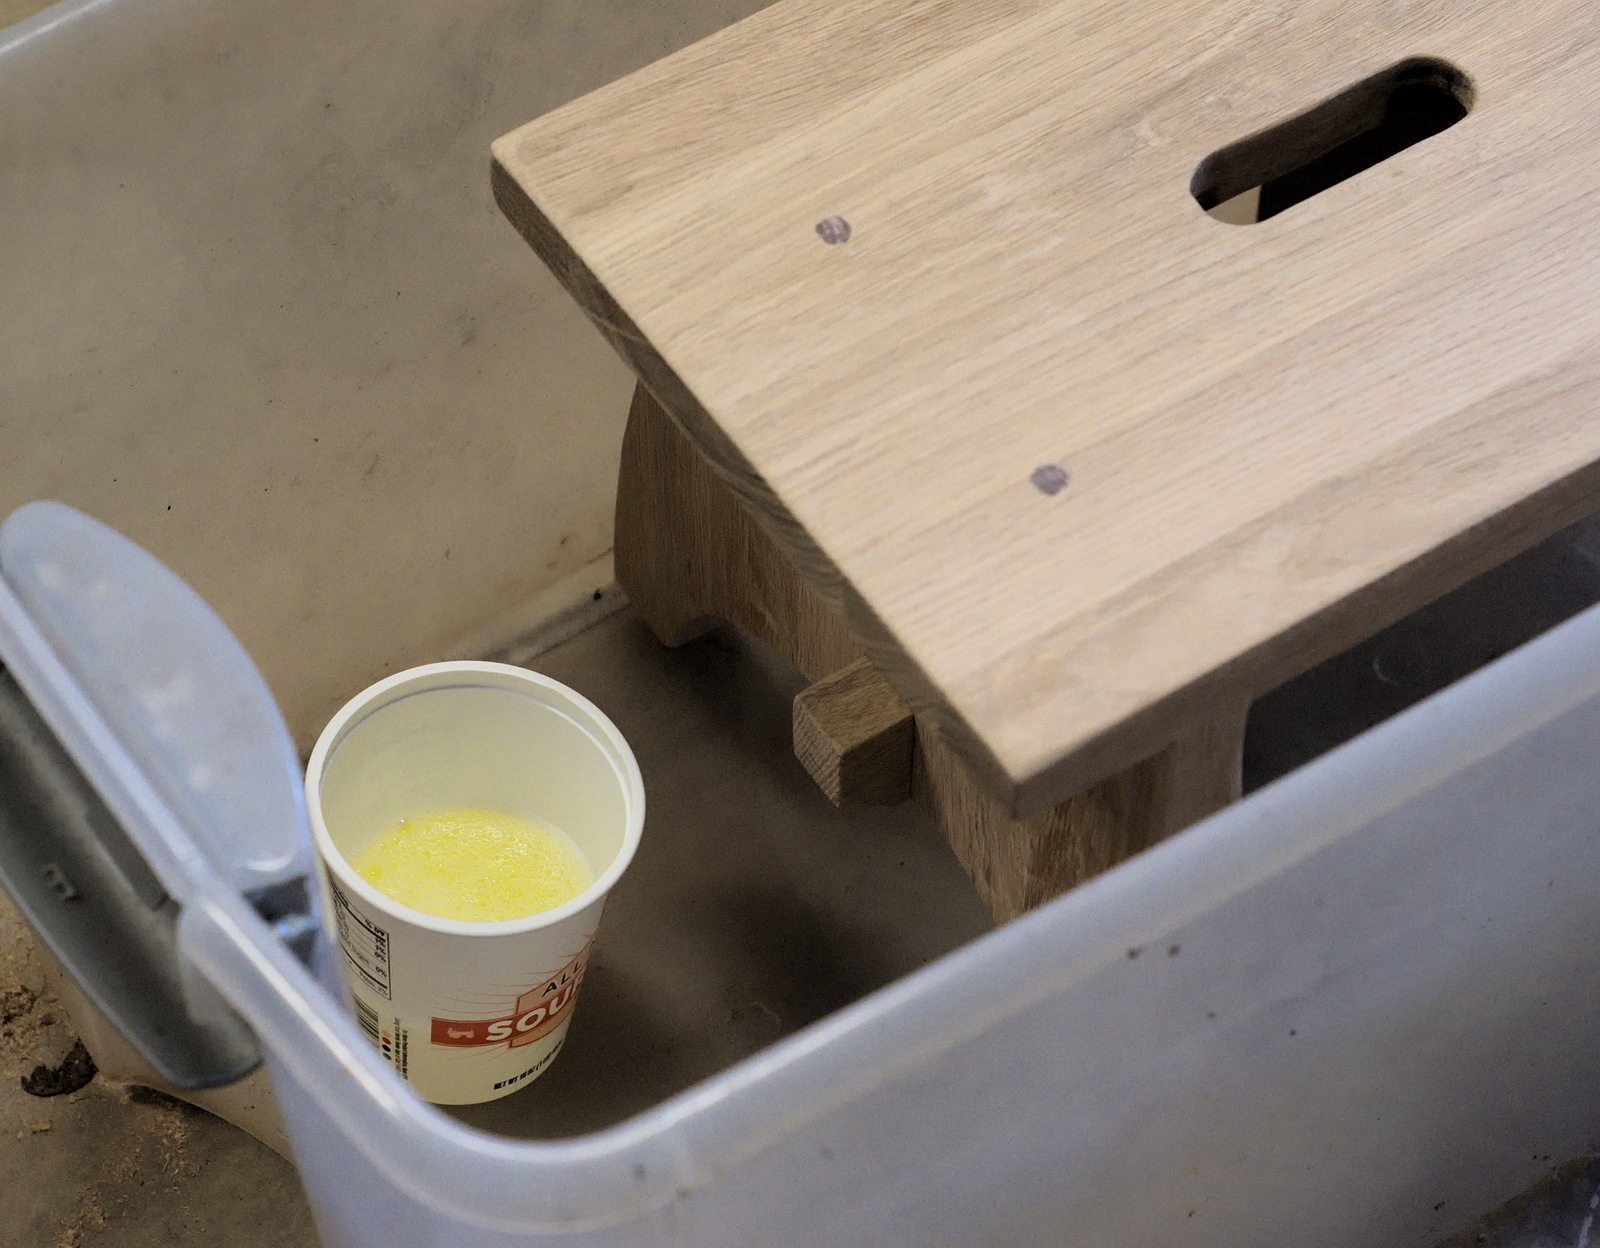
Joe turned up a plastic tub that looked like it would do well, with some judicious applications of duct tape to seal up the holes around the handles. The only ammonia in the house was lemon-scented, so even if the fuming doesn't darken the wood, maybe it will make it smell good. I look forward to seeing the results next week.
June 21st, 2024
Posted by Paul
Marcia and Joe's neighbor had a tree dropped which fell into their back yard and knocked down the purple marten house. Joe has been doing repairs and has it almost ready to put back up. First order of business for yesterday's work session was to attach a vinyl sheet to the roof to serve as shingling. It is white so it should reduce heat in the house. We put it on with Weldwood Contact Cement.
Next we finished off the last cuts on the ends of the two step-stools and started fitting them into the dadoes in the top. Both were very tight. The oak was slow to work. Joe eventually got the one he was working on to fit by dint of vigorous pounding with a mallet, but ran into trouble getting it back out for glueing. His solution was brutal blows to the side of the board, and unfortunately he cracked it. While he took it aside and glued it back up, I continued working on mine. By this time I had thoroughly dulled four planes trying to get the old glass-like finish off and getting it thin enough to fit with no more than moderate force, so I resorted to the orbital sander and eventually worked it down.
We took an end from the other set of parts and got it ready. At least we would be able to glue up one stool, and the other could wait until next time. I set my end into the dado and checked it with a square. It was a little out, but close enough. Nobody would ever notice. Joe's end was a little out as well. Not satisfied, he commenced to whacking it with the mallet - and cracked it. Two in one day!
The moral of this story is - you can tap on the end of an oak piece to drive it into a dado, although it is probably safer to pull it in with the clamp - but don't beat on the unsupported side. Oak, like any other wood, will split.
One thing, though, we proved the strength of our glue-ups - neither piece broke on a glue joint.
June 18th, 2024
Posted by Paul
The 17th Century and early 18th Century American vernacular - furniture of the Pilgrim era - provides the inspiration for most of the pieces that I draw. During this time, the colonists were gradually moving away from what I call "post-medieval" furniture - massive, heavy oaken items, mostly mortise and tenoned, decorated with elaborate carving that expressed spiritualism, both Pagan and Christian. The early colonists, trying to scratch out a living in a new world, dispensed with many of the decorative features and developed their own spare, utilitarian style. In time they prospered, and started adding back embellishments, hewing closer to the sophisticated European styles. But for a short hundred years, functionality took an upper hand.
Not to say that the English didn't have their own strand of simple domestic furniture. The early 20th Century collector Arthur Hayden presents two books on 17th Century English furniture, a style that is known there as "Jacobean", the first, "Chats on Old Furniture", devoted to the high culture, architectural, heavy oak carved furniture of the wealthy, the noble and the clerical, and a companion, "Chats on Cottage and Farmhouse Furniture", which will be much more familiar to the American eye.
Reading an old post at Mark Firley's unfortunately dormant The Furniture Record, I saw a reference to Ron Aylor and his An Unplugged Woodworker site. Here is what Mark had to say: "I was studying his blog in the hopes of gaining some insight as to why an intelligent and literate person might spend time reading my blog. Still a mystery." That intriguing comment demanded a click, and soon I was at Aylor's site, reading about his adventures in recreating the intricately carved, heavy, high-culture oaken furniture of 17th Century England with nary a power tool, nay, not even an electric light in his shop in a small town outside Atlanta.
Aylor has collected and organized many of his posts into a digital book entitled "Art and Craft of an Unplugged Woodworker", available at Smashwords (my choice), Barnes & Noble and maybe some other purveyors. With delivery at the speed of the internet, I was soon reading about how Aylor set up shop and started making his own distinctive style of furniture, which I see as an urbane brother by another mother to my own colonial bumpkin vernacular.
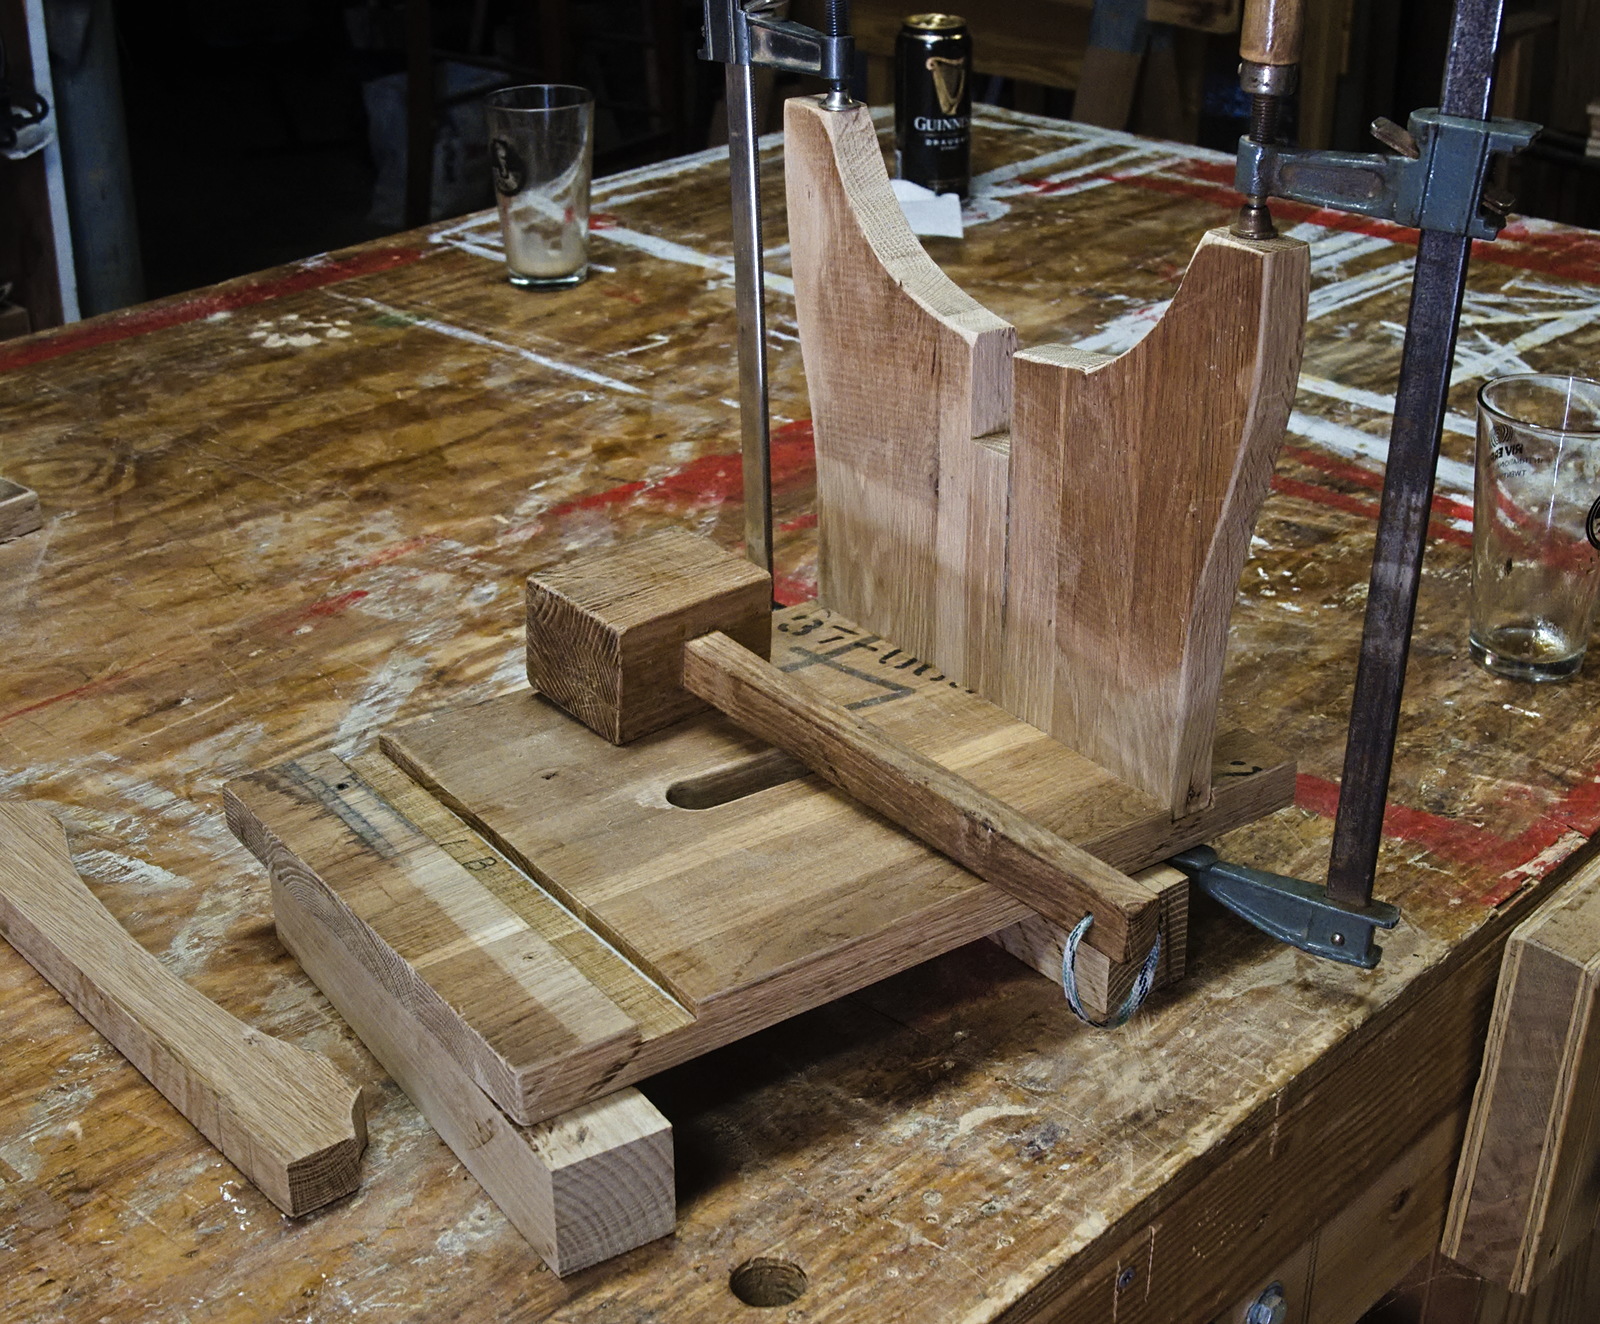
Needing a new workbench to fit the hand-tool techniques that he favors, Aylor turned his eyes to the master and constructed a Roman workbench as popularized by Chris Schwarz. His is scaled down to the point that he can actually straddle the bench and sit on it, which works well for his construction technique, centered around handsaws, chisels and drills. He makes use of a notch in the bench where he can wedge a vertical length of stock for cutting tenons or dovetails, and he uses something he describes as an appliance, "[q]uite similar to a frog or crochet and pegs on a Nicholson bench" for other stock holding. I couldn't wrap my head around this, but he also noted that with a few clamps it could serve as a "quasi-Moxon vise". I grasped that right away and decided we had to have one of them for our shop, the first but not the last inspiration I took from the book.
With the bench out of the way, now we are into the meat of the matter. Aylor states "I am enamored with 17th-century mannerist carving." 17th-century mannerism is a high-culture art form that stresses complexity and virtuosity over naturalistic presentation. Mannerist names that we might recognize include Bronzino and Tintoretto. The high priest of mannerist carving would be Grinling Gibbons, though his work stressed complexity and virtuosity AND naturalistic representation. It is my opinion that much of the mannerist carving as seen on furniture, both English and American, can be looked upon as cabalistic cyphering. In America, mannerist carving developed into a degenerate form in which the virtuosity is less evident and the presentation is much more naturalistic. To me, Aylor's carving style looks like a blend of the English and American streams.

An exuberant and enthusiastic artist wants a big canvas, and for a woodcarver that is a good-sized panelled or boarded box, so no surprise, that is what Aylor generally builds. In his book he constructs seven boxes, demonstrating how he lays out the wood for cutting, creates the tenons and mortises for the joined ones and the shoulder rabbets (which in the English tradition he calls rebates) and dadoes for the boarded ones, how he attaches the tops with snipe hinges or pintles through the cleats, and how he applies his preferred finish of boiled linseed oil and turpentine. Incidentally, he includes some good pictures of how to install snipe hinges, something I have looked for far and wide, and the next flat-topped box we build I will propose to Joe that we use this technique. Another idea that we will certainly use is a set of inside squares that can be clamped to the sides and ends of a boarded box to verify squareness and keep it from racking during glue-up.
Aylor builds a joint stool in high style, with the aprons floored to create a bin under the lid, which has wooden strap hinges to allow it to open. The stiles are square rather than the almost universal turned ones seen in America. I have read that the colonists used turned columns over square ones because, with riven green stock, turning was much easier and quicker than sawing square. The finished joint stool, with elaborate carving on the aprons, thick, heavy stiles and hinged top, looks positively medieval to my eye. Incidentally, Aylor mentions that joint stools were sometimes referred to as coffin stools, and attributes that "to an entry in Pepys’ diary (first published in 1825): '...my uncle’s corpse in a coffin standing upon two joint stools...'", but I wonder if it is actually a corrupted version of coffer stool.
A gateleg table with carving on the top, aprons and square legs looks exotic to American eyes. Aylor fumes the parts with ammonia to darken them. That's something we need to try. We have two oak step-stools ready for assembly, and we should fume one and get a comparison to its unfumed sister.
Aylor finishes off with a nice ratcheted book stand, no carving on this one, but, as he points out, is a good way to use the ever-accumulating piles of scrap around the shop. Around here, we burn it in the fireplace in the winter, but perhaps in Lilburn Georgia it never gets that cold. In truth, we build lots of slatted crates and small boxes out of scrap, we don't burn it all. And in a way, almost all our wood could be considered scrap, since most of it is roadside salvage.
And that's it. A good bibliography follows. One thing I noticed, not a whole lot of detail on how the carving is done. Maybe this is professional reticence, maybe it is just a talented person with a knack for the job who doesn't know that most of us find this kind of work extremely intimidating. On the other hand, there is plenty of information on building the actual boxes using hand tools. If you buy this book, don't be put off by the fact that it doesn't meet Lost Art Press production values. For example, the cover and title page read "Art & Craft of an An Unplugged Woodworker". I am sure Chris and his team could jerk this thing into a $50 coffee table book, but personally, I rarely buy Lost Art Press books any more, even the digital versions, they are just too dear. I'm delighted to have been able to buy and read this book, which is worth a great deal more than the modest price. It is a window into a rather arcane genre that I hardly knew existed. The reader can expect a lot of good eye candy plus more than a few worthwhile woodworking techniques - and, maybe, an introduction to a new facet of his own journey.
June 6th, 2024
Posted by Paul
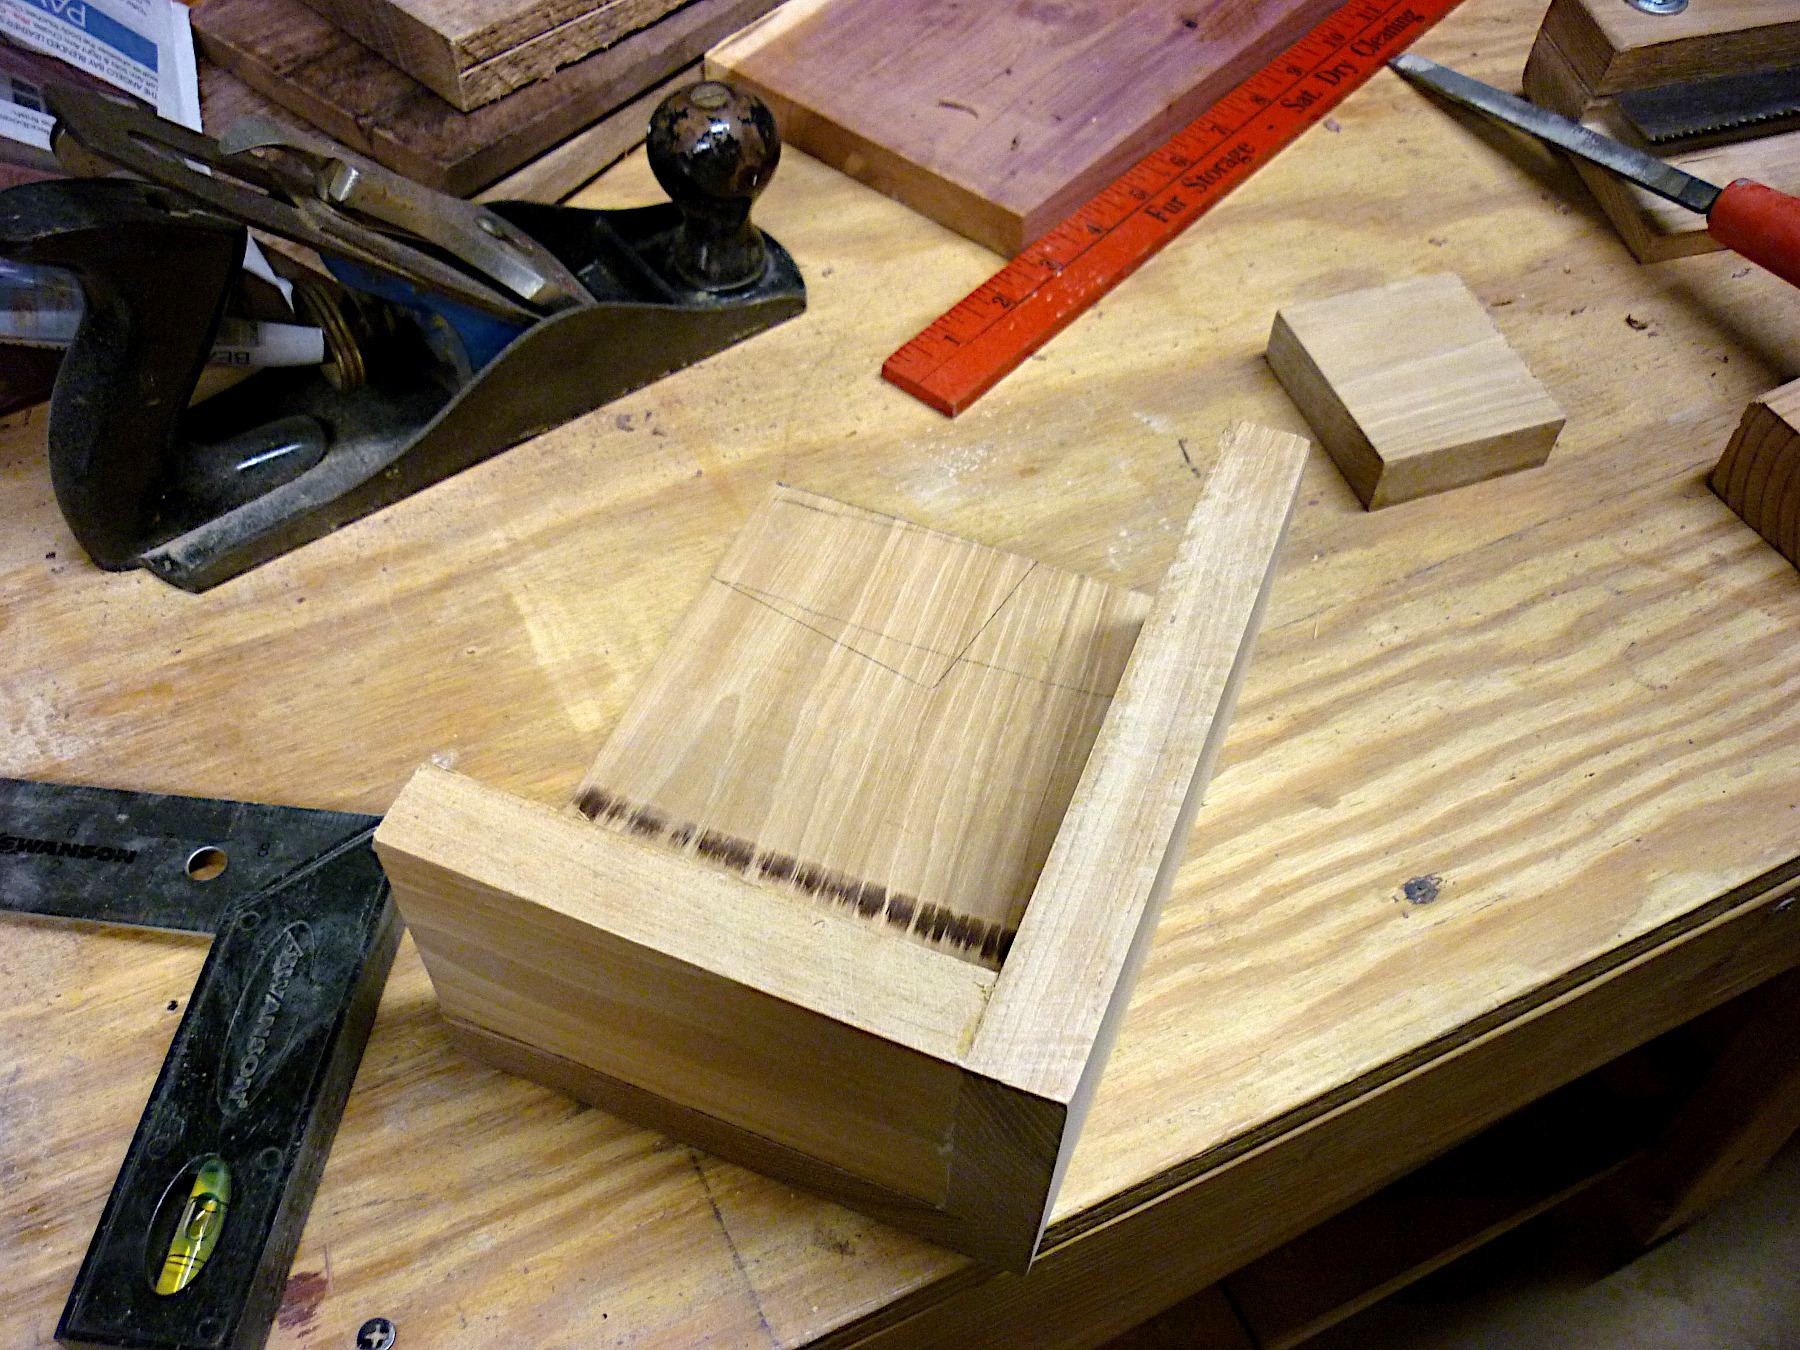
Out cruising bulky item pickup, Joe found a massive five-foot diameter oak table top, a solid inch thick, and salvaged it. To start using it, we decided to make two step stools, slightly larger than my standard plan that I developed years ago (posted February 14th, 2016) to work with 1 x 12 lumber yard planks, more on the line of the one Joe built out of thick mahogany stock for Kyle (see October 1st, 2000 post). It is interesting to see the quality of the wood that commercial furniture makers had to work with in years past. This oak is dense, straight-grained and knot-free with no cup or warp, exceptionally nice wood. Of course, it is tough and hard. When Joe drilled the holes to make the finger slots in the tops, it was more like a wood-burning set than a boring tool - admittedly, the bit was very dull.
May 27th, 2024
Posted by Paul
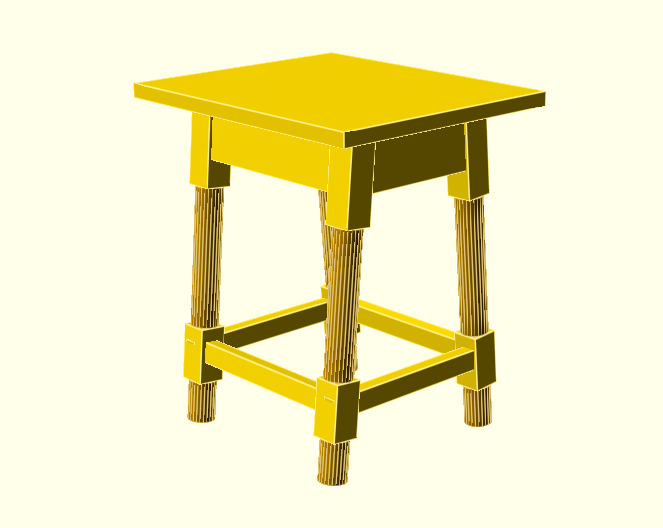
OpenSCAD might be a good tool for drawing plans. One issue so far is that creating the profiles for turned parts looks like it might be very complicated. In this rendering, I have left the cylindrical parts plain, and they could be turned following a hand-drawn profile. Another issue is that like all 3D design programs, OpenSCAD is based on millimeters rather than inches. Converting to inches is not hard, but the output is in hundredths, whereas we are used to working in eighths and sixteenths. The advantage of using OpenSCAD is getting the good perspective views that allow a real appreciation for how the end product is going to look.
May 24th, 2024
Posted by Paul
Joe cut off the pins in the mortise and tenon joints that we set last month, and today we worked on getting the aprons and legs flat enough to install the top. After a good deal of work we got it close and tried clamping the top in place to see if the gaps would pull up. Between racking the frame and slightly bending the top, we got everything tight enough to drill the pin holes through the top and into the ends of the legs - or stiles, as they are properly called. We set the pins and put the assembly aside to dry. Next time we can trim the pins and do a little sanding, and call it done. At some point it will get a finish, but our intention is to let it age a bit first, to see if the colors darken.
April 27th, 2024
Posted by Paul
The joint stool is substantially finished, with the mortise and tenon joints glued and pegged. Remaining is to cut off the pins, level the feet and top edge of the base, and then we can pin the yellow pine top in place. After that, we will give it a little more sanding, put the completed piece in a corner somewhere and let it sit for a month or two, to see if that will allow the colors to deepen and darken. Then we will finish it with a few coats of polyurethane.
This project went together surprisingly easily. It proved that perfectly dimensioned lumber is not a requirement for building this kind of colonial, I would even say post-medieval, furniture. All measurements can be referenced off one surface and any thick or thin sections left to the back. For example, the yellow locust posts varied in dimension by an eighth of an inch or more, so the mortises were located from the front edges of the posts - one eighth setback for a shadow line, plus five sixteenths for the front of the apron, to locate the front of the mortise seven sixteenths back. Then the three eighths mortise was located and any extra depth was left to the back. Likewise, the thickness of the aprons varied a quarter inch or more, so the tenons were located five sixteenths back and made three eighths inch deep. The extra depth was left to the back. All this is exactly how colonial woodworkers handled their riven boards. Seriously, nobody sees the underside of a joint stool unless they are falling-down drunk, and then they don't notice. People have gotten used to closely dimensioned commercial lumber, power planes and joiners, CNC milling machines and such, and they are clueless as to how to handle random dimensions.
I can see how perfectly dimensioned lumber makes it possible to build the more elaborate, I would say baroque, furniture that a lot of woodworkers like, but it doesn't attract me at all. I prefer the colonial vernacular displayed in Kettel and Nutting. There is nothing wrong with the branch of woodworking focused on knowing how to run all the newest and most complex machines, but personally I would rather do handwork, with a few steps done on our rather primitive table saw, chop saw and drill press. Each to their own.
April 18th, 2024
Posted by Paul
The joint stool ("joint"- irregular past tense of "join", analogous to "burn-burnt", "dream-dreamt", "mean-meant"), is now not just a stack of parts, it is truly joined - or joint. The mortises and tenons have been cut and fitted. Now it can rest in assembled state until next time we work, when we will glue and pin it together.
In the earliest colonial days the chair, if there was one, was reserved for the patriarch and all other members of the household sat on either forms (what we know as benches) or joint stools. As the years passed, if the family prospered, they would acquire more chairs. Joint stools gradually disappeared, and of the many thousands, perhaps millions, built during the colonial era, only a few are left. They went out of style and nobody built them anymore, or even bothered to save the old ones.
The heavy structure and simple turnings of the joint stool harken back to medieval times. In those days, planks were riven and turnings were made from green wood, much easier to work with hand tools than modern sawn and kiln-dried lumber. The yellow locust legs of our stool would have been demanding to produce on a kick lathe, but on the Shoprite they were relatively quick and easy. The pine board we used for the aprons, stringers and top, on the other hand, was an ancient one cut on a circular saw and it had a lot of variation in thickness, between 3/4" and a fat inch. A power plane would have made quick work of flattening it, but we don't have one. Rather than hand-plane this much wood, we did as a colonial woodworker using riven lumber would. We established a front for each part and then referenced cuts from that. The cuts on the back fell as they might to make the tenons the right depth.
The tavern table, cousin of the joint stool, had a longer life, and many more of them survived to modern times. We built ours back in 2018 and stained it with walnut that Joe prepared from husks. It is getting blacker by the year as it sits in a truly colonial location, in front of the fireplace, where it picks up dust and soot from the fire. Most surviving colonial furniture looks completely black, unless it has been refinished or heavily cleaned. While the tavern table has the same general lines as a joint stool, only larger, the turnings are thinner and commonly more ornate, and the top is thinner. The habit then was, when entering the large tavern hall, a customer would take a chair and sit where he wanted, perhaps near the fire in the winter, or in the light of a window, and the server would bring a table - so the table shouldn't be too large or heavy.
Joint stools were built with legs unraked, raked one way or raked both ways. Ours is raked one way. The difference is clear when compared to the tavern table, which has legs raked both ways.
For anyone wanting to make a joint stool, plans are included in Kettel's The Pine Furniture of Early New England. The woodworker interested in a full-on colonial hand-tool experience can find Jennie Alexander's and Peter Follansbee's Make a Joint Stool from a Tree at Lost Art Press.
April 17th, 2024
Posted by Paul
Turning is complete and we are working on the joinery.
March 8th, 2024
Posted by Paul
The next project is started - a joint stool from Kettel, plate 60. The top, aprons and stretchers have been rough-cut from pine, and the oak legs are at the lathe.
March 8th, 2024
Posted by Paul

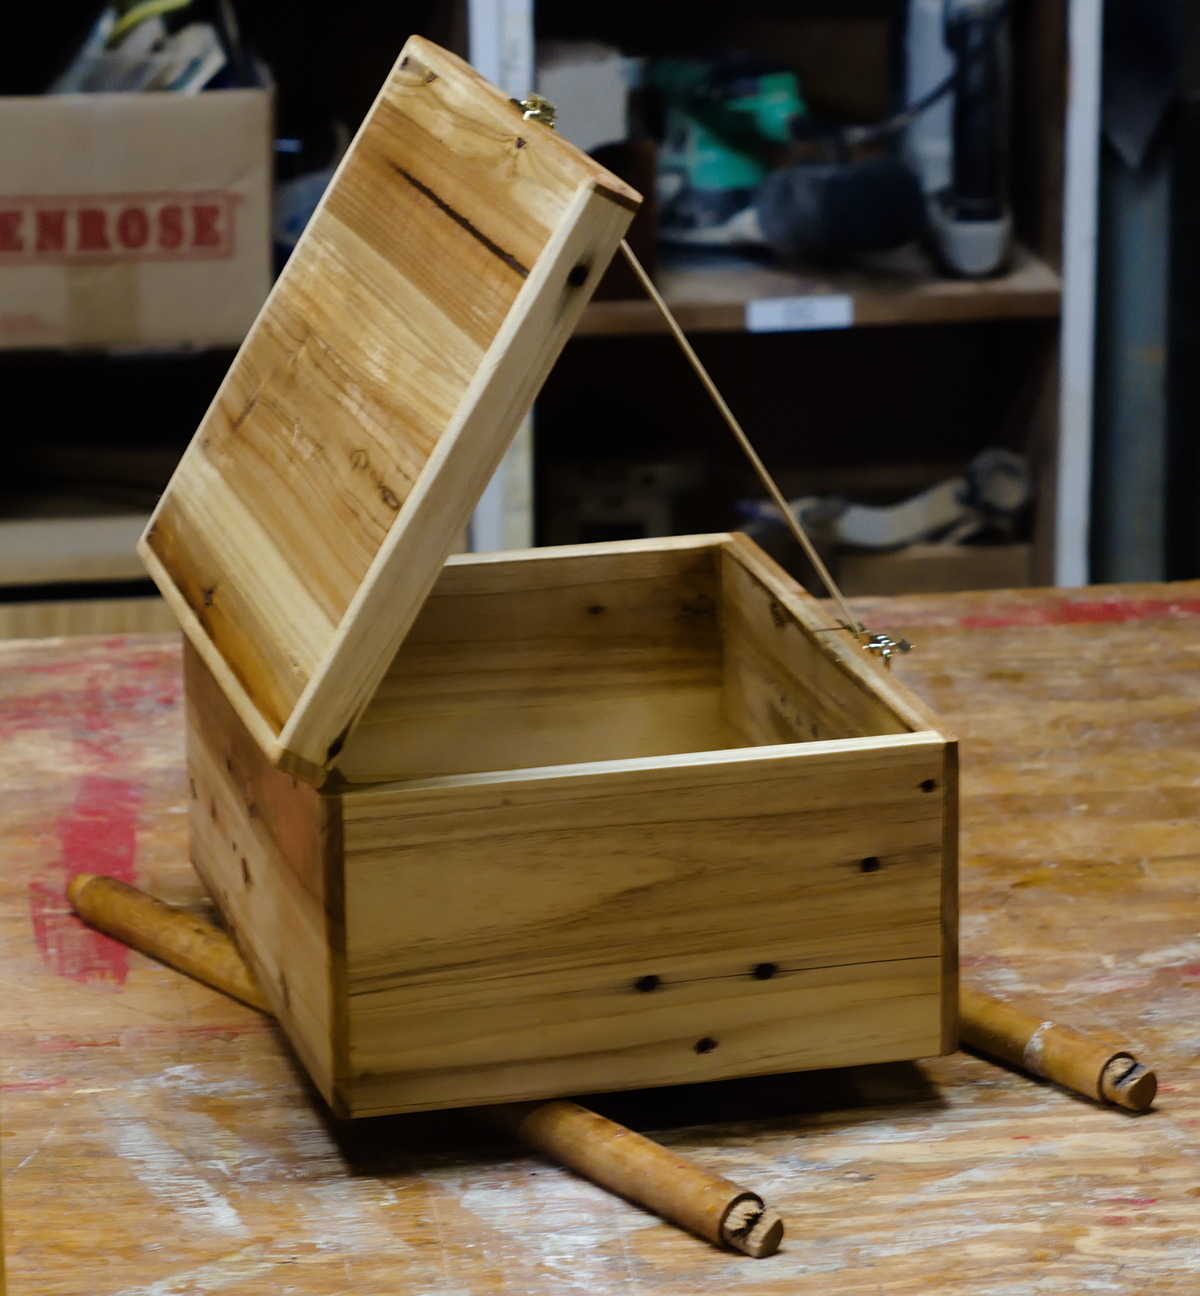
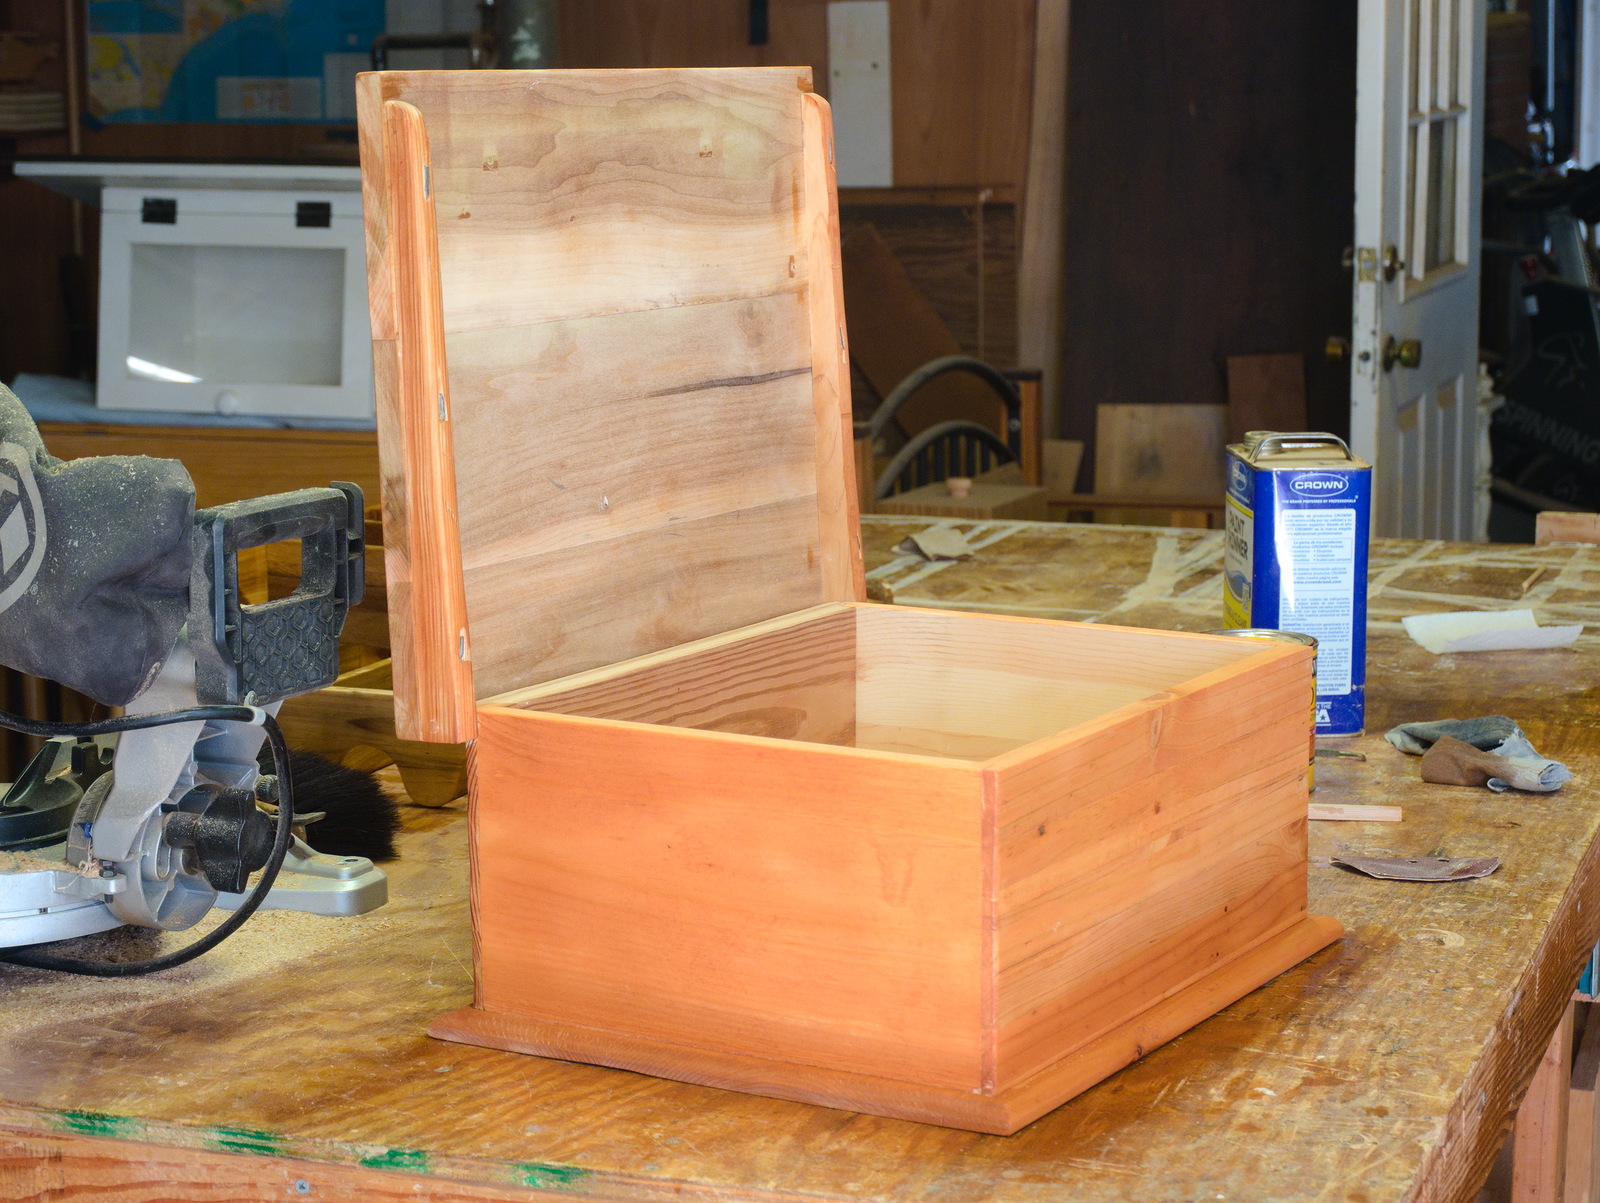
To quote from Wallace Nutting, in his "Furniture of the Pilgrim Century", "The box, otherwise called Bible box or desk box, is a small article designed to rest on a table. Undoubtedly it was sometimes used for a great Bible. But in general it was a receptacle for valuable papers or other articles too small or too important to place in a chest." Since we make so many different forms of boxes, we generally refer to this type of large, hinged-lid box that in many ways is similar to a small chest as a desk box.
Ours is approximately 16x20x8 inches. We have built some slide-top boxes this large, but most of our production is smaller. Anything larger is truly getting into the province of a small chest.
We built this box from the bottom up, with a shallow rabbet all around to locate the sides and keep everything square. I very much like the tapered battens, clenched to the lid, and wooden dowel pin hinges.
The wood is whatever we could find that was close to the right dimensions - a section of old pine board for the back, glued up panels of dimensional construction lumber for the front and sides, a large glued-up panel of poplar from a salvaged piece of furniture for the top, and a non-descript board for the bottom. With the disparate colors and grains, we stained the front, sides and top to bring the colors more in line with the old pine back and dull out the green of the poplar top. We left the inside and reverse of the top unstained. Then we applied a coat of polyurethane, as pictured. We will put another coat or two on as we have time and then probably donate it to a charity auction.
March 6th, 2024
Posted by Paul
Lars and Lex now have their shelves and have started populating them. I think they came out very well, with good proportions and beautiful grain and coloration. We were able to build three of them in one day out of salvage wood, so that adds up to quick, easy and cheap. Practically every house could fit in one or more of these and they would almost certainly be good auction sellers. I'm game for making more, adding them to our repertoire of step-stools and boxes that we build regularly.
February 15th, 2024
Posted by Paul
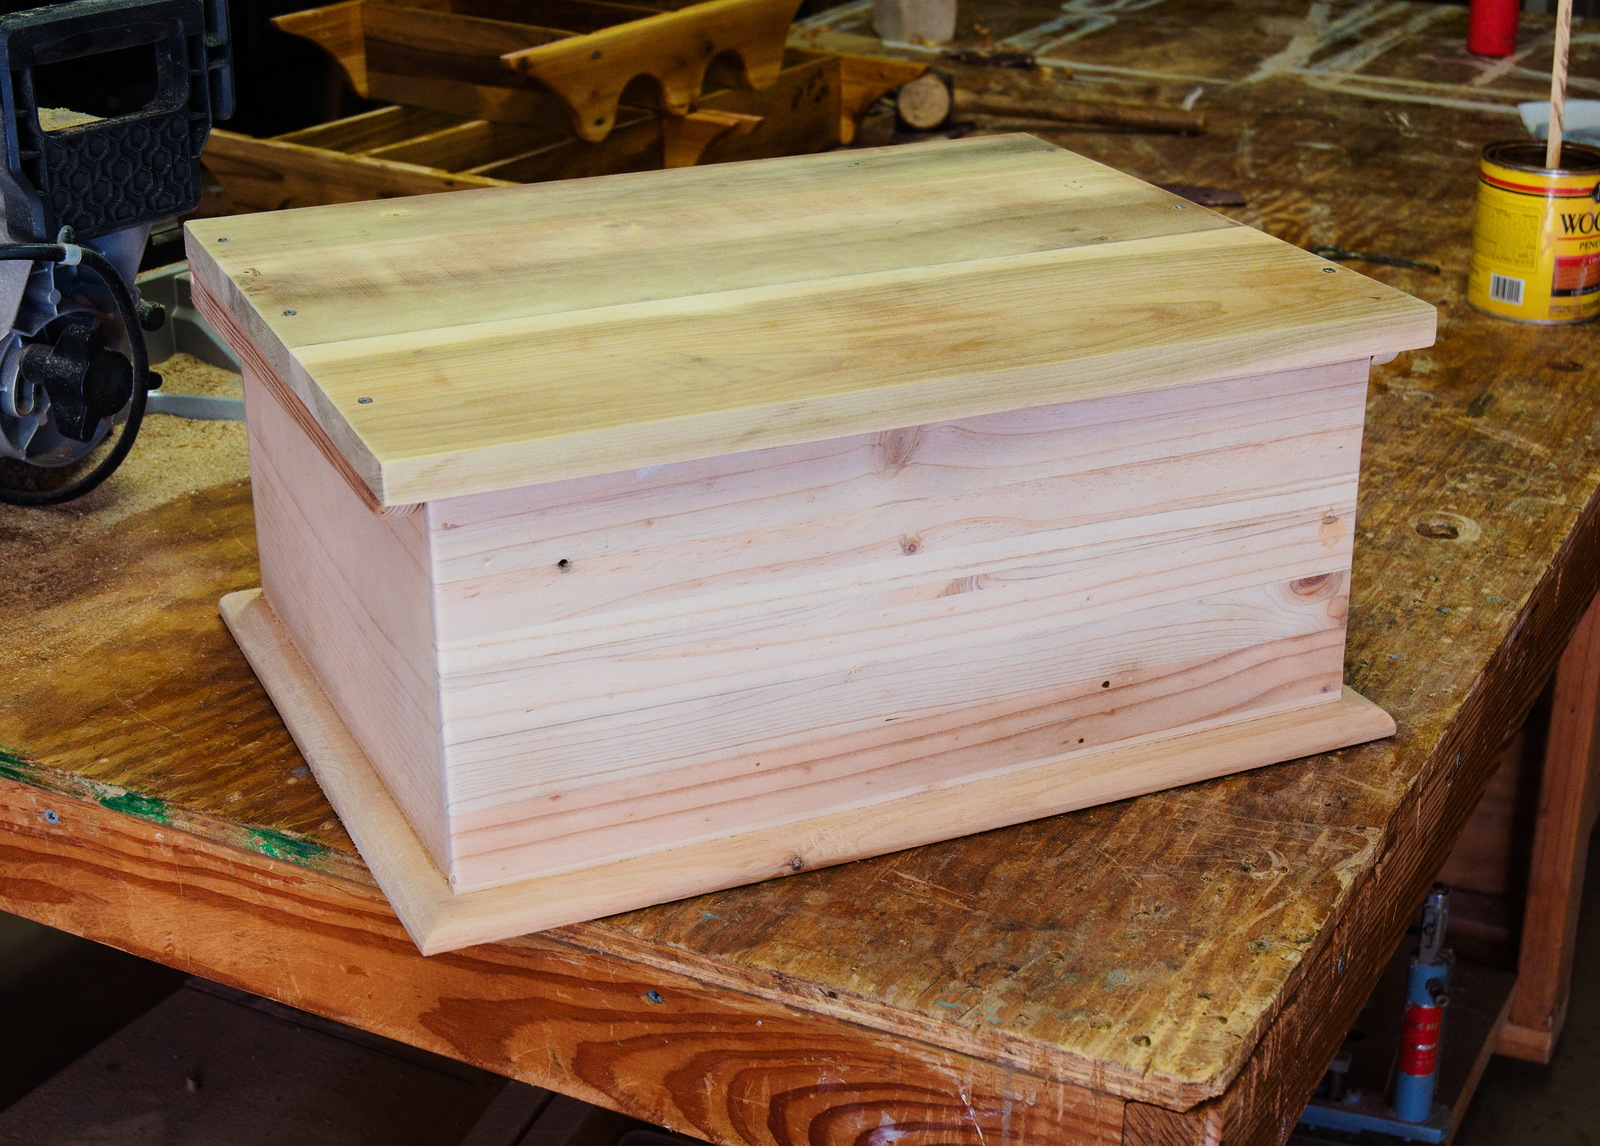
We stained the outside of our desk box to try to unify the disparate woods used in construction - pine, douglas fir, and poplar.
The sides and ends are set into a shallow locating rabbet all around the bottom, and the ends are rabbeted into the sides. Battens are nailed and clenched to the top. The top assembly hinges on wooden pins.
February 15th, 2024
Posted by Paul
The desk box is one of the earliest forms, dating back to Colonial days and long since superceded. It served the function of the household office, or frequently to store the family bible. In later years it was built on a stand, and eventually someone had the idea to slant the top and hinge it at the front, producing the slant-top desk. Next the area within the stand could be filled in with cabinets, and then shelves built above the desk box, soon to be enclosed by beaded-glass doors, creating the imposing high pieces seen in the offices of lawyers and accountants.
February 12th, 2024
Posted by Paul
The shelves look even better with a second coat of poly.
February 5th, 2024
Posted by Paul
A little sanding and the miniature shelf sets were ready for a first coat of finish. The grain came out nicely under the polyurethane. In the background is a large desk box in the clamps.
January 26th, 2024
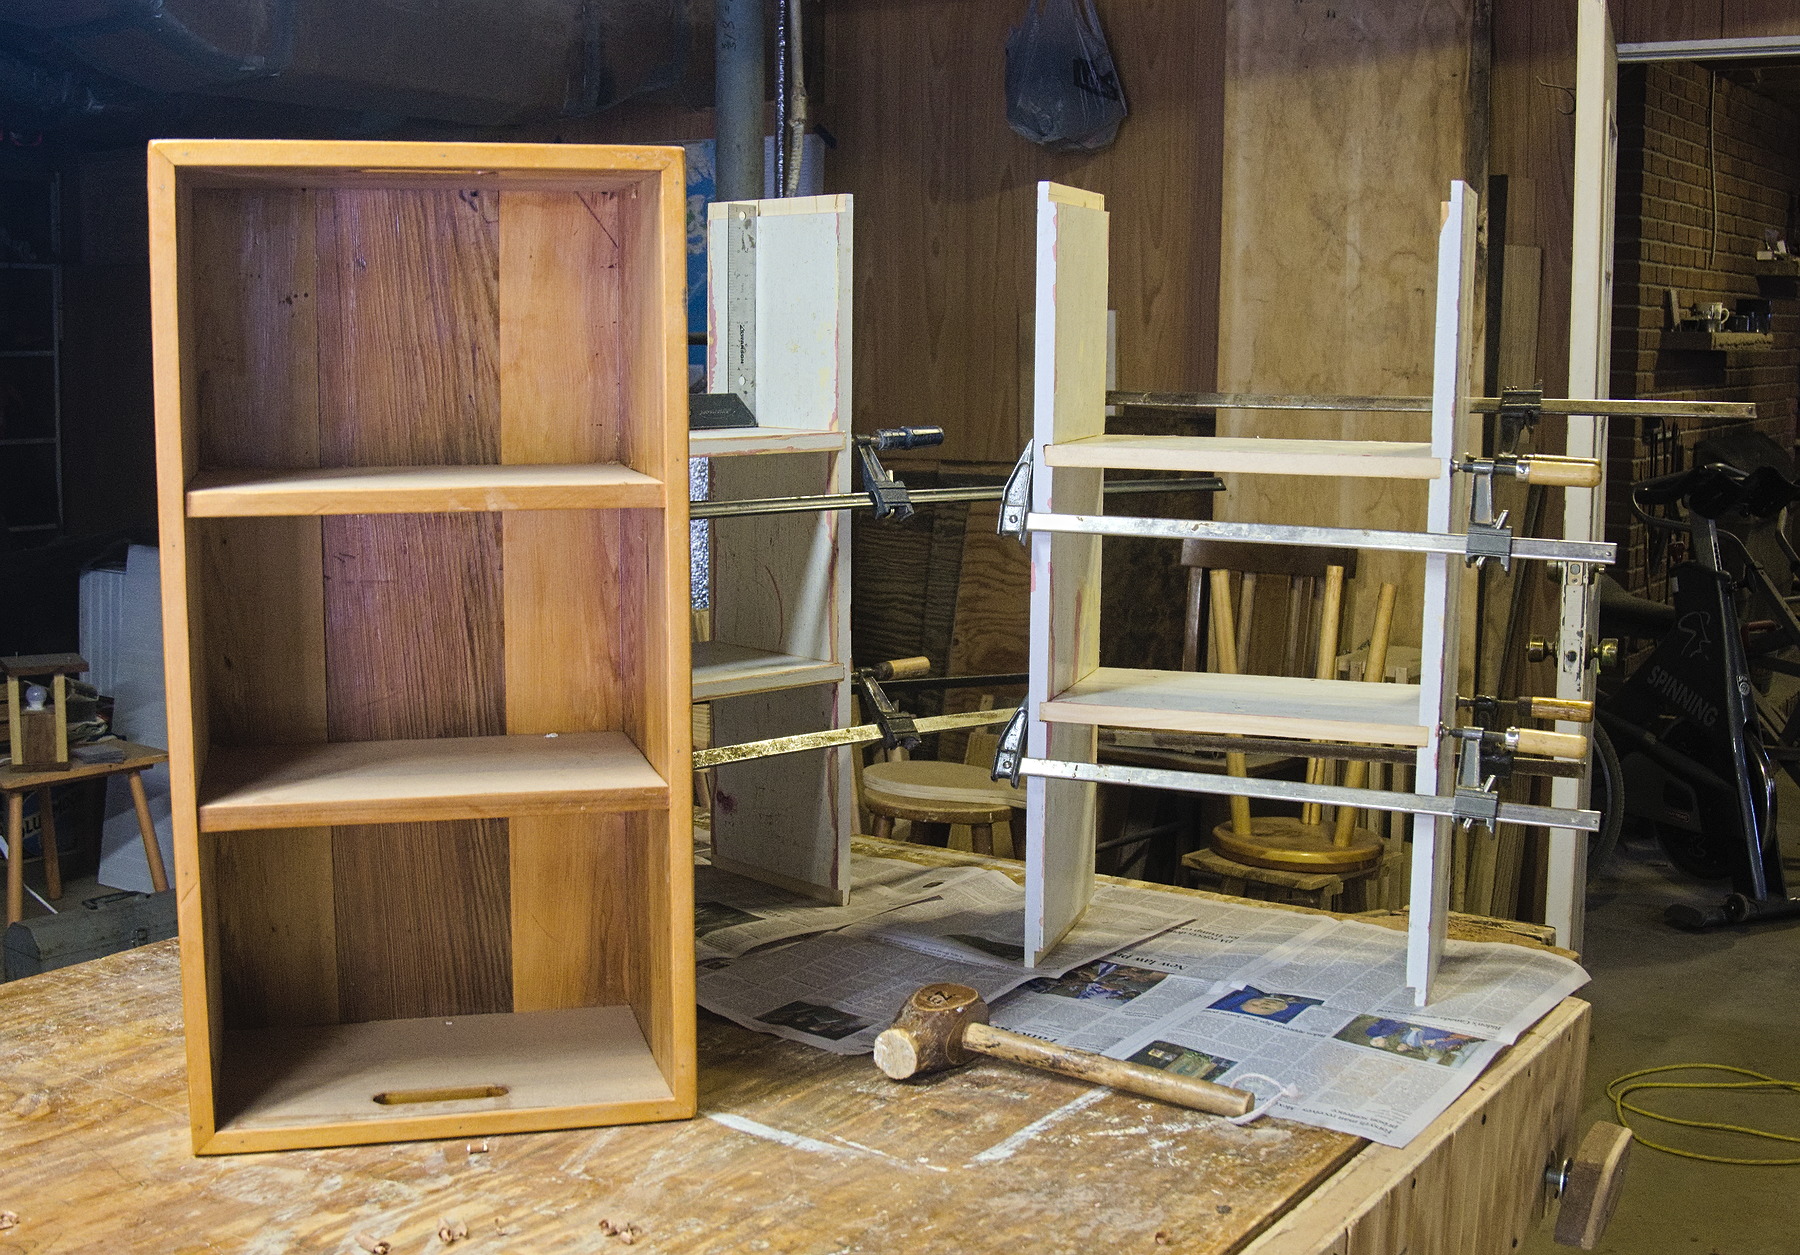
Posted by Paul
In May 2022, when we built the set of hanging shelves based on Plate 128 from Kettel's "The Pine Furniture of Colonial New England", I said I hoped we would get a chance to build it again. Today we constructed three copies in miniature, with all dimensions reduced by half. Joe came up with a couple of techniques to make the work go quicker - keying and taping the two sides of each unit together so that work could be done on both at once, and using a hole saw to cut the major indentations of the scallops, which greatly simplified the jigsaw work. Another time-saver was finding pre-dimensioned salvage wood in inventory. Finally, cutting all the parts for three units at once saved on setting up the tools. I plan on giving Lars and Lex one each, and I am sure Joe can find someone who wants the other. For that matter, they might be good sellers at charity auctions, and as quick as they are to build, we could make more.
December 7th, 2023
Posted by Paul
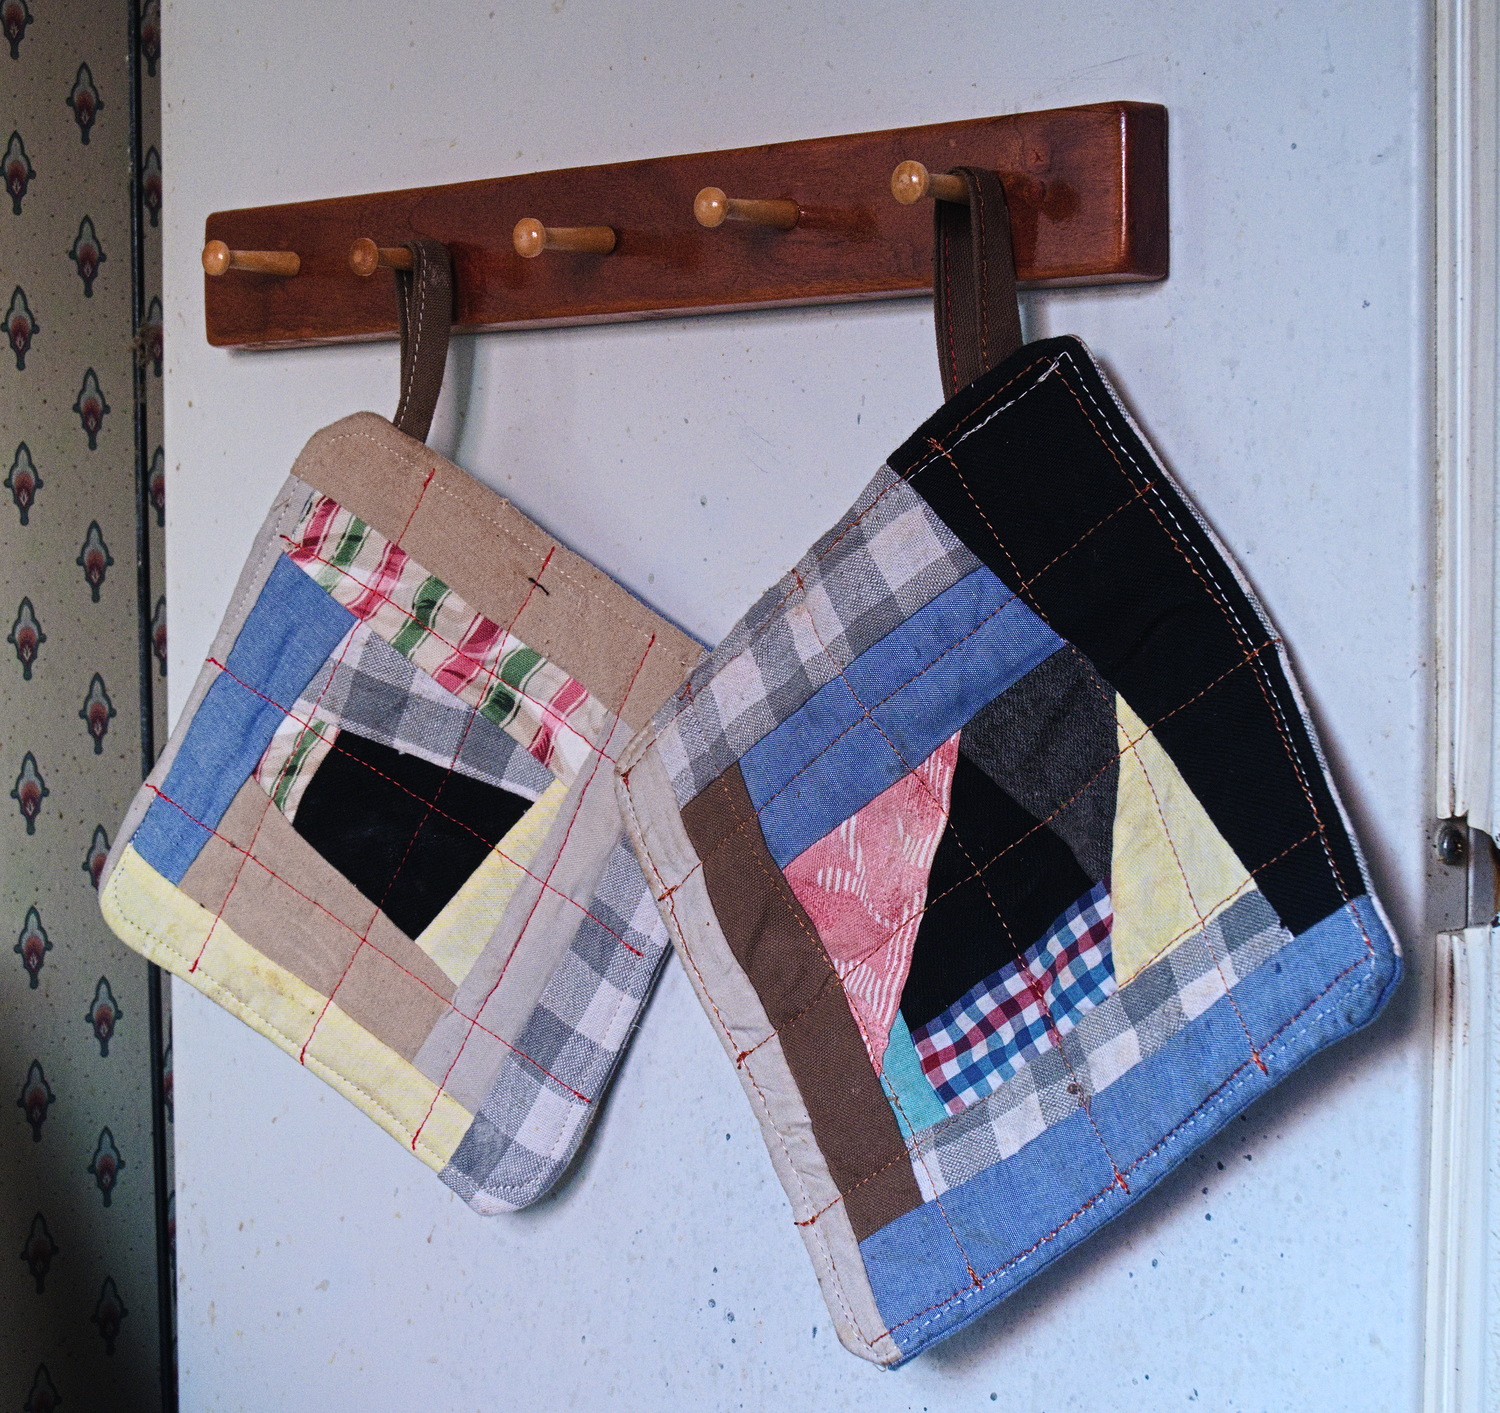
There is just enough room between my refrigerator and stove that I can hang my potholders and not worry about setting them on fire. This was a quick and easy project using a scrap of cherry, some purchased pegs, and two strong magnets.
December 2nd, 2023
Posted by Paul
Payday at the shop. In the front, a table leg and a poplar table top destined for the boat. At right, two butternut open-top boxes which Joe will give as New Years Day presents (Joe and I are both foot soldiers in the War on Christmas), and to the left and behind, crates that will be donated for a burn survivors sale.
November 21st, 2023
Posted by Paul

The bench is one of Joe's side projects. He found it in decrepit condition, with rotted and deteriorated wood, and rebuilt it to like-new condition. All it needs is upholstered cushions, which I think would be a great next project for Joe now that he has discovered the joys of sewing. Also pictured are a few crates that he is getting together for an upcoming burn survivors auction.
October 29th, 2023
Posted by Paul
Here is a diaper shelf unit we built for Audrey. I drew it using dimensions from the unit advertised on Amazon that she wanted, but it seems far too big and heavy to hang on the wall. So we built a table for it to sit on.
October 25th, 2023
Posted by Paul
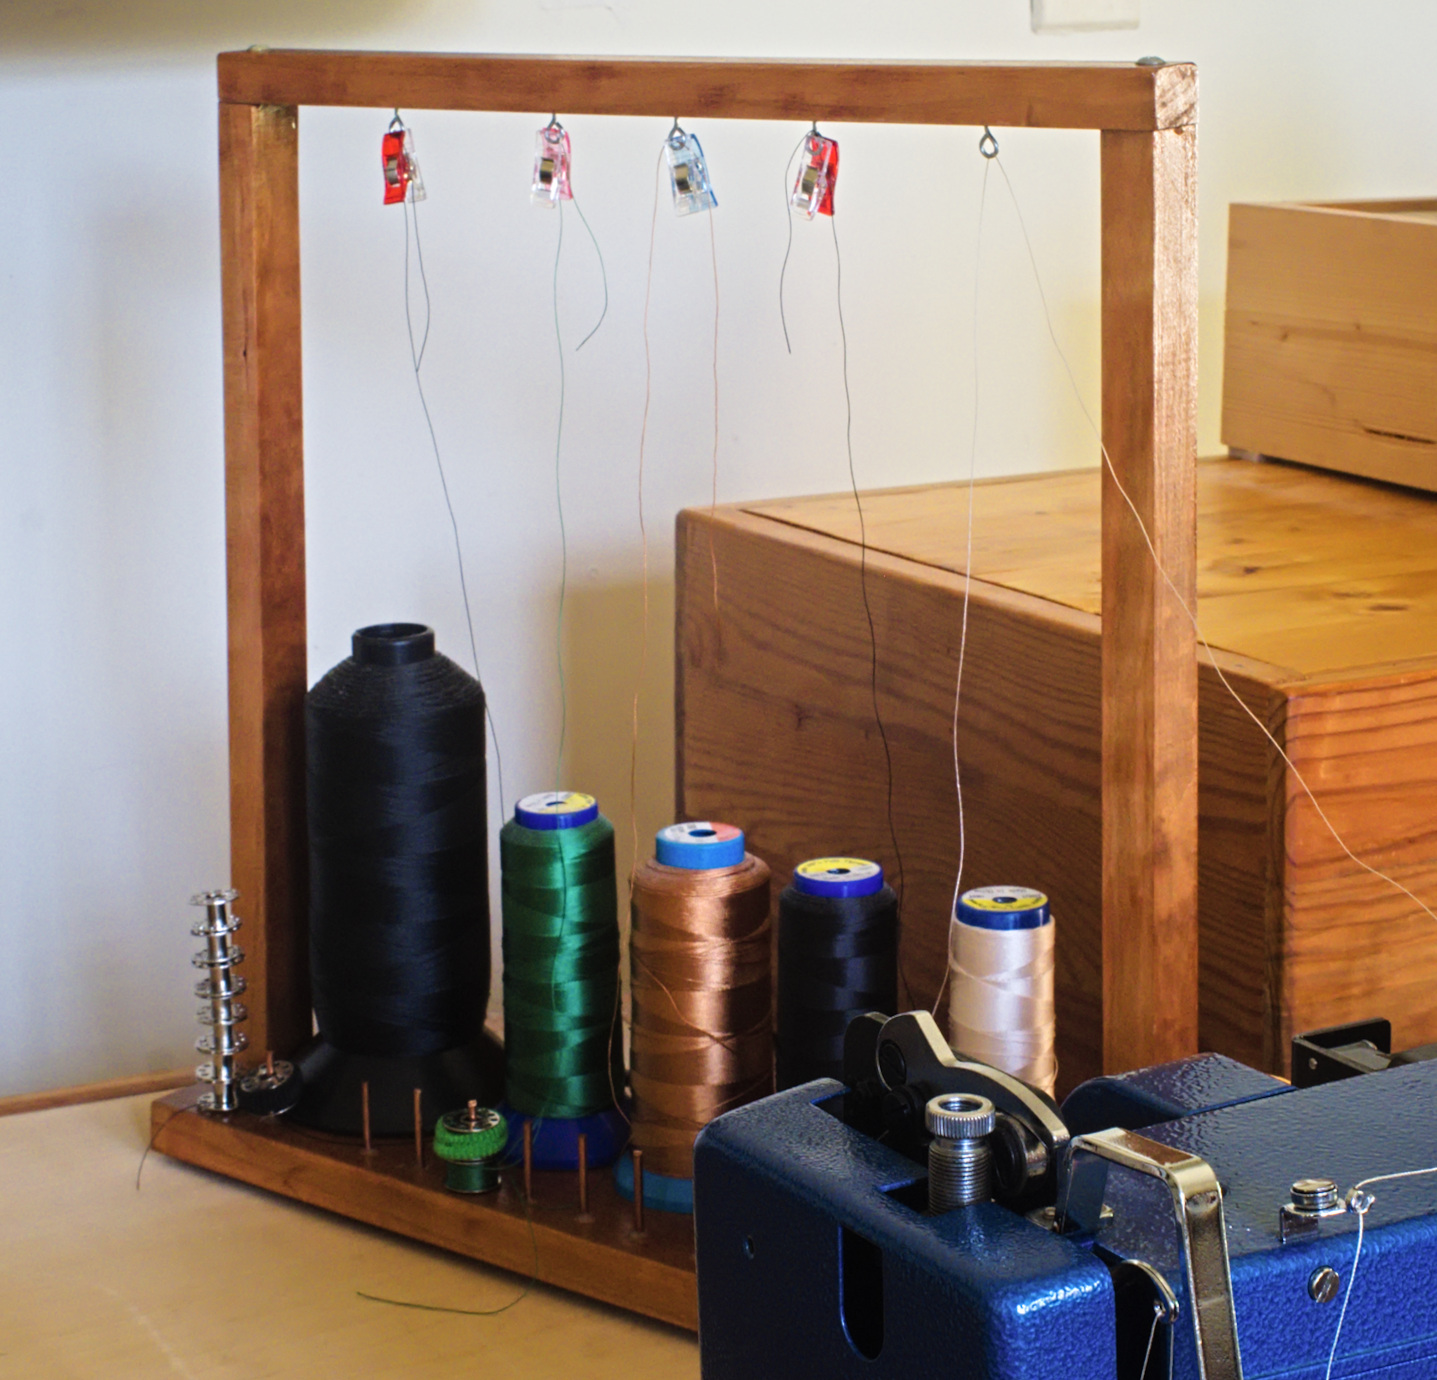
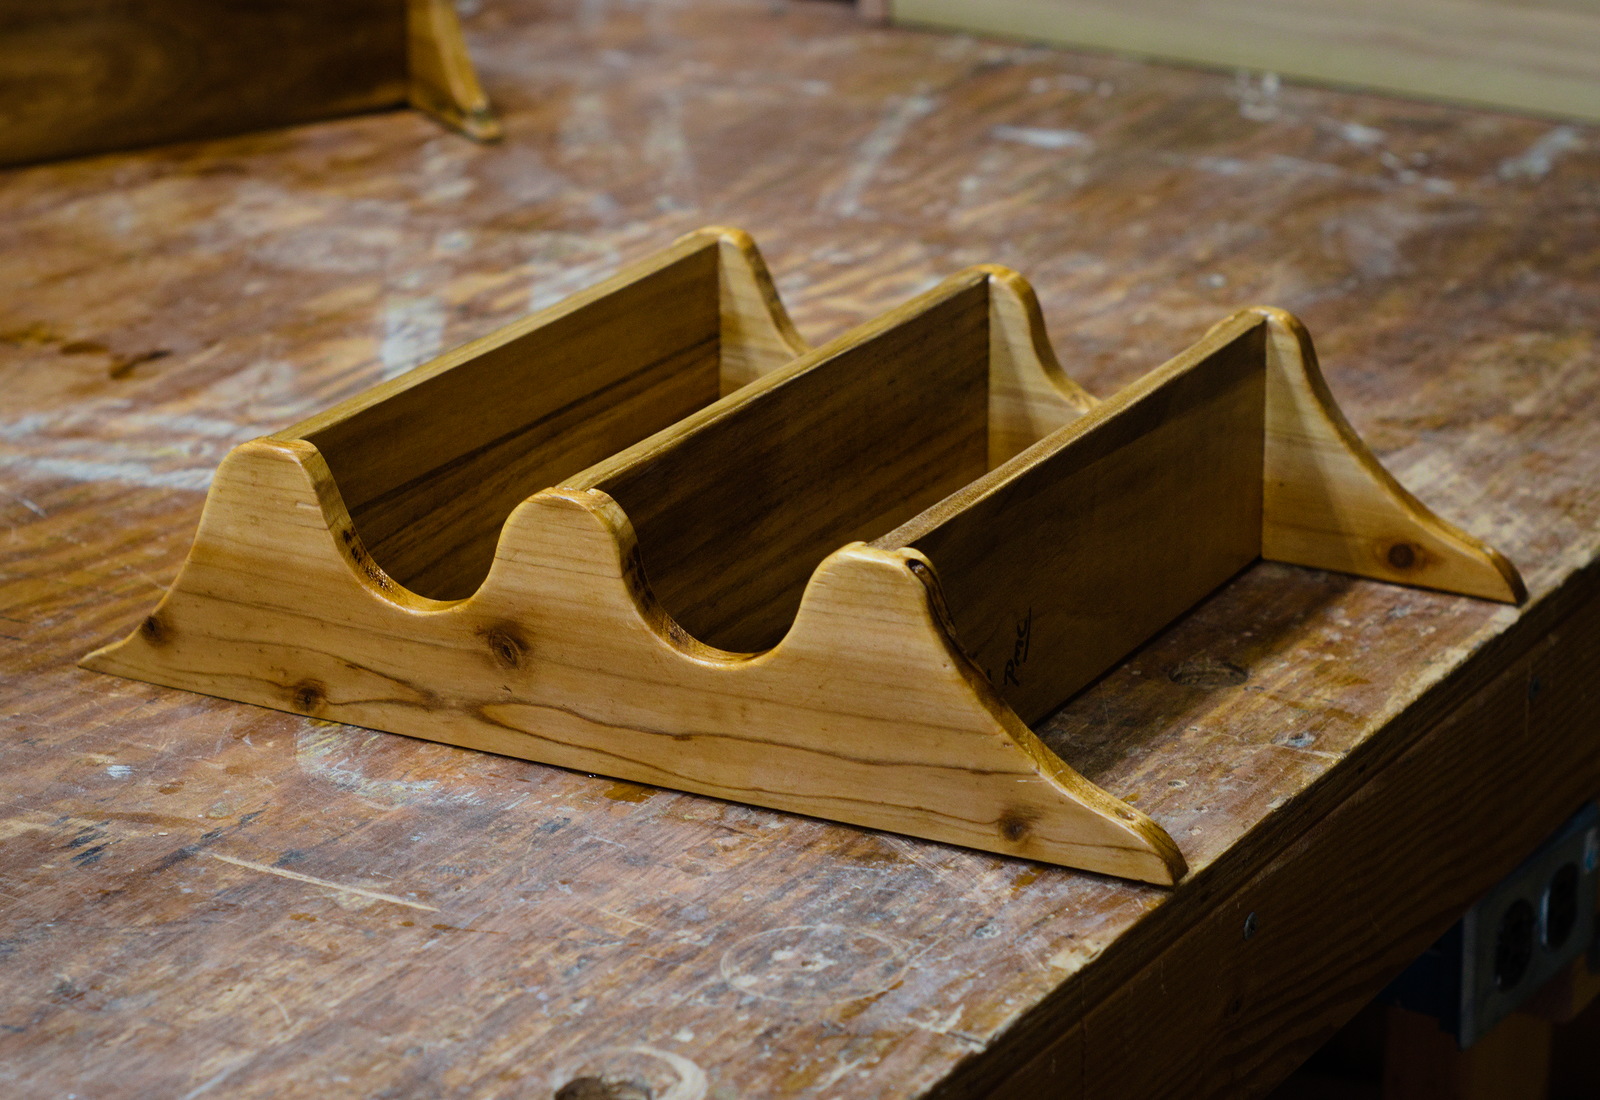
By the time I left the shop yesterday, the thread cone rack had dried enough for me to gingerly carry it out to the truck and on home, and by late in the evening it was dry enough to lightly sand and rub on a second coat of finish. This morning I repeated the process, and by the afternoon it was dry enough to install the pins and screw eyes. So now it is complete and in service on my sewing table. I expect if any quilters or sailmakers, both people who use a lot of thread, see this post, we may get some requests for duplicates.
October 24th, 2023
Posted by Paul
Marie's friend Audrey recently had a baby and so we built this shelf unit to hold diapers and other infant paraphernalia. We used dimensions from one that Marie pointed out at Amazon. It ended up ridiculously big for something meant to hang on the wall, so we built a table to hold it.
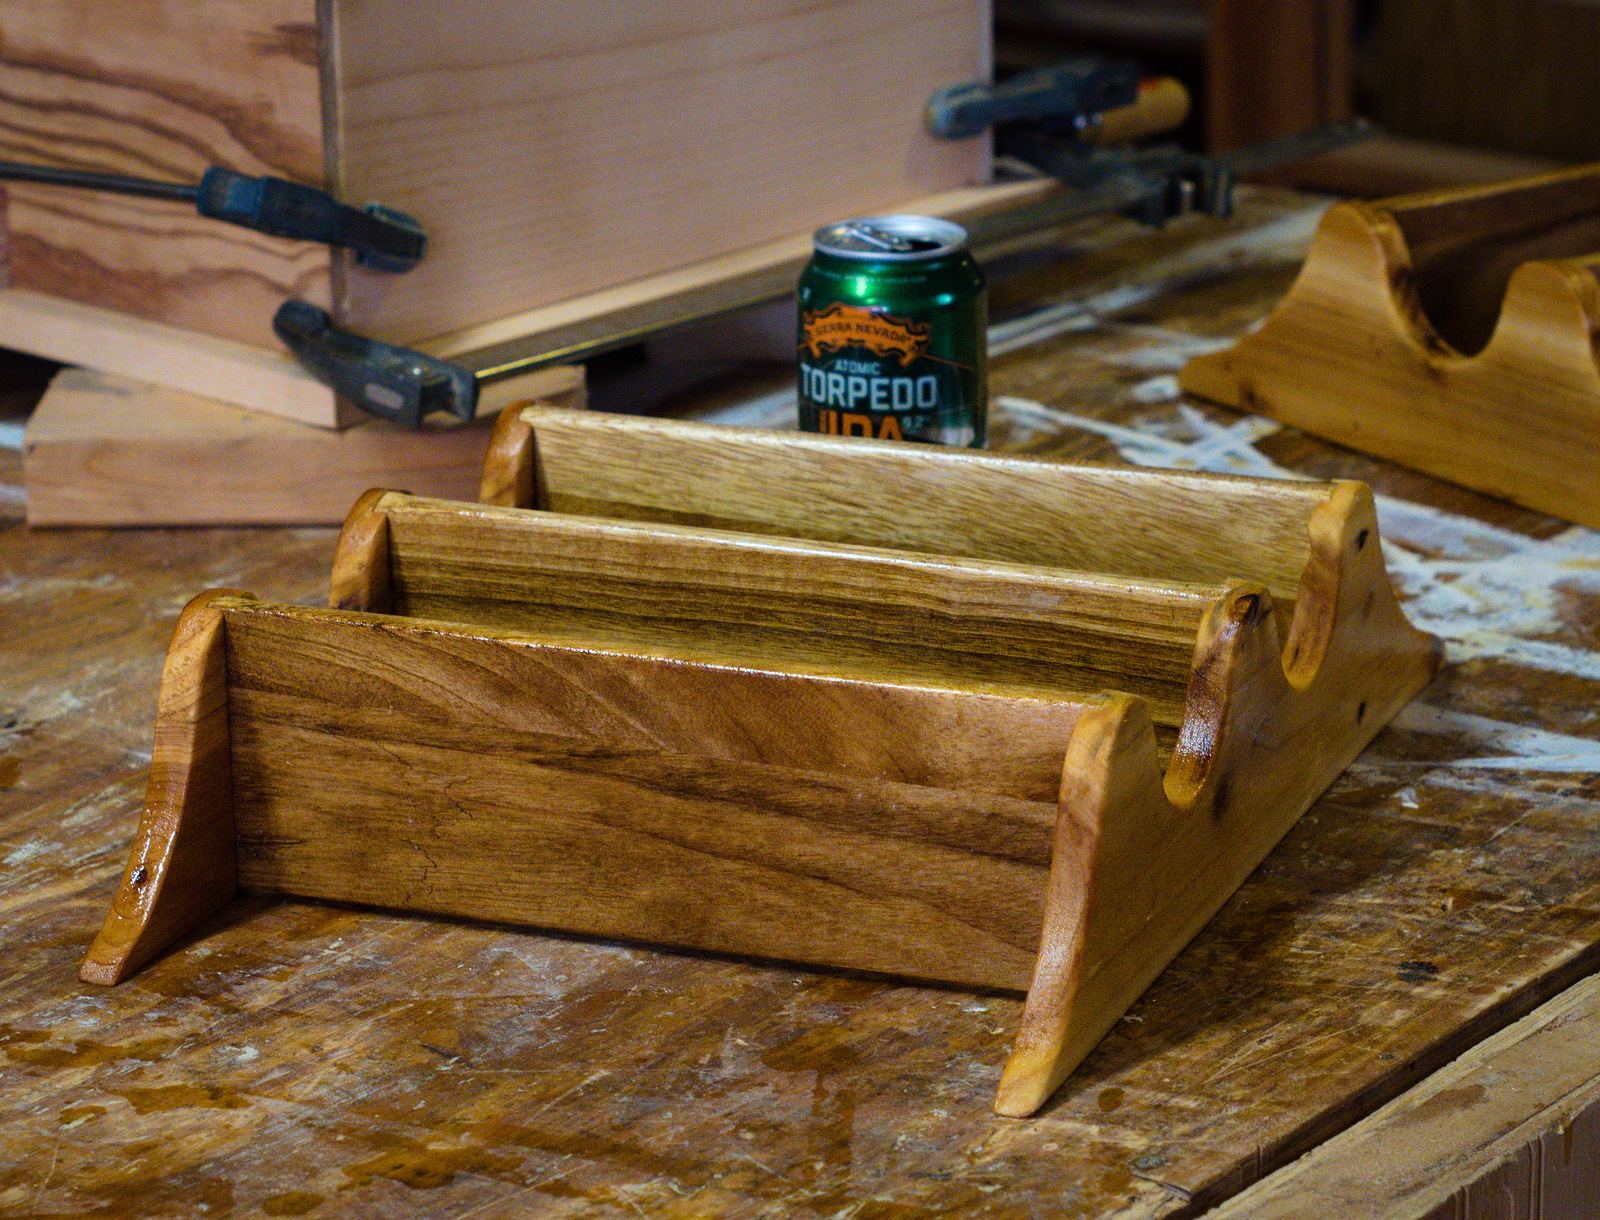
In front is a partially-completed rack for thread cones. It should be done in a few days.
October 20th, 2023
Posted by Paul
This staked table went together quickly and it looks good, but it has some defects that only Joe and I would ever notice.
September 9th, 2023
Posted by Paul
We're still making boxes. This one is salvage wood, hinges that our friends Rich and Sue provided, and a purchased magnetic catch.
August 23rd, 2023
Posted by Paul

Lars and Lex took their wooden battleships to the creek the other day. Joe and I built them winter 2021/2022.
August 20th, 2023
Posted by Paul
A wooden mallet is a good tool to have. We made this one a while back and gave it to our friend Mark, who has bestowed so much furniture-building wood on us over the years. Yesterday it got used tapping a length of rubrail in place on his Sunfish sailboat.
August 14th, 2023
Posted by Paul
In 2017 we built a hard maple board to fit into the top of the bureau in the forepeak of my sailboat Terry Ann. It's gotten a lot of use over the last six years as I have reconditioned the 1964 vintage Alberg 35, and there is plenty of work still to be done. The board has held up fine. Maybe I'll clean it up with a sander, not that it would improve the functionality. The forepeak is the utility section of the interior of the boat, though my crew Taylor likes to sleep on the starboard settee up there.
August 13th, 2023
Posted by Paul
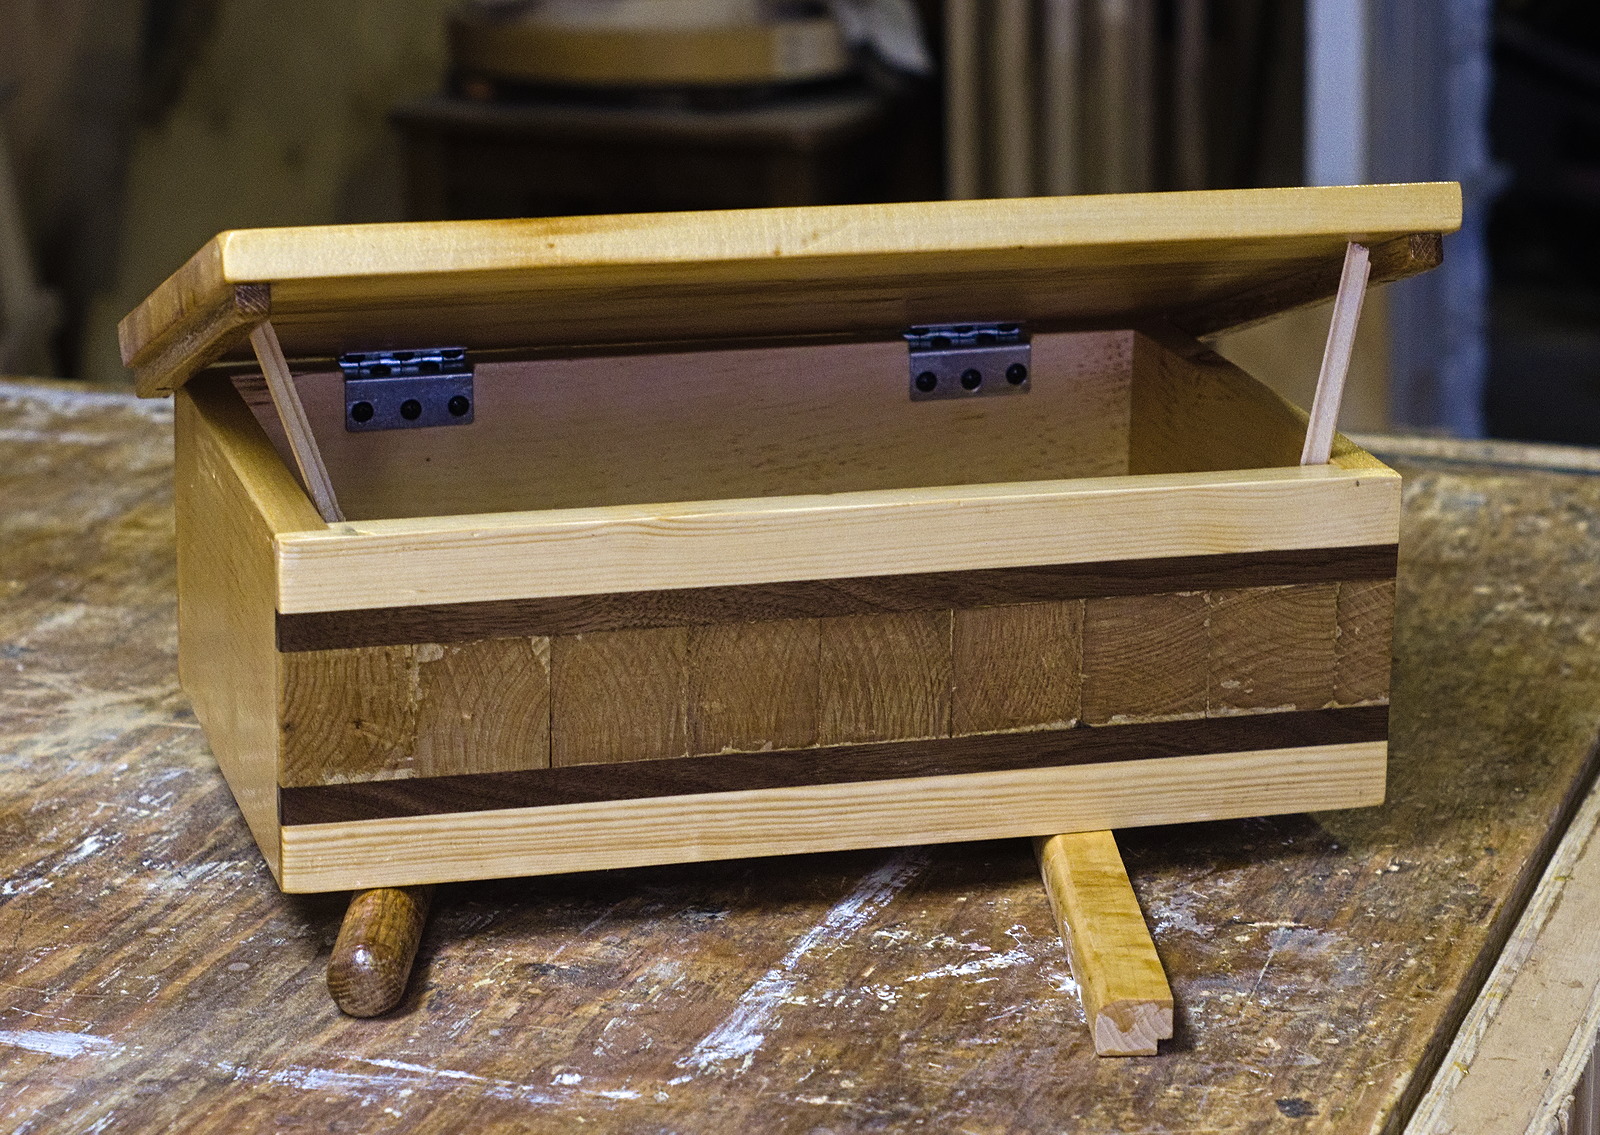
A box we made using a technique that Paul Sellers uses to make picture frames - stacking end-grain sections of wood for visual interest.
July 12th, 2023
Posted by Paul
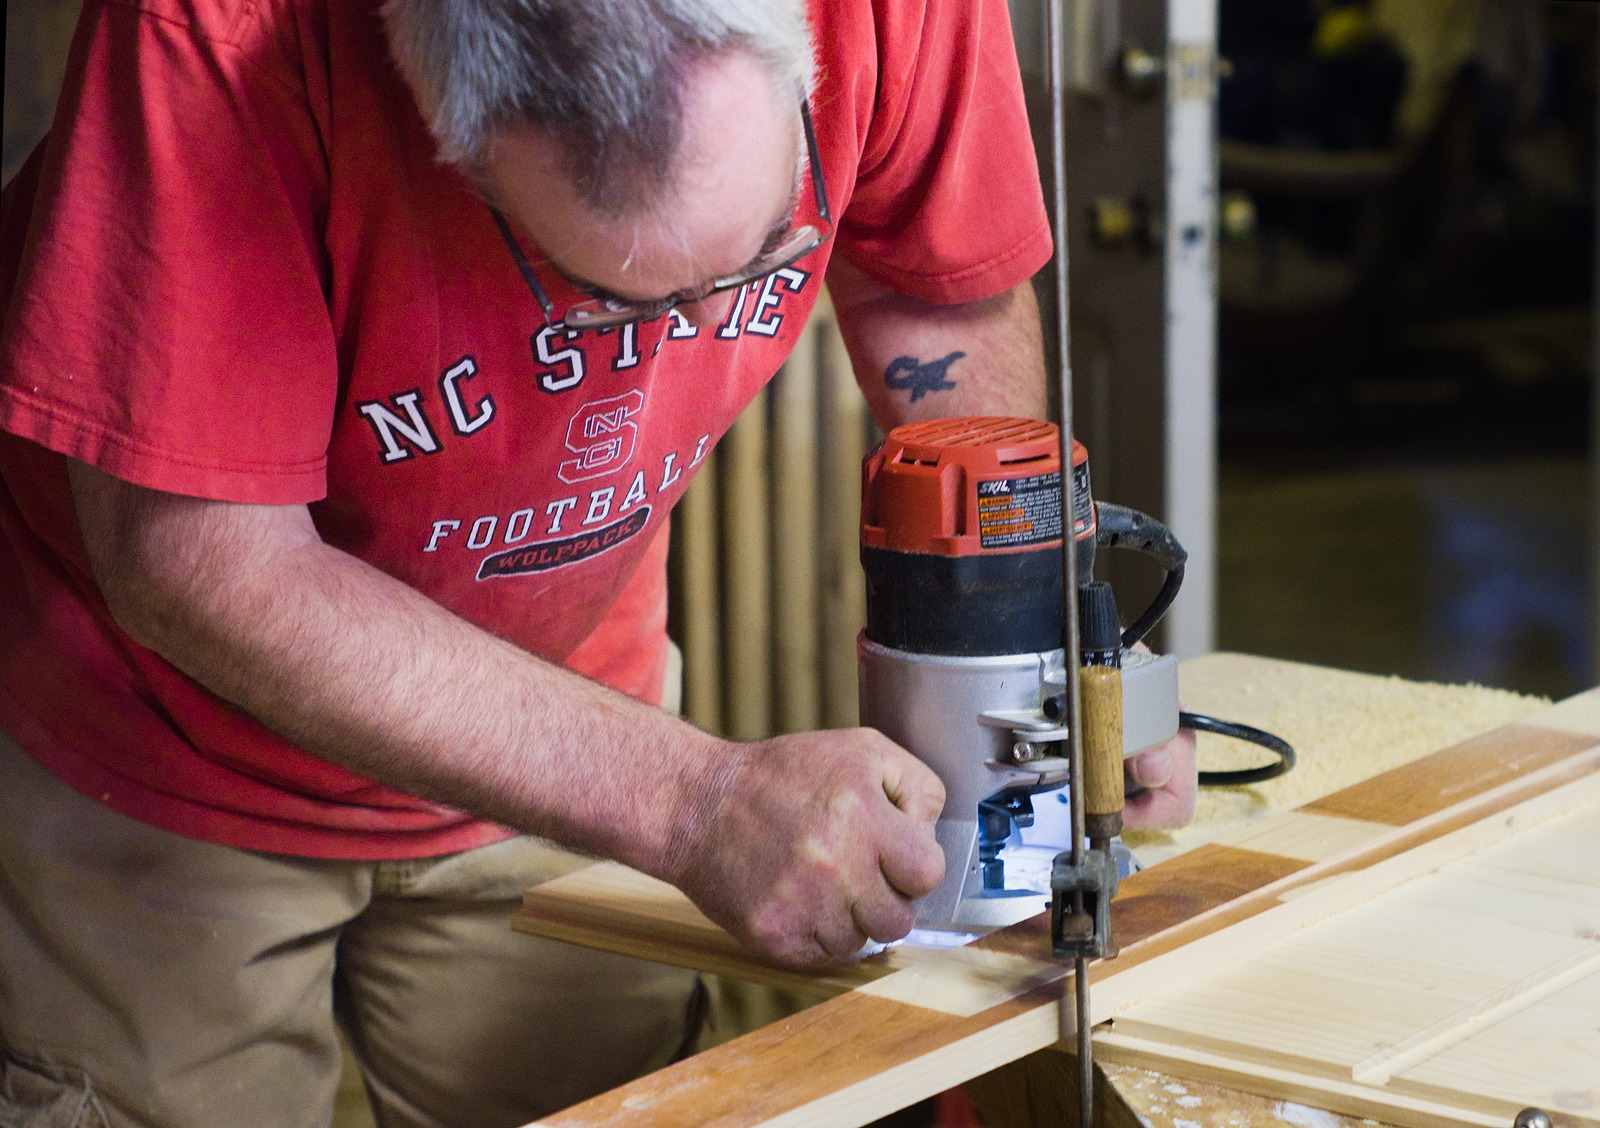
There are a couple of routers in the shop, but they don't get much use. I never had much success with them, and Joe doesn't enjoy them, even though he usually can get decent results. But today, after spending a fair amount of time wrestling with seemingly intractable issues cutting dadoes in a set of wide boards, we turned to the router and managed to get the job done. Maybe this means we will start using the routers more. With practice, I might be able to make some simple cuts with one, and Joe could learn to like the things.
July 6th, 2023
Posted by Paul
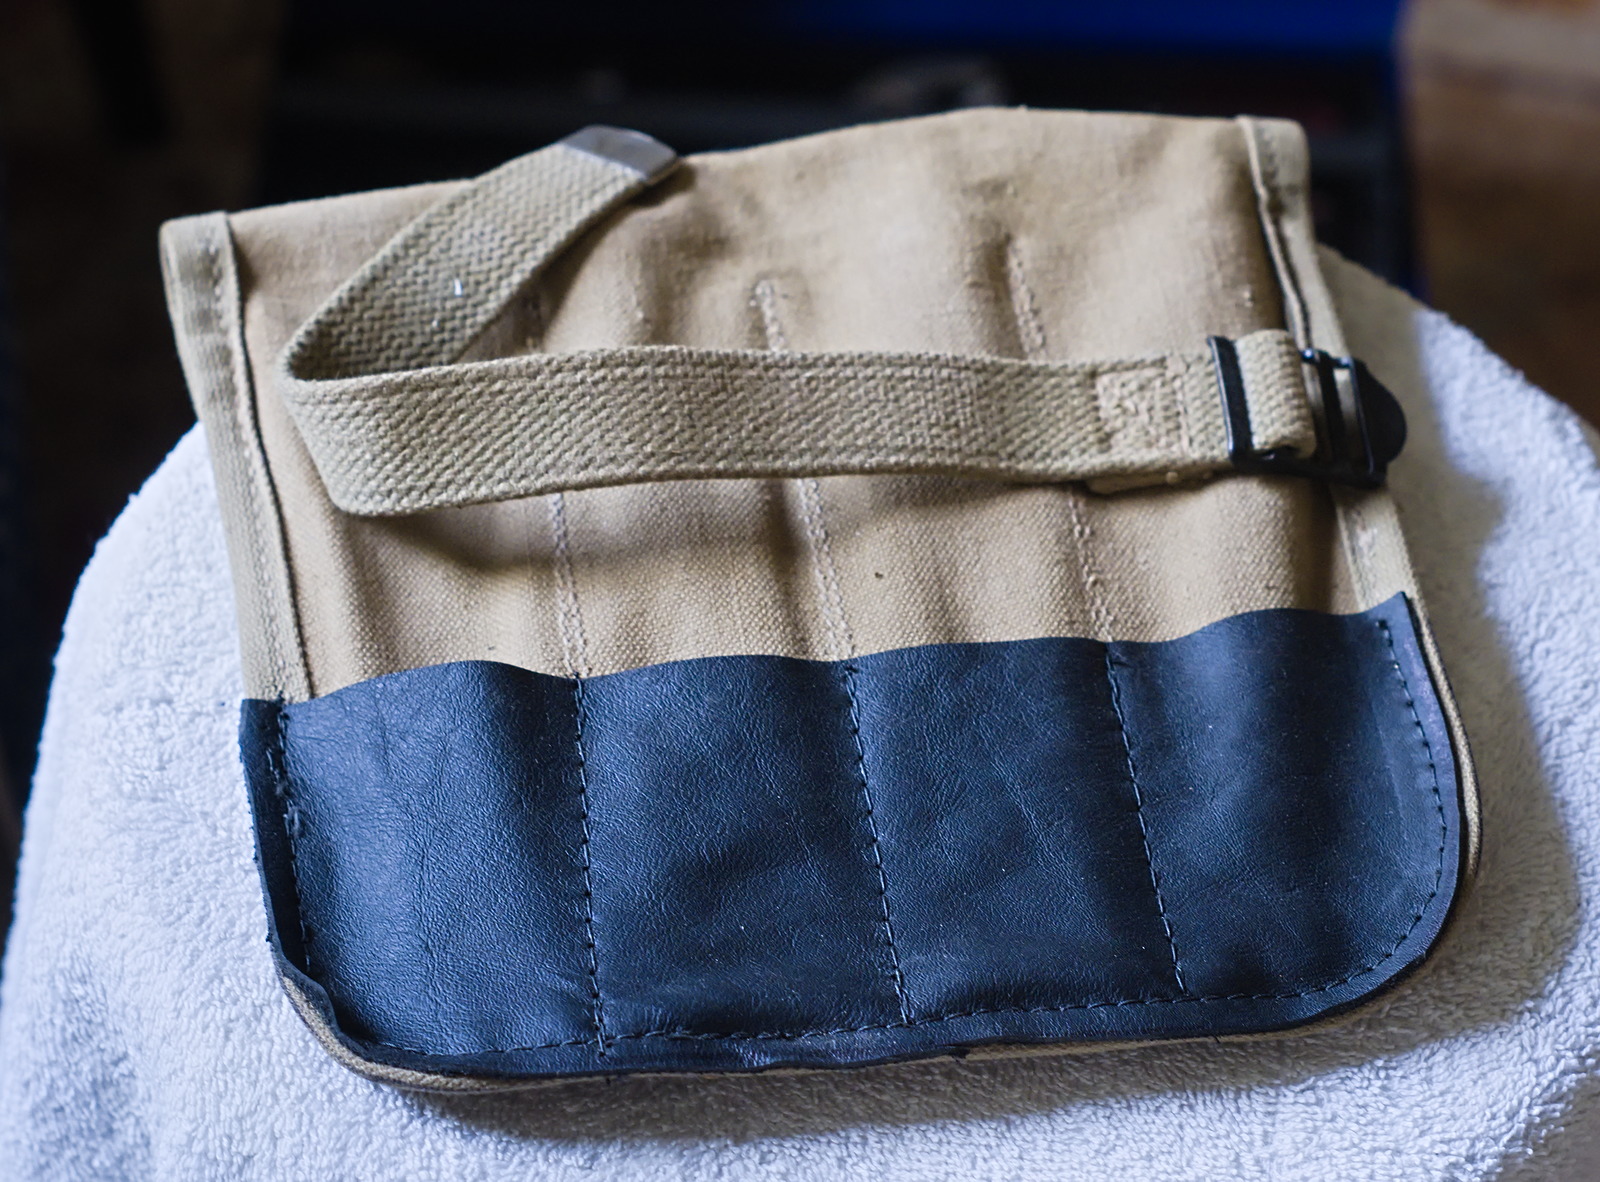
The chisel roll wore through in a corner. Joe had some thin leather available, so I took it home and patched the roll on my Sailrite machine.
July 5th, 2023
Posted by Paul
Paul Sellers demonstrated using end-grain cutoffs sandwiched between contrasting wood to make nice picture-frame stock. We adapted the technique to make the front to a box.
June 18th, 2023
Posted by Paul
The yellow pine stationery box we made for Marie in 2018 has picked up a few marks, but is still as solid as the day we built it.
May 30th, 2023
Posted by Paul
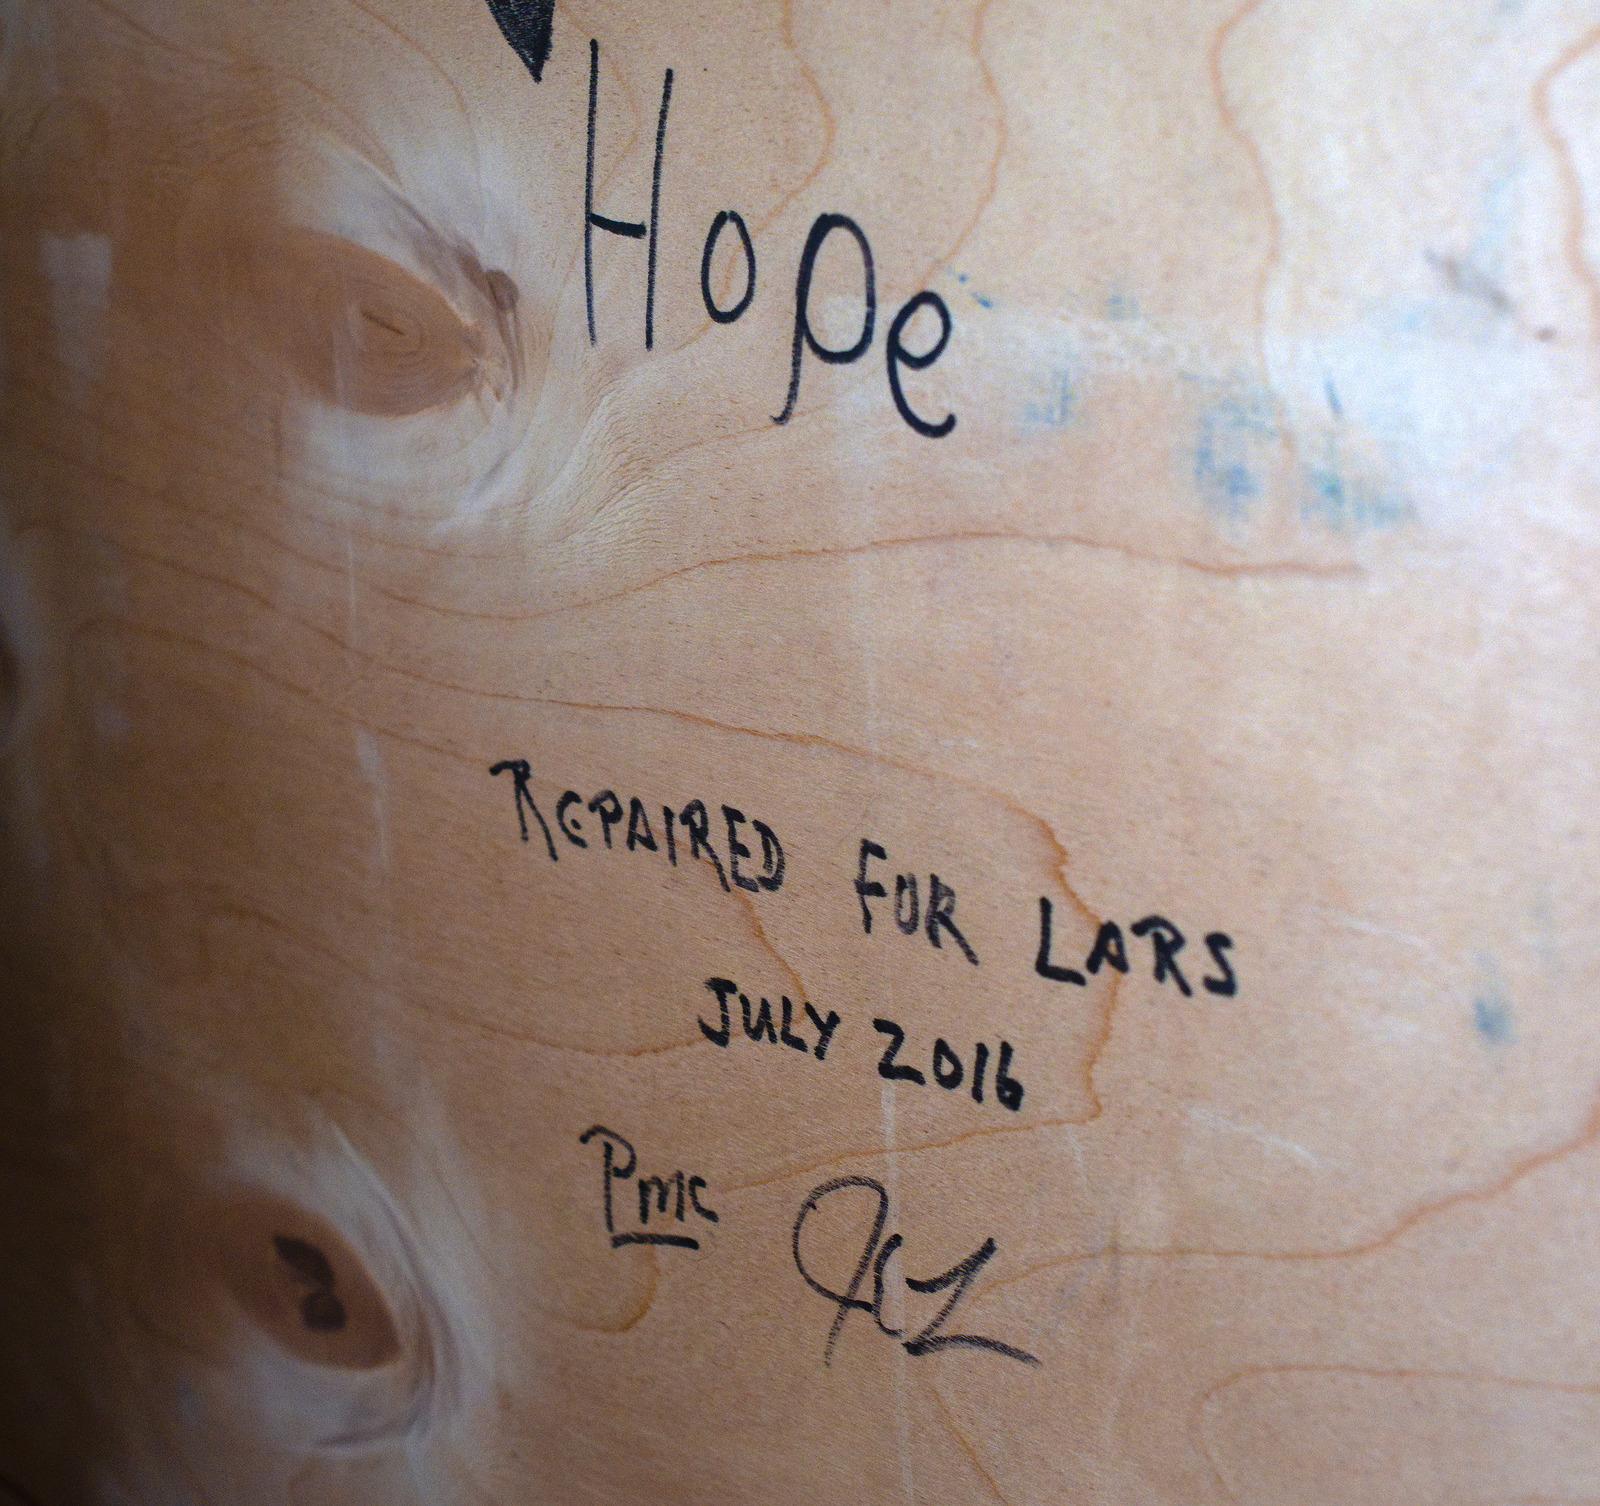
Marie asked me to repair a chest of drawers for her and help her move it into another room. The repair was simple, the bottom was coming out of one drawer and I slid it back in place and added a few brads. On moving it, I found an inscription showing Joe and I did repairs on this chest in 2016. Hope must have been in the shop that day because she signed it too. Lars would have been two years old when we repaired it, Hope would have been nine.
May 19th, 2023
Posted by Paul
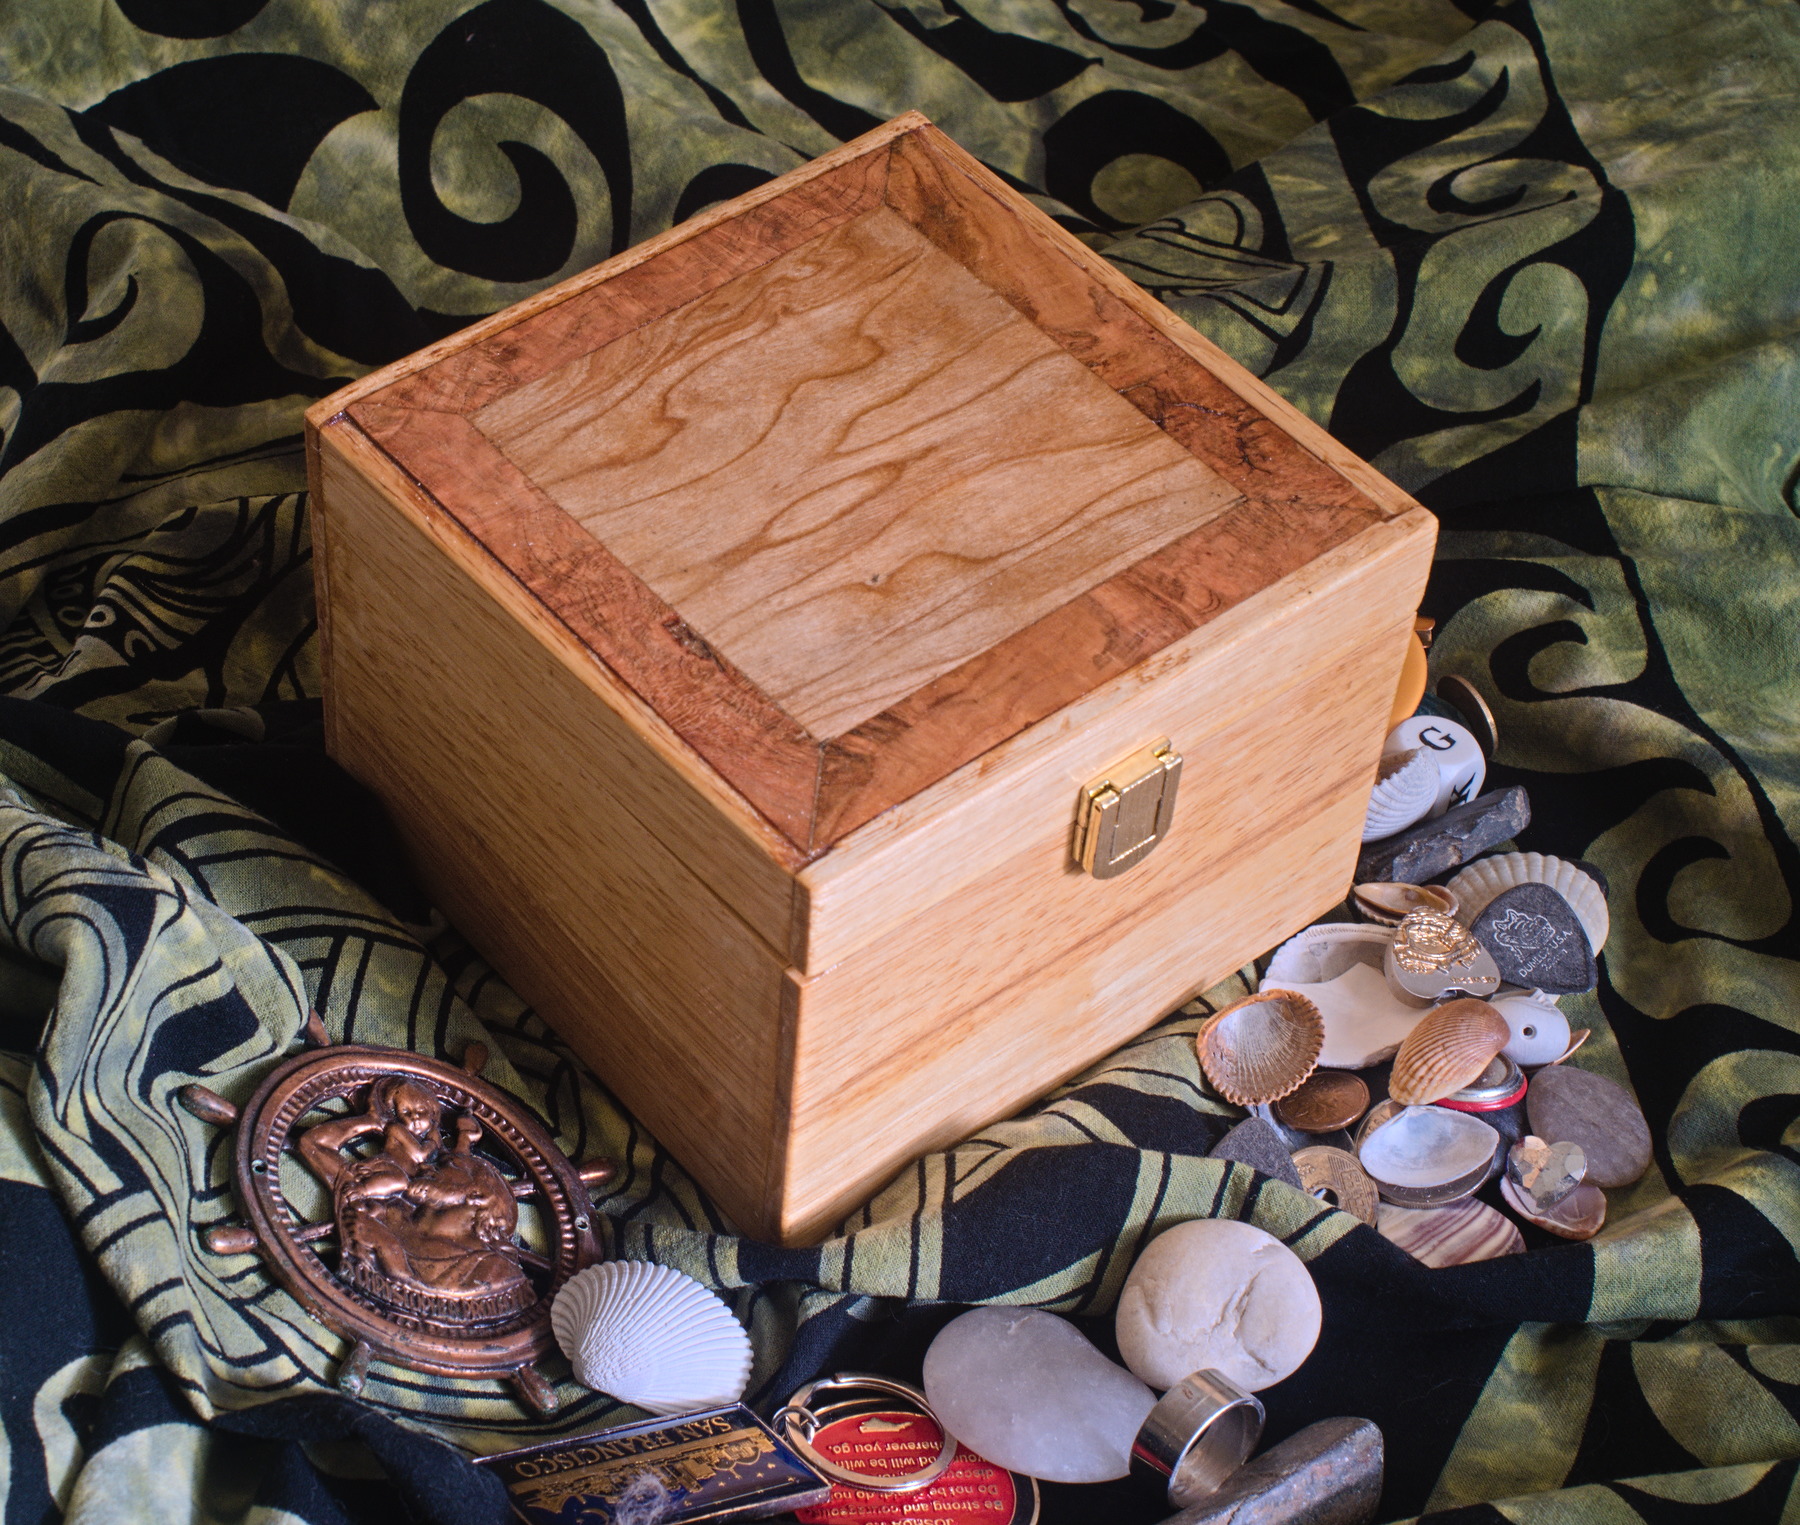
The treasure box is done. It ought to help keep the boys occupied when they come for a visit. It holds marbles, shells, stones, badges, dice, coins, and other interesting things.
May 3rd, 2023
Posted by Paul
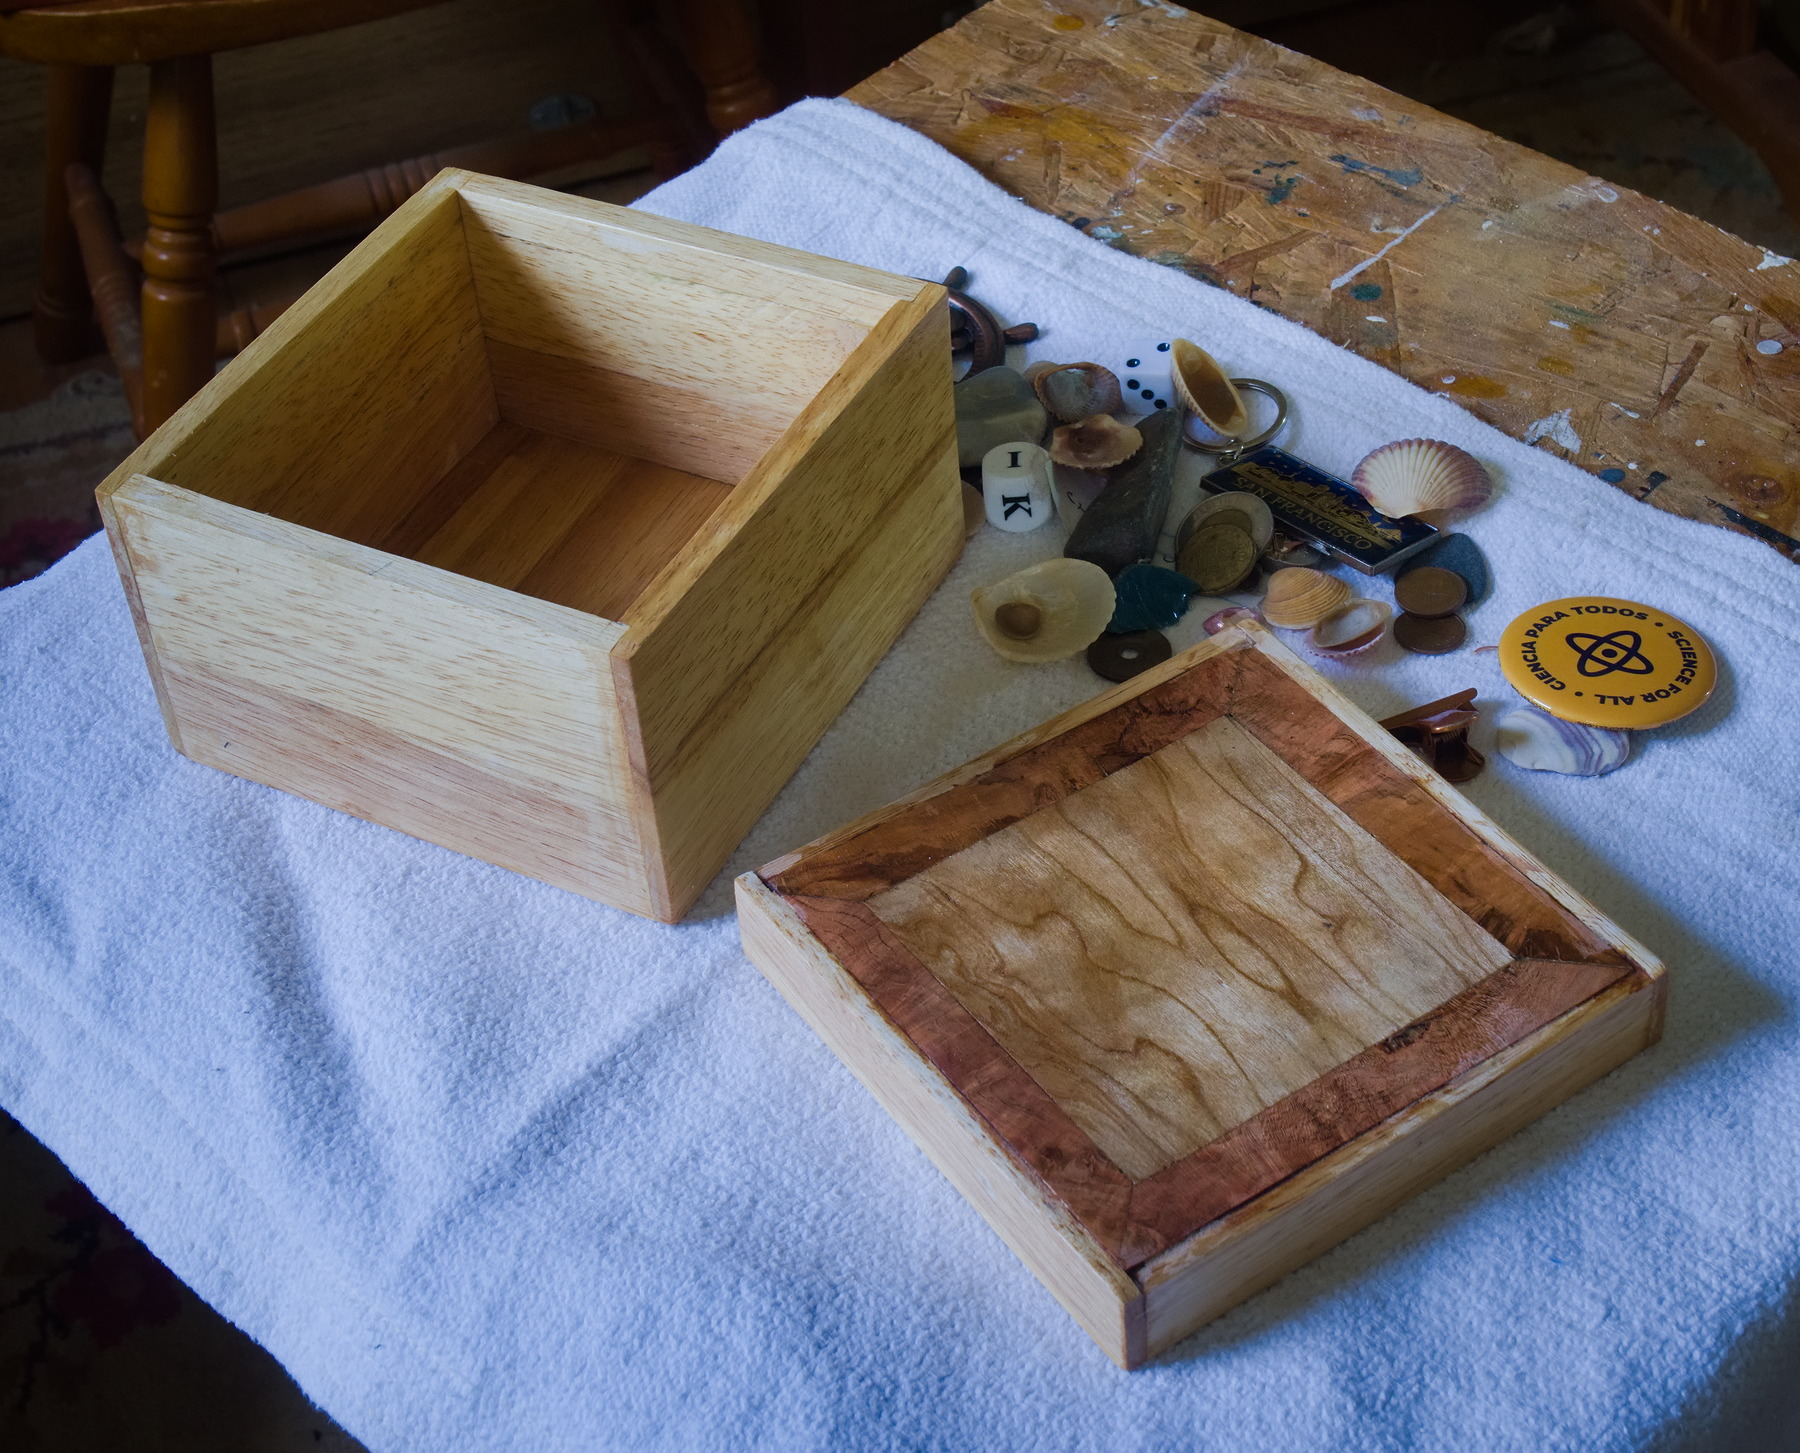
I took this little treasure box we built for Lars and Lex home for finishing and will put a couple more coats of poly on it. Then it will go back to the shop for hinges and a latch.
May 2nd, 2023
Posted by Paul
The woodshop is packed with masses of salvage wood, since it is bulky item pickup season in Winston-Salem, and Joe has scored truckloads of items from the curbside. Recently we have been experimenting with leaving remnant paint on salvage wood to get an antique look, and it worked out pretty good on a set of shelves we made for Marie in February. Last time we worked, while I planed and beveled a couple of boards for a boat project, Joe cut out some shelving boards with at least three coats of paint on them and started building a couple of his patented moving crate/bookshelves, shown here with one of the earlier ones that is still hanging around the shop. I think they are going to come out just fine.
April 27th, 2023
Posted by Paul
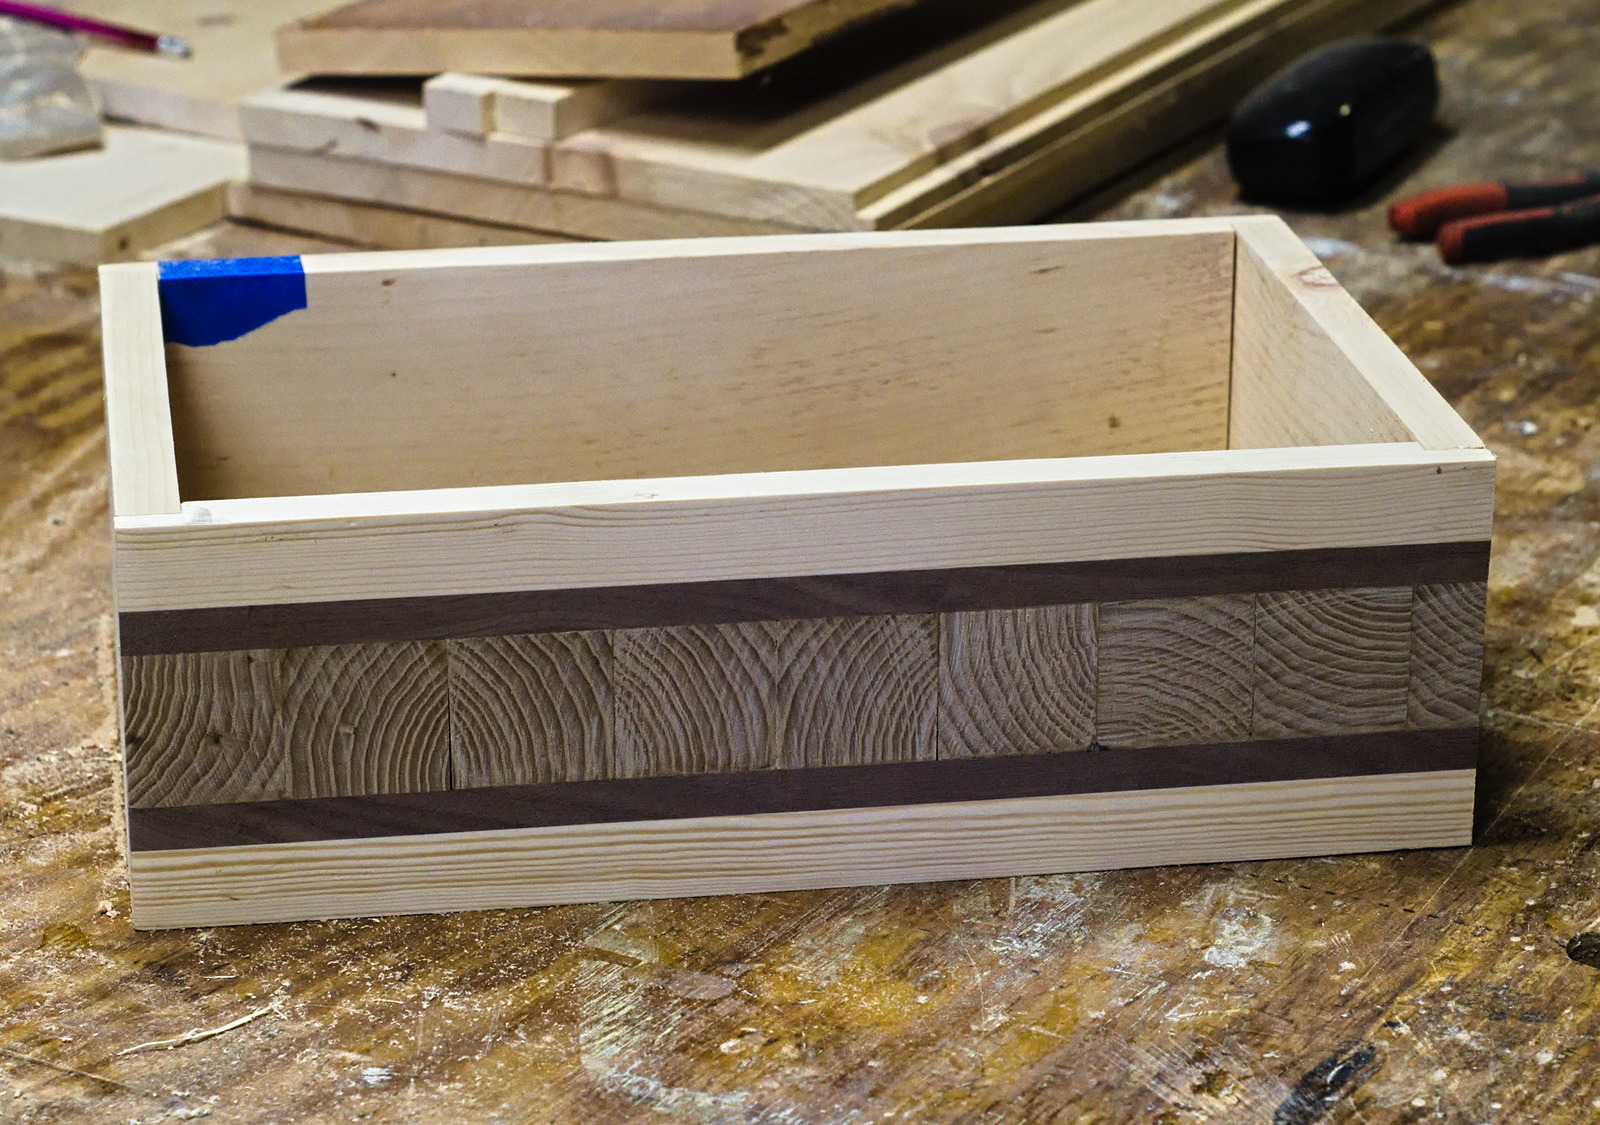
In a recent post, Paul Sellers showed some picture frames with end-grain blocks sandwiched between strips of contrasting wood. We decided we could do that, and it might make a nice front to a box. Ours has outer strips of light wood, probably Douglas Fir, then narrow strips of walnut, and end-grain cutoffs of oak.
April 22nd, 2023
Posted by Paul
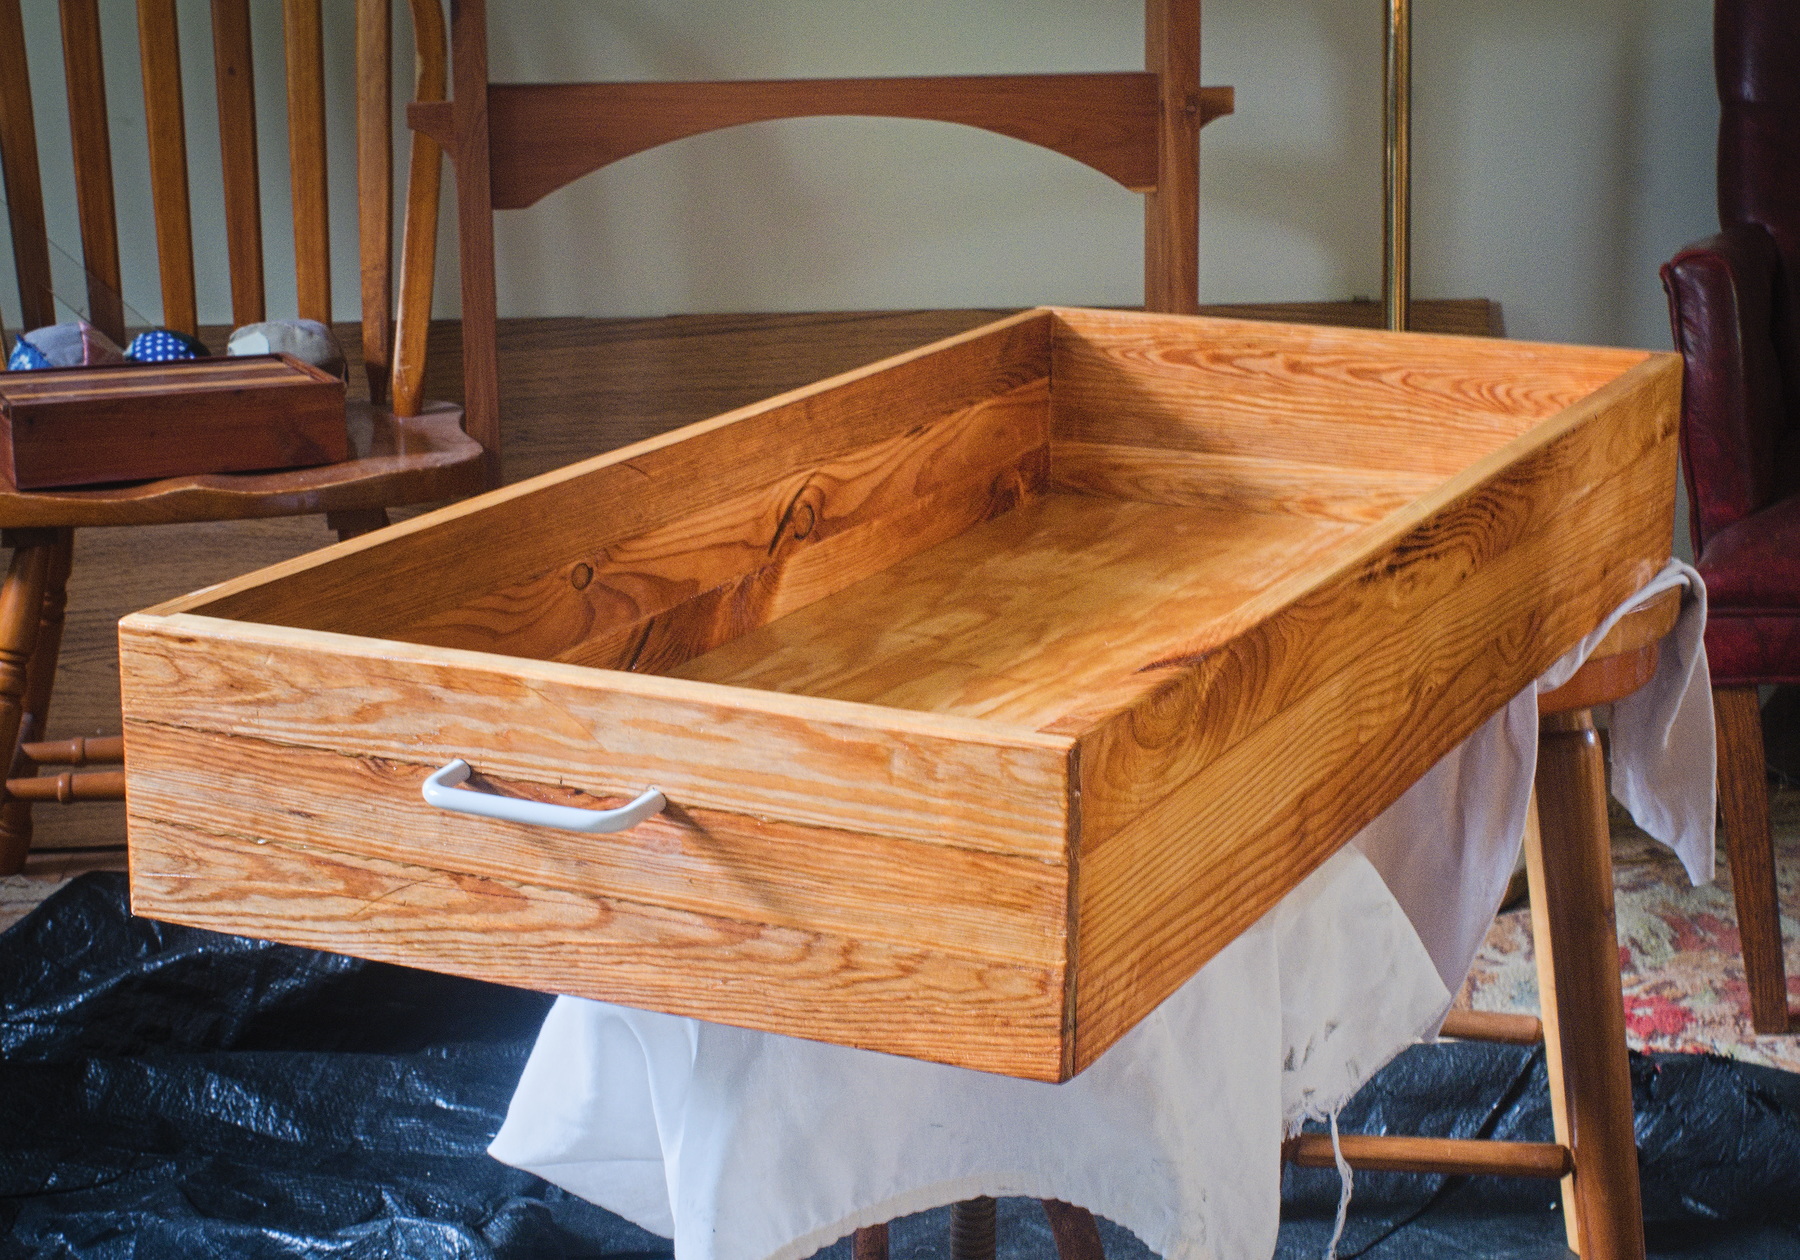
An under-bed storage tray for Marie. The ones Joe built for Marcia and himself are already pressed into use. It's almost a shame to push this nicely-figured yellow pine tray, built from salvage wood, under a bed, but on the other hand, there's plenty more where it came from. People aren't going to quit throwing out furniture, and Joe is not going to quit picking it up. We have plenty more to build things that will be on display.
April 7th, 2023
Posted by Paul
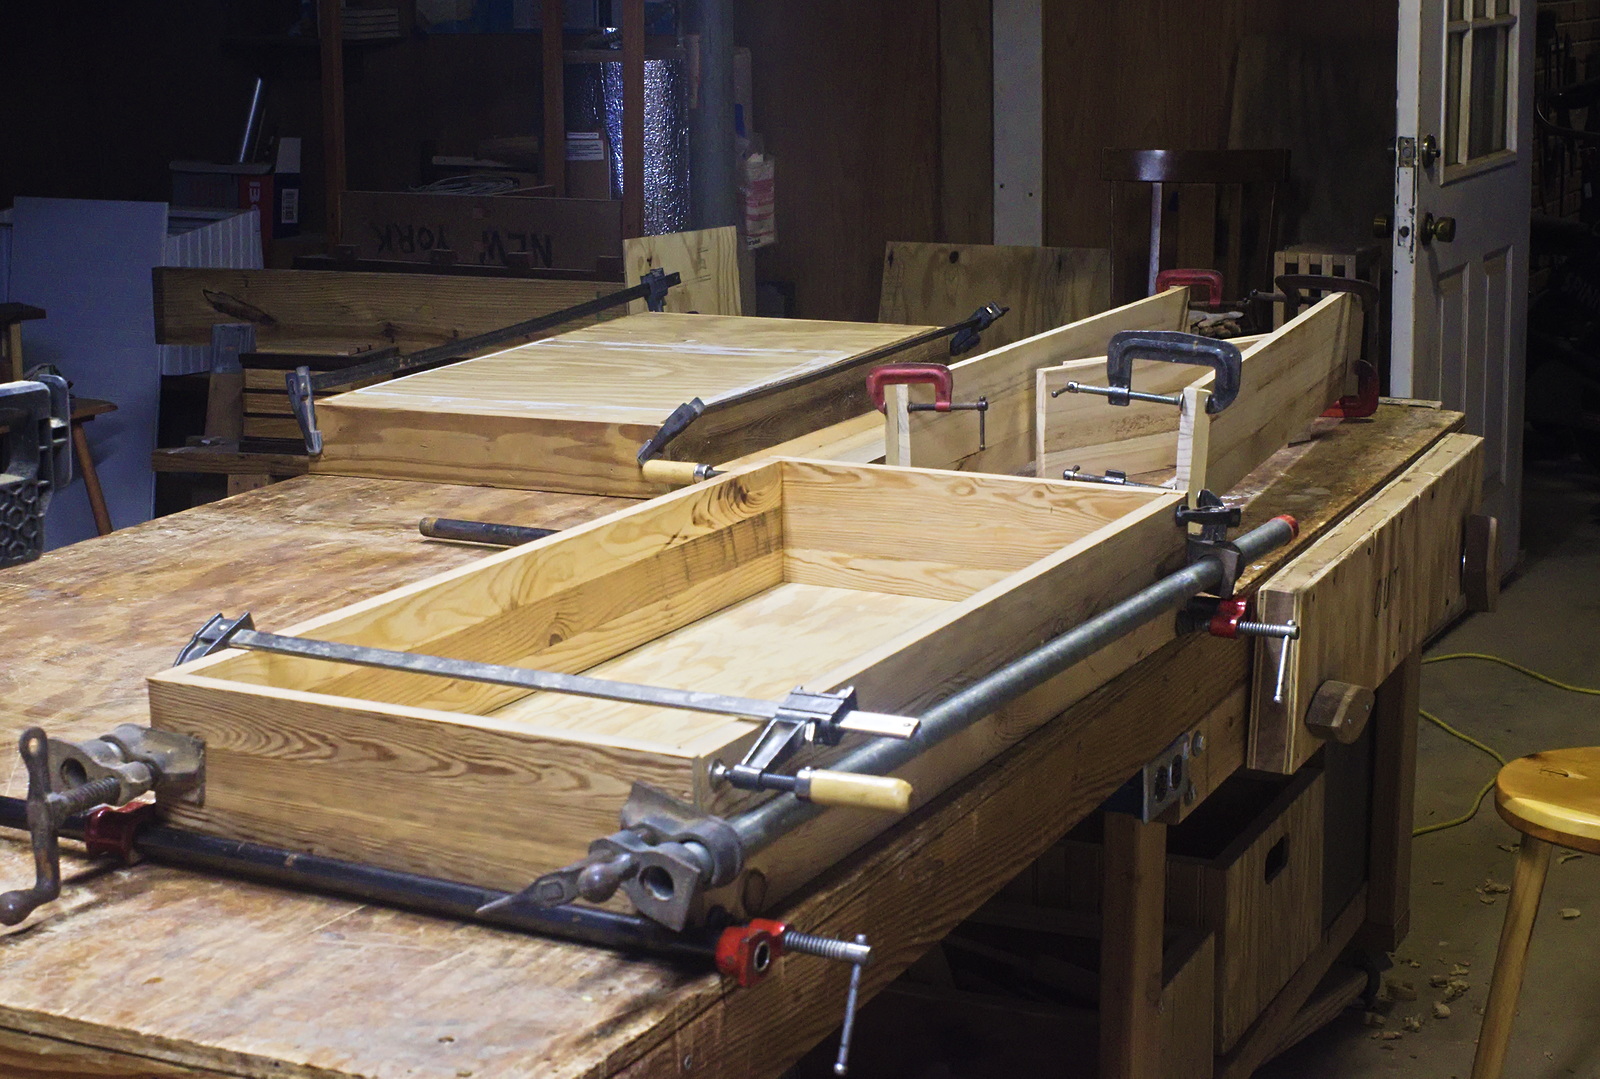
Something new, under-bed storage boxes. Marie asked for one, and Joe liked the idea so decided to make a couple for Marcia and himself. We worked out the dimensions and designs ourselves. If you see something like this at Lost Art Press, remember, we did it first. Eat your heart out, Chris Schwarz!
March 22nd, 2023
Posted by Paul
Here's something we built for Lars and Lex. Shelving board case, cherry top and facings, painted plywood back. This uses up all but a few scraps of the 200 board feet of cherry we bought to build the kitchen hutch for Levi and Marie in 2020.
February 23rd, 2023
Posted by Paul
Here is a bookshelf we made for Marie.
February 10th, 2023
Posted by Paul
Making simple things out of wood has gotten so routine that it has changed the way I go about all kinds of projects. I am working on rebuilding the battery bank on my sailboat, and am realizing just how much bigger the deep cycle GC2 case 6 volt batteries I want to use are than the Group 24 batteries that I am replacing. Measurements are good, but this wooden model built to the actual cube of a Trojan T105, including the terminals, will be the best way of verifying that the planned batteries will fit. Joe and I made it in less than an hour.
February 8th, 2023
Posted by Paul
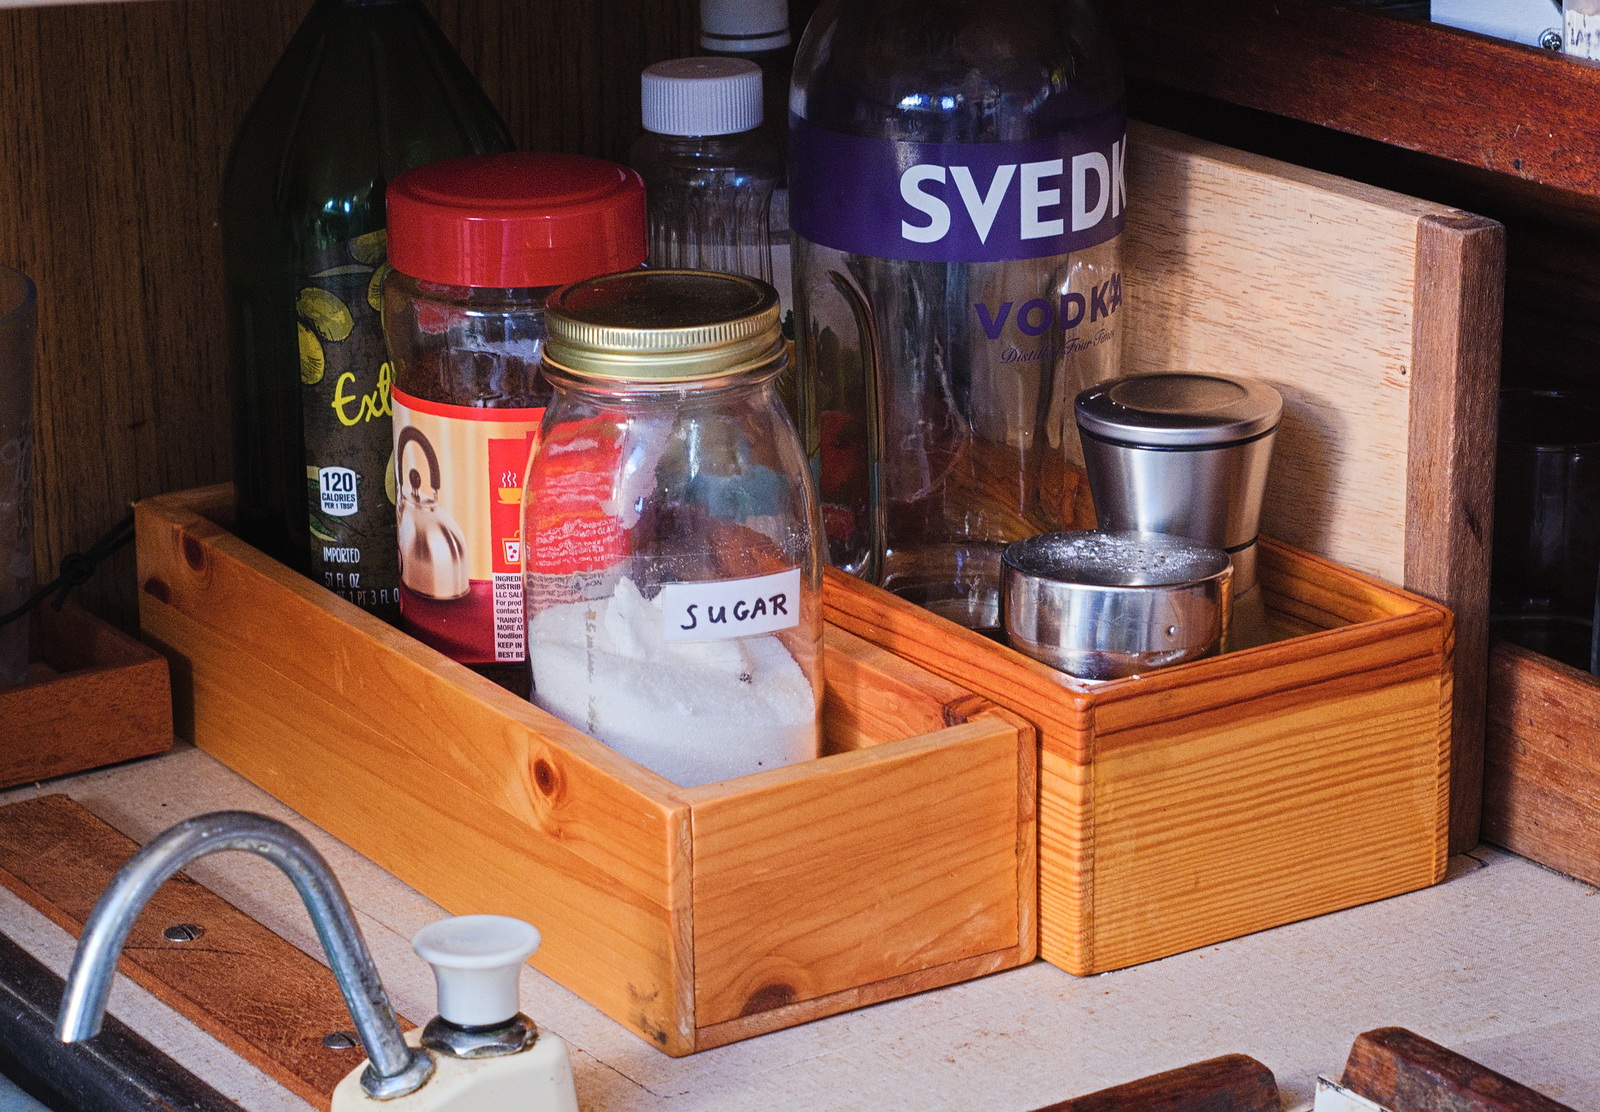
When we built the first of these trays, designed to hold three half gallon bottles of rum and vodka, Joe christened it "the liquor cabinet". I found enough room in front of it to fit in a second, slightly smaller tray which could be called "son of liquor cabinet", currently holding kitchen sundries, though fifths would fit nicely. When I took this picture, the liquor cabinet was woefully short of liquor, but I do have a handle of Gosling Black Seal earmarked for the boat which will help a lot.
February 4th, 2023
Posted by Paul
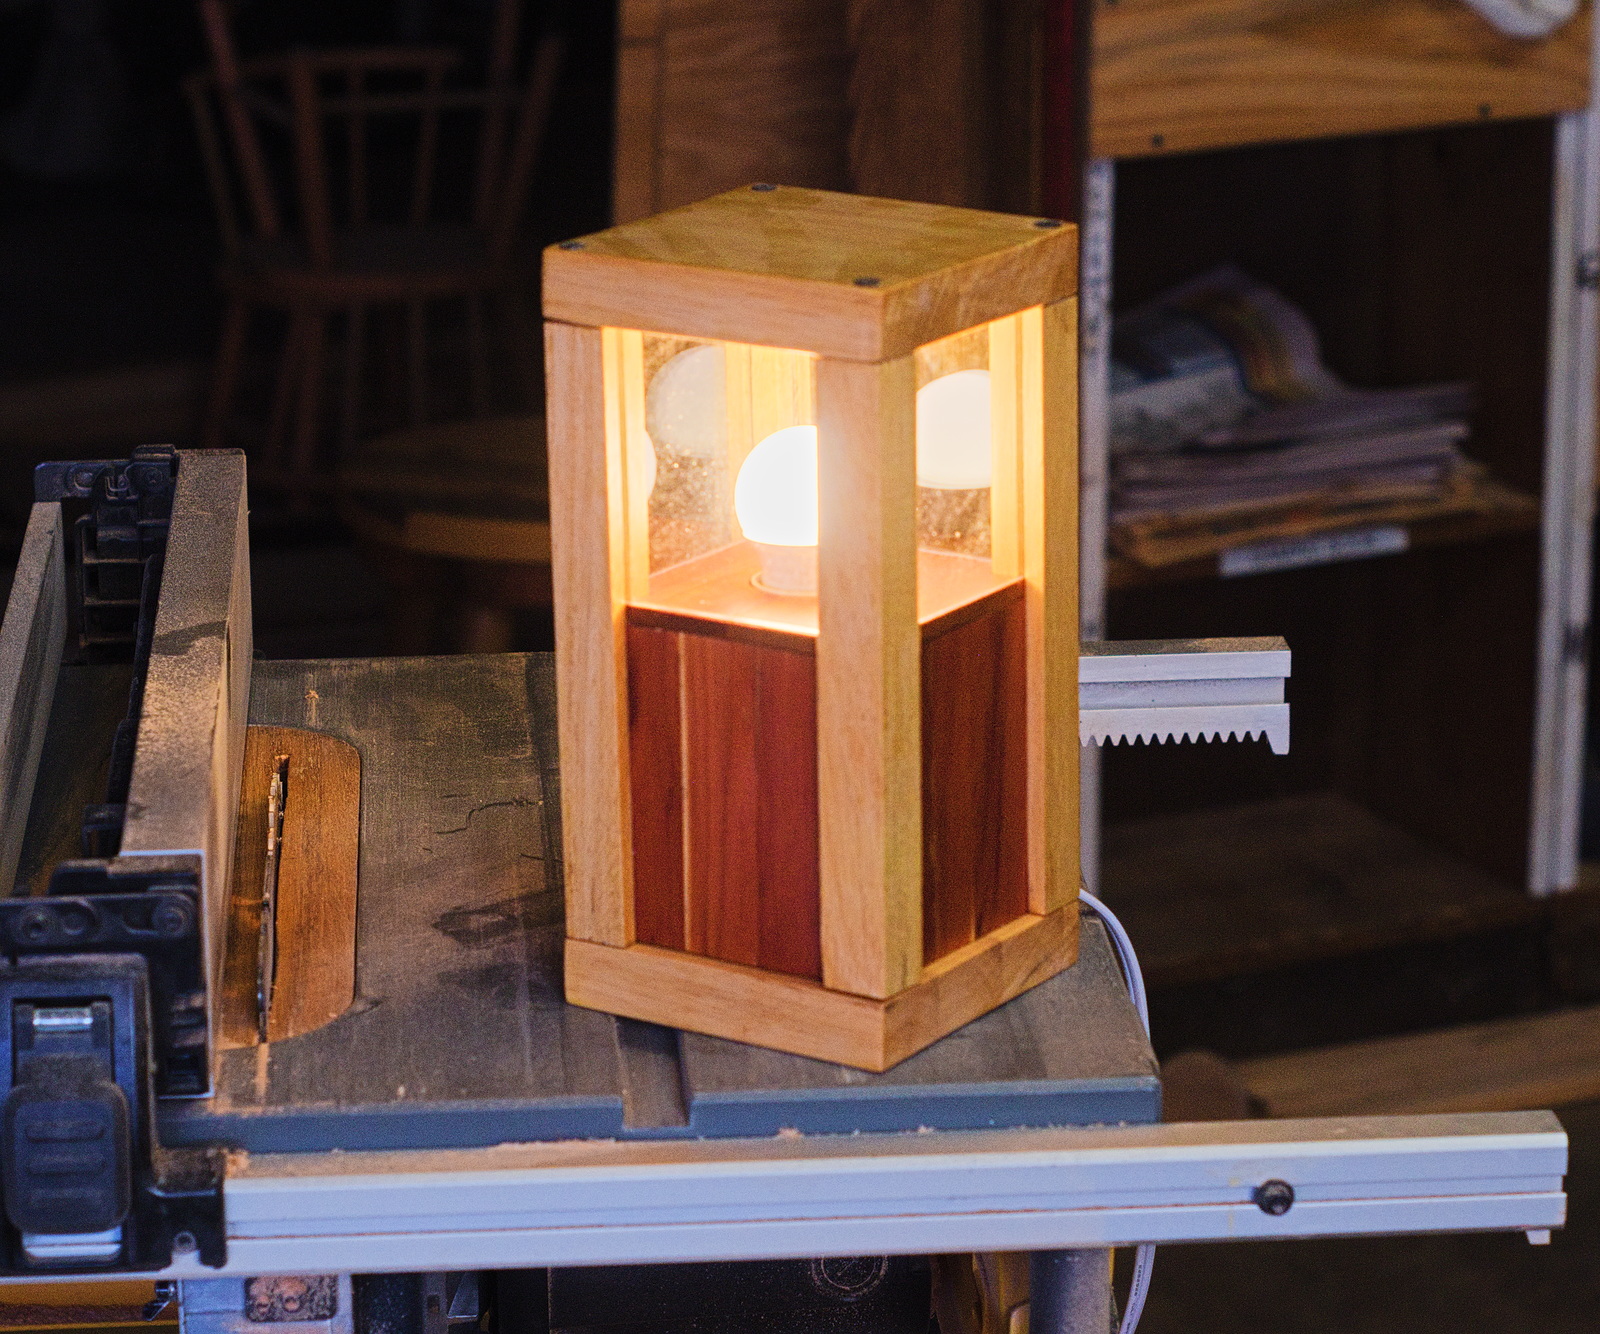
I found some fixtures on Amazon and drew up plans for this lamp. We cut out parts for two and each built one. Joe's turned out better, so this picture is of his.
January 20th, 2023
Posted by Paul
A small step-stool out of some oak scraps that were laying around the shop.
January 13, 2023
Posted by Paul
Another small box. I took it home to hold sewing supplies. It replaces a blue plastic mushroom carton. Part of my campaign to rid the house of plastic.
January 13th, 2023
Posted by Paul
This one is from salvage wood that has laid around the shop for too long to remember where it came from. We decided to leave the remnant paint on, to give it an antique look.
January 3rd, 2023
Posted by Paul

Last work session we applied finish to a massive table full of projects. In the back, a moving crate/bookshelf. We built this out of salvage wood, and just to see how it came out, left the existing whitewash on, rather than planing or sanding it clean. In front, three big DVD cases that Joe built over the preceding week - each will hold, I believe, 57 DVDs. Some member of the household suggested they could be hung vertically on the wall, a great idea that would save space in a small apartment. Also, a large tool tote that Joe built for himself - despite us building who knows, maybe 50 of these things, he found that he didn't have one himself, and needing to be able to take a selection of tools to wherever work was to be done, made his own. There is also a small box hidden behind the in-process work, that I will use to hold sewing clips and weights.
December 20th, 2022
Posted by Paul
I spotted this toolbox at Marie and Bobby's apartment recently. We made it for them back in June and stocked it with tools. Since then it has acquired a vital roll of duct tape.
December 19th, 2022
Posted by Paul

Last March we built a bookcase for Marie's DVDs. She has put it to good use.
To build it, we bought shelving boards from Home Depot. Lumber prices were high at the time, but shelving boards are about the cheapest thing you can get, outside of salvage. I doubt if this piece has more than $50 worth of materials in it, and as far as I am concerned, its quality and appearance are superior to anything Marie could have bought at retail even for twice that price. So this goes back to one of our initial premises of having the woodshop, to make solid, attractive furniture for young people who otherwise would have to settle for pressboard or worse, plastic.
December 18th, 2022
Posted by Paul
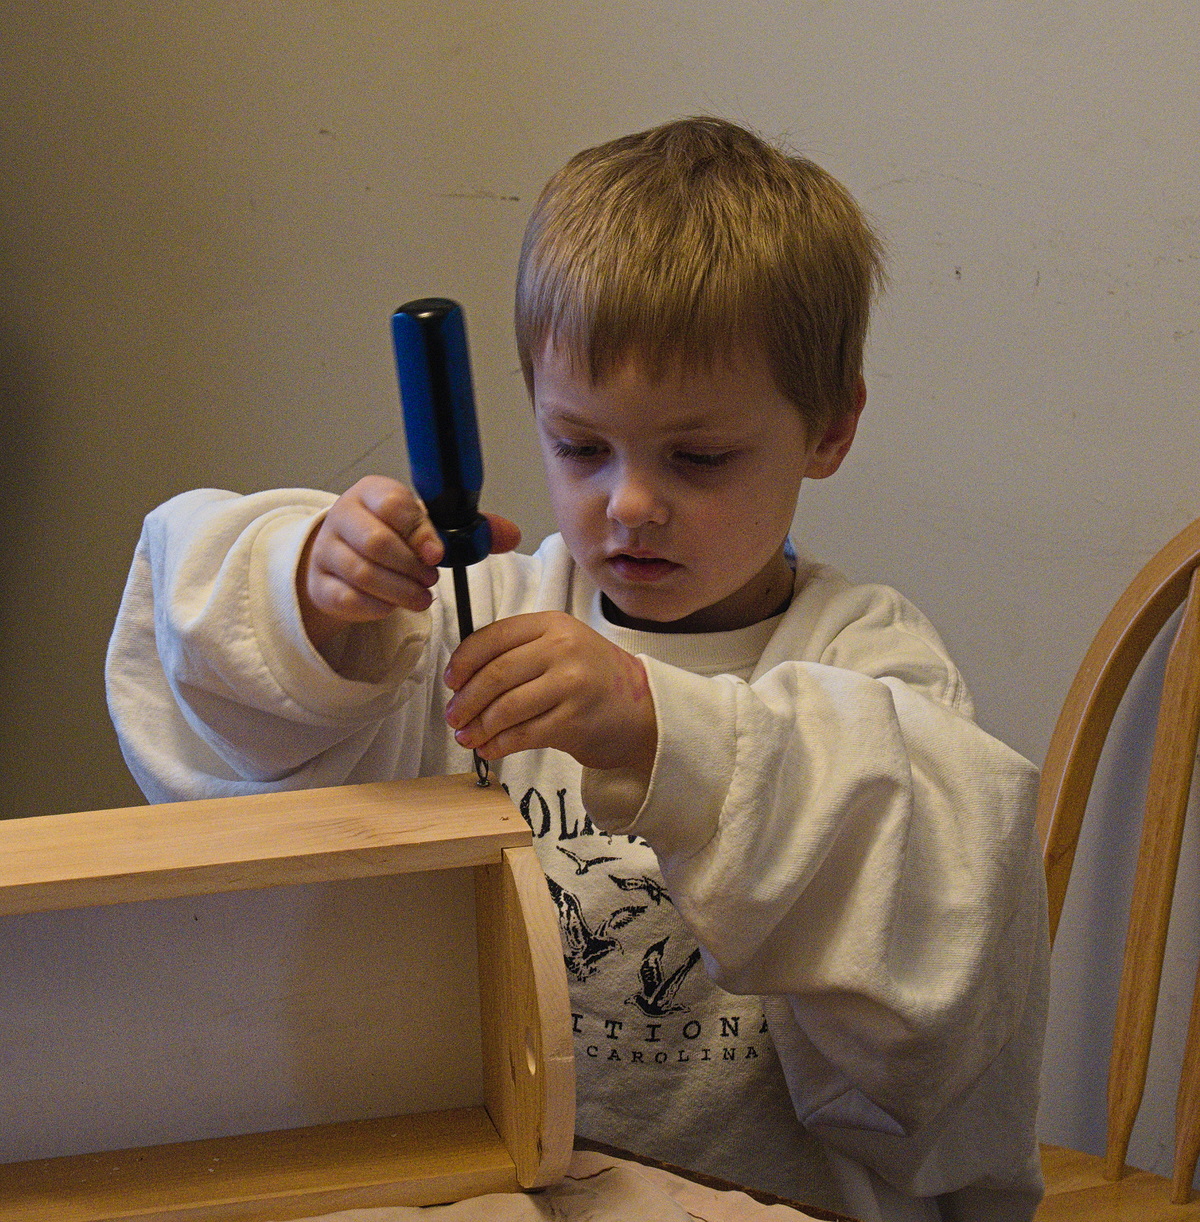
We kitted tool totes for Lars and Lex, figuring Lars would enjoy the gluing and screwing and driving pins home, and if it was too hard for Lex, Lars could do his. That turned out completely backwards, as Lars had no interest in putting together a tote, but Lex eagerly spread glue, drove screws and pounded pins. Finishing the first screw gave him a real sense of accomplishment.
December 13th, 2022
Posted by Paul
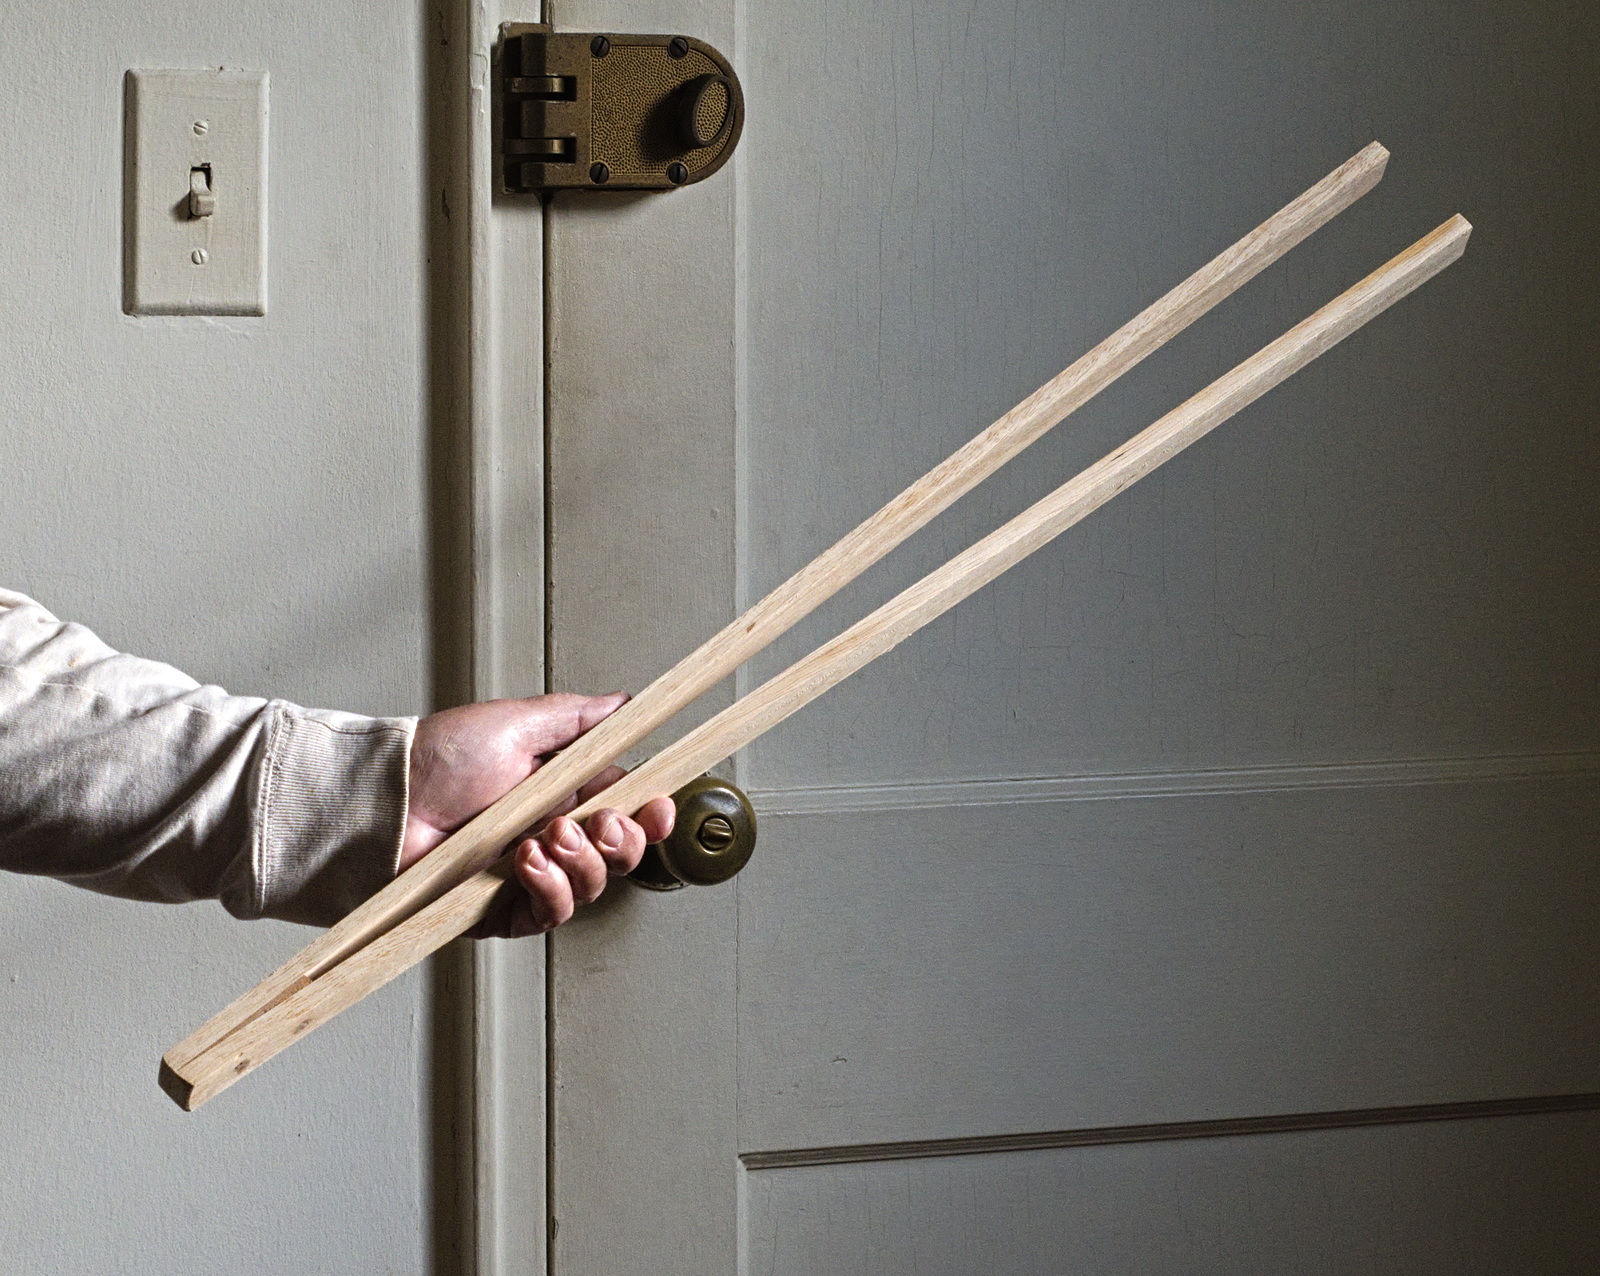
Making kitchen tongs, Joe said he wanted to make a really long set, but he couldn't think of a use. I suggested that young fathers might find one useful when learning to change diapers, but we decided to pass on it for the time.
The next week, aboard my Alberg 35 Terry Ann, while draped over the engine, head down, trying to reach the transmission case oil drain plug, I dropped a puck light, which slide down under the motor mounts and into the bilge. I could see it shining down there. but the boat has a deep bilge and there was no way to reach it. At the hardware store, I found a "reacher grabber tool", but they wanted $25 for it, far more than the puck light was worth. The other hardware store had the same tool, but they wanted $27 for it. The clerk did have an idea, though. He said I should flood the bilge with a hose until the puck light floated into reaching distance. That sounded like more trouble than it was worth.
I figured I could get a "reacher grabber tool" from Amazon for a lot less than $25, and filed that idea for when I got home and put together my next order. On second thought, I realized this was the perfect use for a really long set of tongs, and that the puck light probably wouldn't be the last non-ferrous thing to slide into the bilge. (I have a strong magnet on a lanyard for retrieving tools and such.)
Our custom extra-long tong set may prove to be an essential tool for deep-drafted boats like Terry Ann.
December 10th, 2022
Posted by Paul

Not having a project going on means we have plenty of time for small utility jobs like the tongs we worked on last month or more slide-top boxes. Yesterday we made a fixture for an SAE connector that I can install in the galley on my boat so I can plug in a fan or a light. I prefer this type of connector over cigarette-lighter sockets.
November 20th, 2022
Posted by Paul
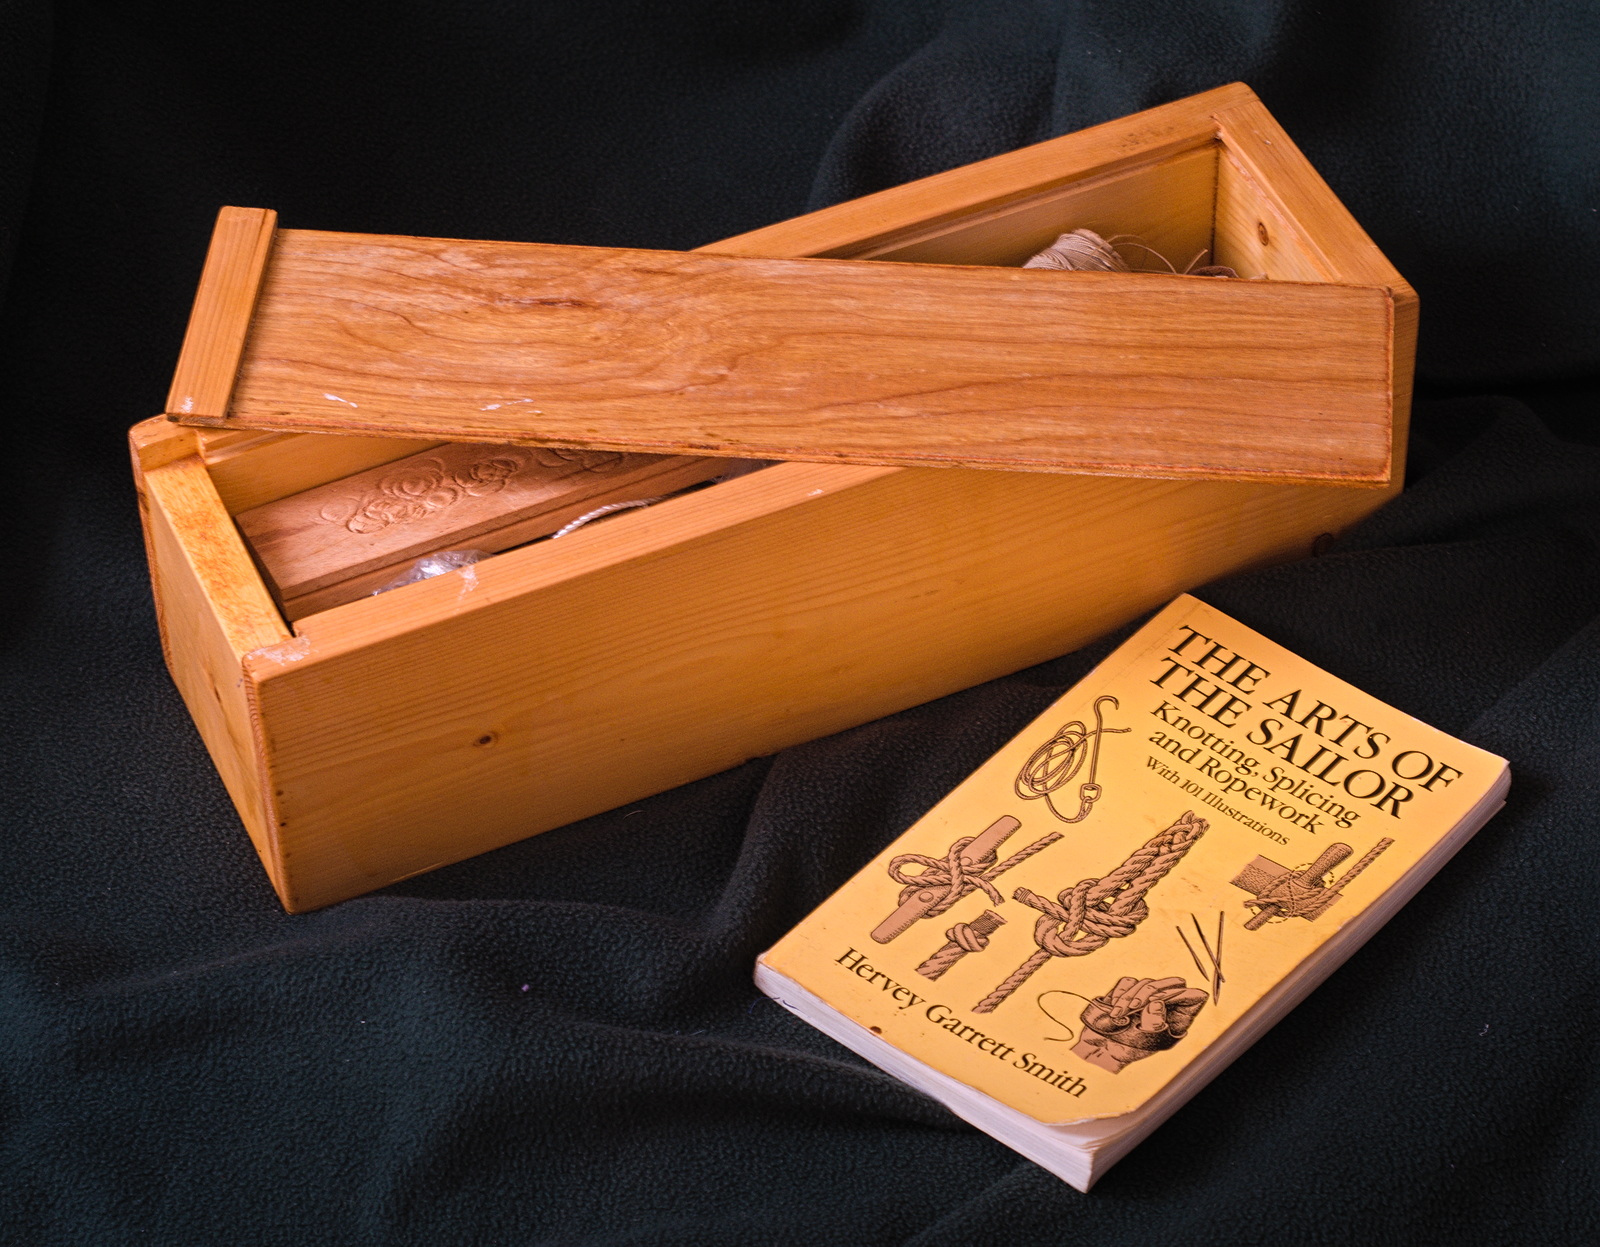
Back in 2017 when we built this box to hold my rope and canvas-working tools and supplies, Joe was interested in why I would want such a long, narrow one. The reasons were, the length would accommodate my Swedish fids, used in splicing double-braided rope, and the narrowness would allow it to fit on a shelf over the starboard settee on my boat.
I went into the box earlier today to get needle and twine to whip the ends of a dockline.
November 7th, 2022
Posted by Paul
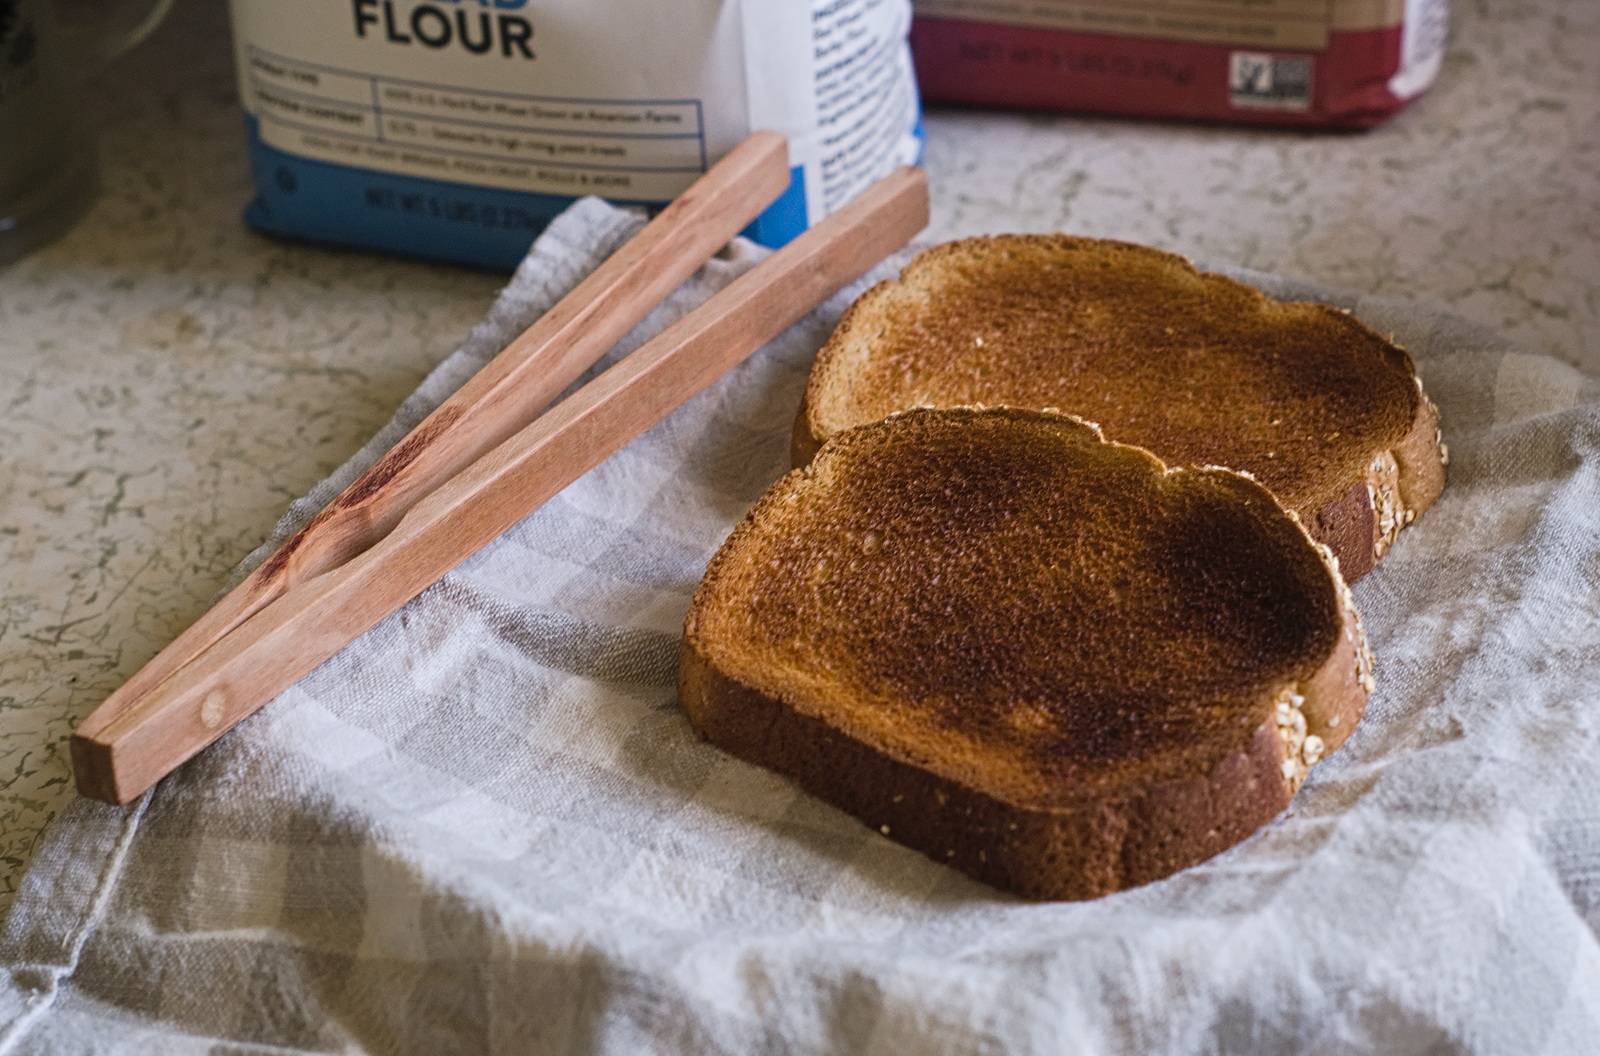
Marcia and Joe were driving on the Parkway when they passed a store selling crafts, and saw some wooden tongs at an exorbitant price. Joe decided we could make these things in the shop and that they might be good items for the Firefighters' auctions, if they ever start having them again. He explained to me that they were used for extracting bent toast that had gotten jammed inside the toaster, without burning your fingers. I was a little sceptical, sounded like the solution to a kind of middle-class American type problem, but I don't have a toaster. For all I know this is a pressing issue in many households. Then Joe mentioned that they could be used to remove toast from under the oven broiler. OK, well I could see that, so I joined him in making three of these devices - one for his kitchen, one for mine, and one for a shop sample. They were easy and quick, made from cherry scrap.
I took mine home and tested it out. Yes, it worked! It plucked the toast right out of the oven, no need to scorch my fingers. I'm waiting to hear how it works in the toaster.
November 7th, 2022
Posted by Paul
Two more slide-top boxes with clear lids - one is polycarbonate, the other acrylic.
November 2nd, 2022
Posted by Paul

There was already a drilled boss on the flywheel of my Sailrite, so it was a simple job to cut a length of dowel, drill a hole in the end and thread it onto a bolt run through the hole from the back. 15 minutes, max. Sailrite will sell you a plastic one for $9.95.
The handle makes precise needle placement easier.
November 1st, 2022
Posted by Paul

A glue joint in a plywood edge is weak, so mechanical fasteners to supplement or replace the glue are called for. Simply nailing or screwing into the edge of a plywood sheet is not much better than glue. One alternative is a metal corner bracket, but they're not pretty and they can be pricey. A better alternative is to drill a hole close to the plywood edge and then fill it with a dowel plug. Then the screw run in through the face board seats into the plug, which will hold it better than the joints, voids and glue of the plywood edge. This technique also works well on end grain of solid boards.
We considered attaching the sides of this Little Free Library with brackets, but decided that the method described above would leave a cleaner interior for books, and be just as strong if not stronger. In other words, a more elegant solution.
We used this method before in a shoe rack that we built for Levi and Marie (posts March 15th, March 17th and April 24th, 2017, April 23rd, 2022). It's still in use.
October 15th, 2022
Posted by Paul

This little box keeps sewing bobbins organized and protected from dust. I drew up a plan, but we ended up running into difficulties hinging the top so for the next one we will try something different. Since the top won't swing all the way down, I had to add 9 ounces of lead wheel weights underneath to keep the whole box from tipping over backwards when it was opened. So, a redesign is in order, but if we can come up with something workable then we could make several to give away and donate to auctions.
October 12th, 2022
Posted by Paul
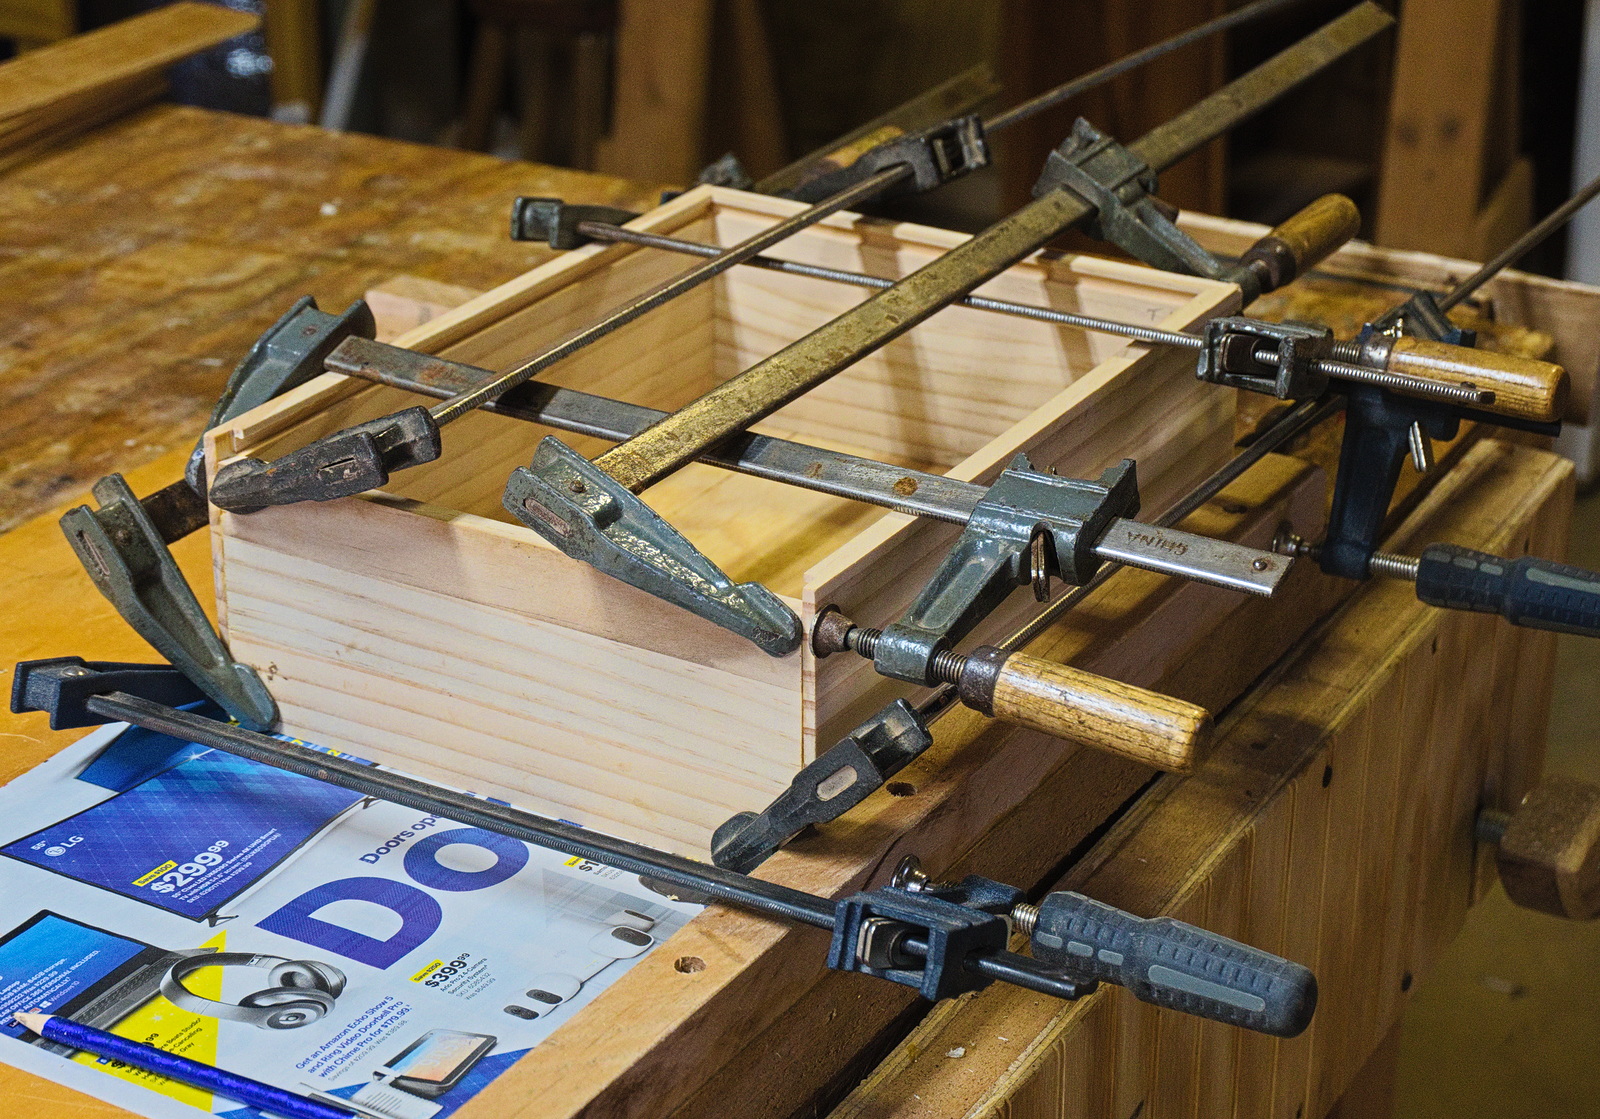
Nothing pressing in the woodshop today, so we took the opportunity to cut out parts for three slide-top boxes. We used all our bar clamps to glue up two cases, so next time we can glue up the third and make the lids.
This is the current page, posts from 10/12/22 through today. Older posts -
Links
- Steve Wall Lumber Company
- Bluejacket Boats
- An Unplugged Woodworker
- Working in a Tiny Shop
- Christopher Clarke Antiques
- Oldwolf Workshop Studio
- Tremont Nail Company
- Lost Art Press
- Patrick's Blood and Gore
- The Furniture Record
- Paul Sellers
- Oregon Woodworker
- Bob Easton
- Matt's Basement Workshop
- The Wood Database
- The Literary Workshop
- By Hand & Eye
- Hand Tool Woodworking
- HJT Woods
- Neuse River Sailors
Comments?
Email us at paul
@neuseriversailors.com
Copyright © 2018-2025 Paul M. Clayton