June 30th, 2015
Posted by Paul
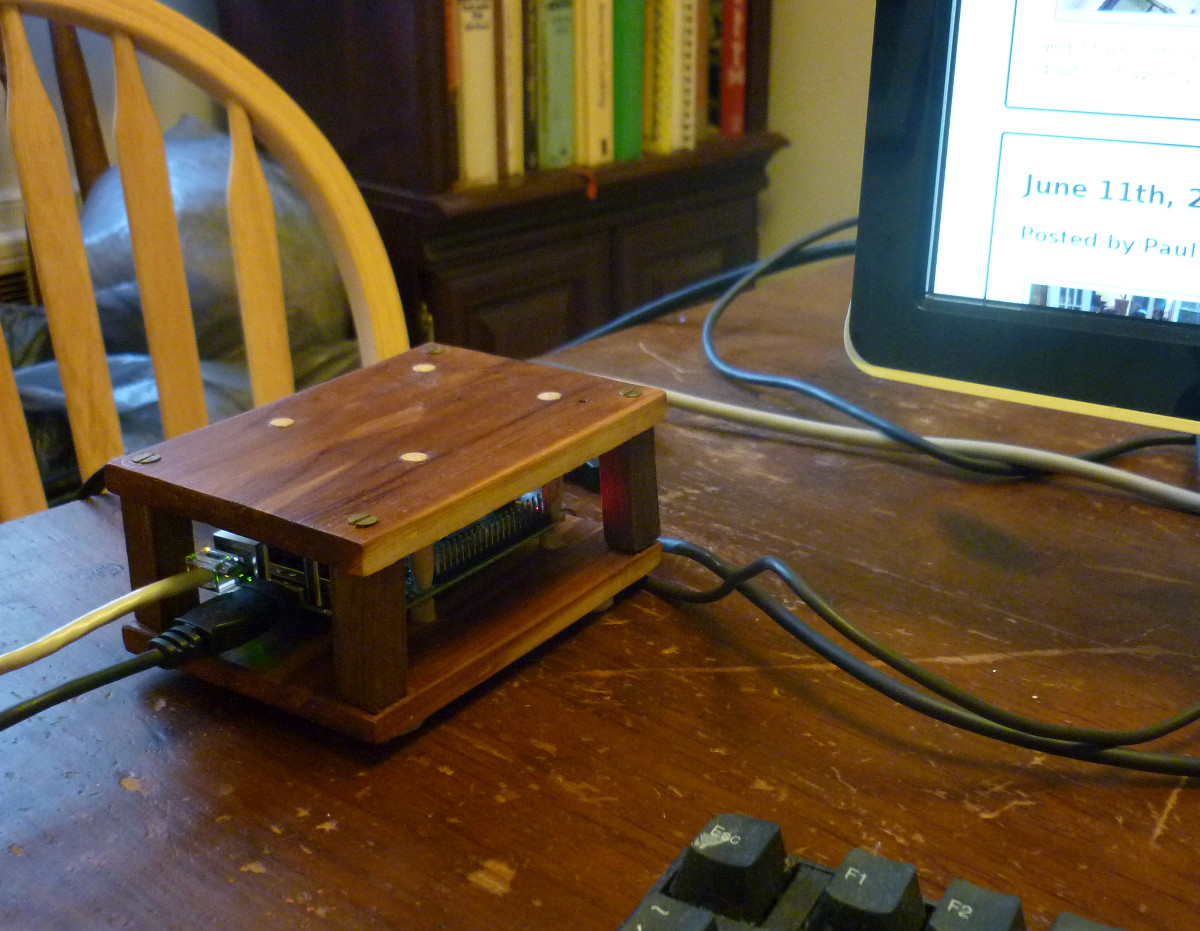
(Raspberry) Pi safe. A Raspberry Pi is a $35 computer-on-a-card, and the latest model sports a gig of RAM and a 900 MHz ARM chip. You have to build or buy your own case, and I've seen some beautiful ones of lexan and brushed aluminum, as well as simple ones made from Altoids tins or even cardboard. Joe and I made one for my new Pi out of cedar and walnut in a couple of hours of work. The most important features are to hold the board securely in place, to allow room for air flow, and to leave the ports accessible. This case does all that and looks good too. When I get time, I'll rub it down with Minwax and set all the screws, which will make it look even better, but I was too eager to plug it up and test it last night to wait for that.
June 14th, 2015
Posted by Paul
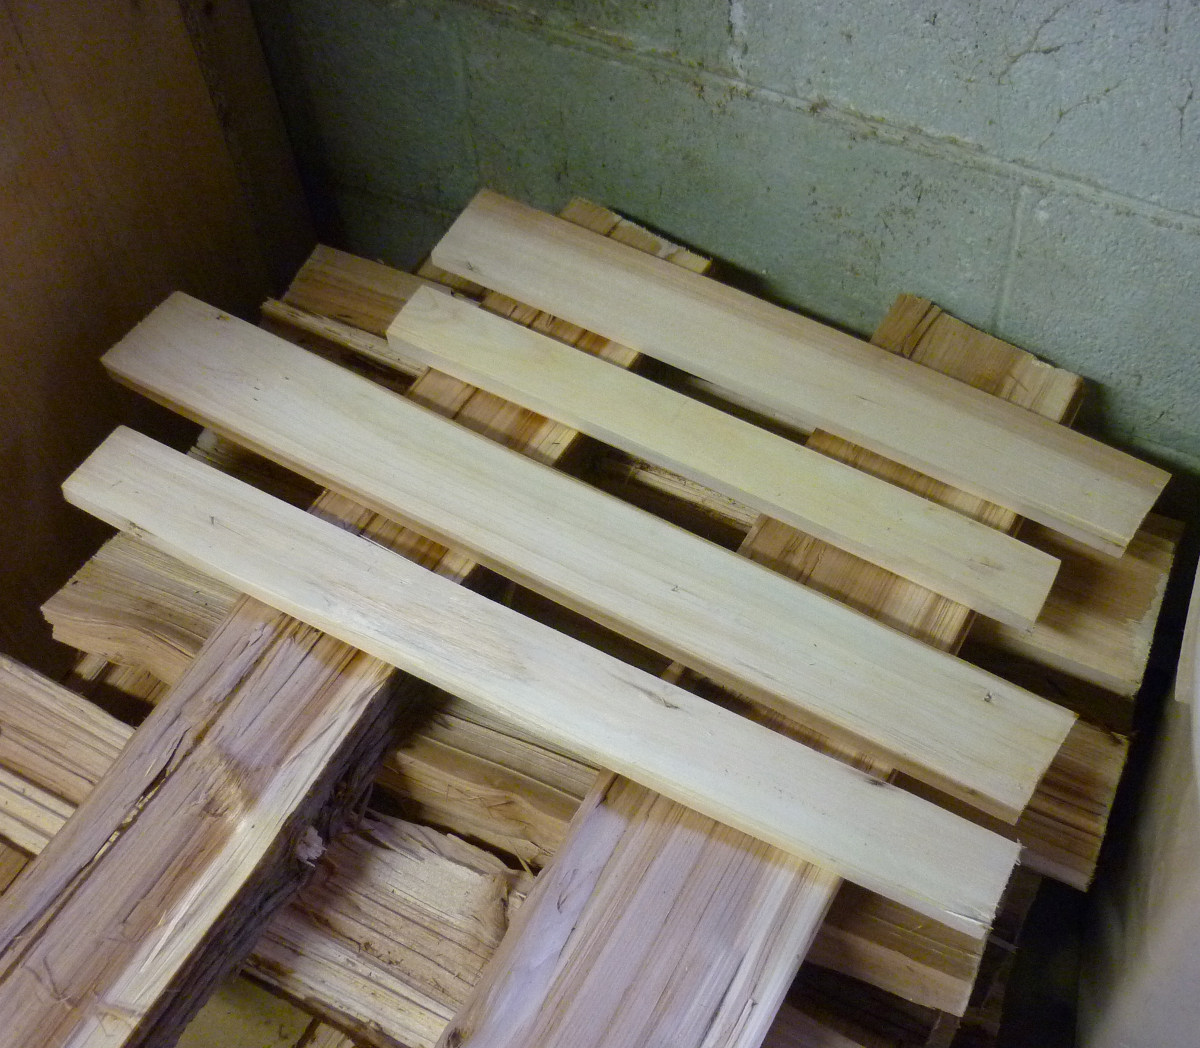
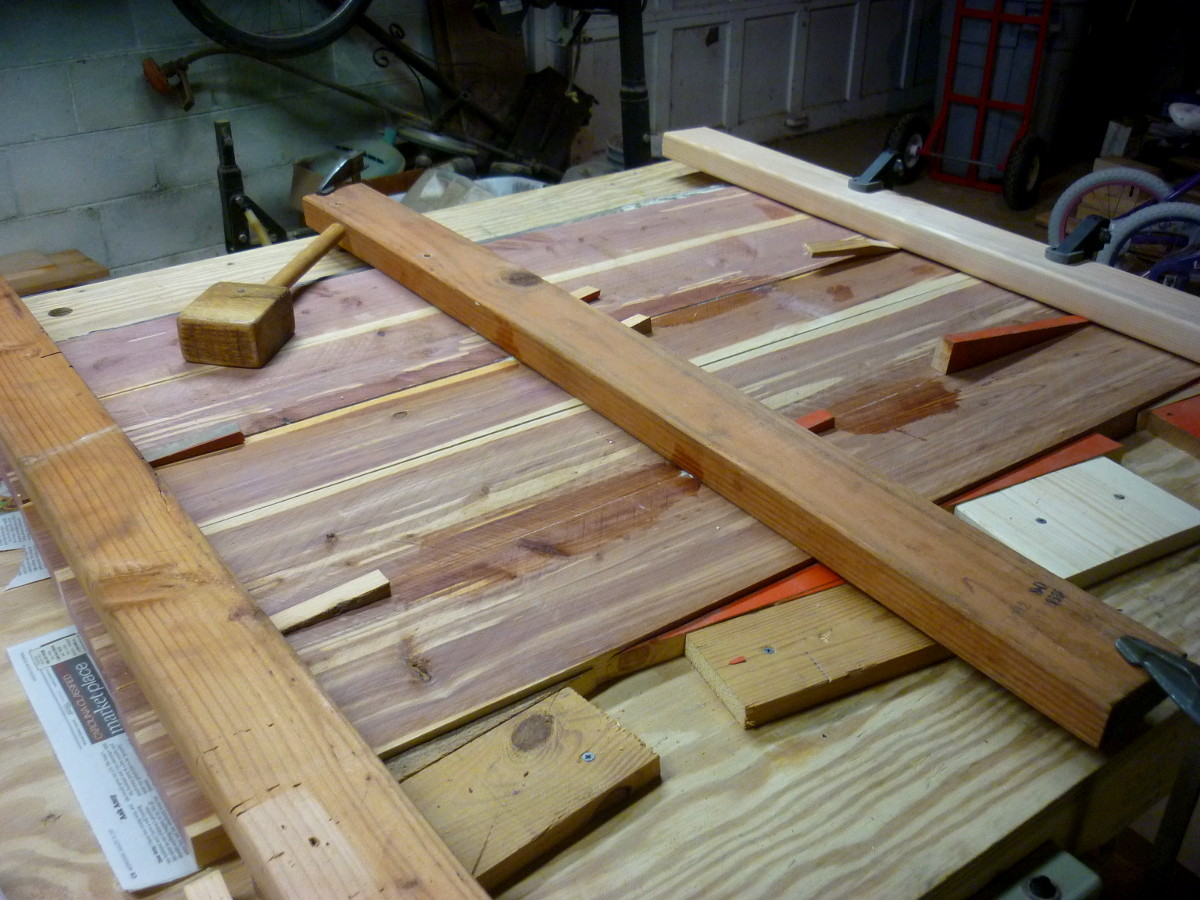
A couple of months ago I found some Leyland cypress lengths on the side of the street near my house and took them to the basement. We split out the most promising pieces, as much as possible trying to rift them, and set them aside to dry. When I get a few minutes, I plane a piece out into a board. This wood planes very easily. The grain is straight and long. The only problem is knot holes that leave an indentation in the working surface. Frequently this is on only one surface of the board, so I don't have to worry about getting it perfect - that side can be the back. I'm not going to claim that it has a lot of character or strength, but it has it's advantages - it is very light and easy to work. It looks like a fine wood for making small boxes and trays. Plus the shavings have an intense, piney,resiny odor, which I happen to like. I'm sure the planings and scrap will make excellent fire starter.
I'm looking forward to getting enough Leyland cypress planed out to build a small project. I get pumped about the idea of having something that I took all the way from a round length of tree to a finished product. Leyland Cypress grows fast, and it turns into a nuisance when people plant it without having any idea how big it is going to get. Then they have to cut it down. I'll have my eyes open for any I can salvage.
June 11th, 2015
Posted by Paul
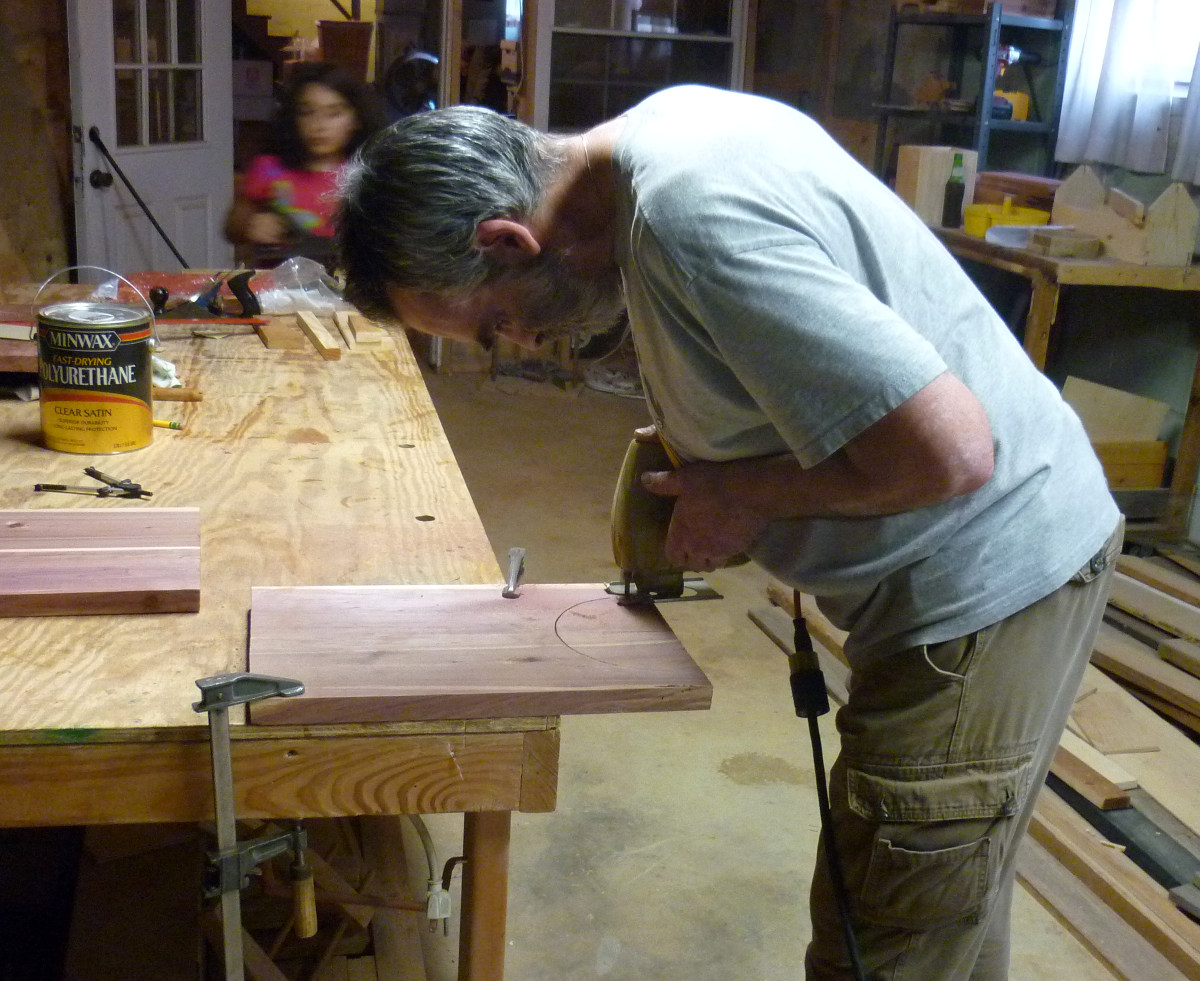
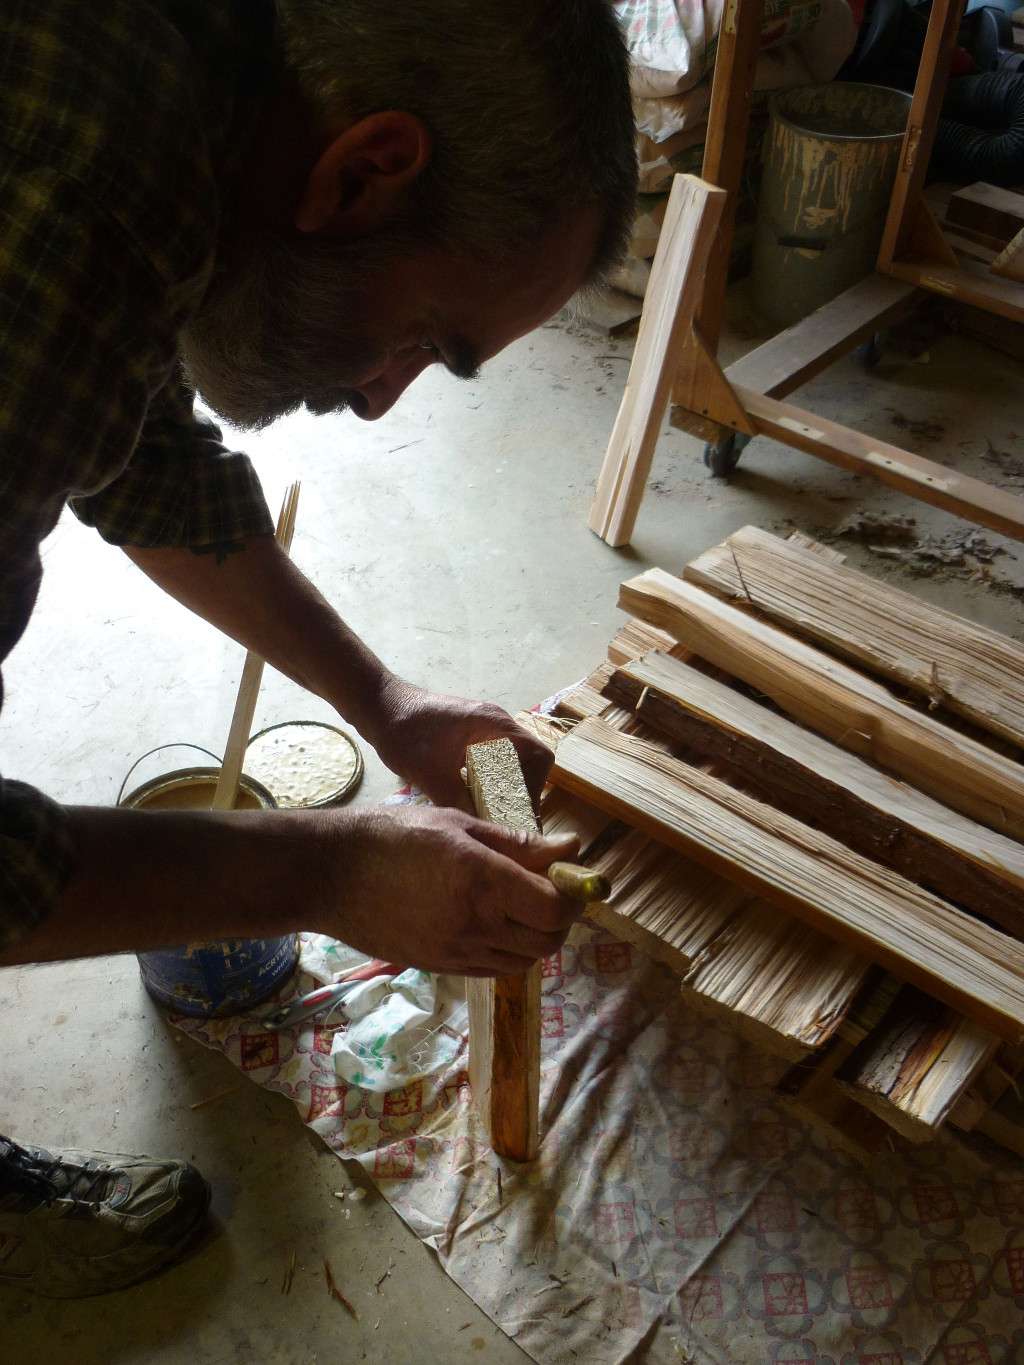
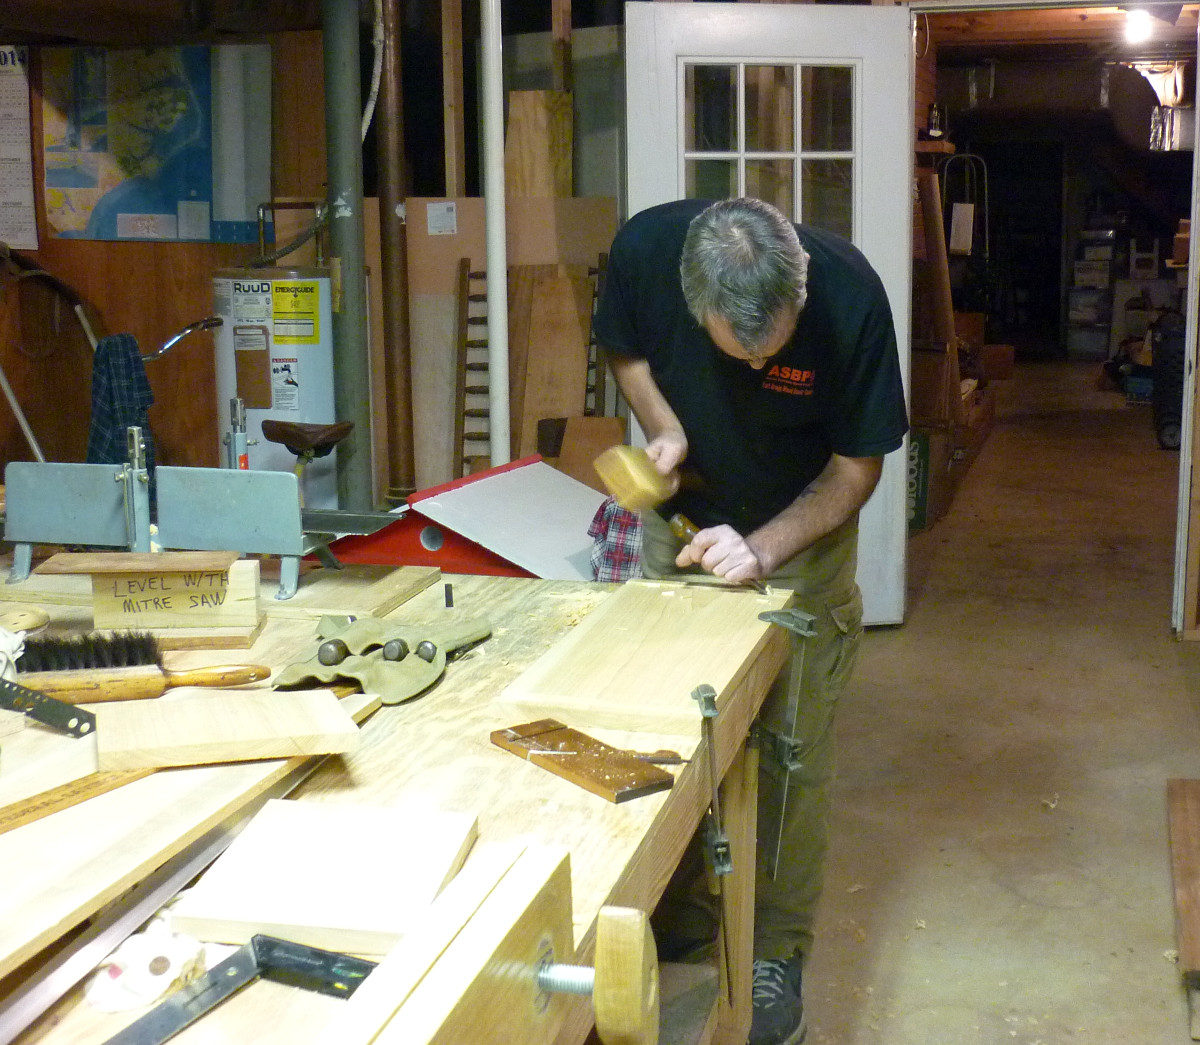
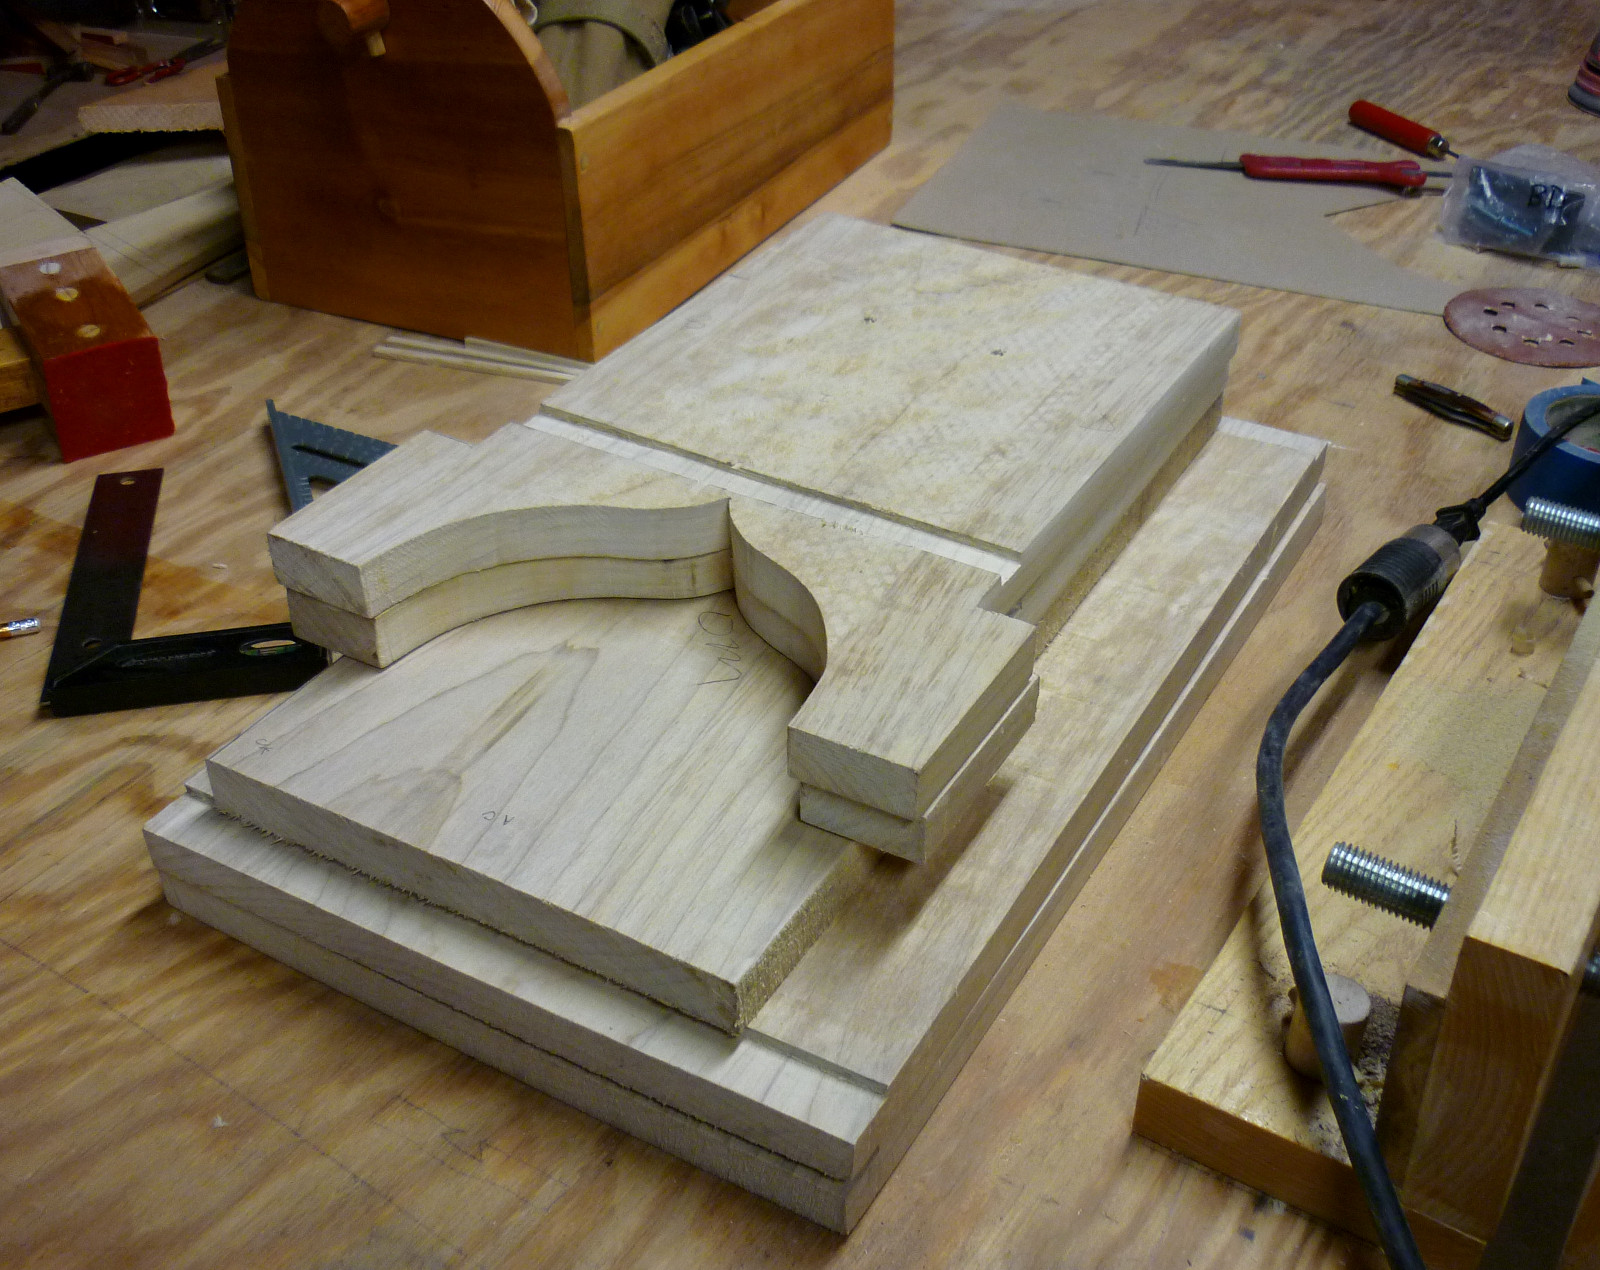
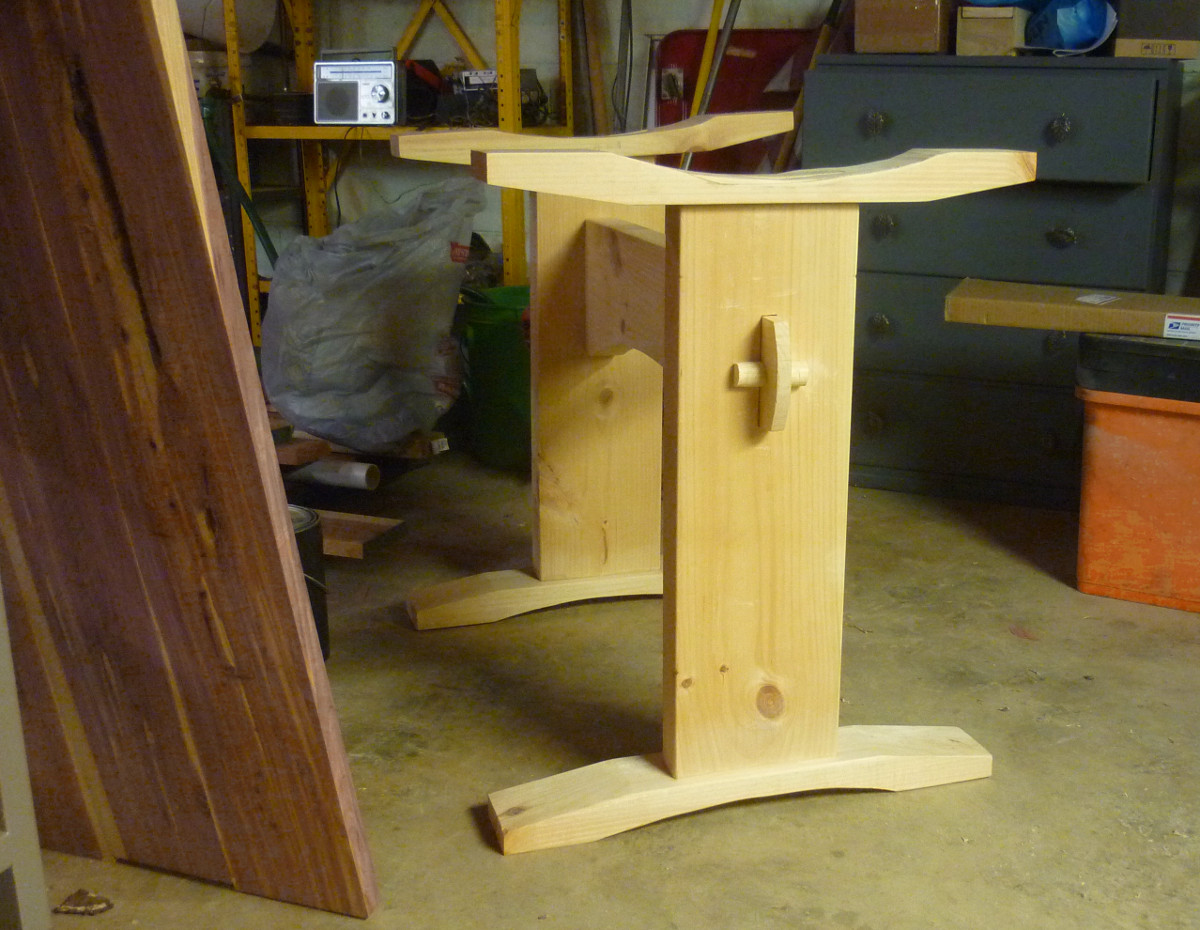
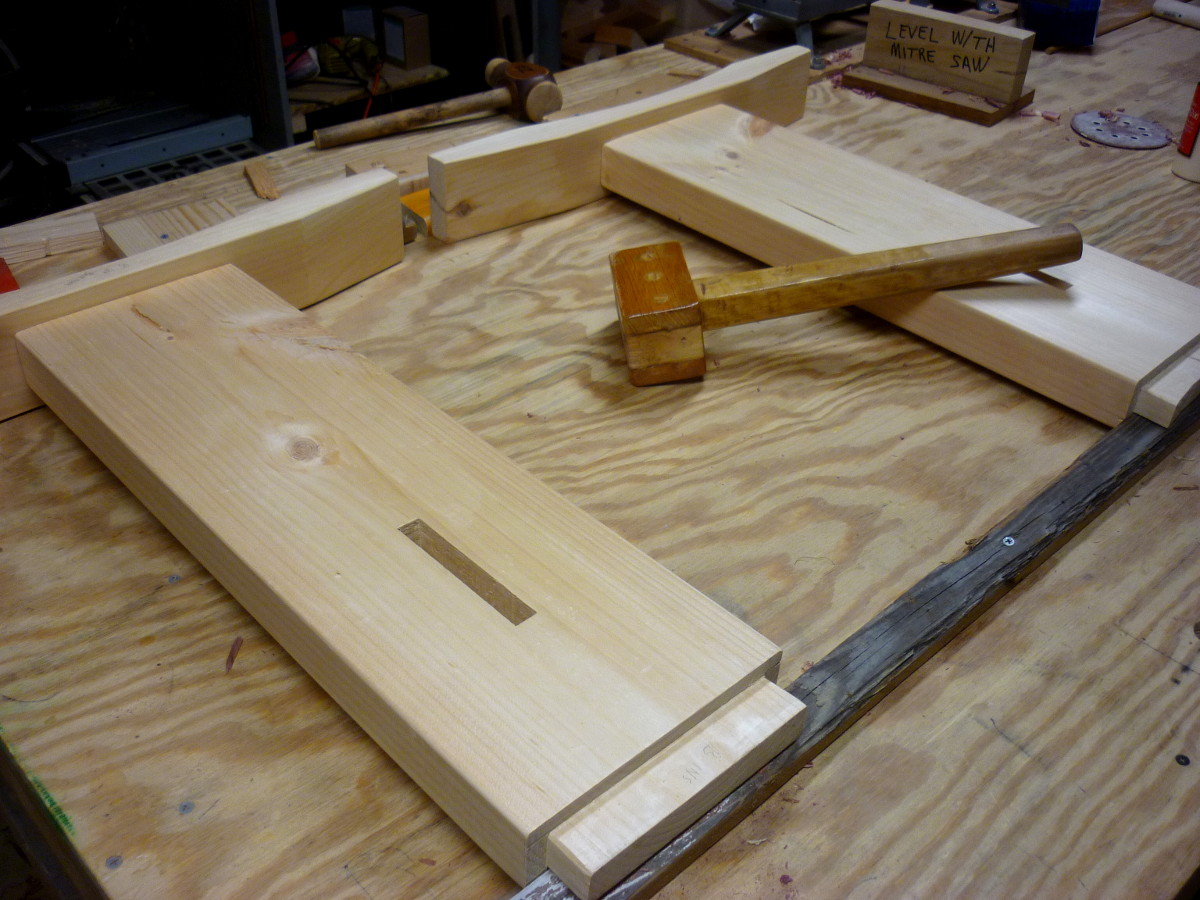
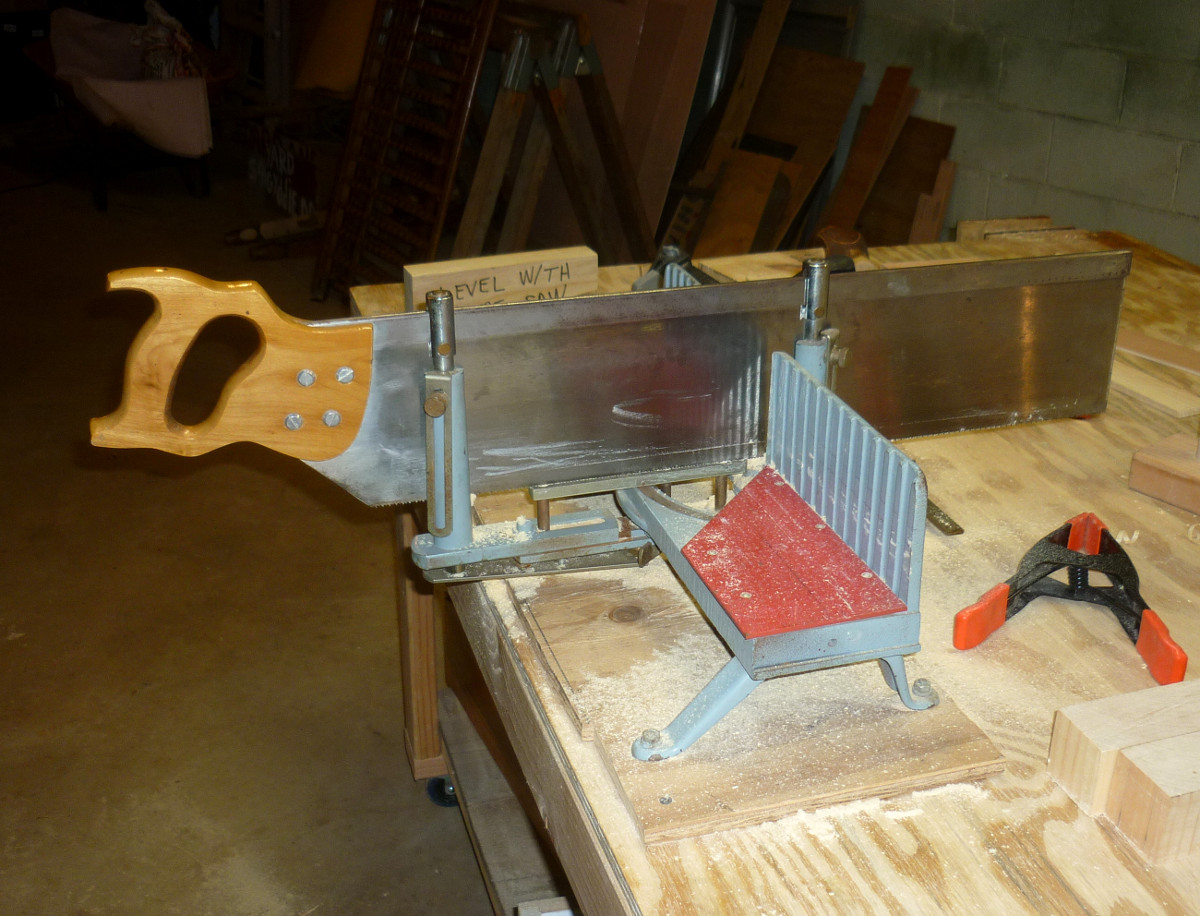
The Paul Sellers bench has some curves and we decided to cut them with a jig saw, since we don't have a band saw. This is one of the few jobs that we often give to the power tools, and I won't deny that it saved us a lot of time and tedious work. I don't mind working with a coping saw, but Joe doesn't enjoy it, and this job would have taken hours. On the other hand, Joe, with his production carpentry background, is fast and accurate with a jig saw, so he did most of the cuts.
June 9th, 2015
Posted by Paul

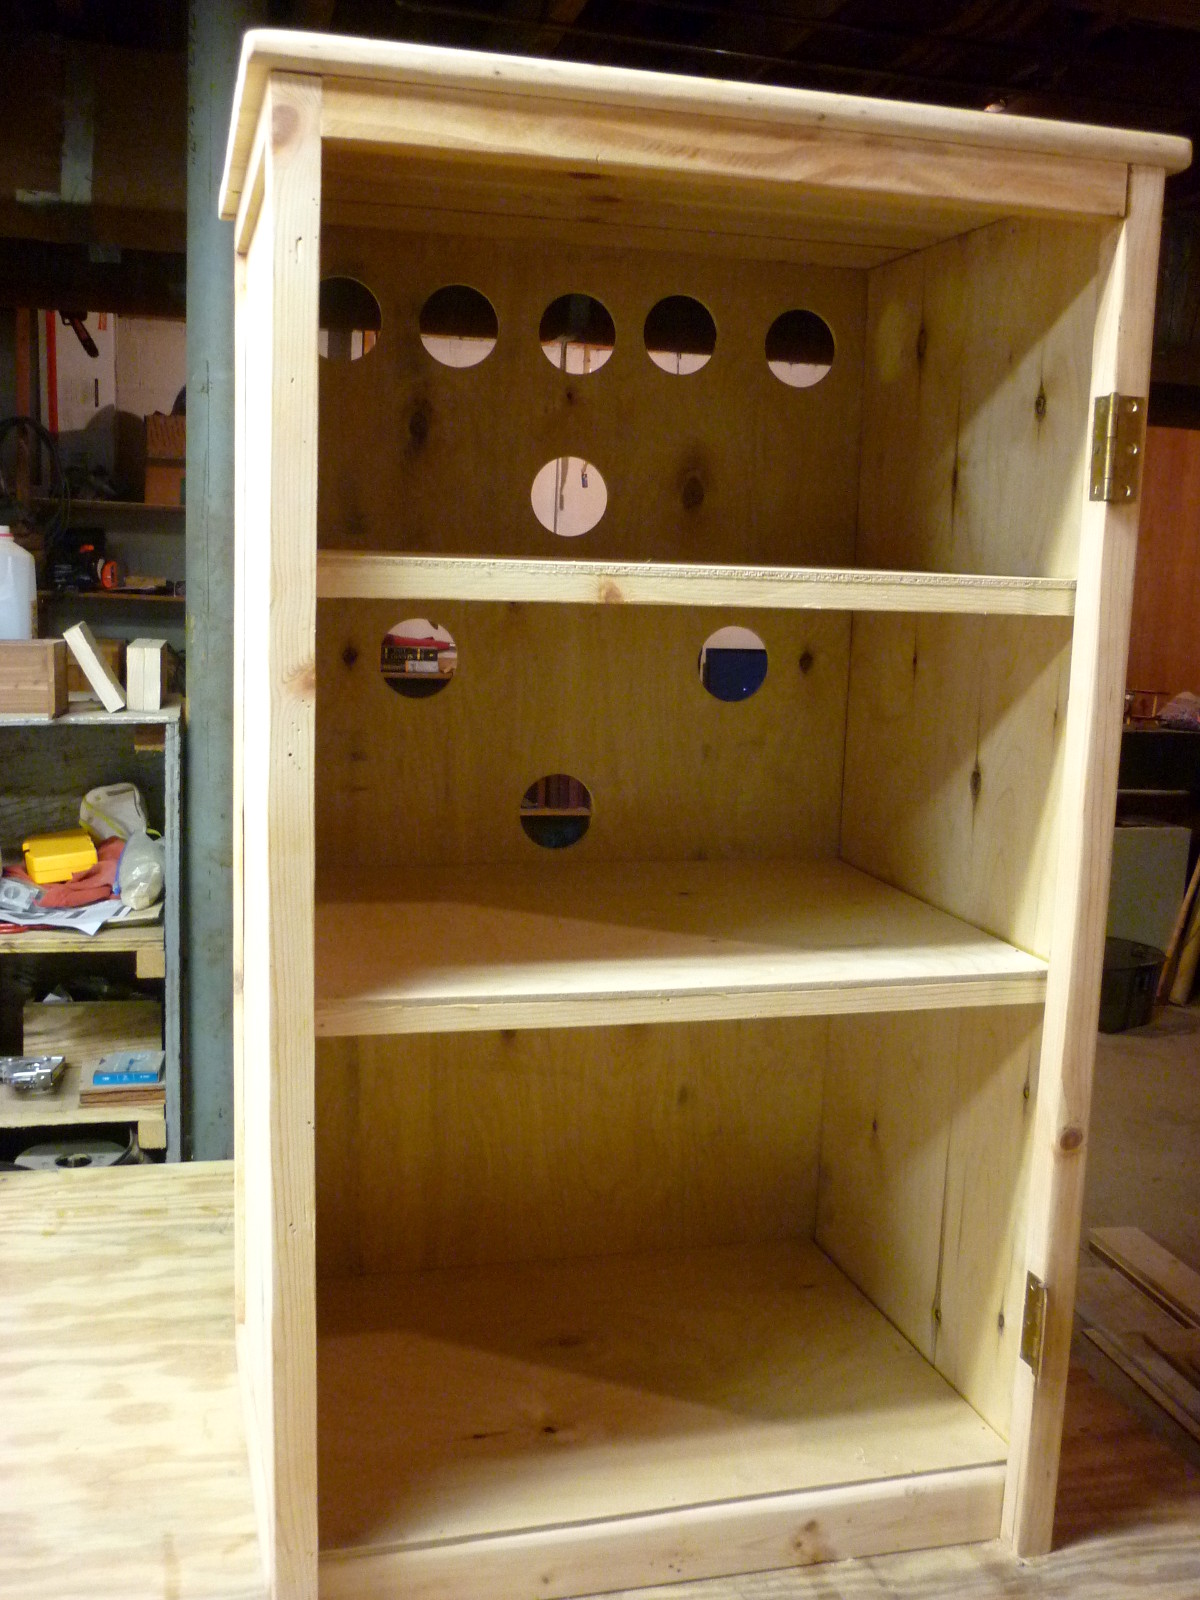
We hung the door on the PS4 cabinet and installed the latch, an elbow catch hung on the door back and accessed through a hole. It should be Lars-proof, at least for a while. This style of latch is common on boats, and my CD25 Valor has three of them on various lockers. With a first coat of poly painted on, we're getting very close to delivering this job.
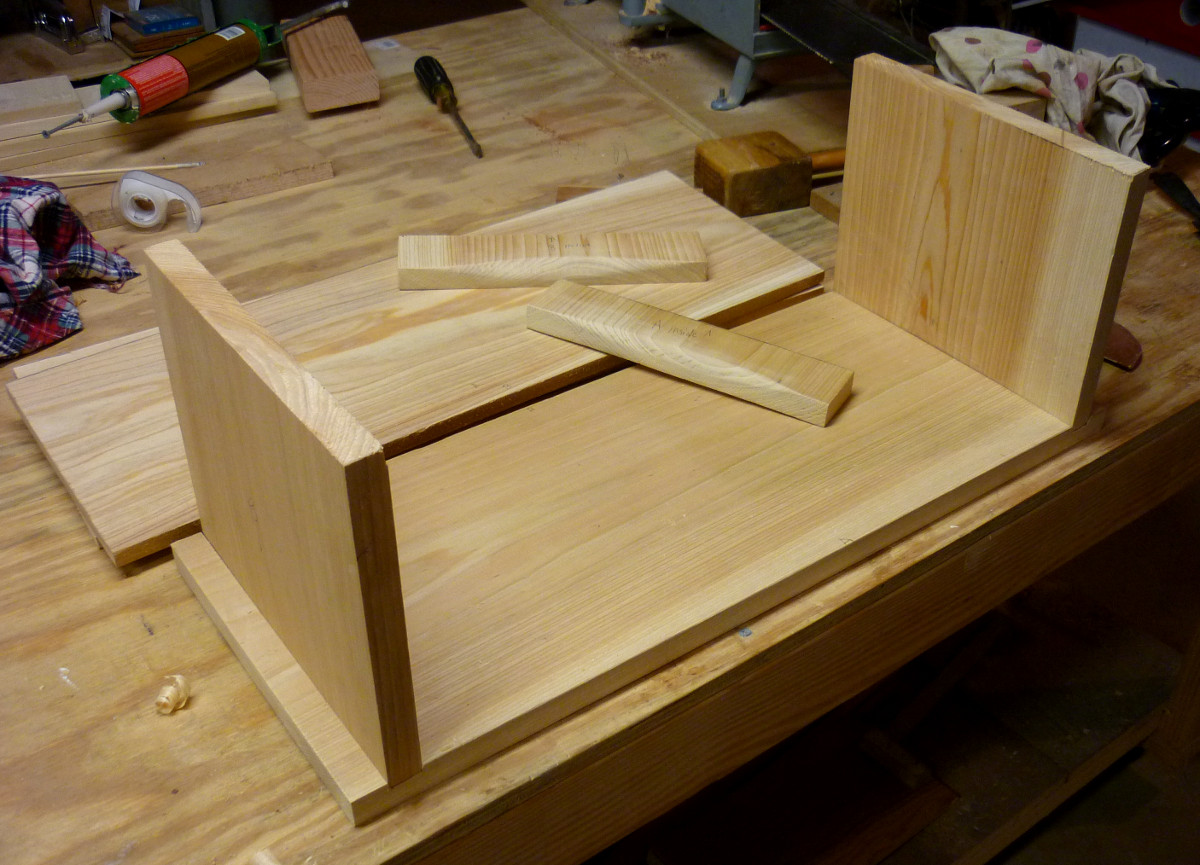
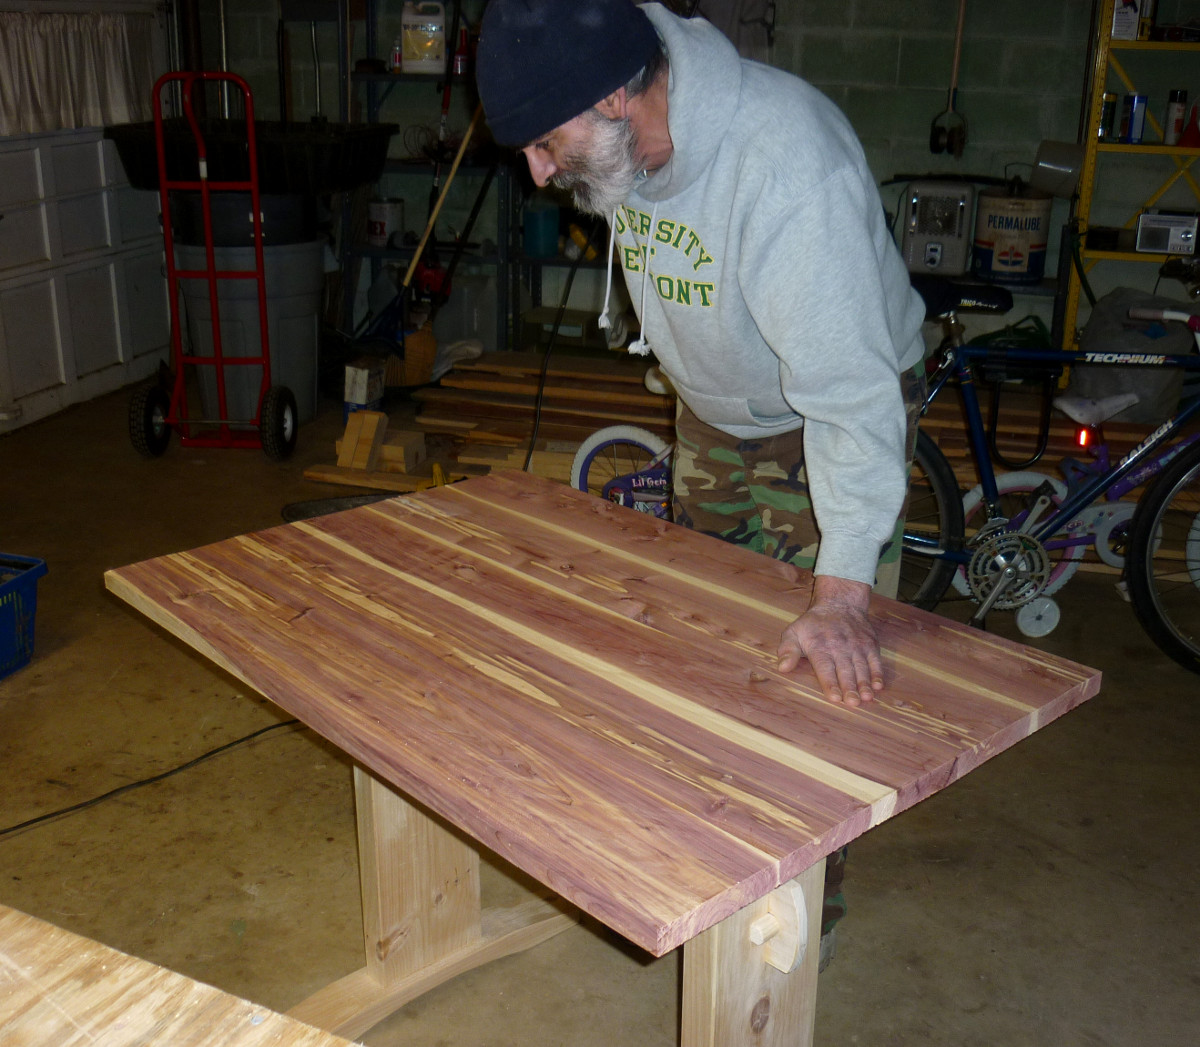
Next up - a bench patterned after one that Paul Sellers designed and featured on his June 3rd, 2015 blog post. Ours will be in cedar, and will have simple dado joints to attach the legs to the top, rather than Paul's sliding dovetails.
May 29th, 2015
Posted by Paul
Over at Matt's Basement Workshop, we had a little discussion about the concept of "building with a purpose", which to me goes along with Chris Schwarz's idea of "furniture of necessity". After a while, we don't just randomly build something for the fun of it, we start building specific items because someone we know needs something that will make their life easier, safer, happier, whatever. There is making fine furniture to support people's needs for beautiful settings and ostentation, which of course is a legitimate craft and the bread and butter of almost every professional cabinetmaker out there - and there is making a kitchen table for the neighbor who lacks a kitchen table, which is furniture of necessity. Chris Schwarz is writing a book about it, and I'll buy it the day it is issued.
This purpose-built item for Marie and Levi is to hold their PS4 console and controllers (those are devices to play video games, for the uninitiated). The cats had taken an interest in all the wires and cables, and now Lars has as well. So we decided it was best to put it all away inside a cabinet. We drilled holes in the back to let out any heat that the devices may generate, and allow wires to be pulled in from the back. All that is left is to install the door and latch, sand lightly and finish.
May 28th, 2015
Posted by Paul
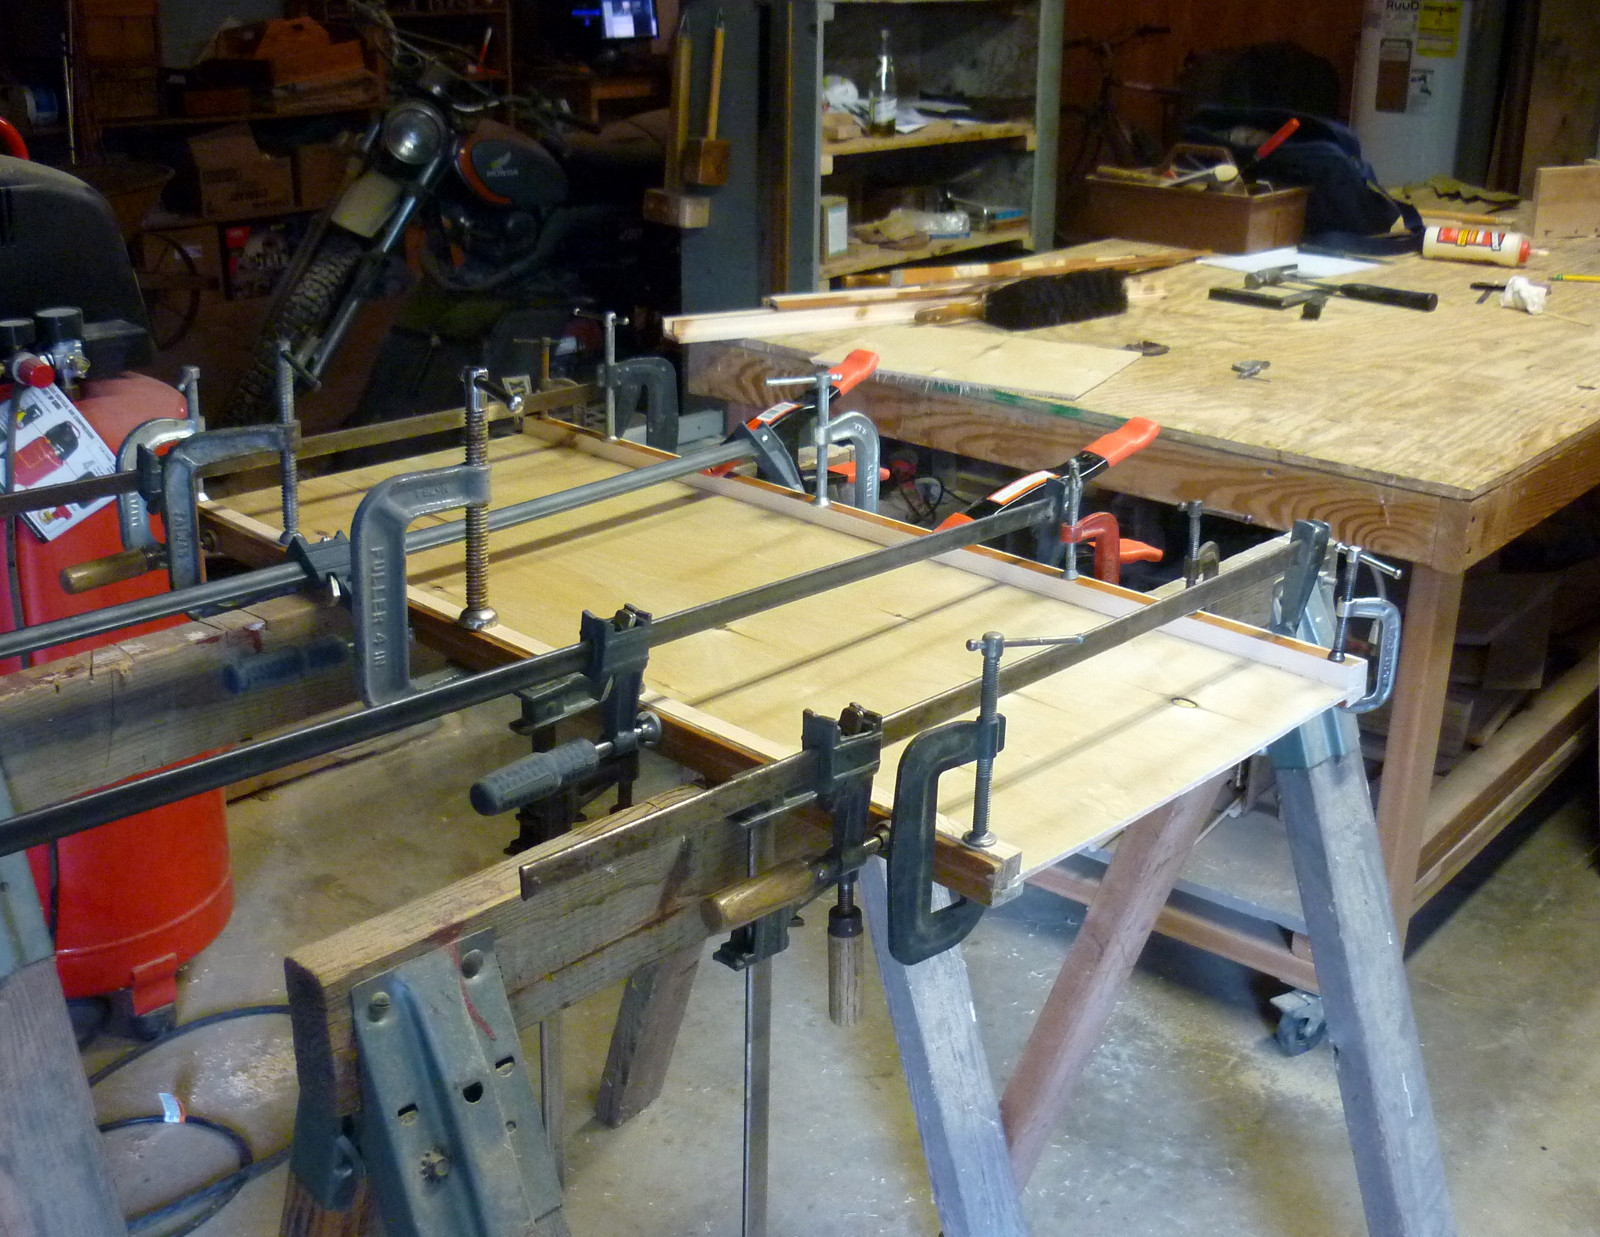
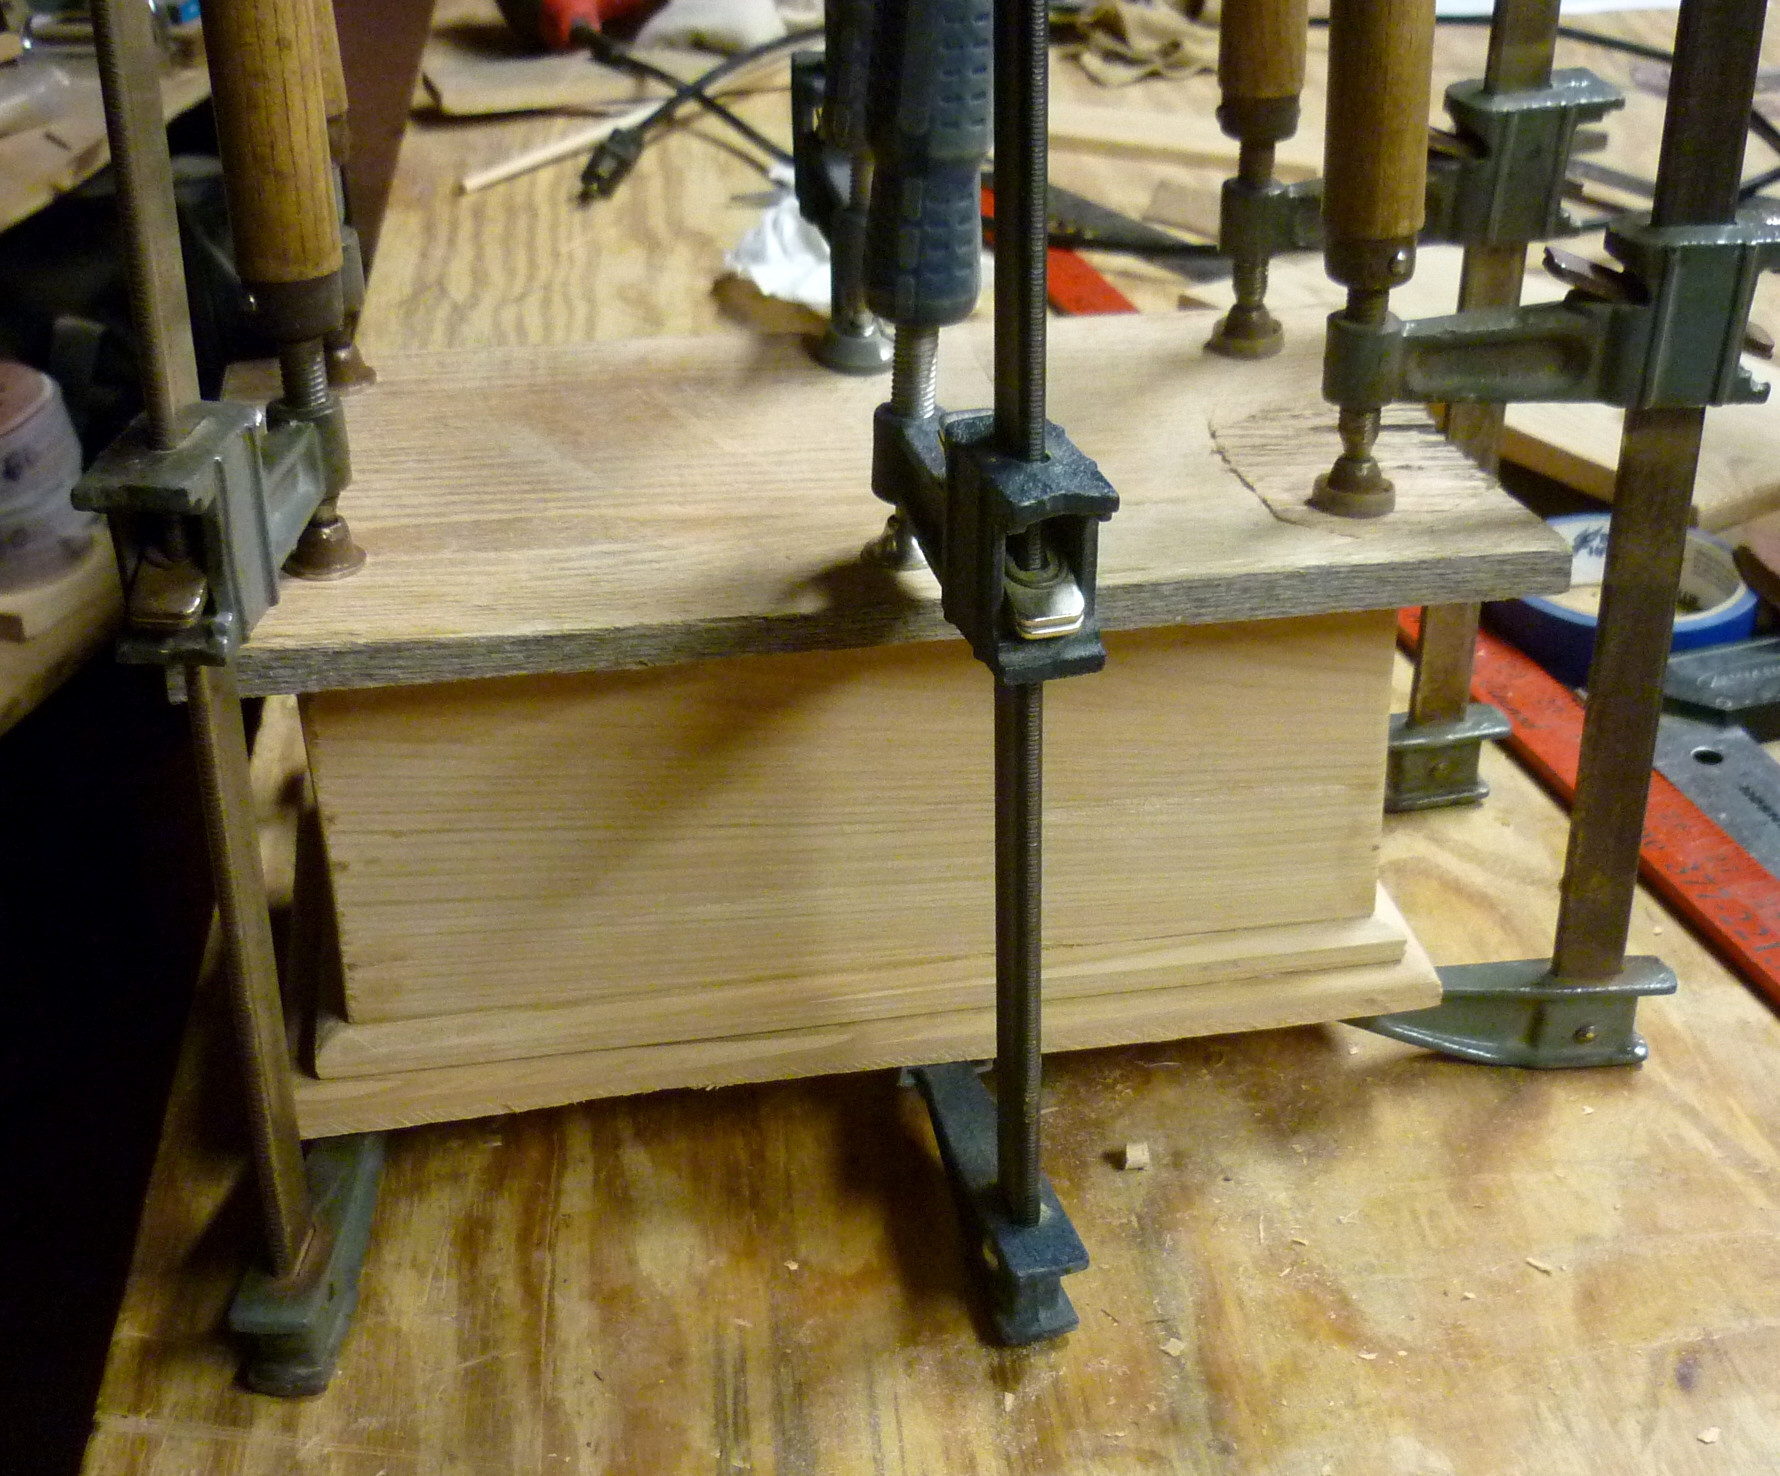
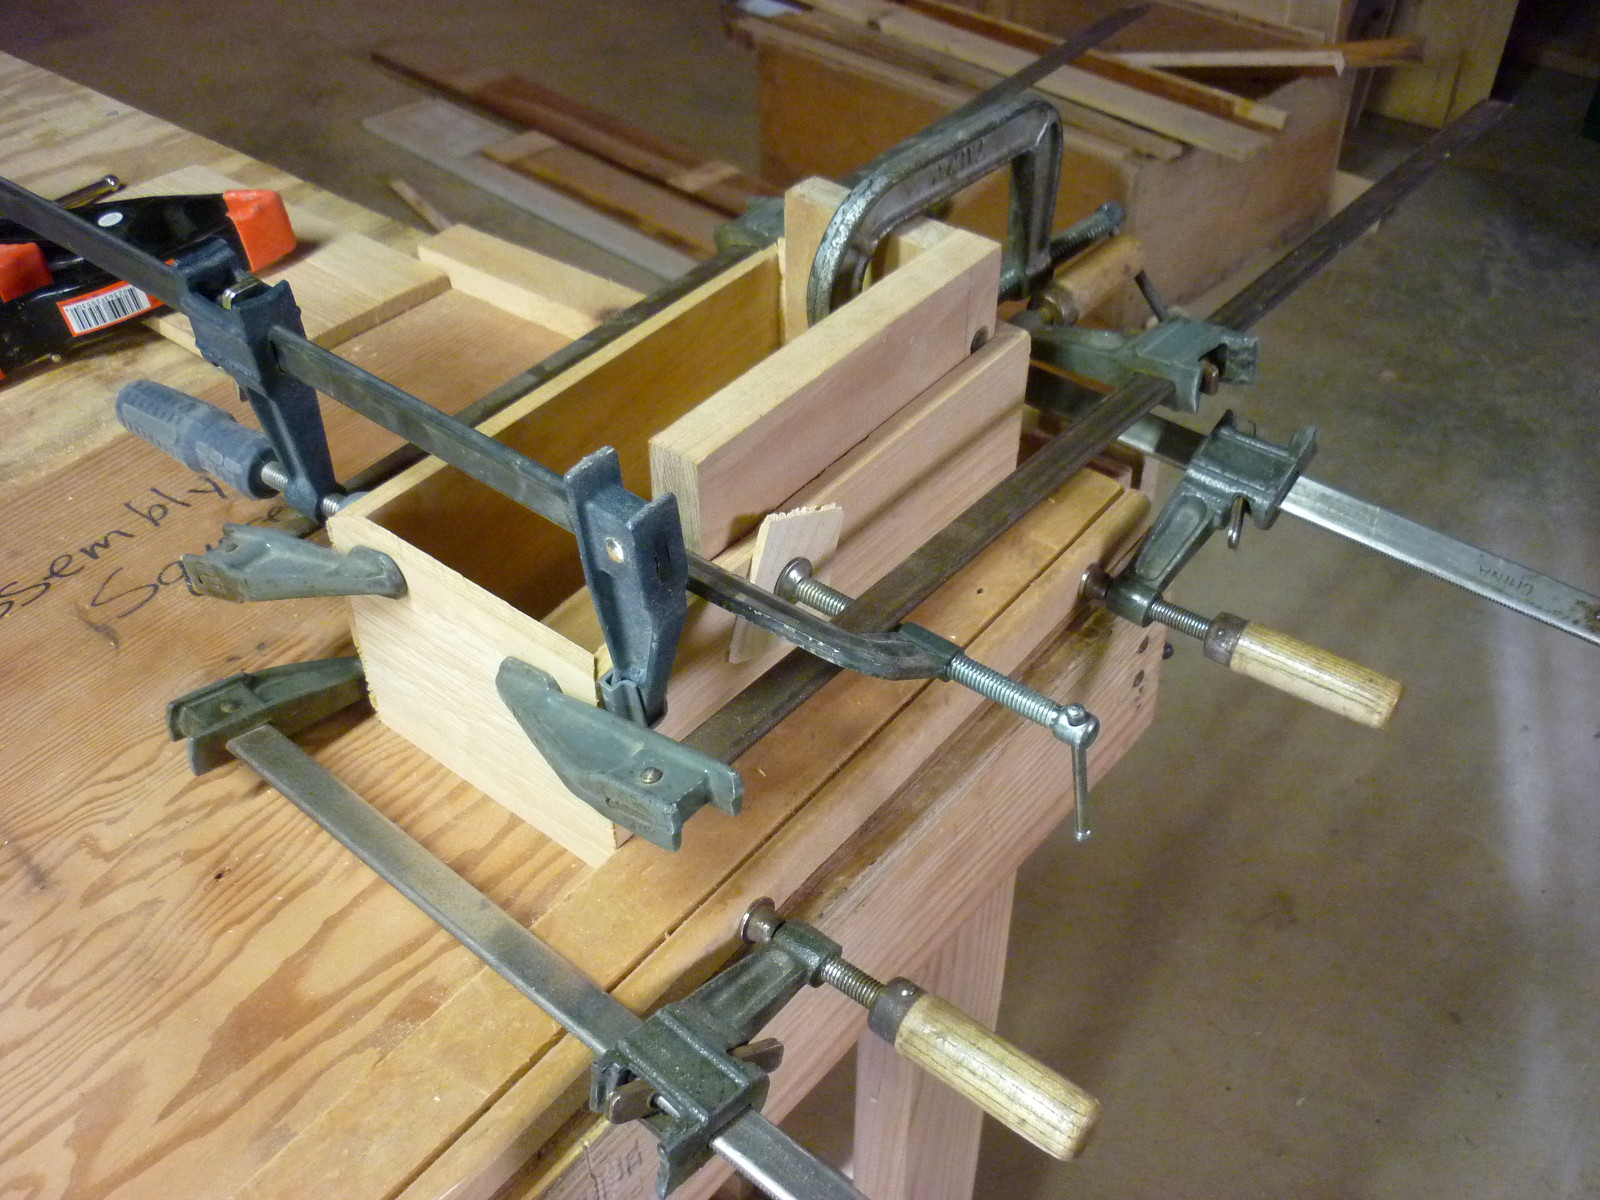
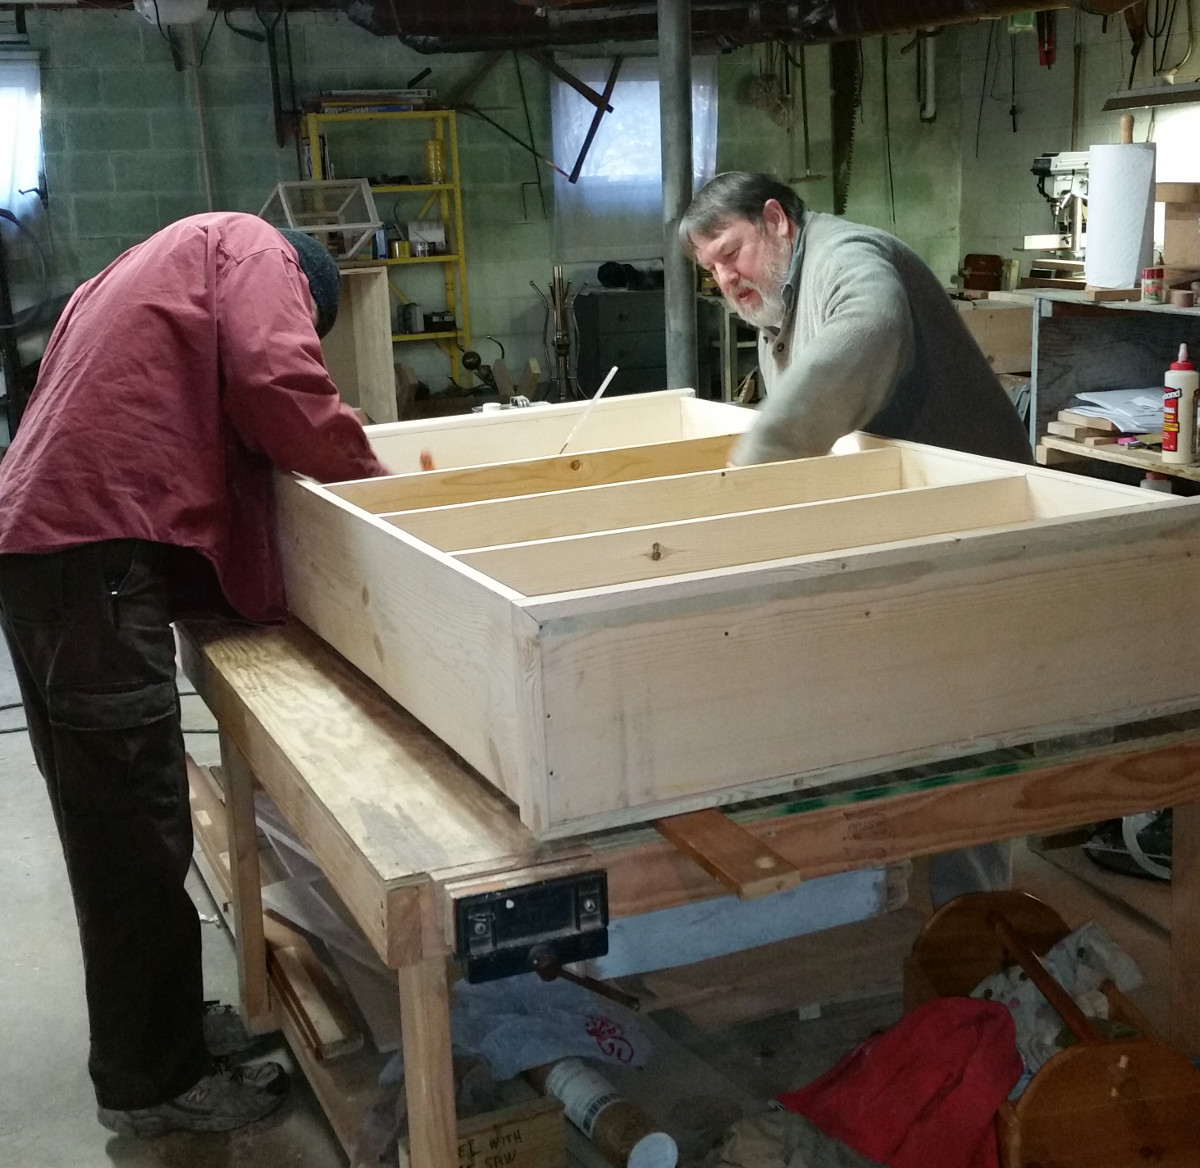
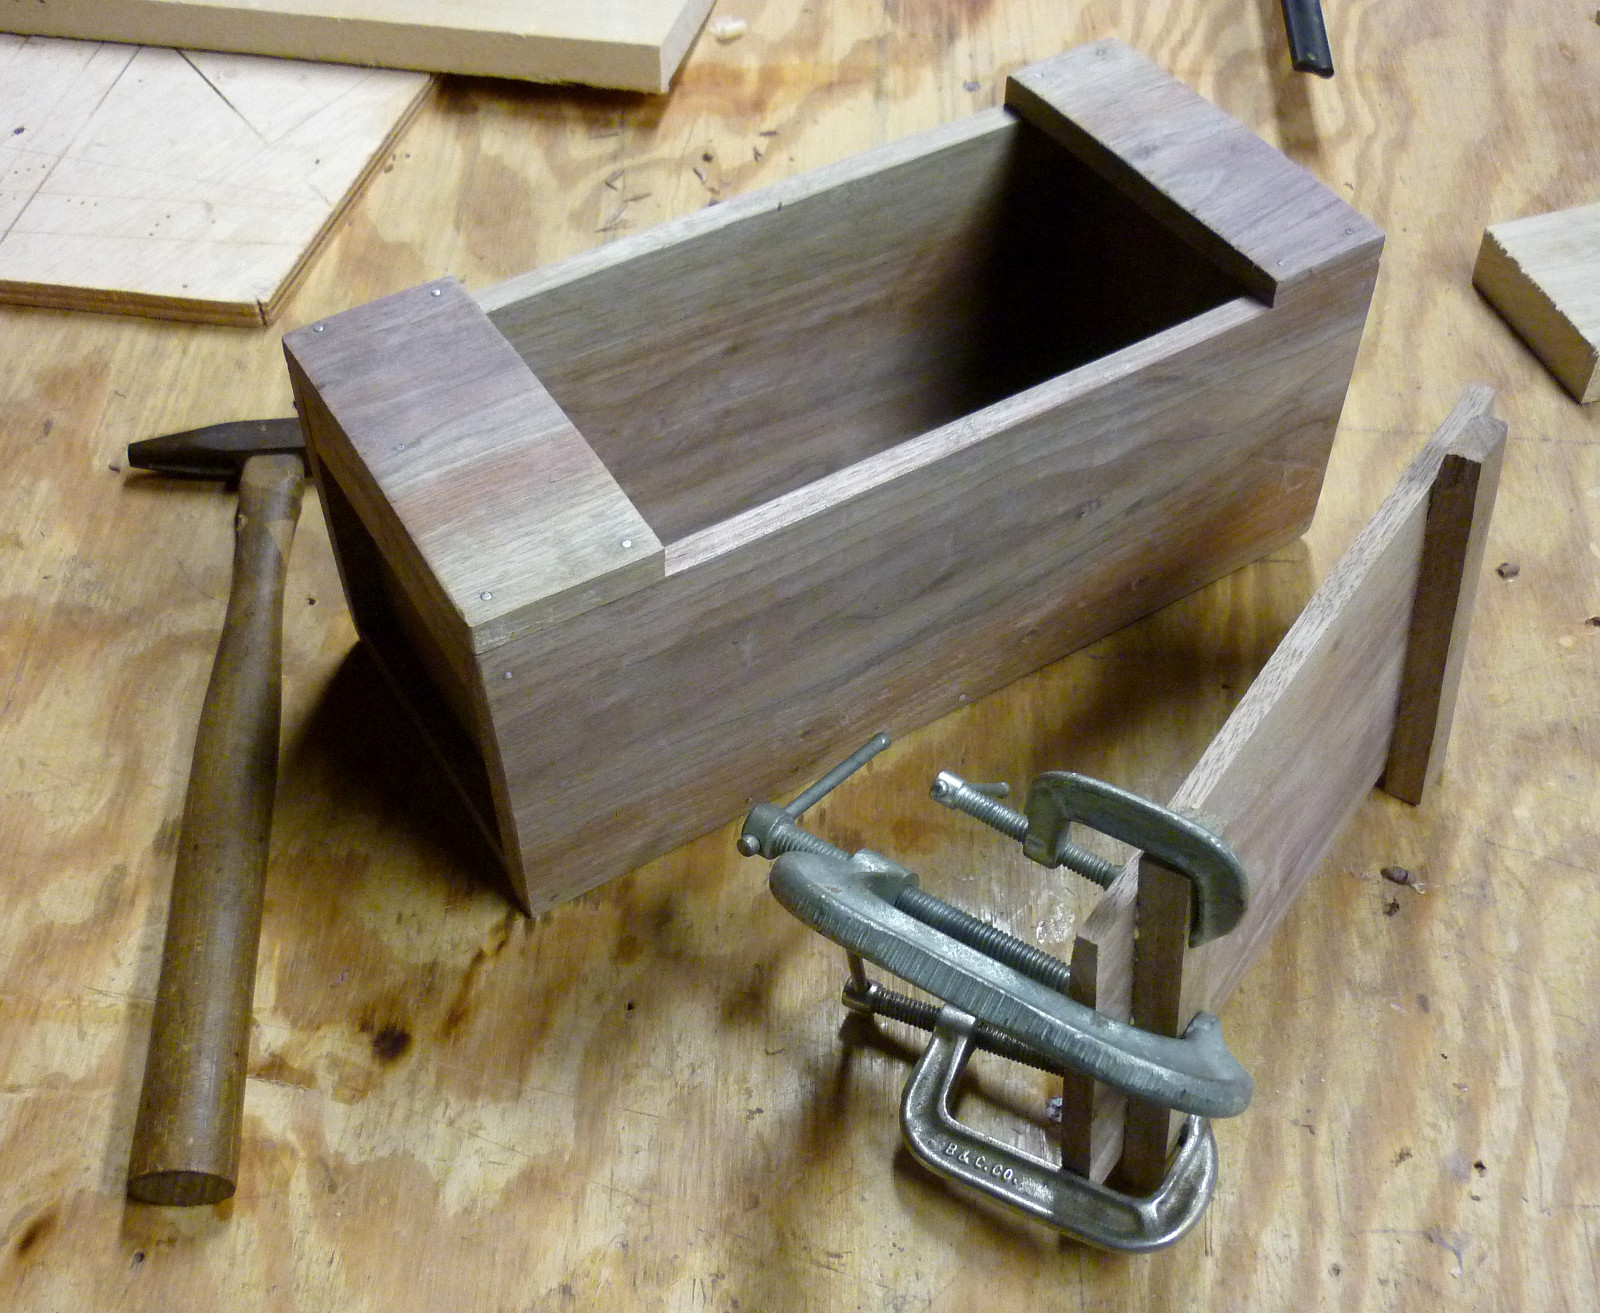
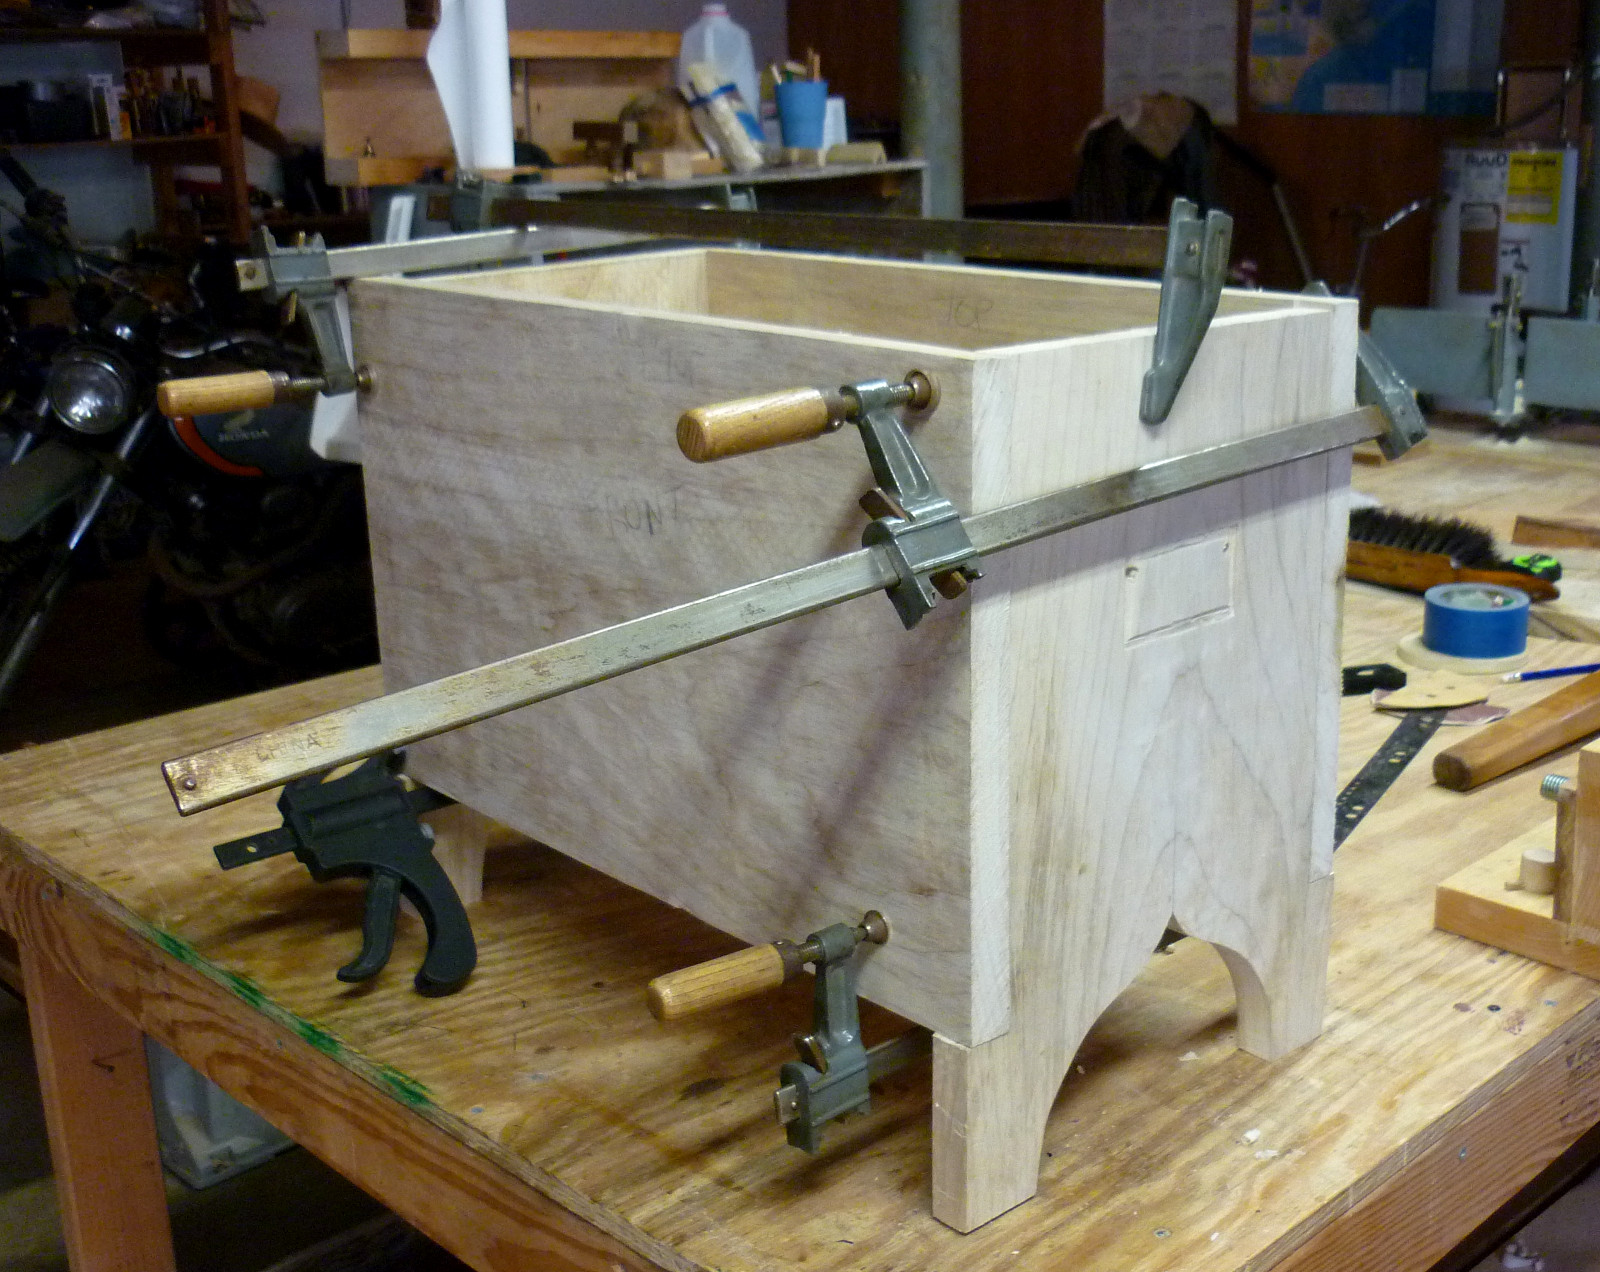
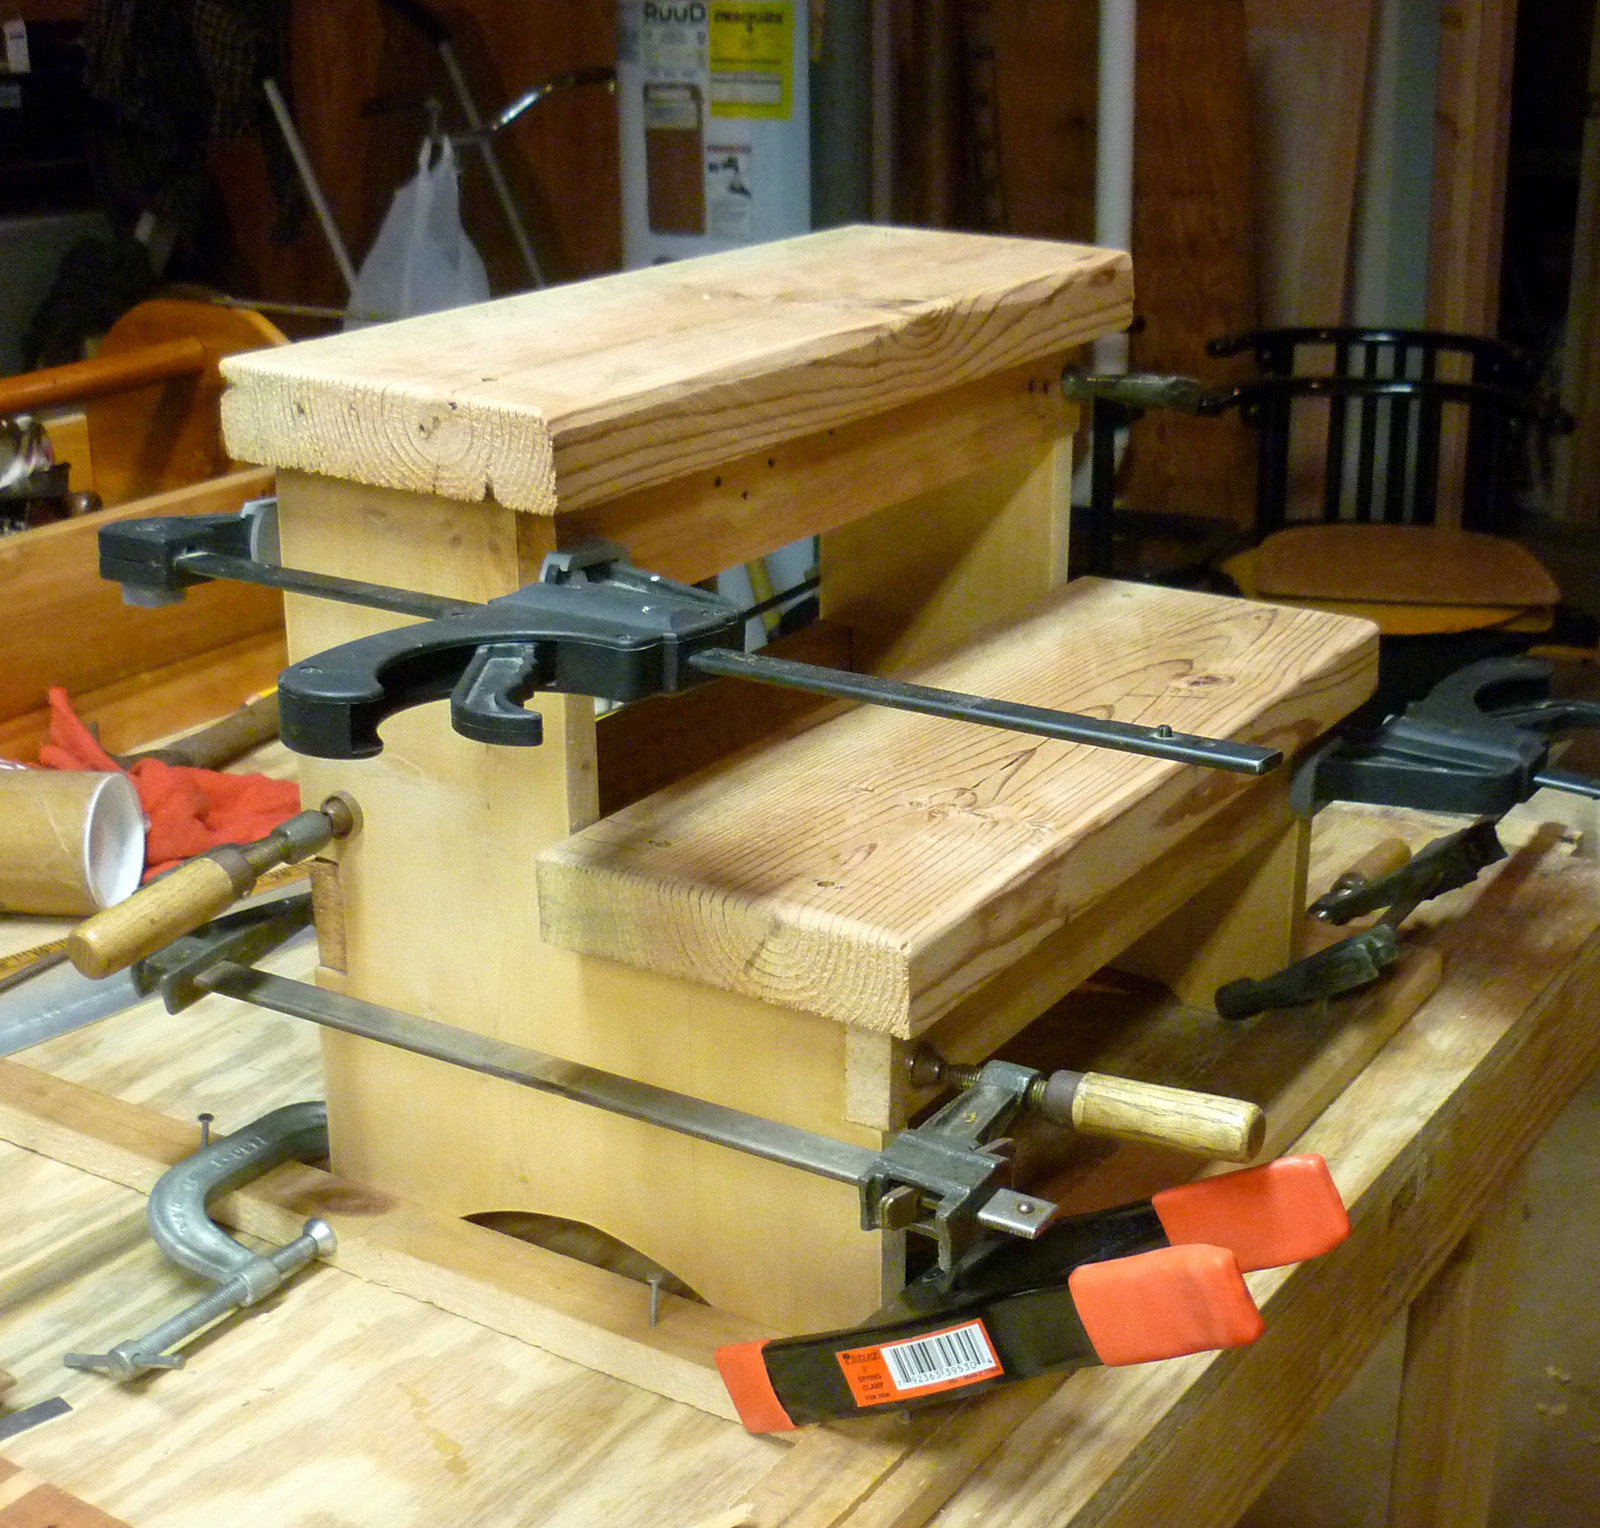
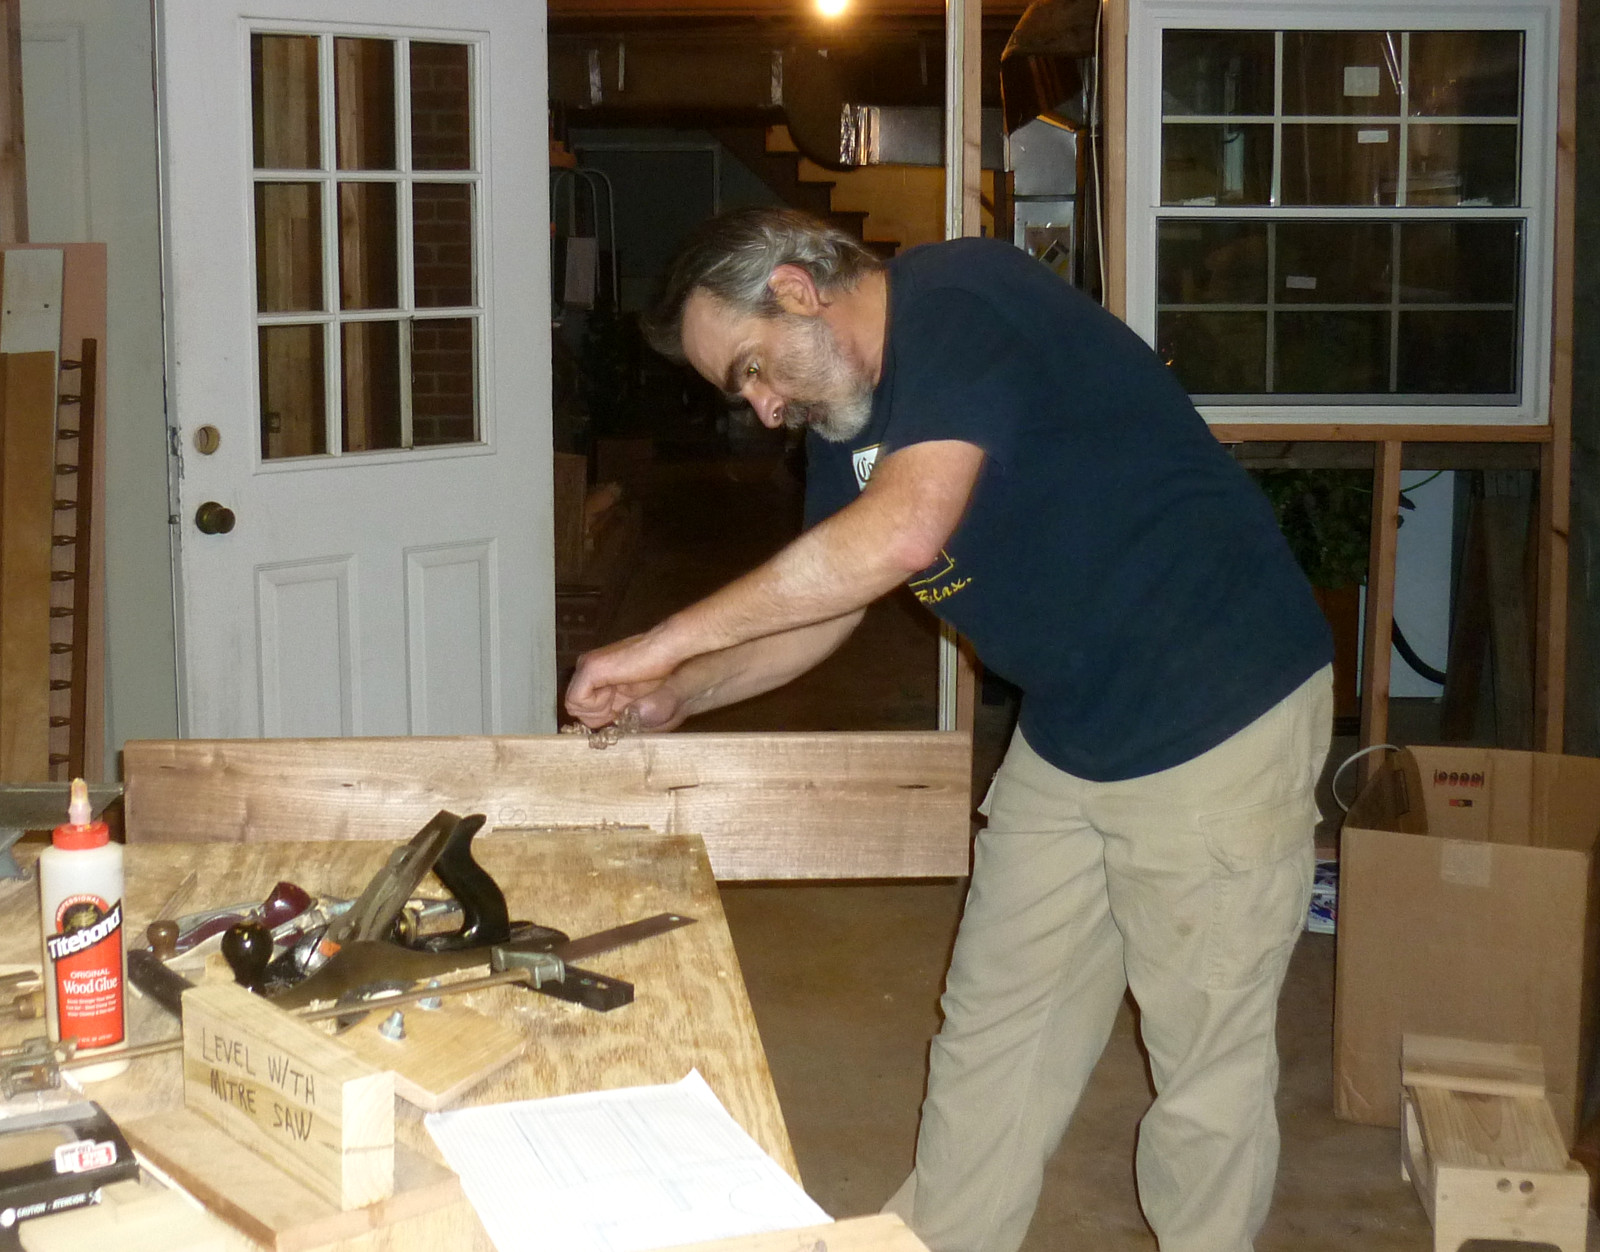
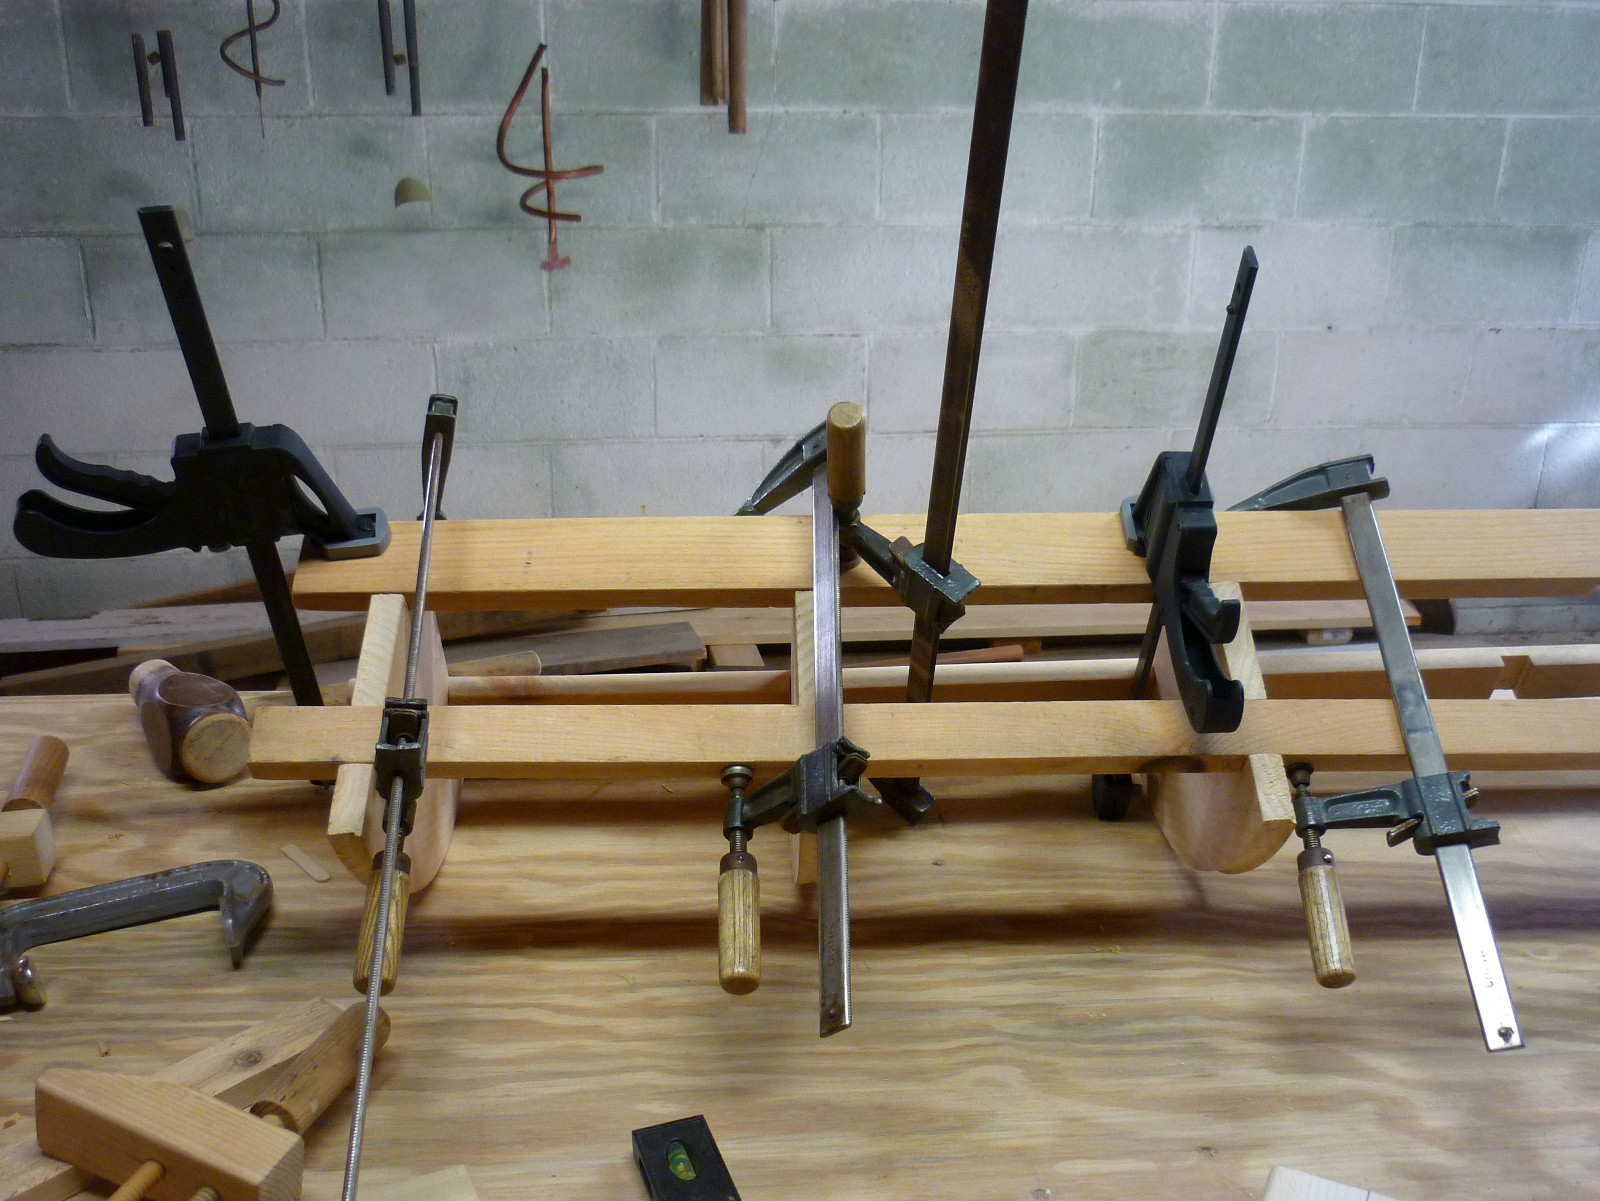
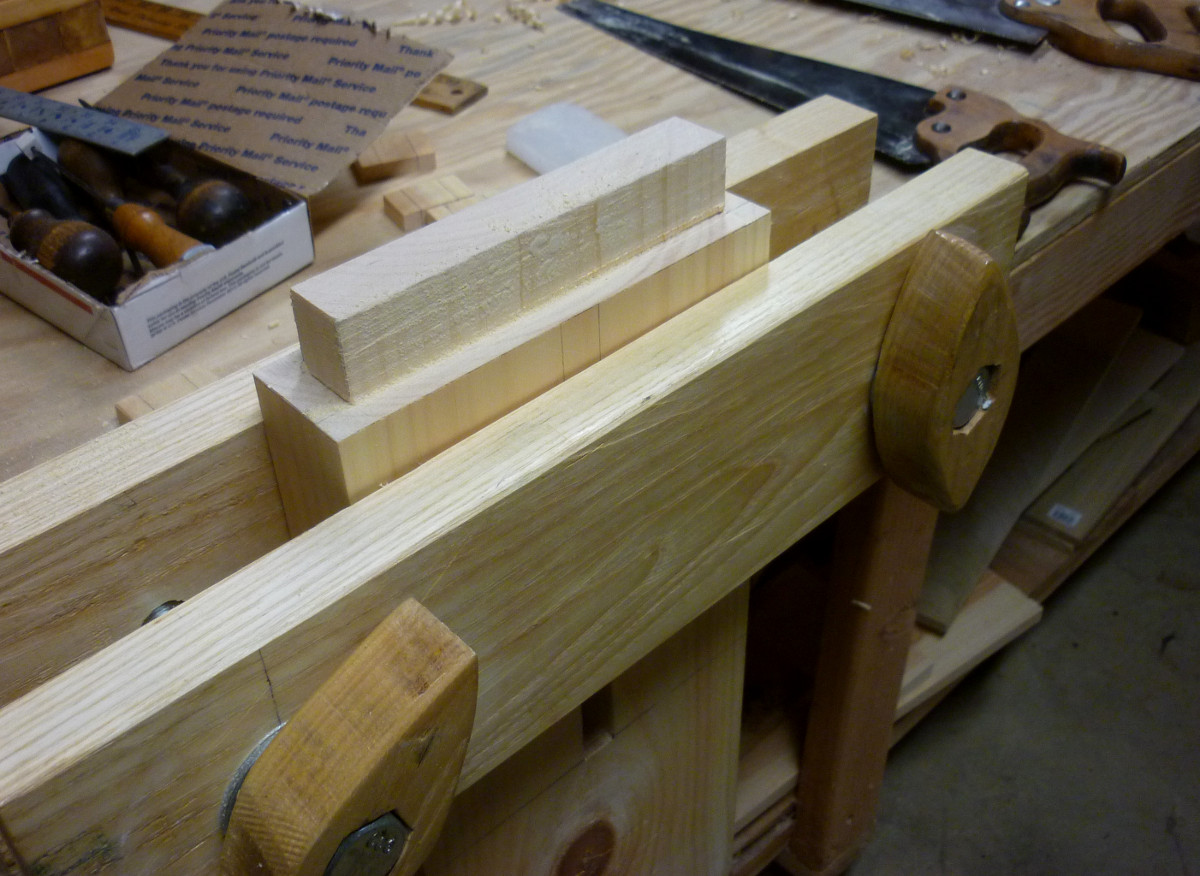
I count 16 clamps on this glue-up. This is essentially every clamp we have, except for the two little c-clamps laying on the table and the wooden screw-clamps we made when we first got started.
Lots to see in this picture. Our hammers Thor and Jr hanging on the case. An almost-empty bottle of glue and a half-empty bottle of Miller High Life. Box of milk paint on the shelf. Chisel roll, assembly square, carpenter's square, pencil, brush, framing hammer, awl...
May 27th, 2015
Posted by Paul
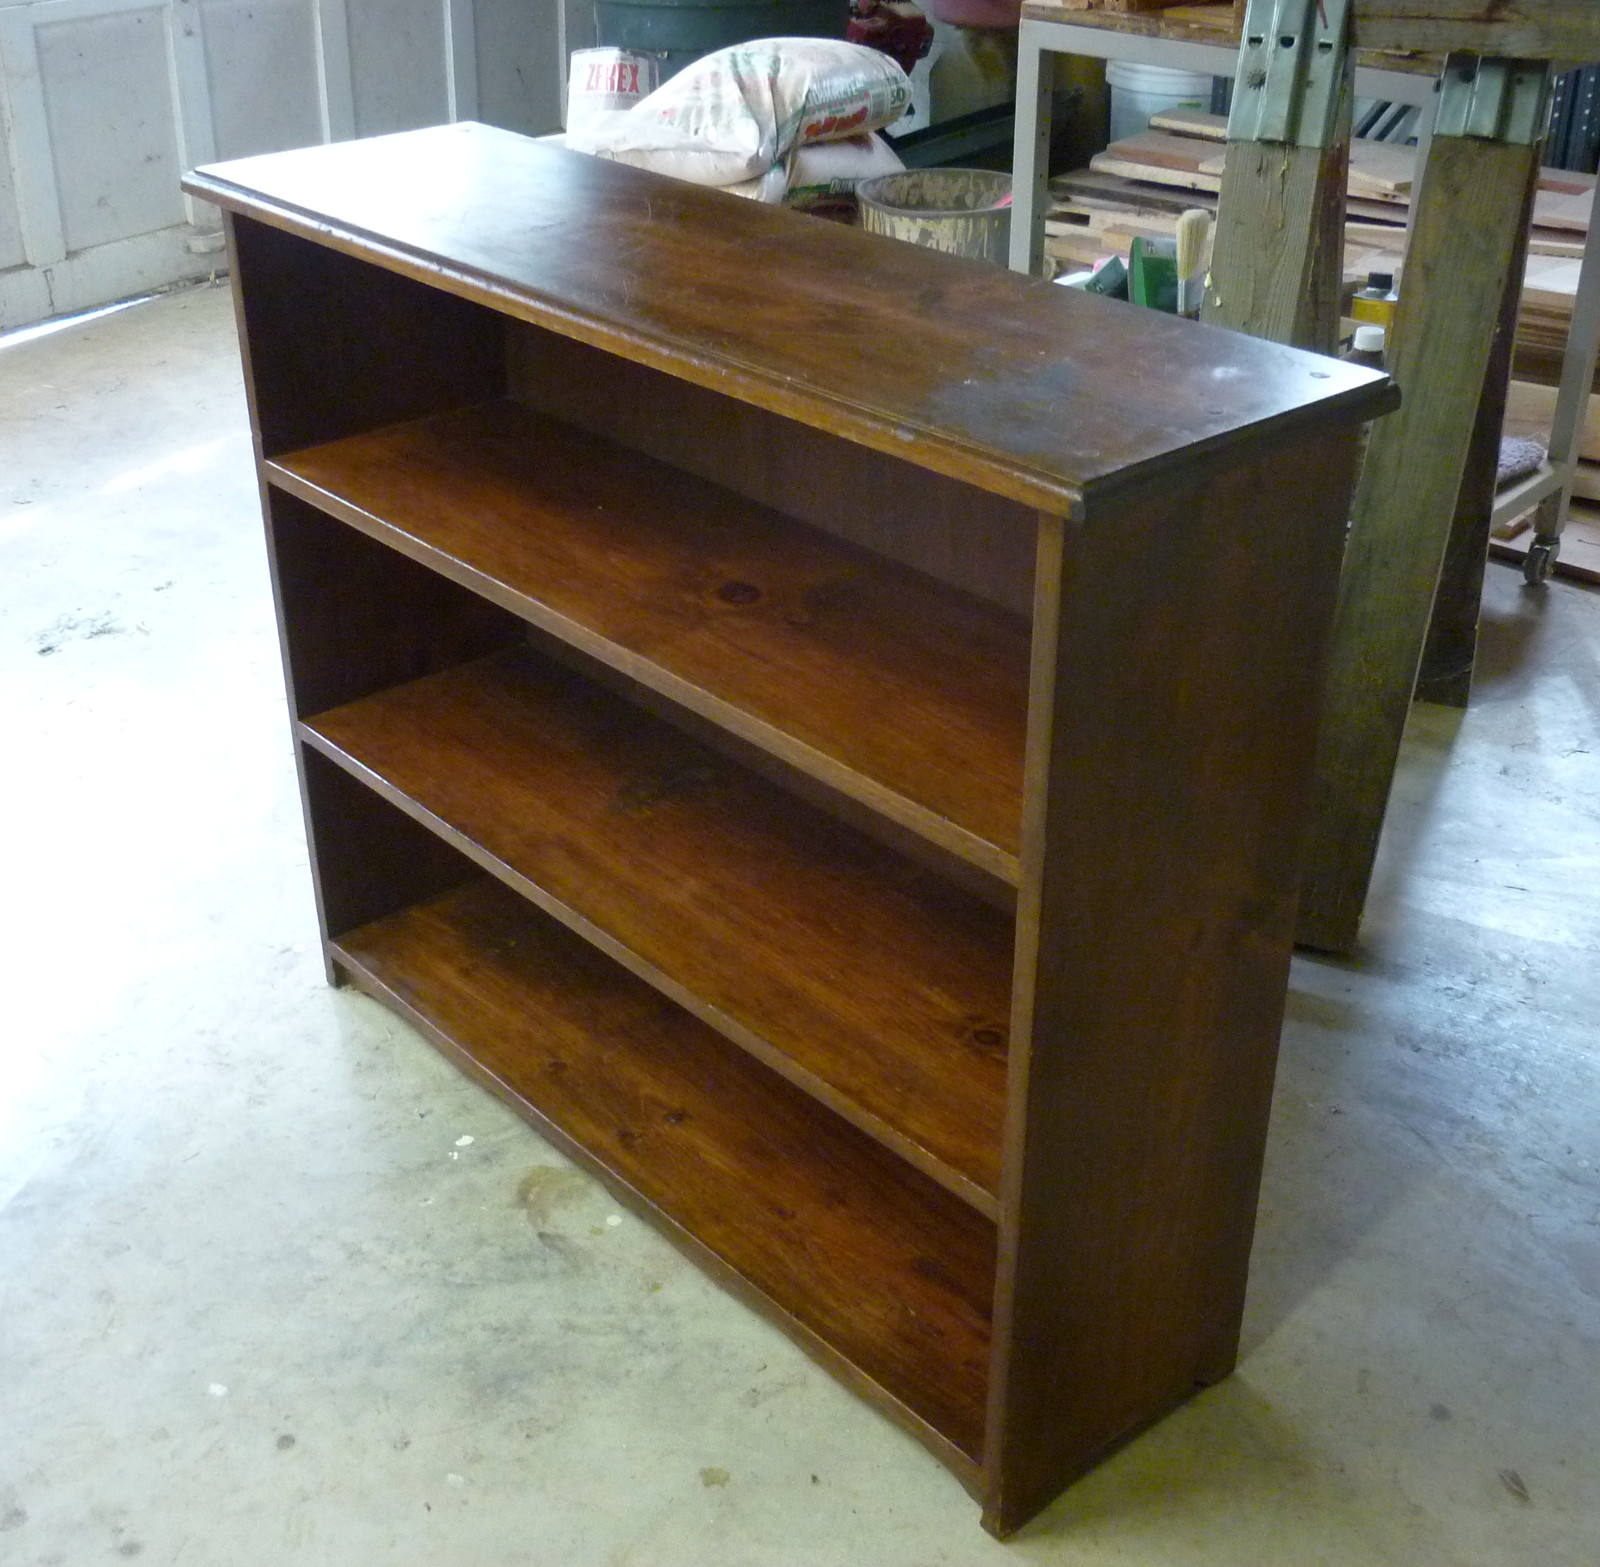
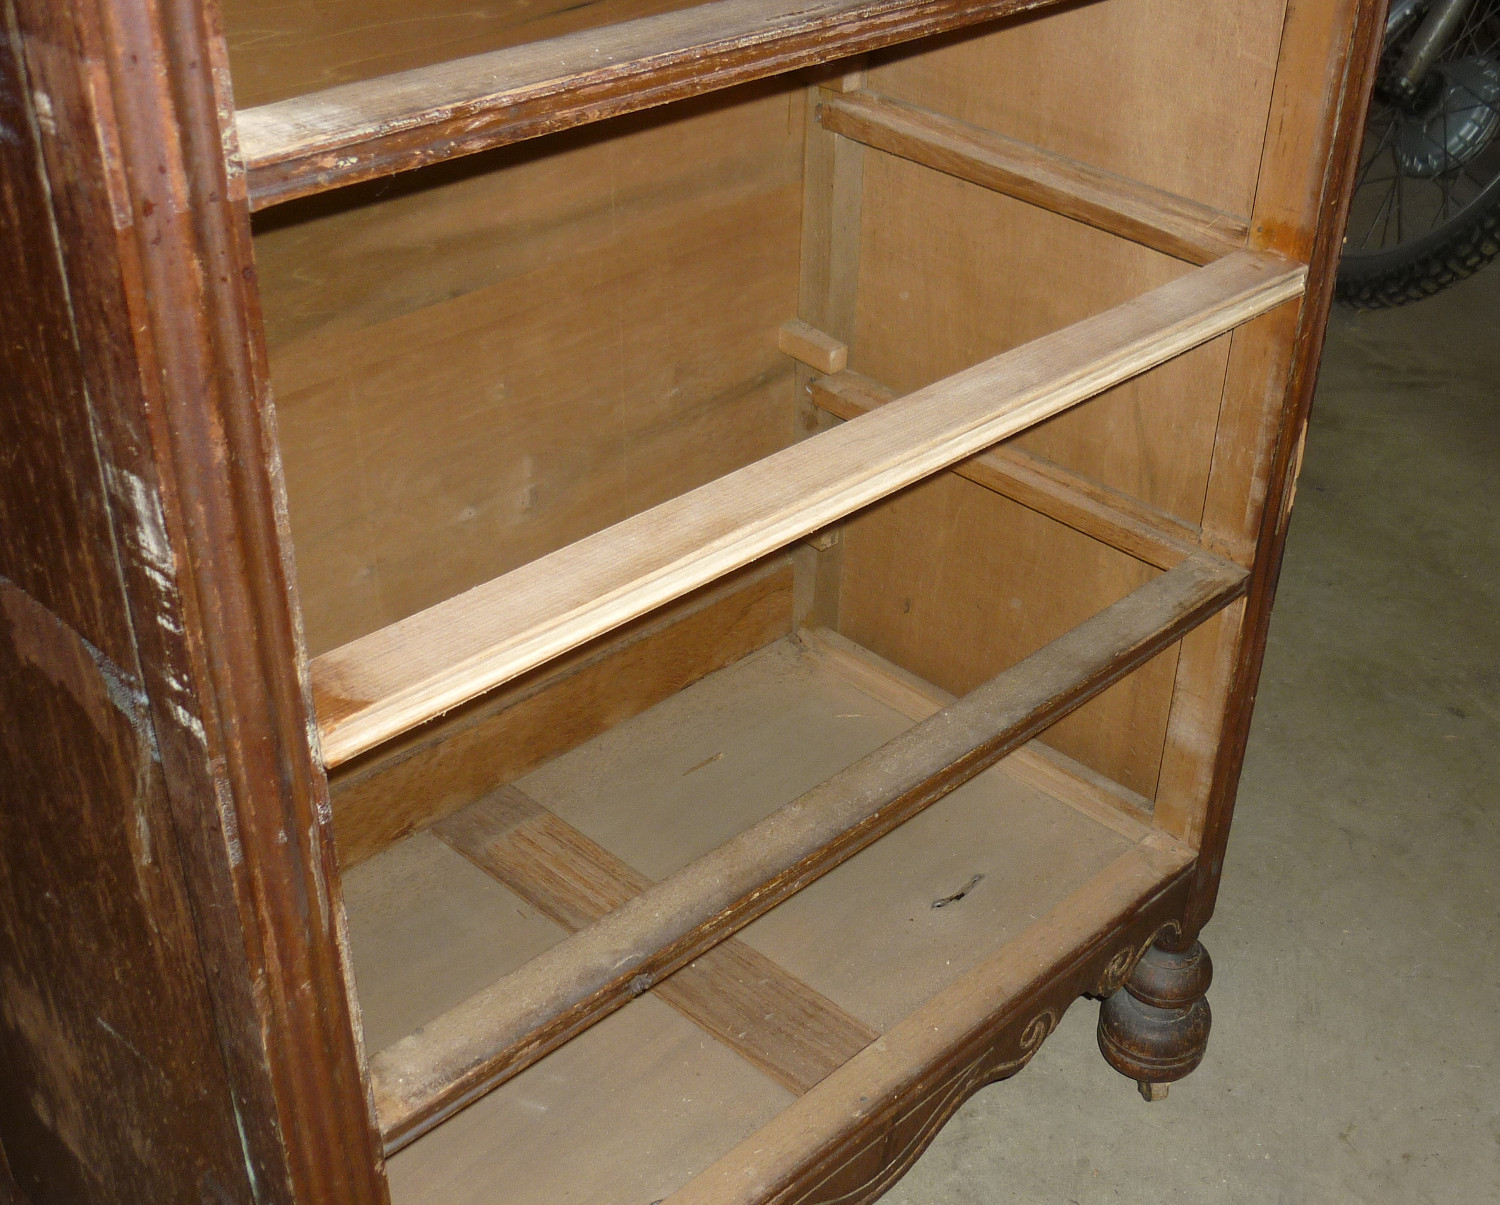
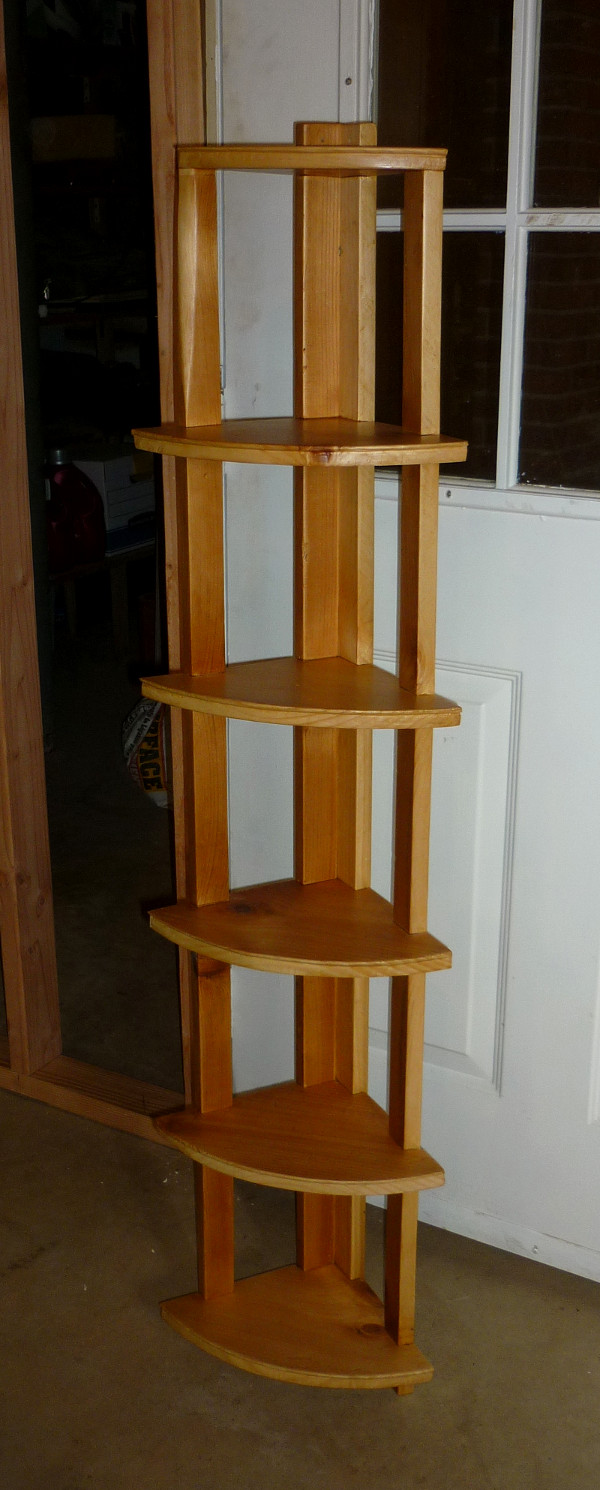
Somebody put this bookshelf out by the dumpster at my condominium complex. Maybe they are moving and don't have room to haul it, or maybe they bought or inherited something they like better. I'll give them credit for knowing someone would want it and putting it prominently in front of the dumpster, not in it.
I figured I could find someone who needed the bookshelf, so I loaded it in the back of the truck and took it to the woodshop. Marcia, Joe and I spent a few minutes looking it over, and finally concluded that it was either a senior class shop project or the product of a home woodshop - probably not a factory job. It is very plain, with only two adornments - a thumbnail moulding around the top and a rounded, serpentine batten below the bottom shelf. All the joinery looks machine-made, except for the rounded edge of the batten, which looks to have been cut by hand. The joints are tight and the whole thing is solid. The wood is pine, stained with a red mahogany color. Overall, it is well-proportioned and crafted, and we all applauded the quality of workmanship. It had a couple of paint stains that we lightly sanded, and lots of scratches, but a rubdown with Old English scratch cover made it look a lot better.
I called Marie to see if she needed another bookshelf and she said yes, she and Levi had just been talking about trying to find one, so I told her I would bring it to her. So one less imported pressboard eyesore will be sold by the big box store, to end in the landfill in a couple of years, and one more piece of hand craftsmanship will grace Marie's house.
May 27th, 2015
Posted by Paul
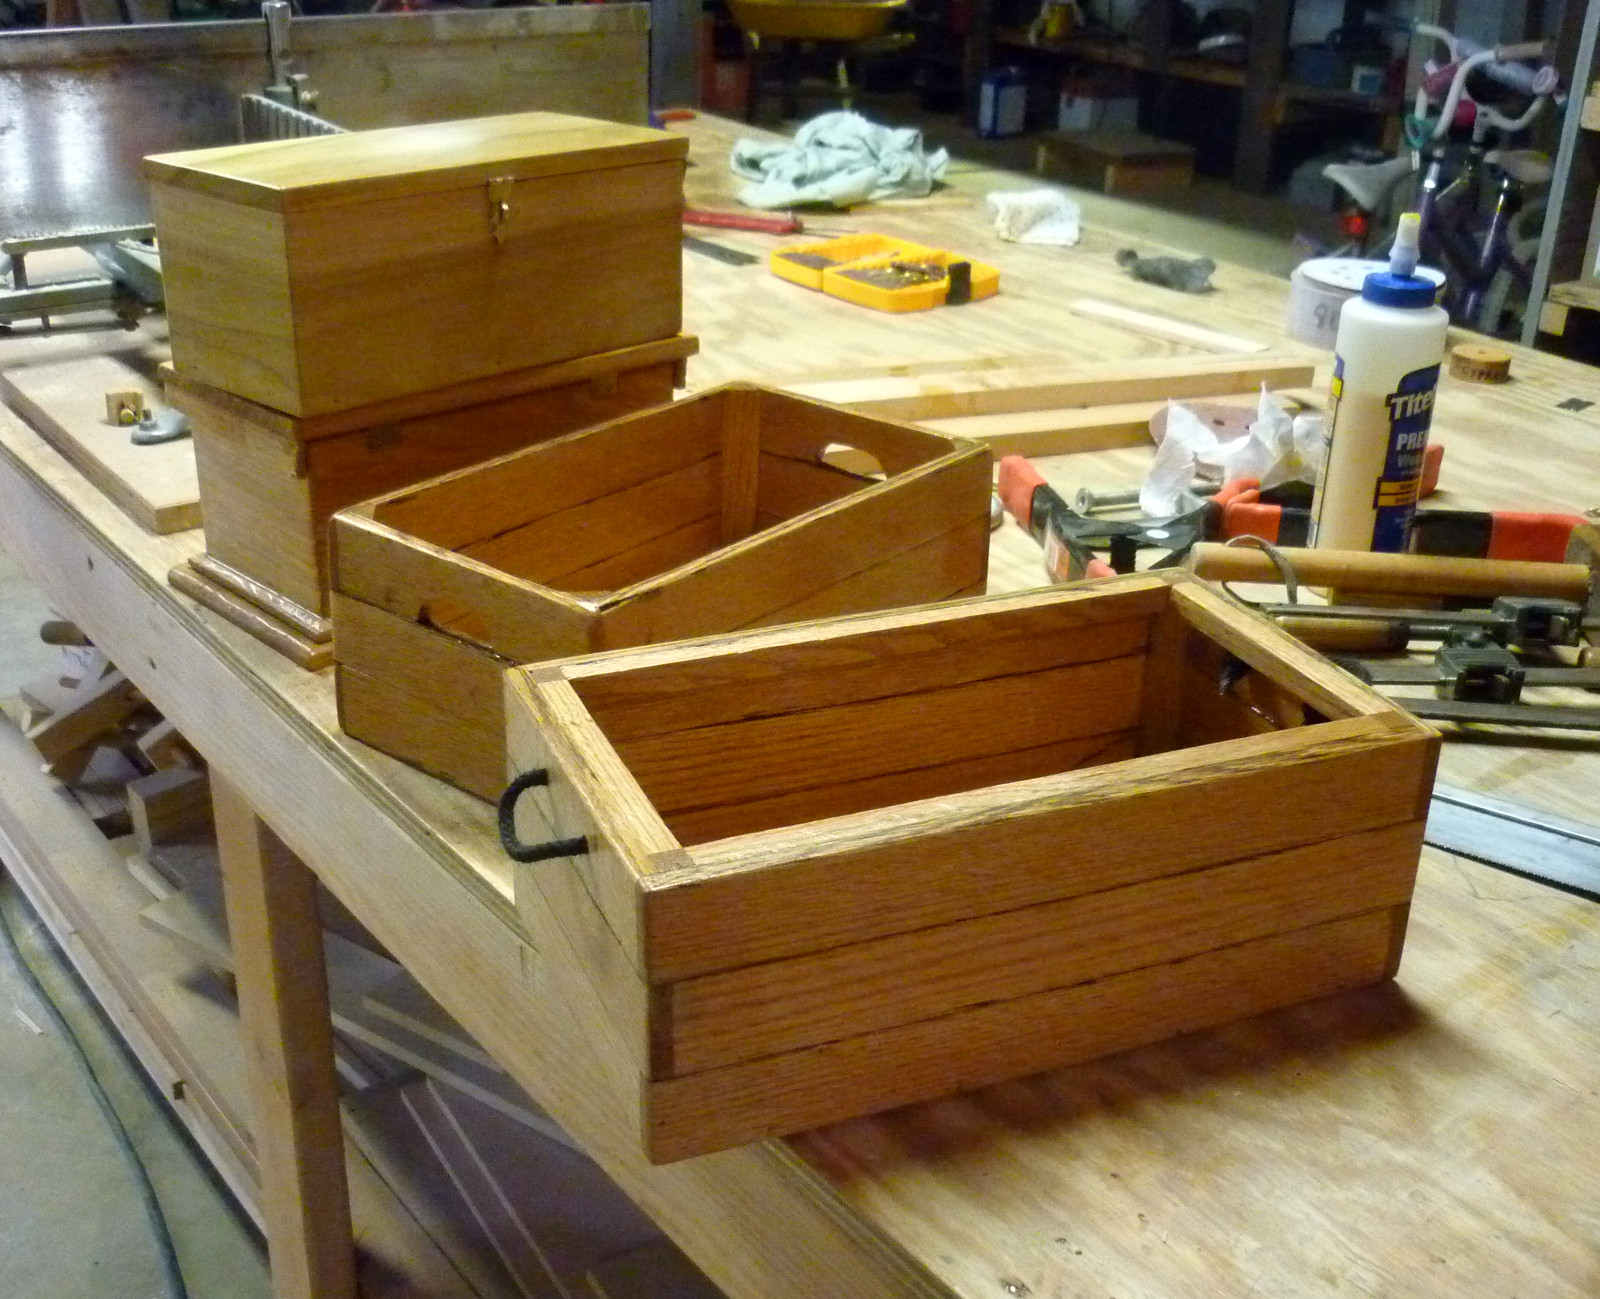
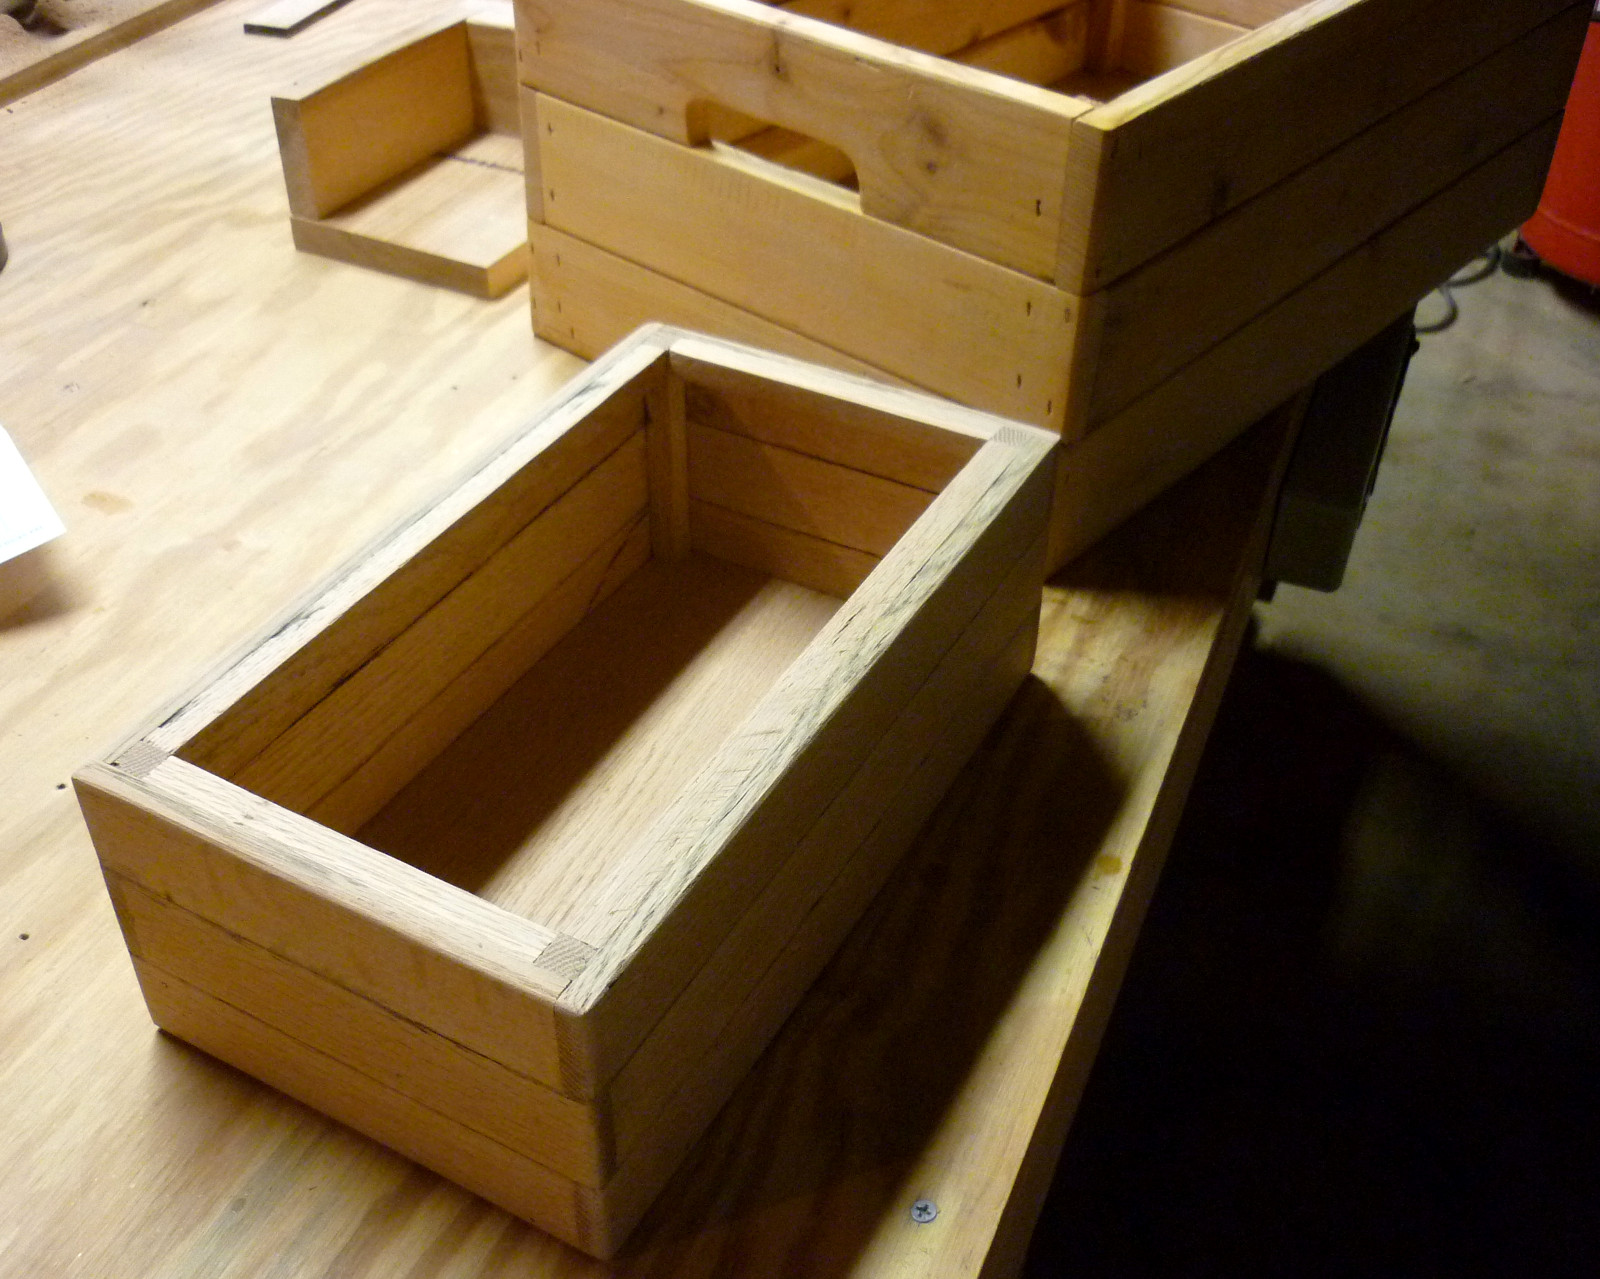
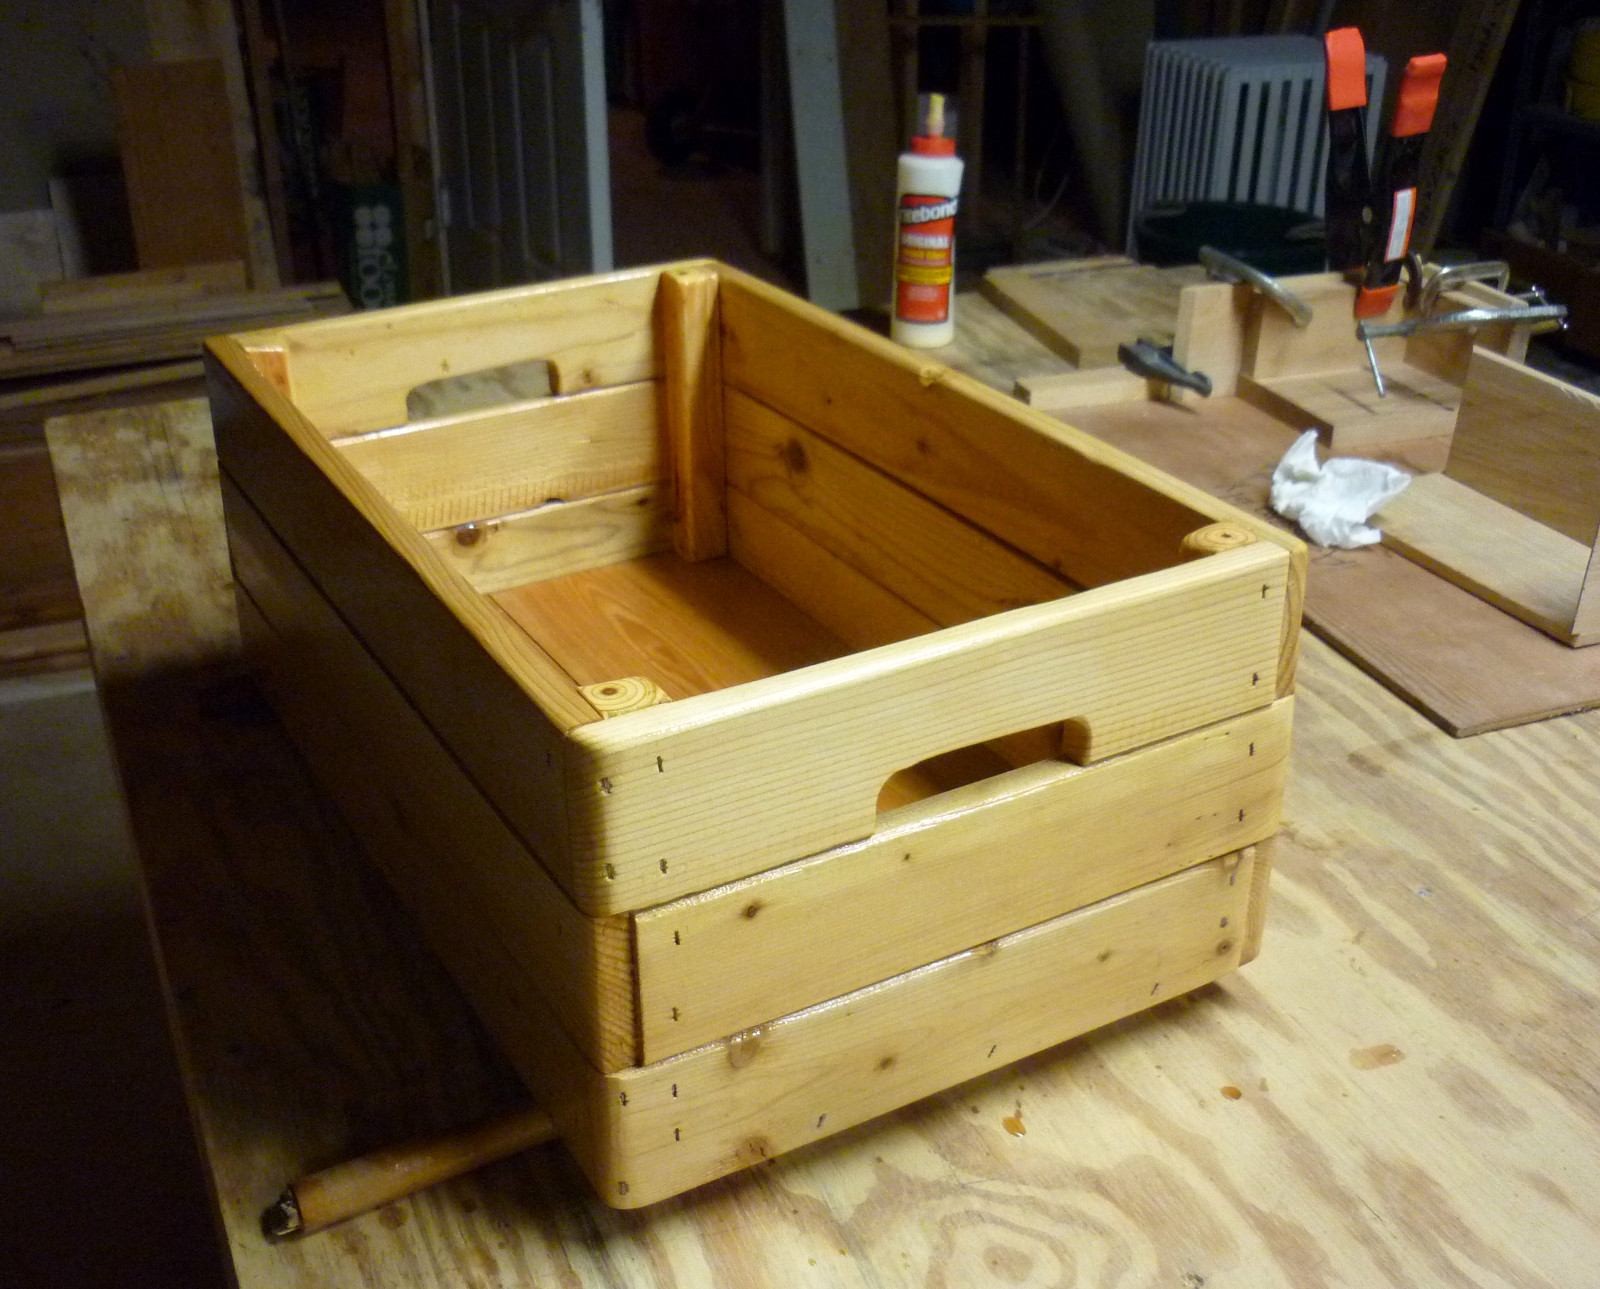
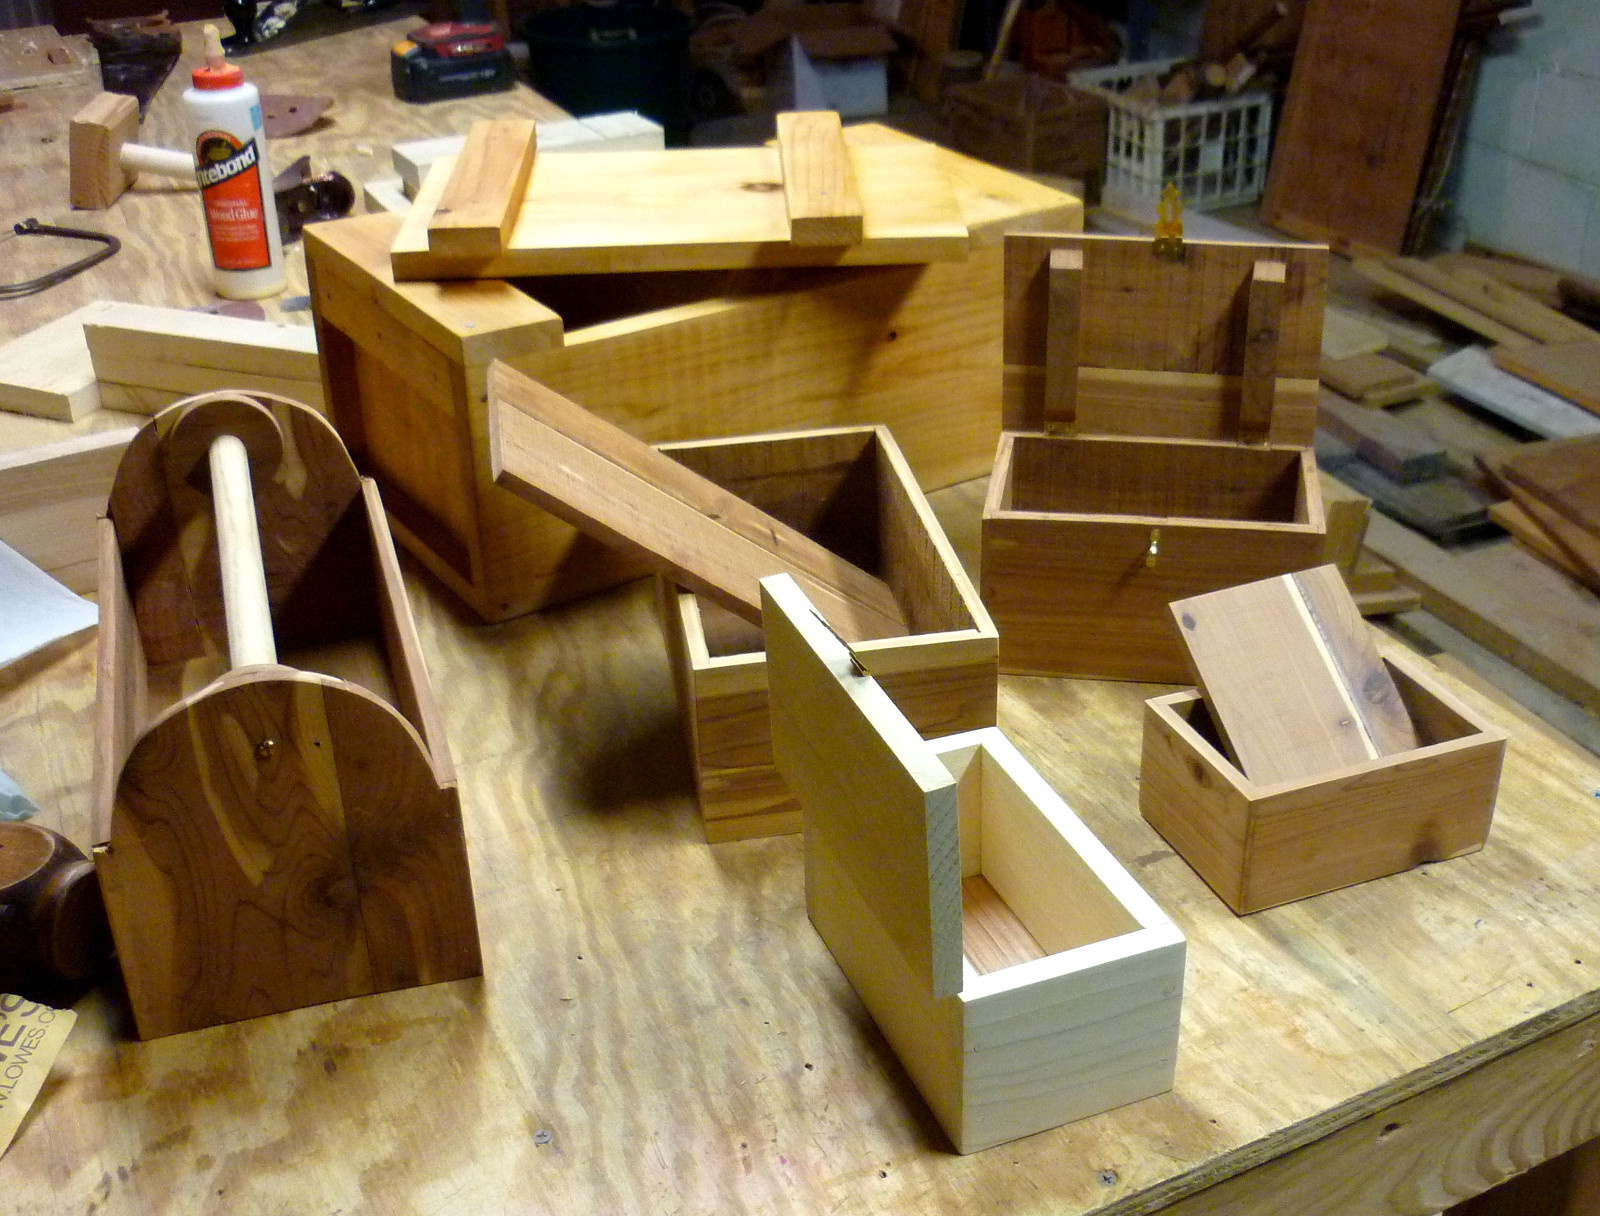
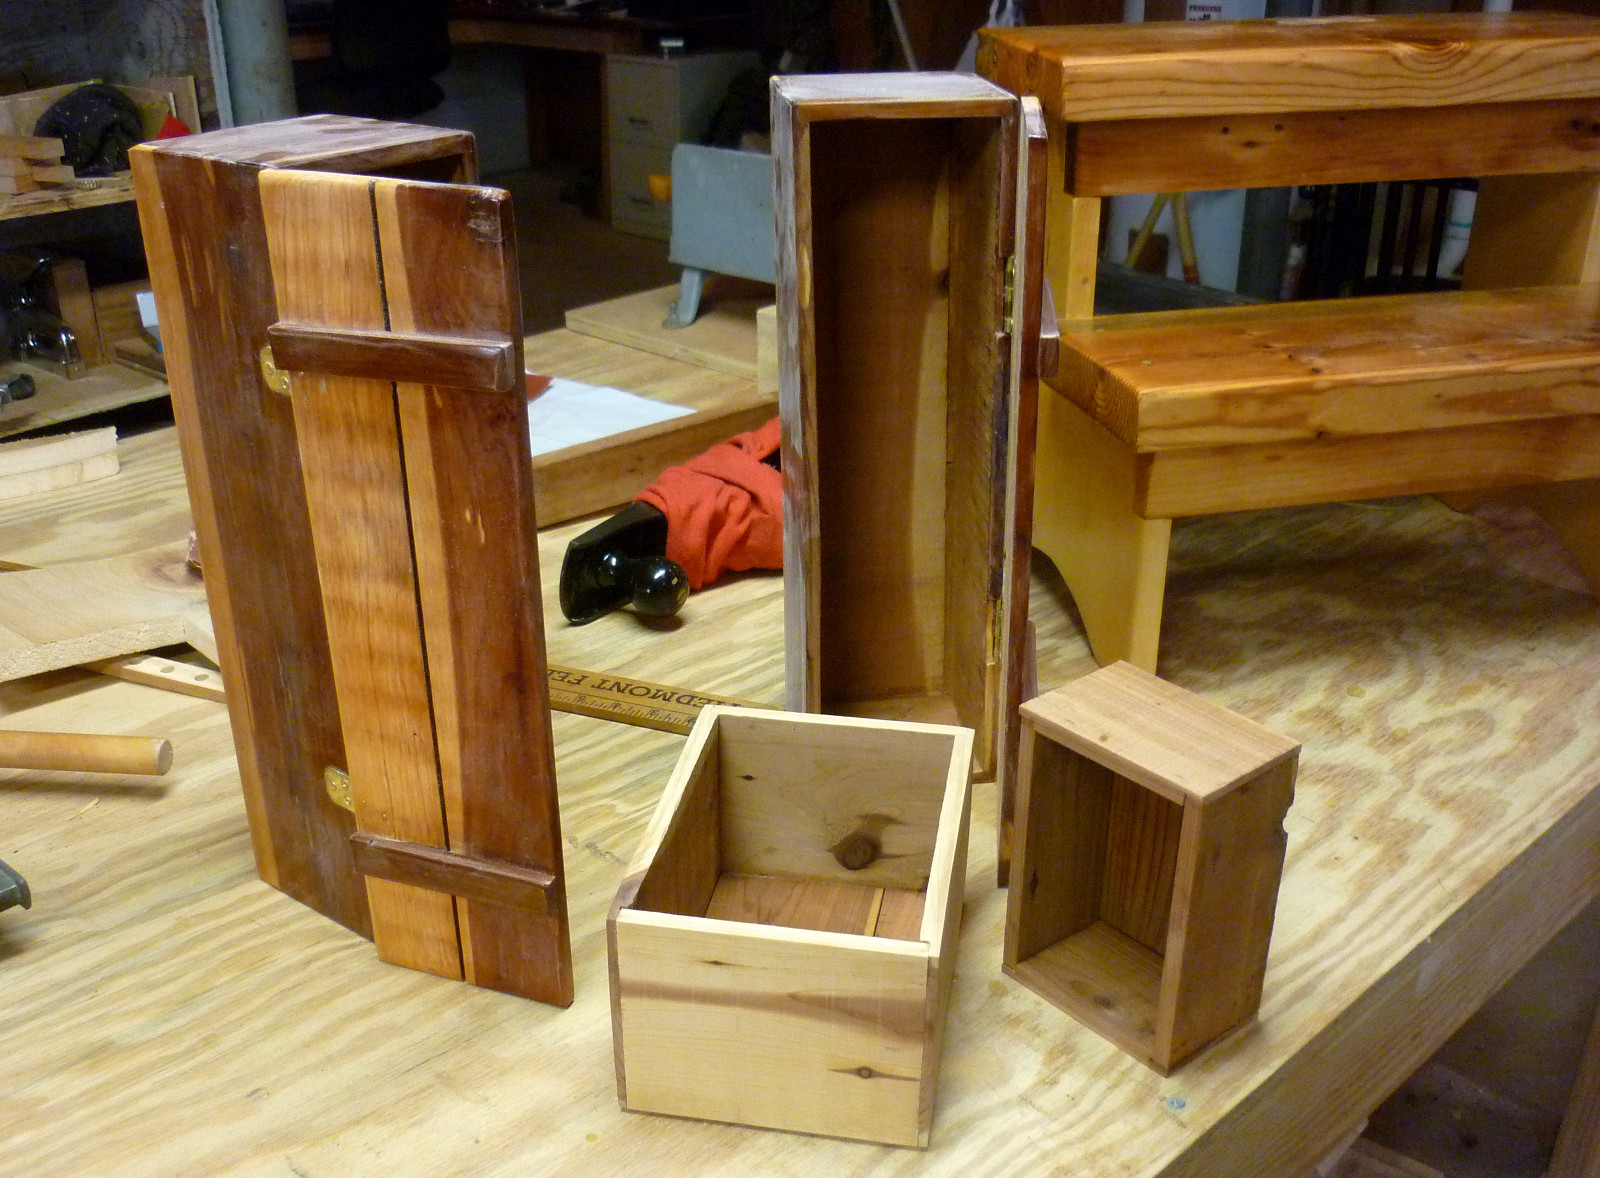
Finished projects. The crate in front is one Joe made. Maybe he'll keep it or maybe he will give it away, it's not yet decided. We work on most projects together, but Joe has more time for the shop than me, so he usually has a side project or two going. The other crate and the two boxes behind it are going to Levi's neices and nephew, so they will soon be gone.
The glue bottle in the background was new a couple of weeks ago. I told Joe that if we keep working at this rate, we'll have to start buying glue by the gallon.
May 15th, 2015
Posted by Paul
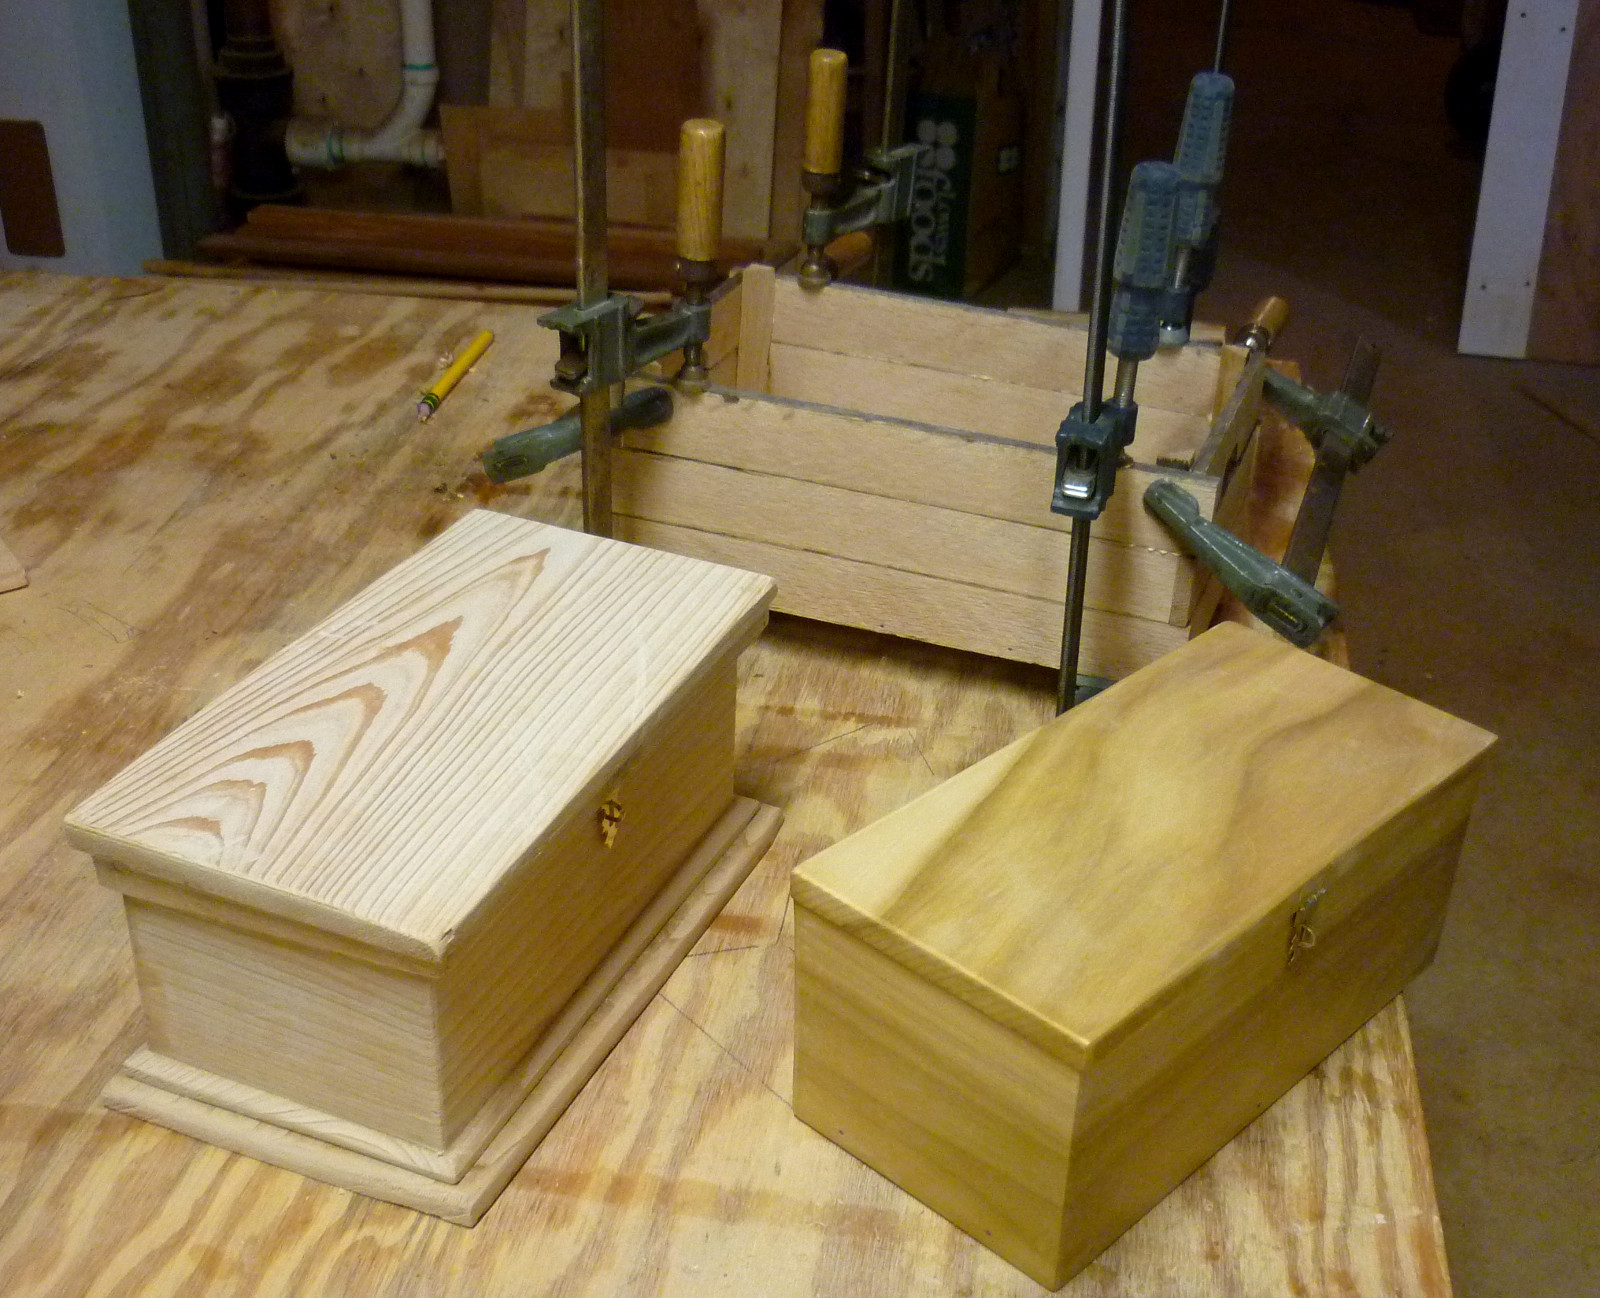
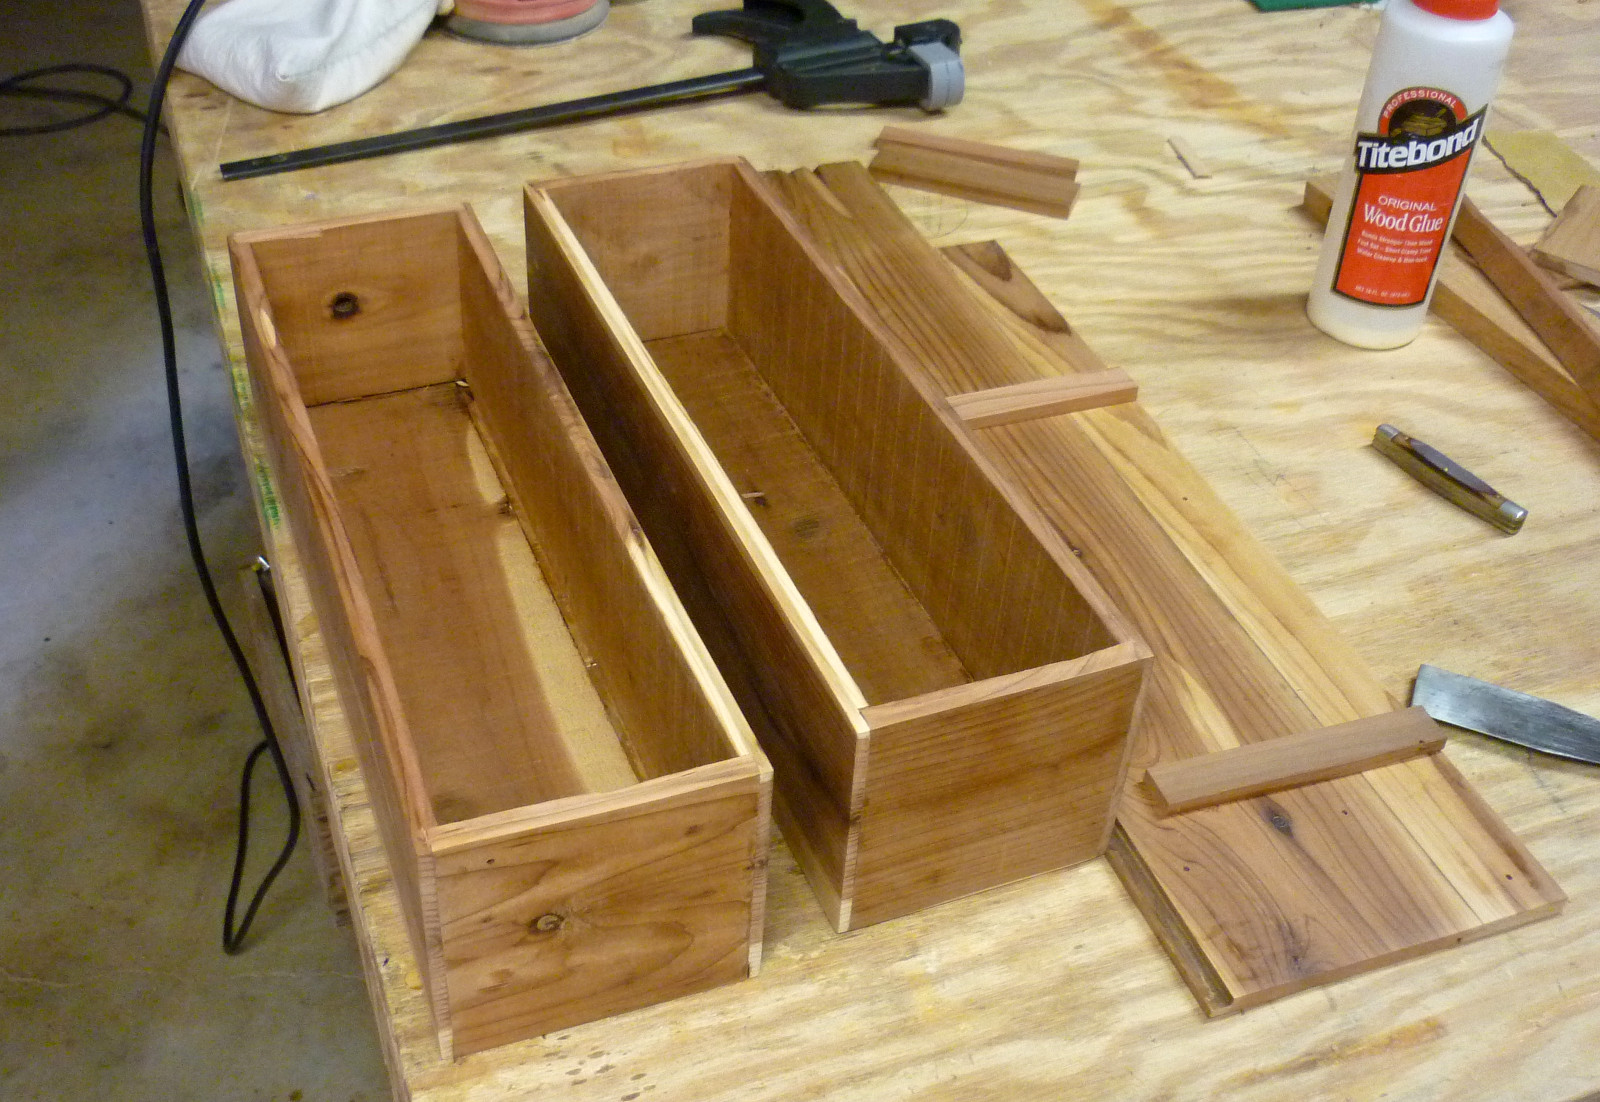
And now they're all done, except for a little trimming and sanding on Lilo's crate, and finishing. These three boxes for Levi's neices and nephew are close enough to each other in size and finish so there won't be any jealousy, and different enough so each can feel they got something special. The one for the quiet, gentle girl has more molding detail and is lighter and more delicate. The one for the outgoing, active girl has nice grain detail and is very solid and strong. The one for the toddler boy is open topped so he can see all his stuff. And all three are handmade, of wood, which sets them apart in a world made of plastic.
Finishing these things up and sending them on their way is kind of like launching boats onto the sea. We've done our part and now we can just hope that the recipients will use and enjoy their items. If they keep them for a lifetime, if they use them a while and lose them, if they throw them away next week - it's their call. That's how it is with almost all of our work. We're not building for ourselves, because we already have everything we want. We're just giving others - young people, children and young adults - a chance to own something made out of wood, and see if they like it.
We turn back to the bench and start work on the next project.
May 10th, 2015
Posted by Paul
Still working on the boxes for Levi's neices and nephew. This one we designed as we went, never a good idea, and it is taking way too long. Not that we begrudge the time, but Sally and the kids may be moving to Colorado next month so we want to get these finished before they go.
I picked up a maker book that has all sorts of ideas, and now Joe wants to make a banjo...
May 10th, 2015
Posted by Paul
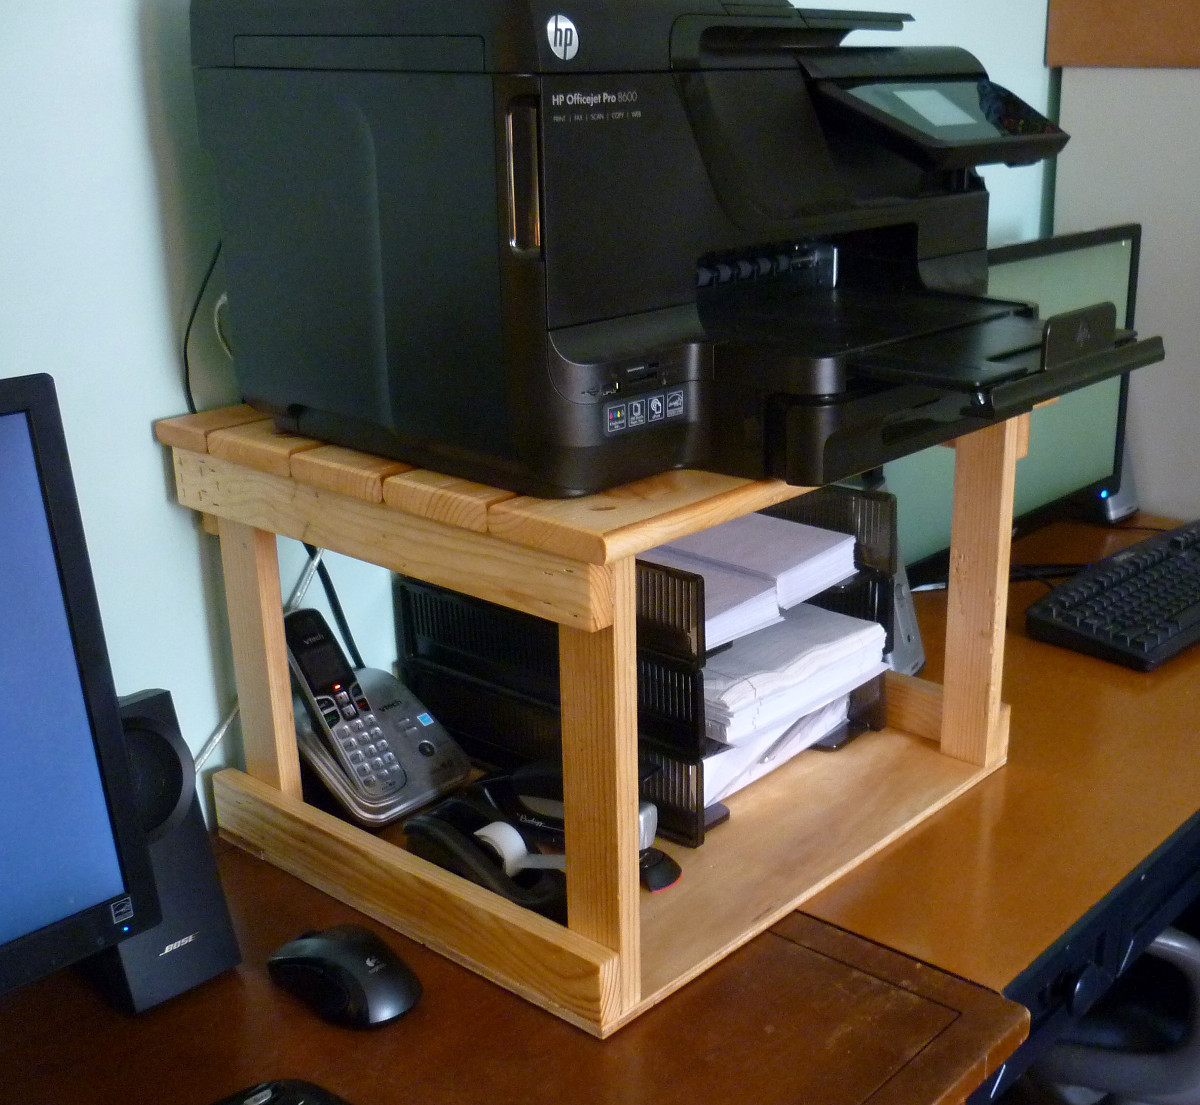
Joe built this printer stand for Marcia to help her get her office organized.
May 8th, 2015
Posted by Paul
Lately we've been exploring one of the simplest forms of woodworking - the construction of open-topped crates. We started off with my anchor crate a couple of months ago, and Joe followed up with Lars' toy crate. Over the last week, Joe built a twin to Lars' crate, and another to the same pattern but considerably smaller. We are now working on one similar to this small crate, to give to Levi's nephew Lilo.
April 28th, 2015
Posted by Paul
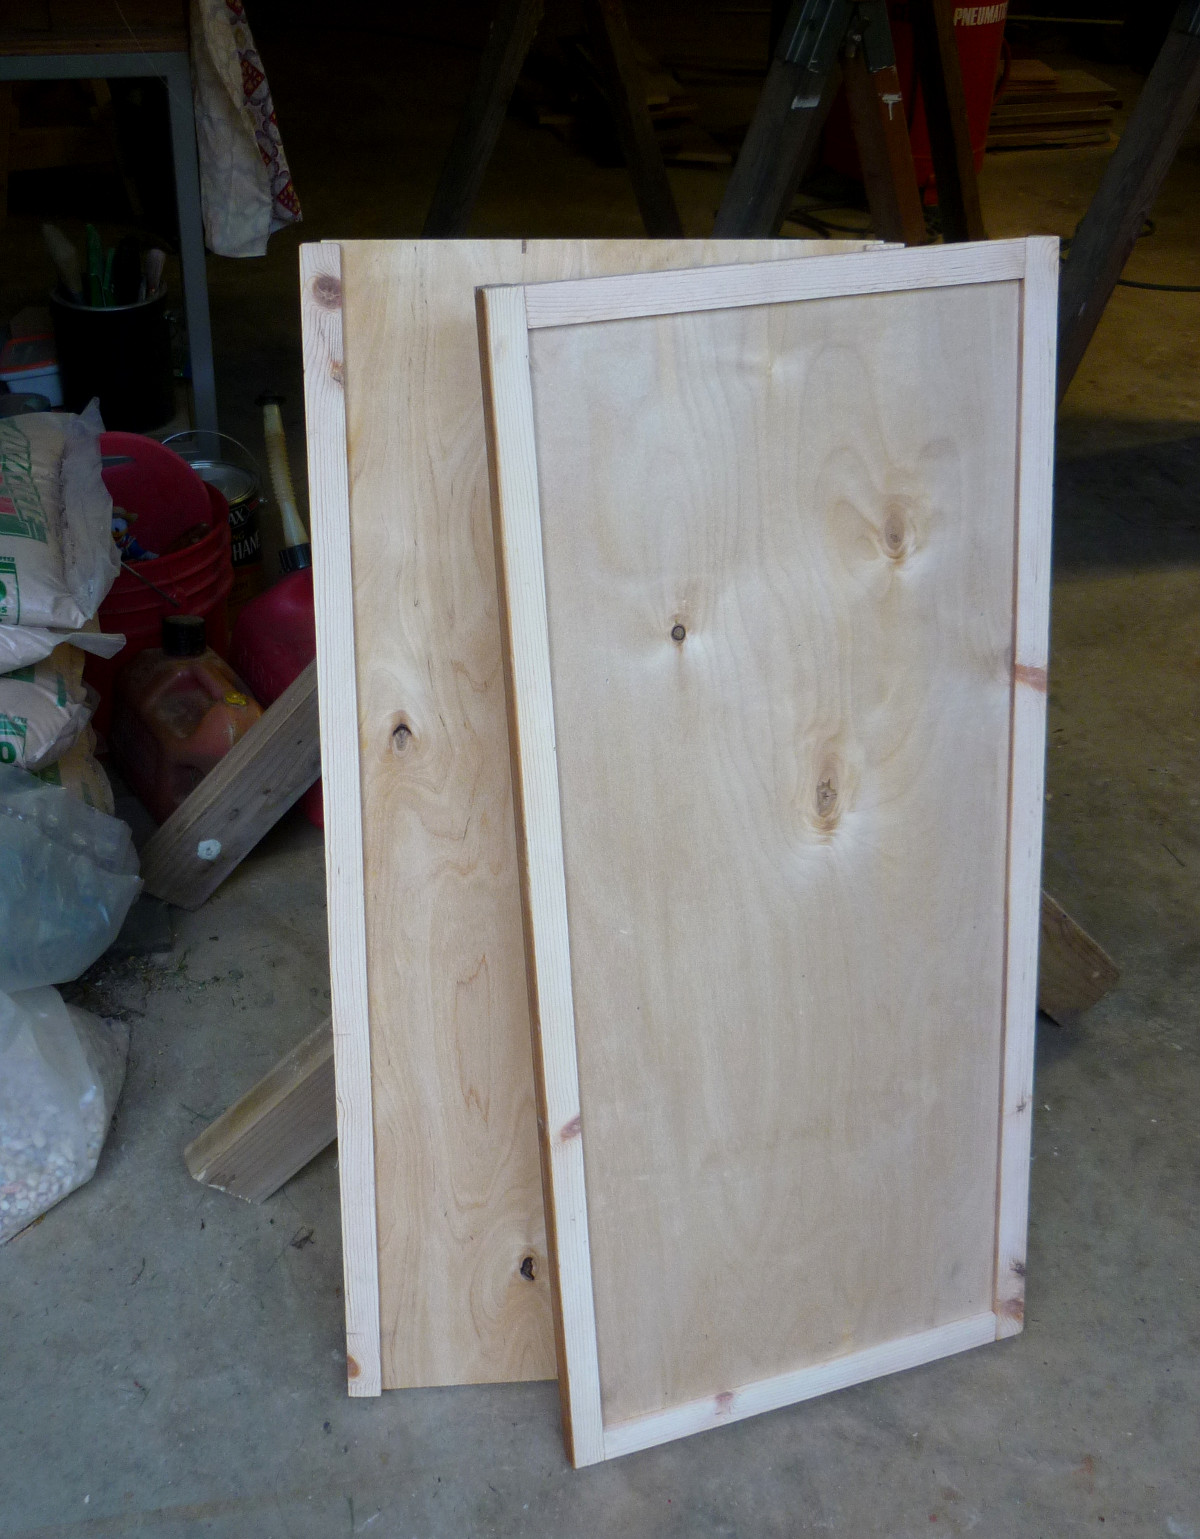
We're working on a project for Marie and Levi, a shelf with a door on it to keep the PS4 and controllers in. Seems the cats are a bit too interested in all the cords and cables, and now Lars is starting to take an interest as well. So it seems best to put it all away behind a latched door. I'm not a great fan of plywood panel construction. I like the stuff I build to at least have the potential to last 50 years, 100 years - who knows, that treasure chest we build Katie could last 500 years. But it does go together quickly and easily. What redeems it here is that it is all found materials. The plywood is birch dieboard that I dug out of the dumpster at work and the framing came out of some broken bed frames that Joe picked up at the landfill. All we have in it is glue, nails, hardware and finish.
I saw a line that I really liked in a story at Wired a couple of months ago entitled "The Pro Dumpster Diver Who's Making Thousands off America's Biggest Retailers" - "...while America�s streets have never been paved with gold, these days they are certainly littered with it."
April 28th, 2015
Posted by Paul
Here's the glue-up of another little box that we are making for one of Levi's neices.
April 24th, 2015
Posted by Paul
More of Joe's work. A toy box for Lars.
Tonight we started work on skirting for the cover of the lazarette on my boat. My 6 horsepower Yamaha sits a little too high for the cover to fit down around it, so the skirts give some extra clearance. In the past, I have made these out of commercial grade plywood, and they only last a couple of years. This time we decided to frame out thin strips of solid wood and then fill in the sides with die board. And what, you may ask, is die board? Die board is a high quality, voidless plywood used to make cutting dies for corrugated sheets. We use a lot of die board at the plant where I have my day job, and the dumpster behind the die shop is an inexhaustible source of good, free Latvian Baltic birch off-cuts. Once the skirts are complete, we will either fiberglass over them or paint them with a good epoxy paint, and I hope they will last for several years.
April 23th, 2015
Posted by Paul
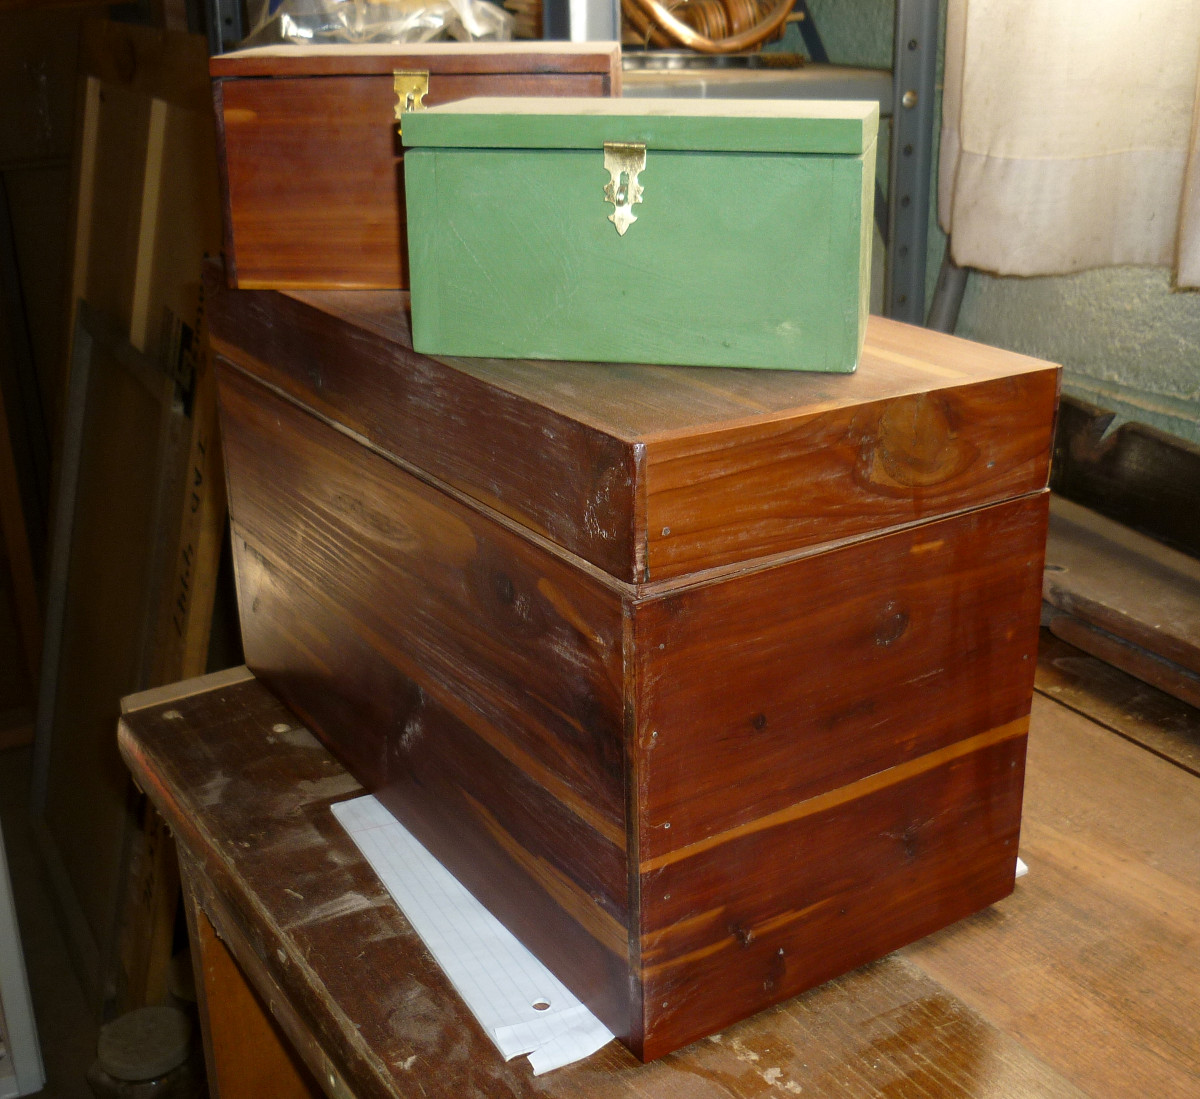
Among other things, Joe built this big cedar file box last week, shown with boxes that the twins made for themselves.
April 9th, 2015
Posted by Paul
A neighbor had a big Leyland cypress tree cut down. The loggers cut the trunk into 30 inch lengths and stacked them on the curb for city pickup. I found them on one of my afternoon walks, and immediately doubled back in the truck. I loaded as many lengths as I could fit and took them to the basement the next evening.
I found from internet research that the Leyland cypress is a hybrid between the Monterrey cypress and the Alaskan cedar, has moderate rot resistance and looks a lot like bald cypress, one of our favorite woods. With that in mind, Joe and I decided it would be worth trying to split some out for lumber. Worst case, it would make decent firewood.
We found that it split easily. We ended up with a nice stack of 2 to 4 inch wide splits, mostly around an inch in thickness, and 25 to 30 inches long. To reduce checking as the wood dries, we coated the ends with paint. In six months or so, we should have usable lumber. Considering the narrow widths and short lengths, I expect we will resaw most of it down to 3/8ths inch thickness that will be good for building small boxes and trays.
Speaking of boxes - we built a small box out of poplar that will go to one of Levi's nieces. Under Joe's expert supervision, I cut in the hinges, the first time I have done that. Lots still to learn in this woodworking pastime.
March 28th, 2015
Posted by Paul
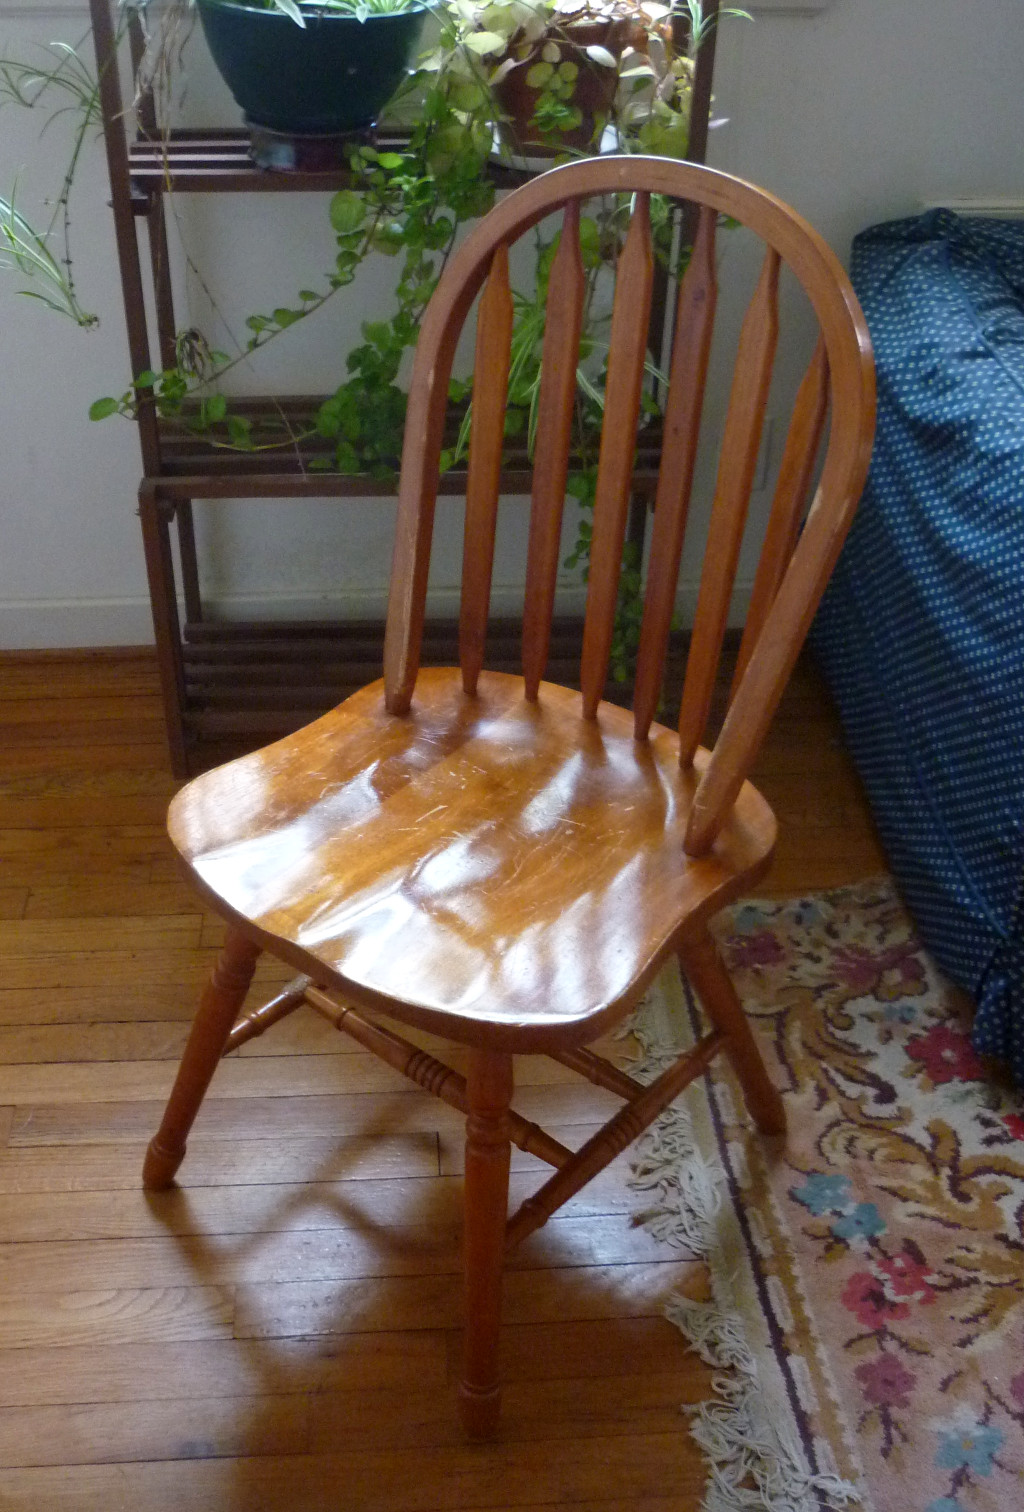
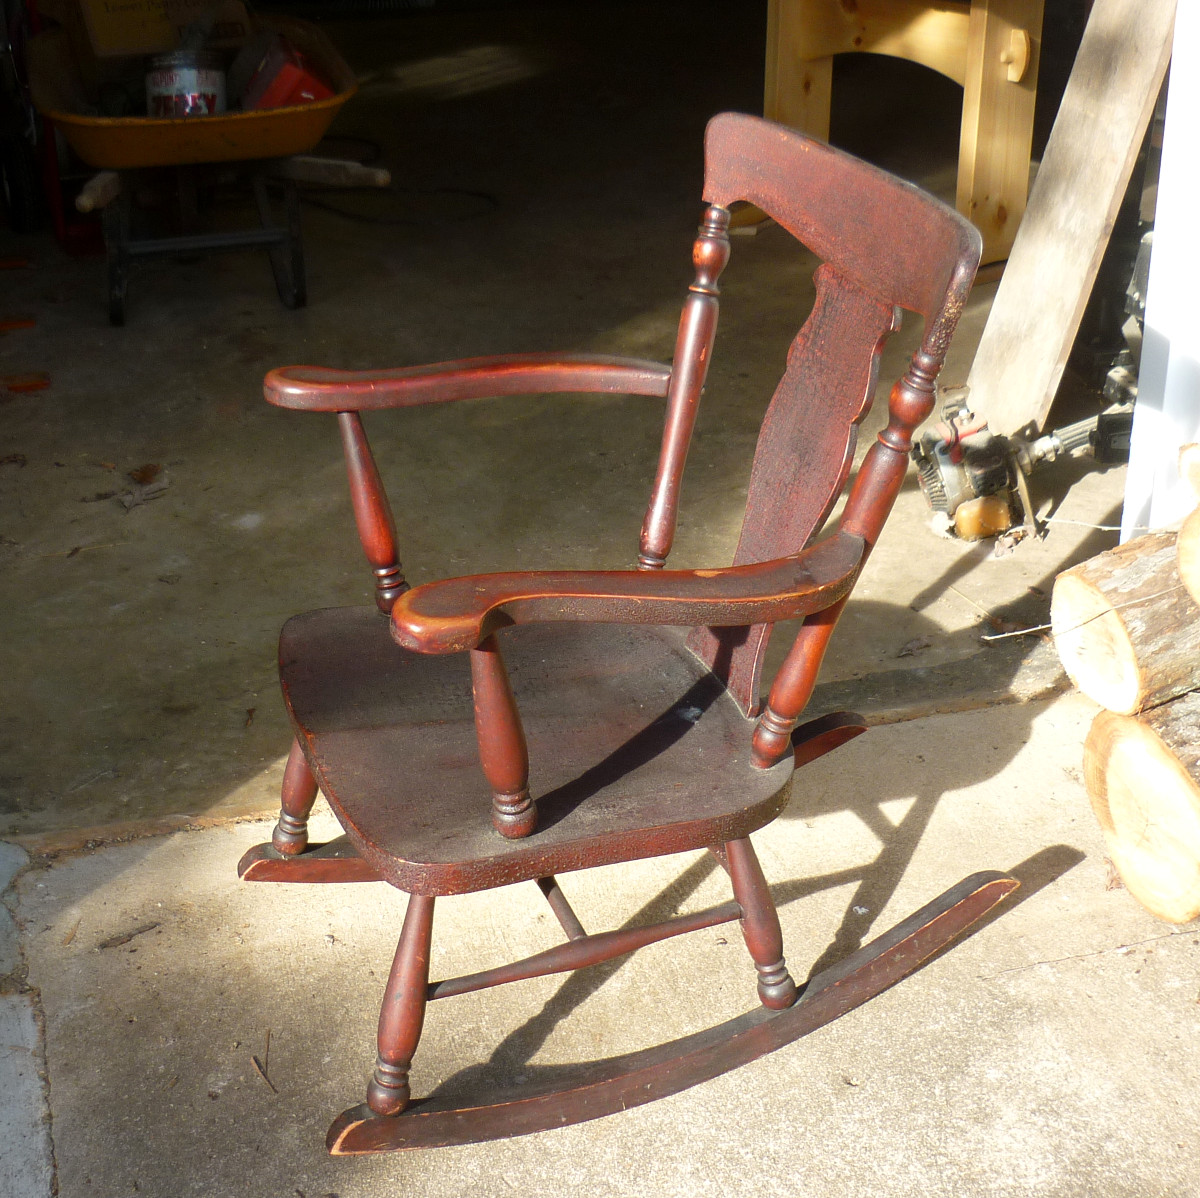
Driving home from the shop one evening, I spied a chair on top of a garbage bin that had been rolled out to the street for morning pickup. I made a u-turn at the next intersection and went back for a look. It was dark, but I could tell that all the pieces were still there, so I threw the chair in the back of the truck. The next day, I took it by the shop. We glued a leg back in place, replaced a missing screw and tightened up all the others. At home, I washed it down with Murphy's Oil Soap and waxed it. Now it's ready for a new life, instead of being buried under a pile of garbage at the dump.
March 27th, 2015
Posted by Paul
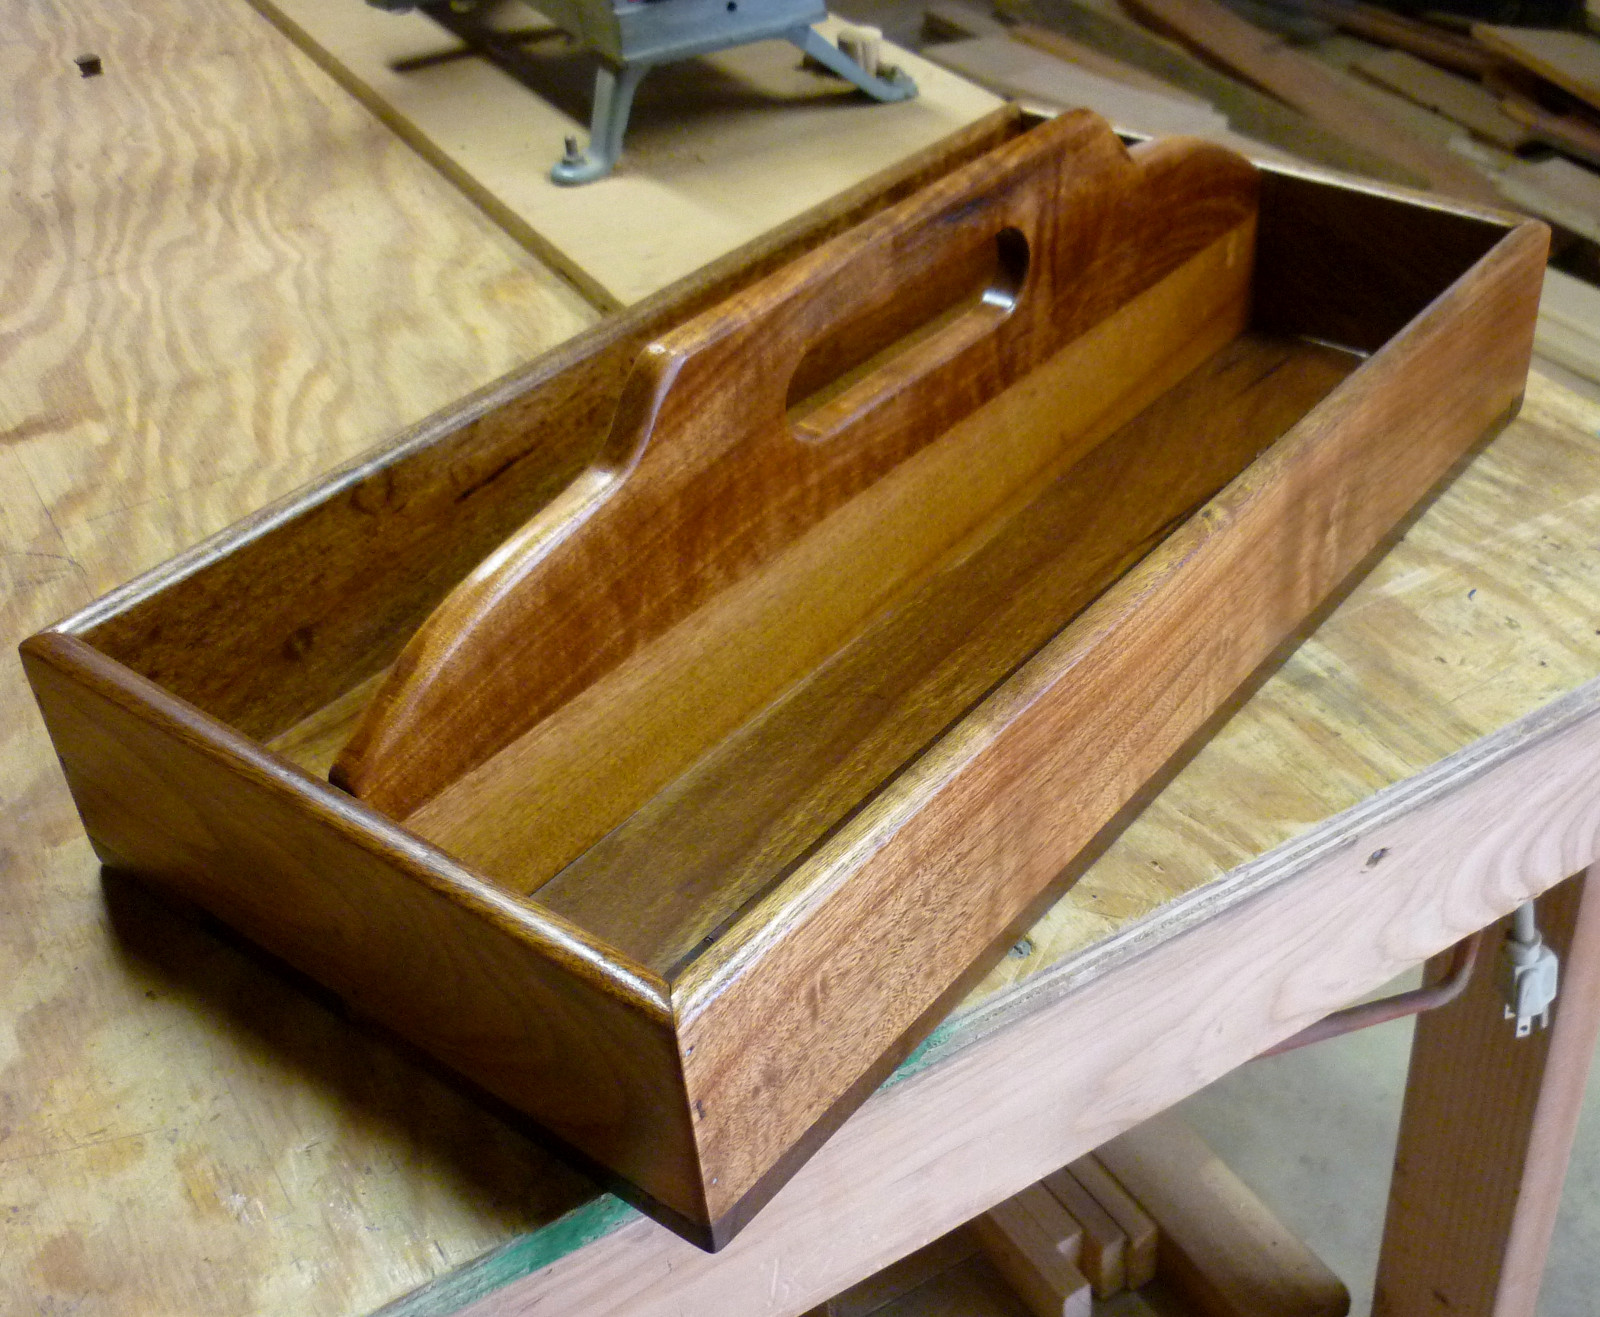
Joe outdid himself with this gorgeous walnut tray. He is working on two more, slightly smaller, in oak. They are all in salvage material.
March 24th, 2015
Posted by Paul
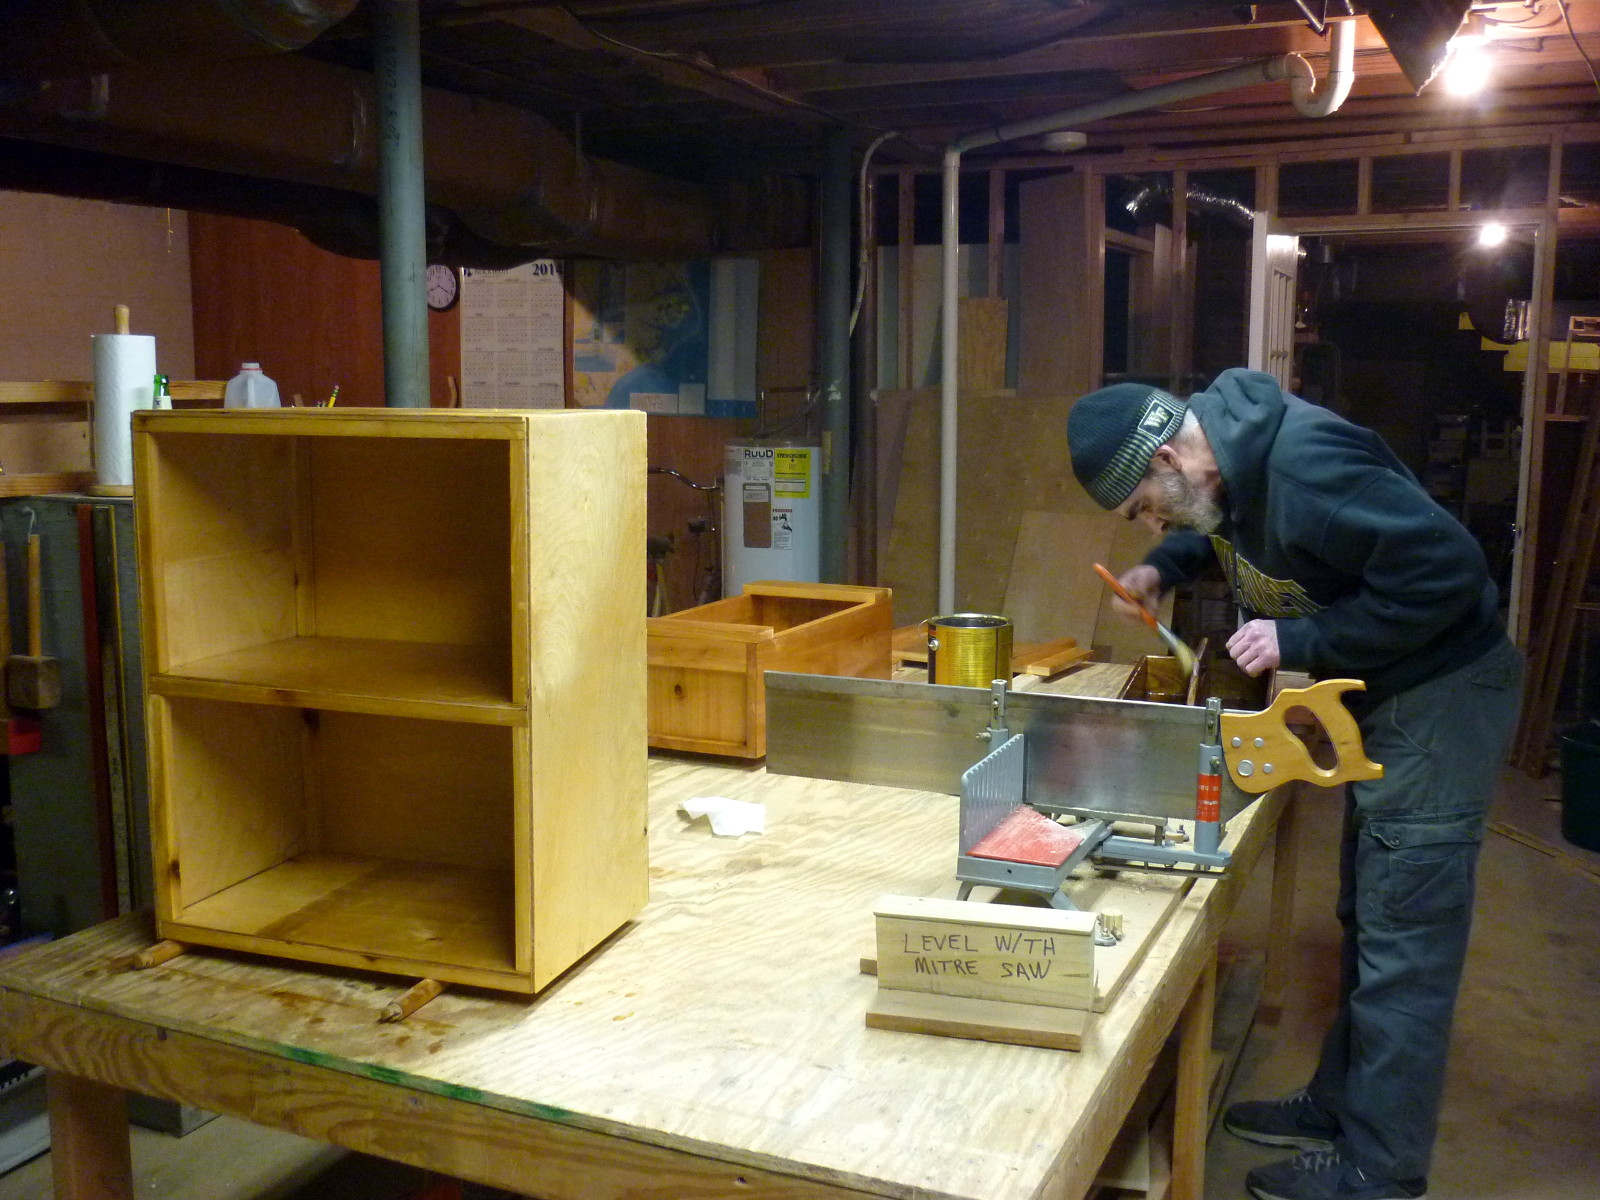
Susan wanted a storage unit for pots and pans to fit under a table. She didn't need anything fancy, so we put one together from salvaged stringers and plywood. Joe completed a couple of his own projects while I was at the coast, so we had several items that needed polyurethane. We cleared off the table, let the dust settle, and knocked them out.
March 13th, 2015
Posted by Paul

I delivered Marie's new bookcase last weekend and she sent me this picture of it in situ.
This piece is a natural progression for us, and is just where I hoped we would be at this stage of the woodshop. With our limited time and expertise, we can't realistically expect to make fine furniture. What we can do, is build furniture for young householders that is stronger, more attractive, and more likely to last, than the things their budgets would allow them to buy. We have about $50 worth of materials in this case, and if I had bought one for Marie of similar appearance, of pressboard, new from the big box store and to be assembled by the buyer, it would have cost between $60 and $100.
March 12th, 2015
Posted by Paul
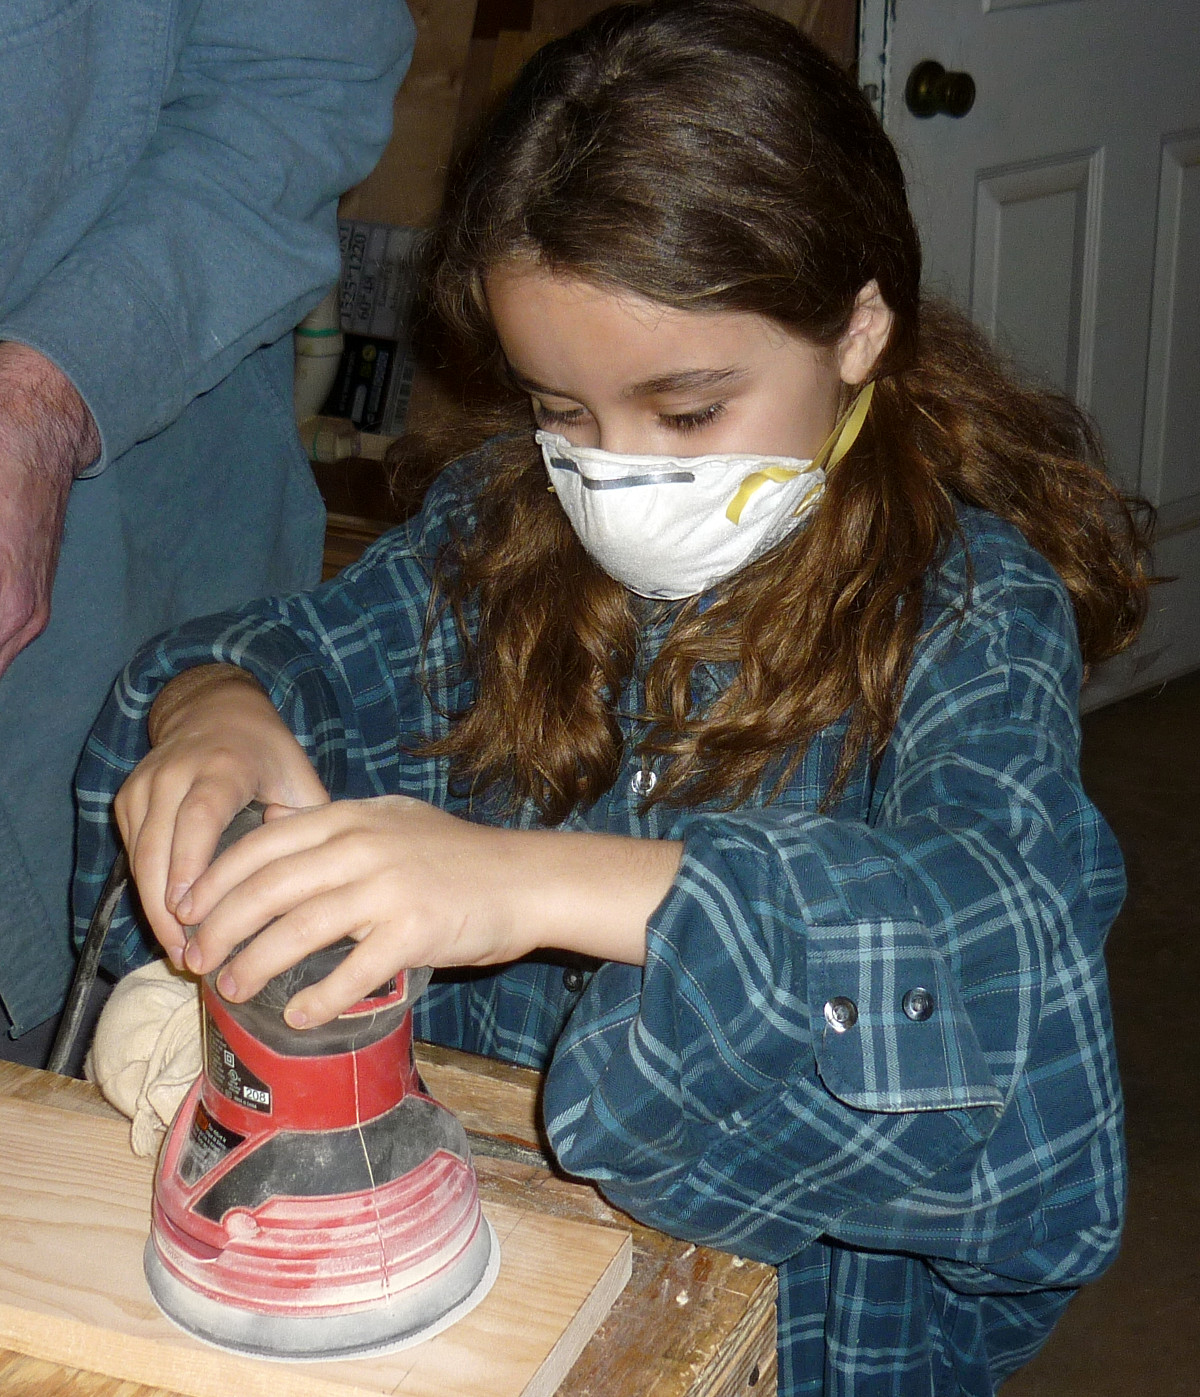
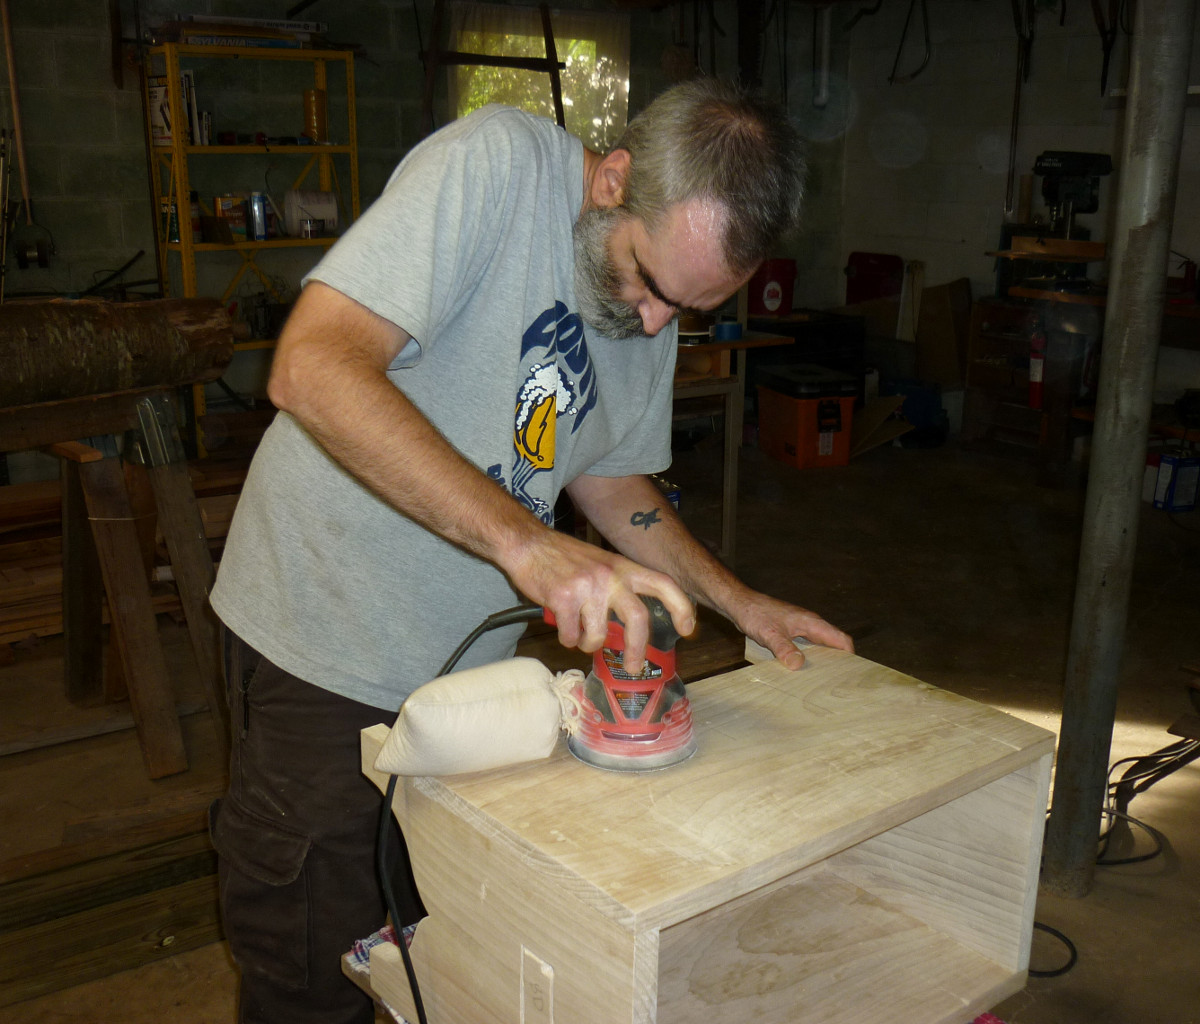
Hope got a turn in the woodshop and Joe taught her how to use the orbital sander. Afterwards she painted the box she made a while back with green milk paint. Then it was her sister Faith's turn to coat her box with polyurethane. Faith also practiced planing and hammering, and spent a few minutes learning to use the spokeshave.
March 11th, 2015
Posted by Paul
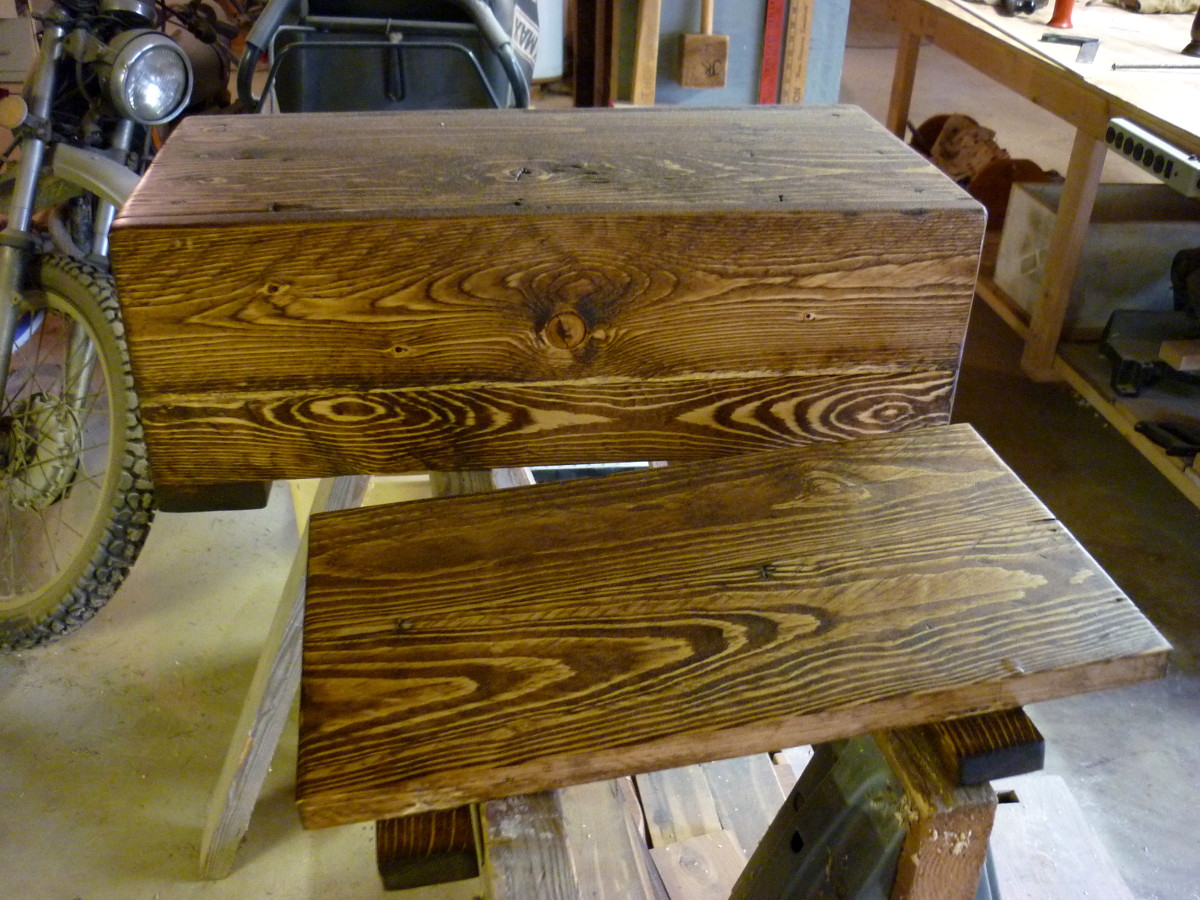
Joe built a Japanese toolbox out of some non-descript wood salvaged from a shipping crate. He decided to apply a stain, and got this interesting grain pattern as a result.
March 7th, 2015
Posted by Paul
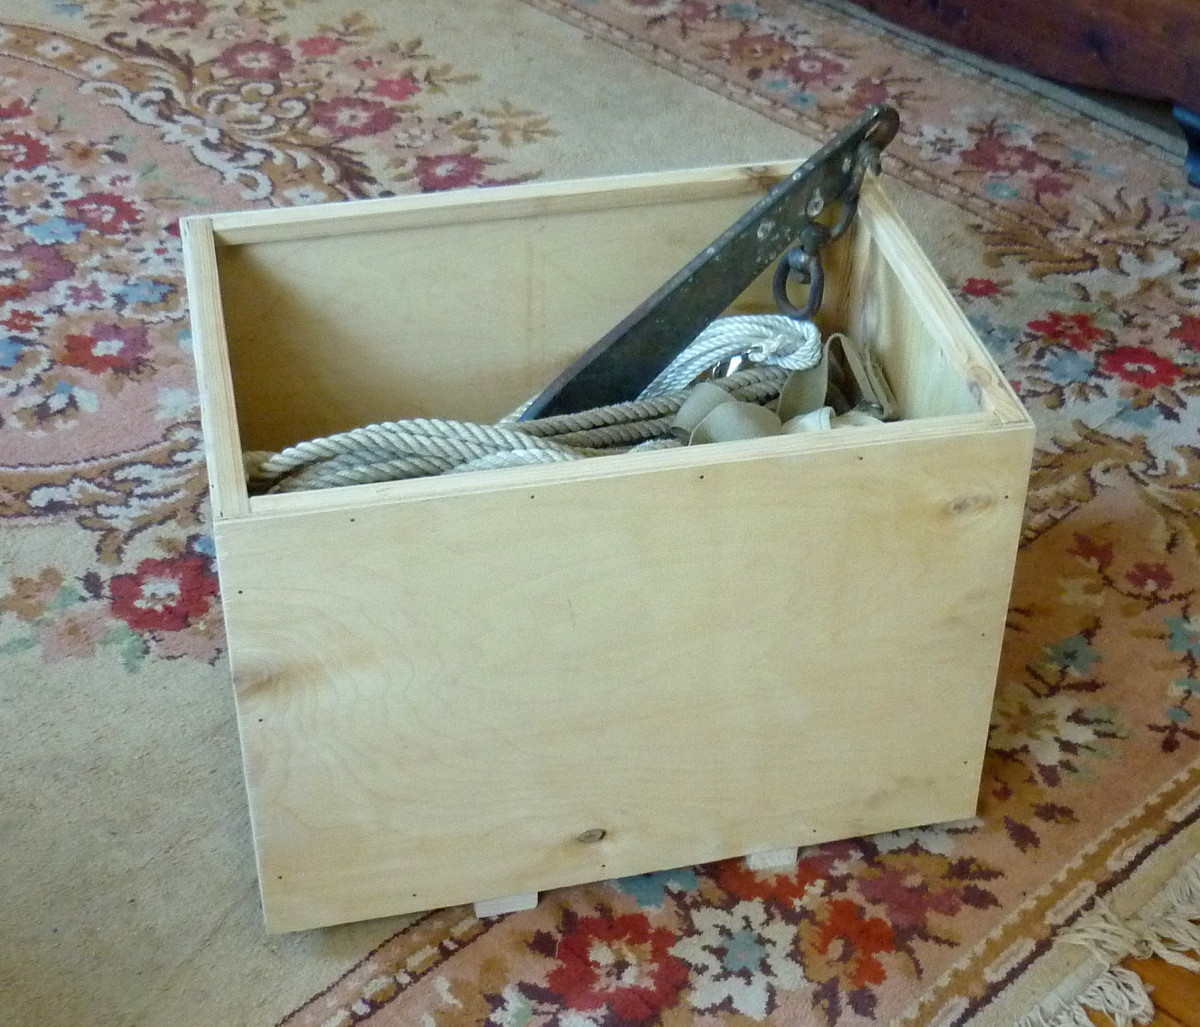
We built this crate, for storing an extra anchor and several coils of rope, in one evening. For the frame, we ripped scrap molding that I found in a dumpster at the marina into 3/4 squares, and for the faces we used some nice plywood scraps from the plant. The battens are from marina scrap. All we have in it is glue, nails and screws. The lapping of the faces across the frame joints makes it very strong and solid. It should last a lot longer than a plastic crate, and it looks a lot better too.
March 6th, 2015
Posted by Paul
Our friend John is in town from Colorado. He spent an afternoon visiting the woodshop and took this shot of Joe and I painting polyurethane finish onto a new bookcase we made for Marie.
For this project, we made a simple thumbnail molding to apply to the base and crown of the case. Since this case will be free-standing, we put on a back, but we still made provisions to screw it to the wall. With cats and a baby in Marie's house, we want to be positive that it won't tip over.
February 22nd, 2015
Posted by Paul
I took this one down to the coast with me for finishing. Instead of brushing on the poly, I tried rubbing it on with a cloth, and found it worked very well. After four coats of poly, I rubbed on three coats of wax and called it a day. It's now packed up and ready to ship to San Luis Obispo.
Next up - we left a new bookcase for Marie in the clamps a couple of weeks ago and should be able to finish it quickly. Joe is working on another airplane, this one a Spirit of St. Louis. I need some crates to hold things that I take off my boat as I prepare to refit it. And I know some kids who might like to have boxes.
February 6th, 2015
Posted by Paul
When, last April, I posted "boxes, boxes, out as far as the eye can see", little did I know how prescient I would prove to be.
While I've been at the office working month-end close this last week, Joe built another Japanese toolbox, put hinges on the boxes that Faith and Hope built, and made the gussets for the handle on Rennie's tote. These, along with a couple more boxes awaiting finishing, comprise the subject of tonight's picture. There's another Japanese toolbox in the clamps that didn't make it into the picture.
Our count of boxes, including trays and totes, to date - 25.
January 29th, 2015
Posted by Joe
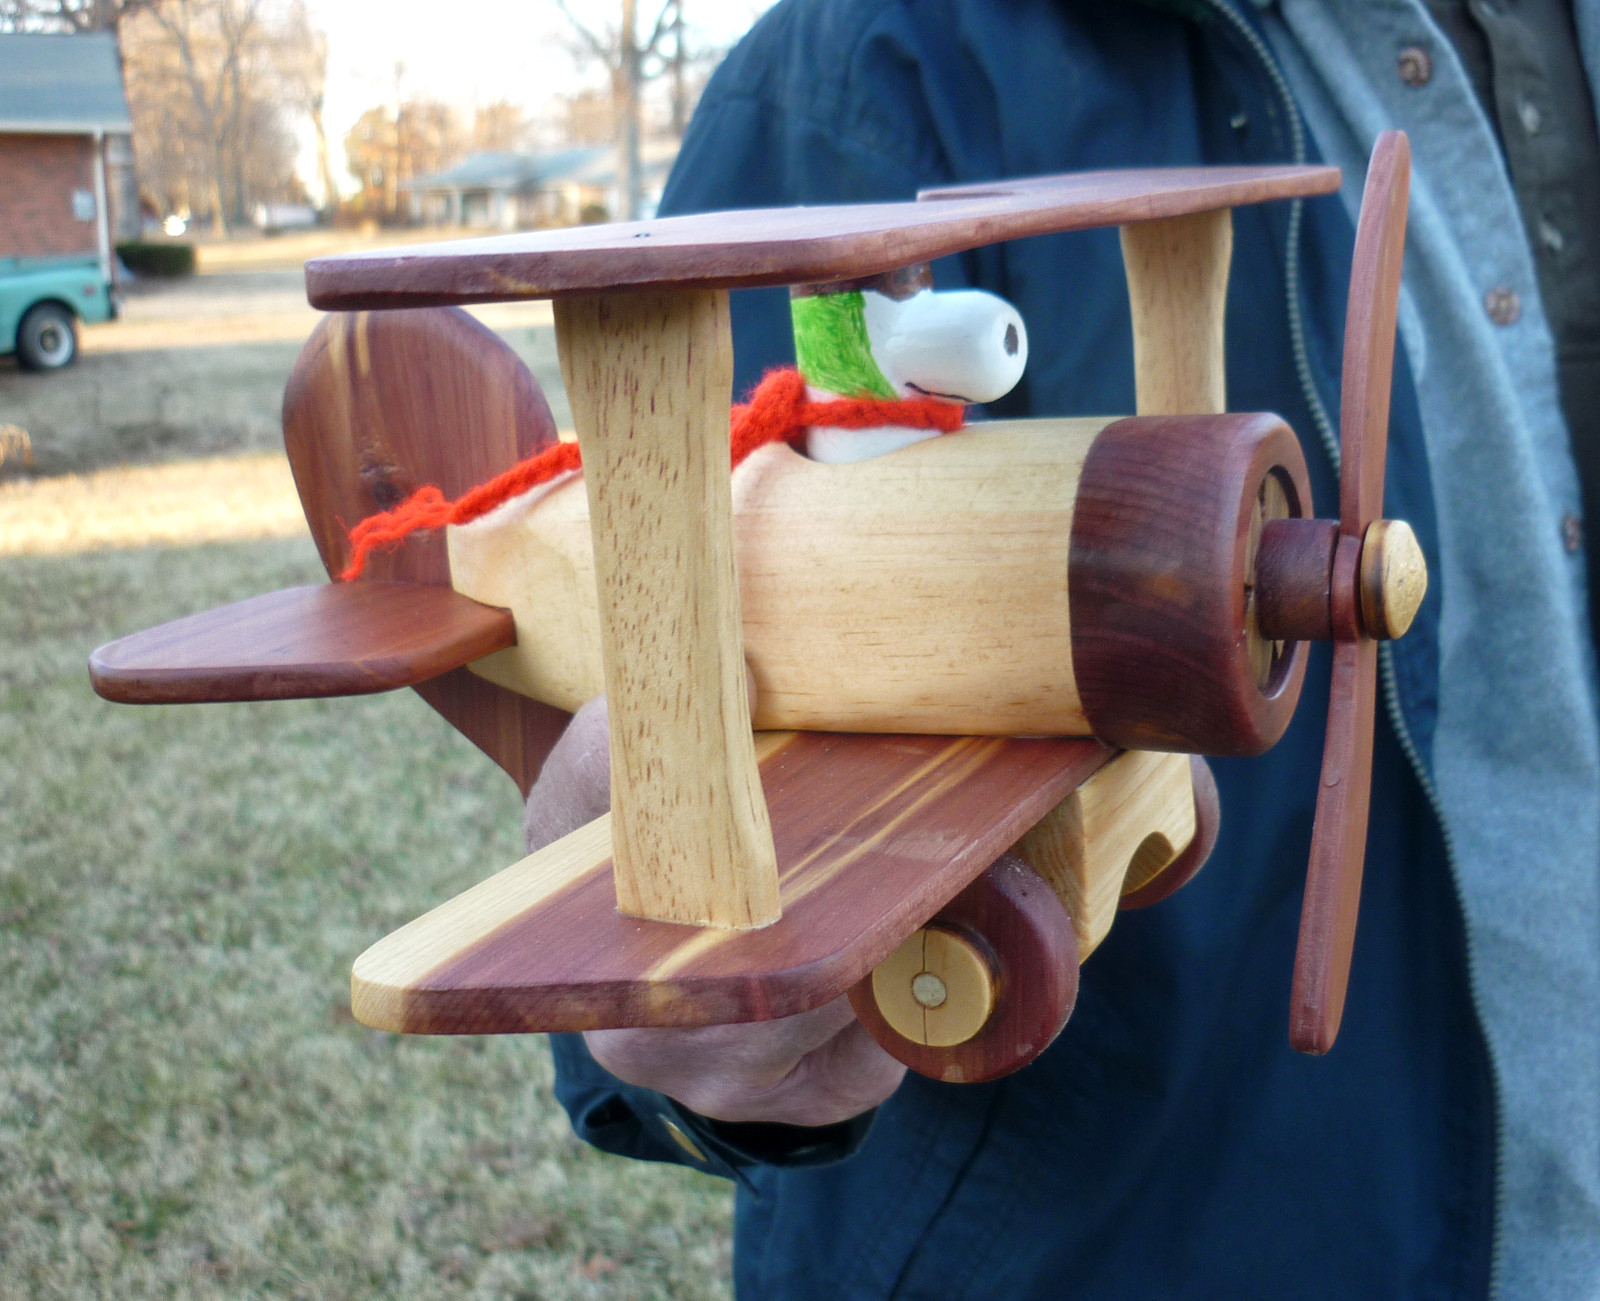
The animated Sopwith Camel is finished! ( much to our delight). Snoopy is ready to soar the skies and protect the woodshop and Marten House from that dastardly red baron (or maybe Lindy), we haven't decided which is the next plane to be constructed at Woodshop aviation. We have , for the most part, enjoyed constructing this model with many parts, though tedious at times; the finished product is a joy to behold and inspires the kid in those who've seen it so far. We may have to build a toy shelf for our toys to be built.
(Joe did 99% of the work on this project and then when it was finished, I managed to knock it off the bench and break the tail fin. Joe was able to make an almost invisible fix and never uttered a word of reproach. pmc)
January 29th, 2015
Posted by Paul
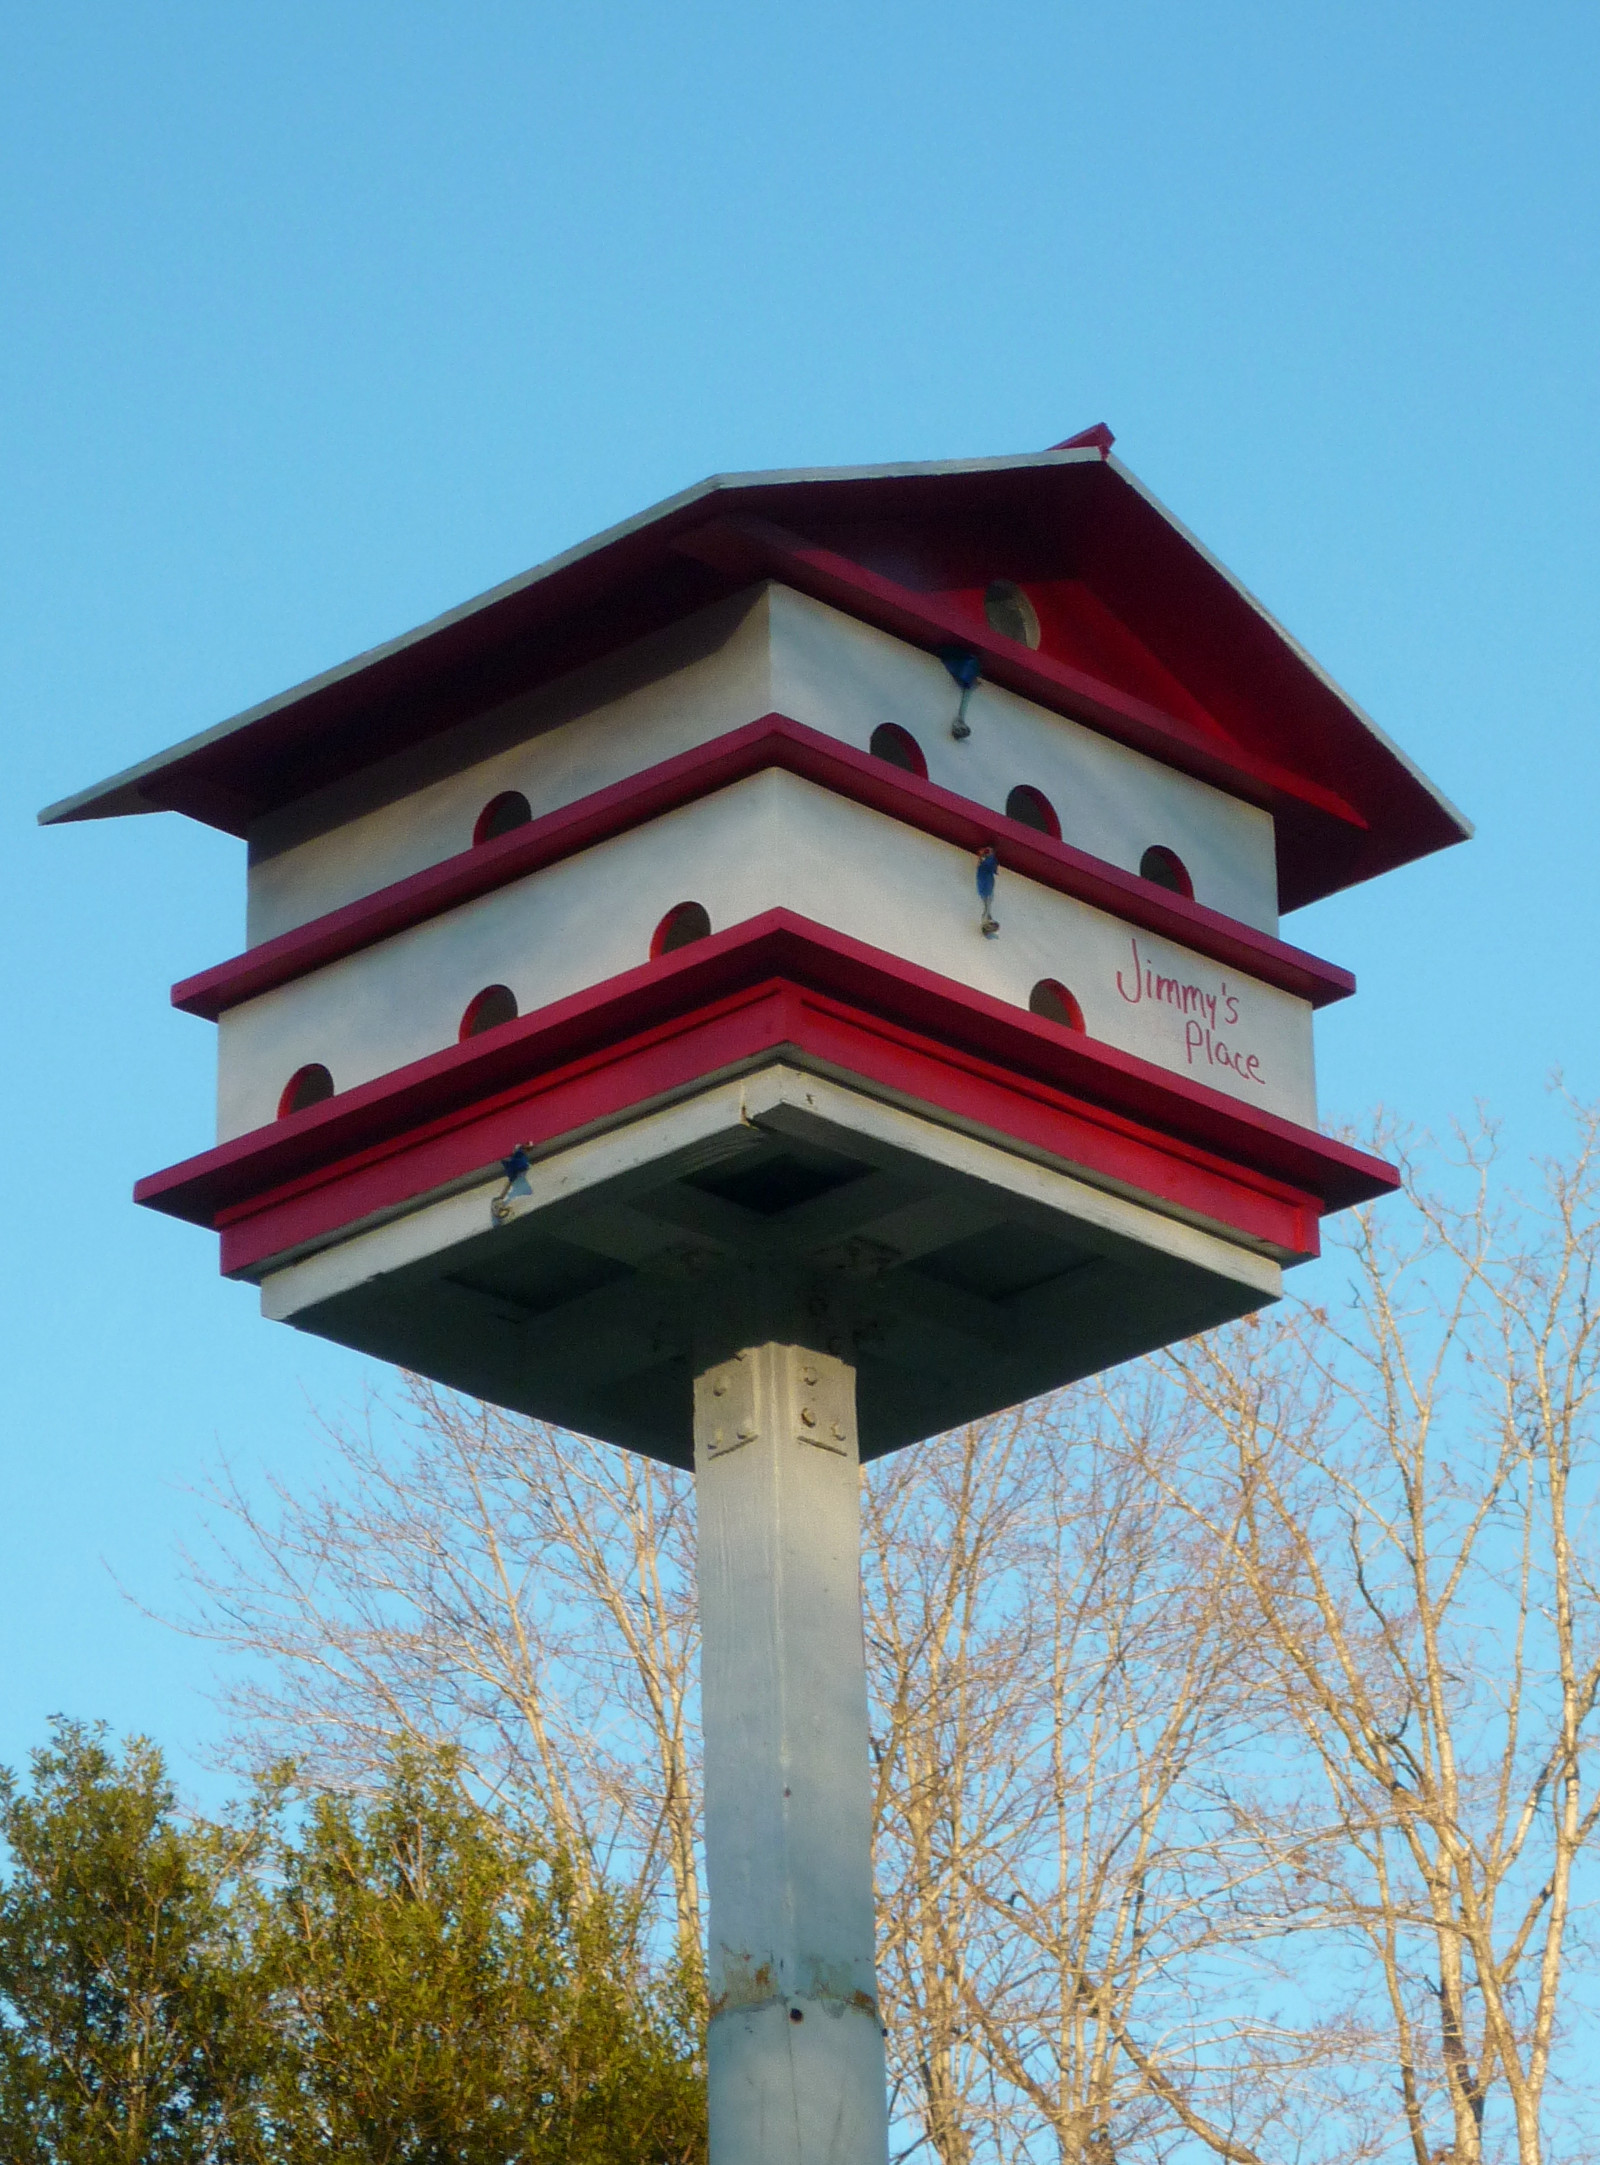
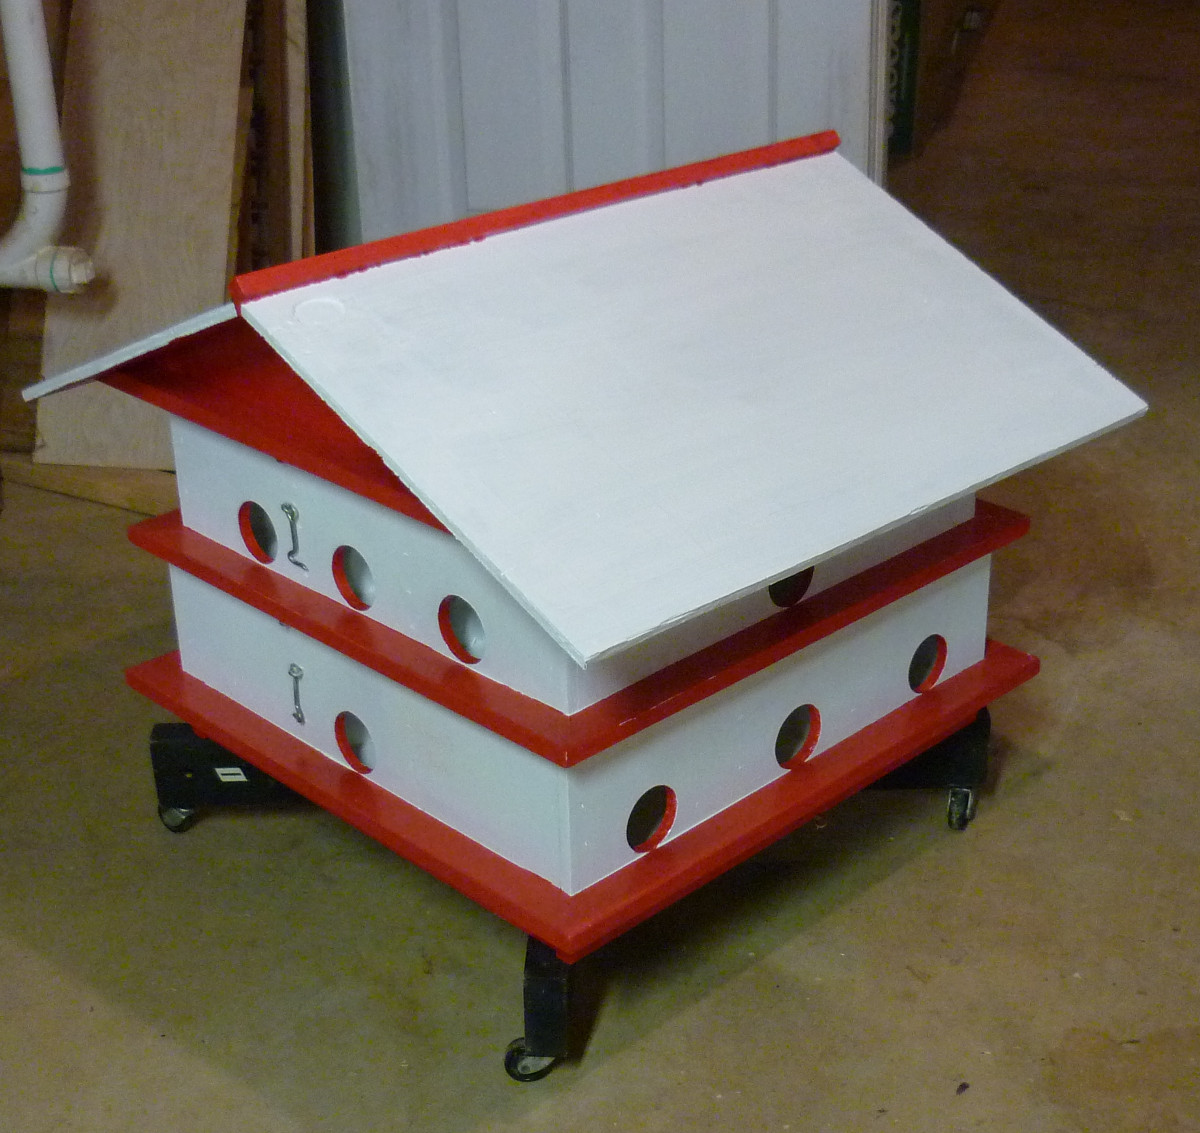
Marcia's father Jimmy Hudson was a man of many talents - flew bombers over Germany in World War II, drilled wells, farmed, fixed any kind of equipment, and raised a large brood of children with his wife Bette. One of his retirement projects was a Purple Marten House, which had a place of honor in his back yard. After Jimmy and Bette had both passed away, the Purple Marten House came into Marcia's possession. Years of weather had left it in bad shape, and Joe made a good effort to restore it. But it was too late. There was not enough sound wood left in it to refasten. So Joe built a new Marten House, which is now in the yard behind the Woodshop. He named it "Jimmy's Place", in memory of James Hudson.
January 26th, 2015
Posted by Paul
The small walnut box for Sophie is complete. We applied three coats of satin polyeurethane, from the bottom of the can so not much gloss, and I put a couple of coats of Minwax over that. I'll keep adding coats of wax until I get a chance to deliver it.
January 21st, 2015
Posted by Paul
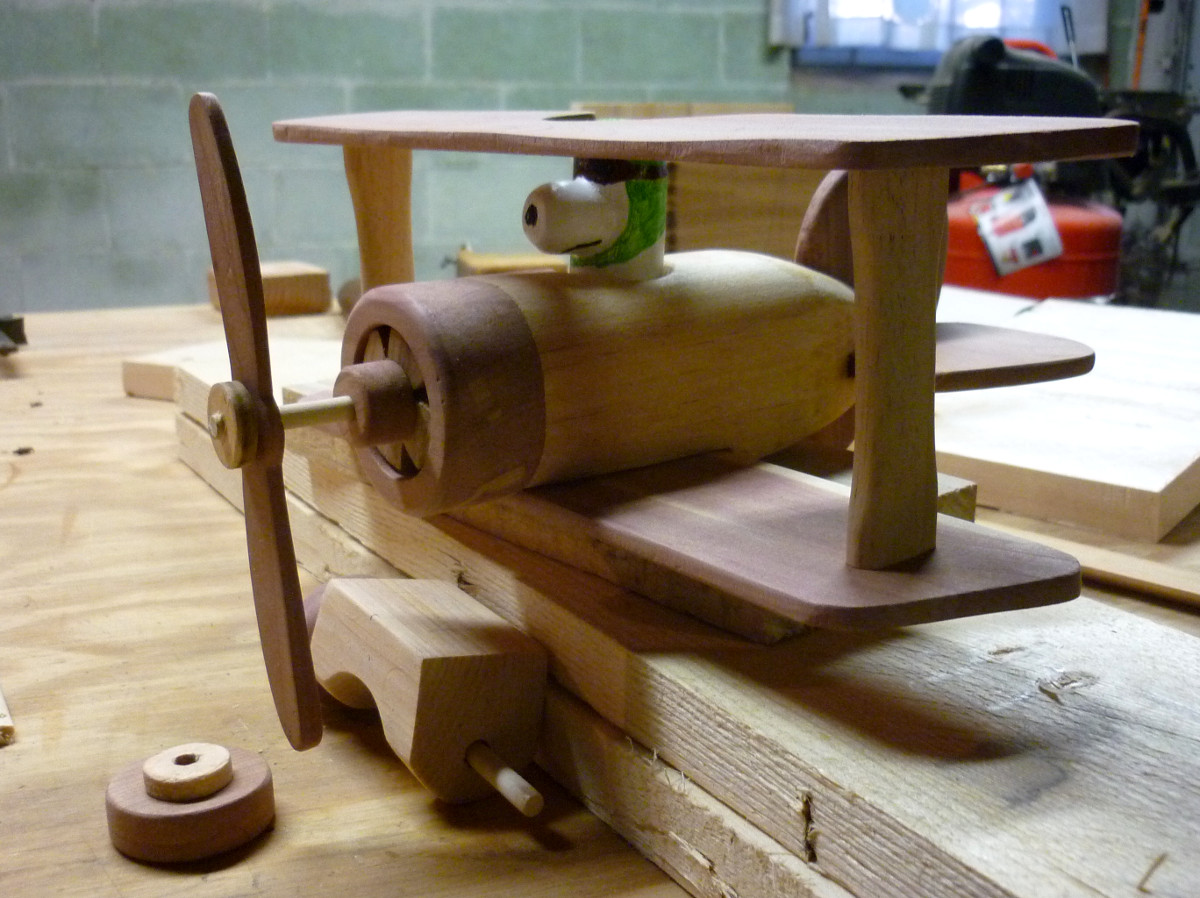
Snoopy tests the ergonomics of the cockpit of his almost-complete new biplane as the fateful day draws near when he faces the Red Baron in single combat. With a tricked-out five cylinder rotary engine and hand-carved cedar propeller powering his Sopwith Camel, he stands a fighting chance. I've heard a certain young lady is crocheting a scarf for him to wear into action.
January 10th, 2015
Posted by Paul
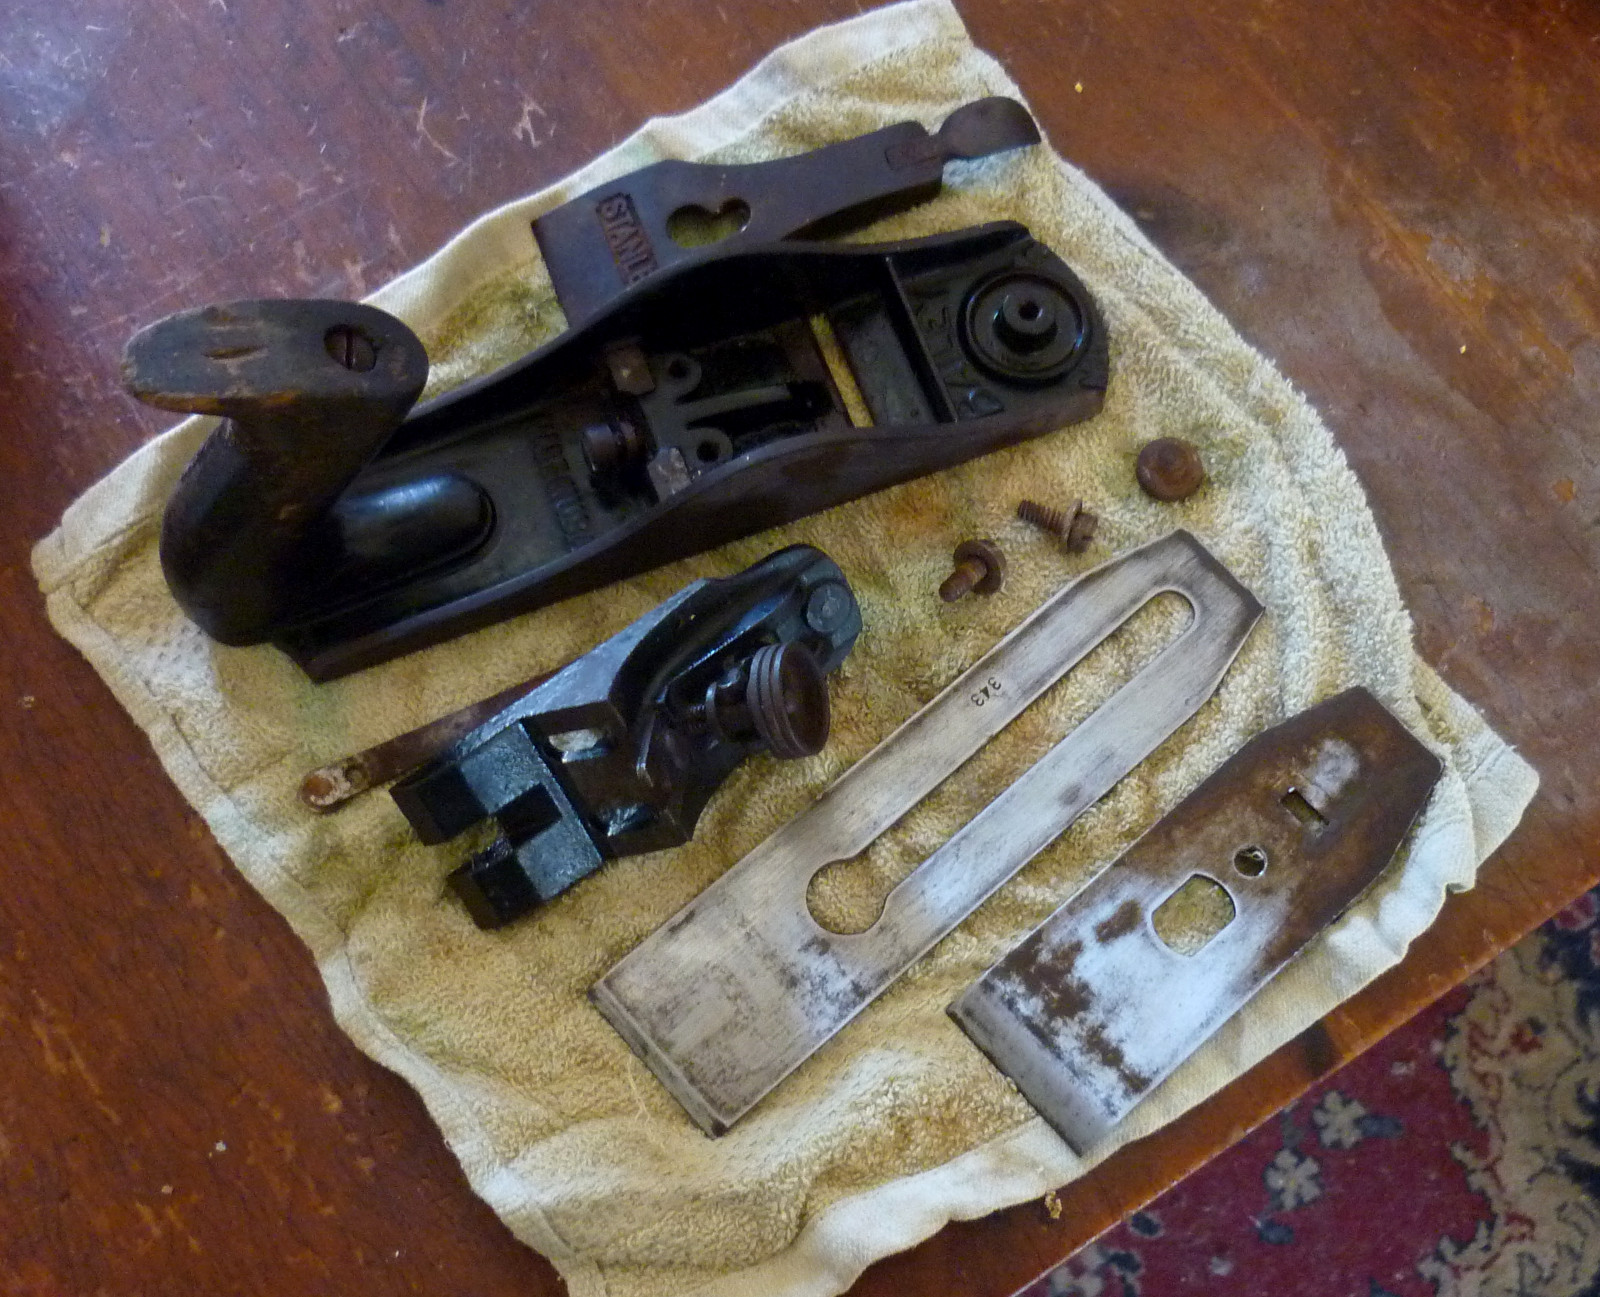
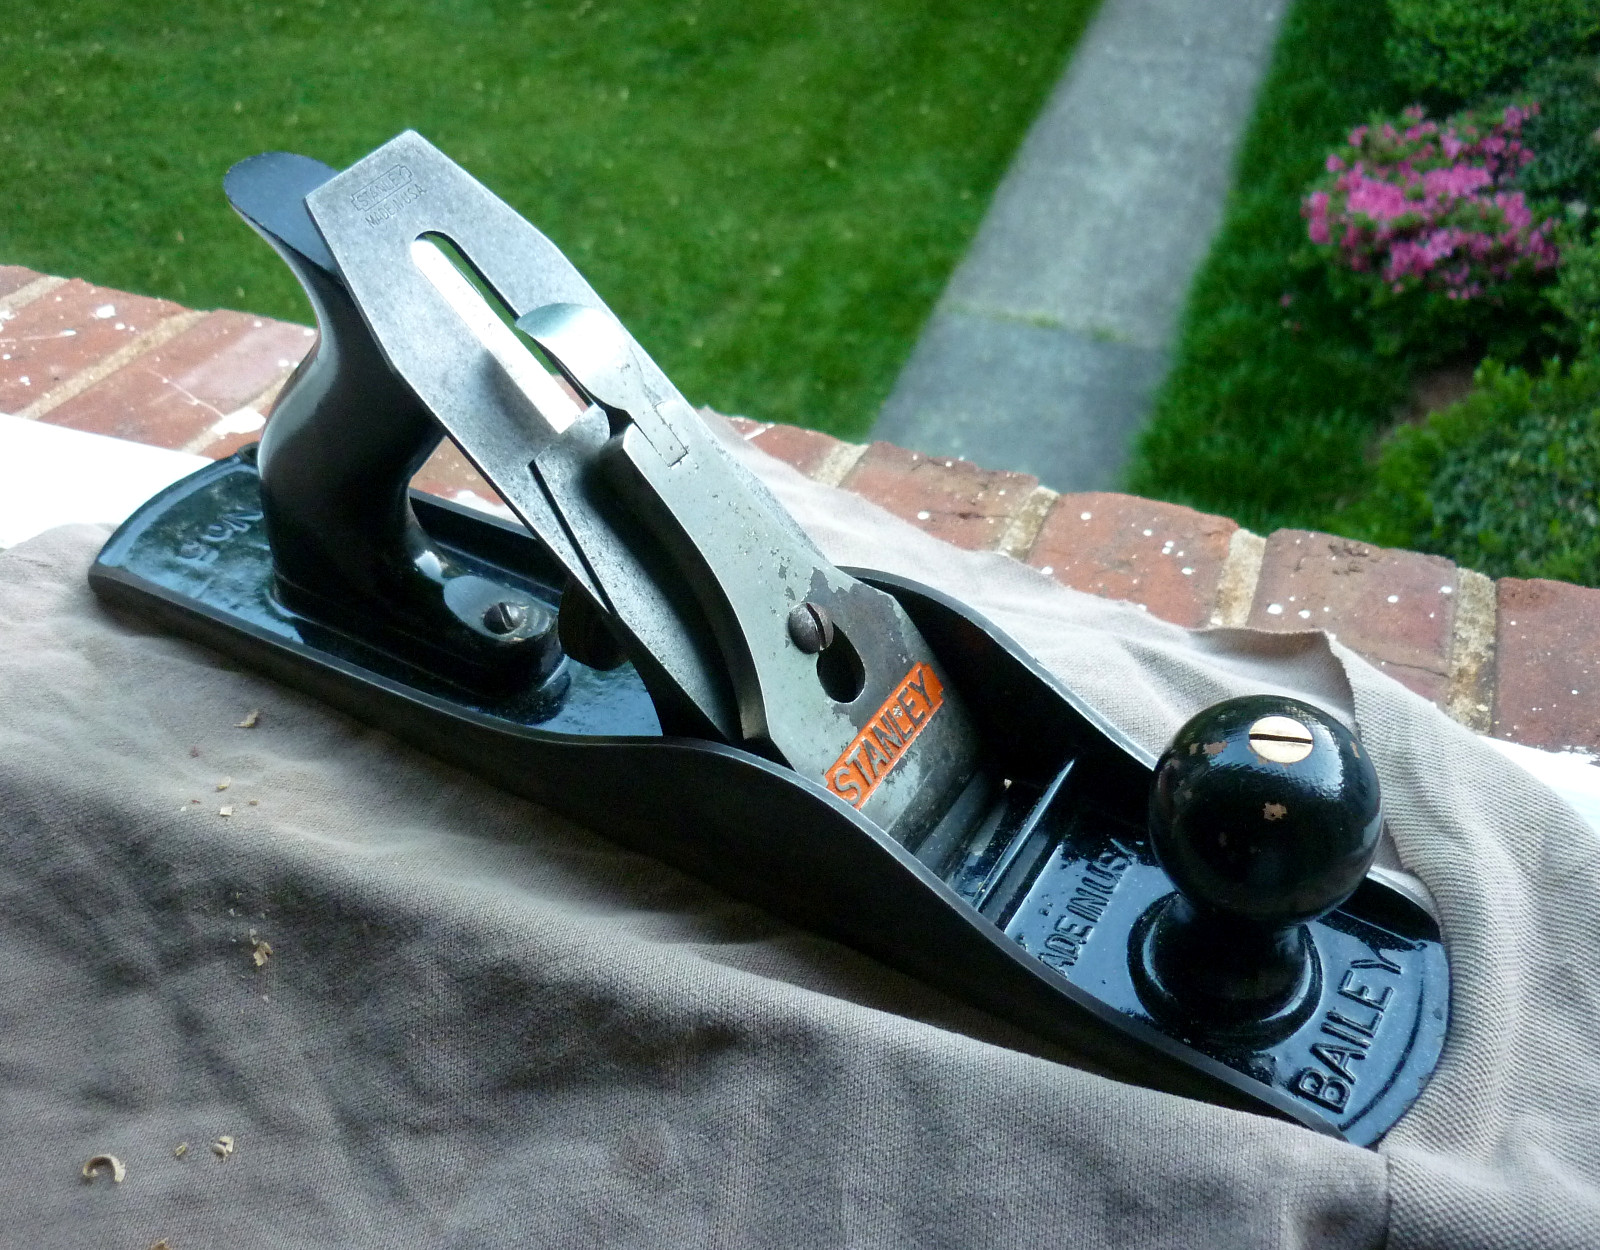
Joe called to tell me about a couple of planes he and Marcia had spotted in a junk store the other day. One was an old Stanley Bailey No. 3, missing the knob and in general decrepit shape, while the other was a Stanley of about the same size as the No. 3, but with blue paint and a squared-off tote. I figured the blue one was a late model and probably not worth much, but the old No. 3 sounded interesting, so I drove over to the junk shop on my lunch break and took a look. The No. 3 was woefully filthy and rusty, and the blue one looked like a Stanley Handyman, but I bought them both, along with a windshield ice scraper and a pair of pliers, for the princely sum of $21.
At home, I hit all the hinges and mating surfaces of the No. 3 with light machine oil, and it came right apart. Once I cleaned off the dirt, it looked good, with all the parts there except the knob, and nothing broken. I started in cleaning rust, and was happy to find no bad pitting. In particular, the blade looked very good and was still actually sharp. So with a little more work and a knob, we should have a good No. 3 for the shop. The other one might make a good scrub plane.
January 8th, 2015
Posted by Paul

Joe finished up most of the parts for the biplane over the last week. Snoopy looked on as they were dryfitted. That plane should be airborne pretty soon now. Look out, Red Baron.
December 29th, 2014
Posted by Paul
Another Japanese toolbox, this one in walnut. It's for Susan's grand-daughter Sophie.
December 25th, 2014
Posted by Paul
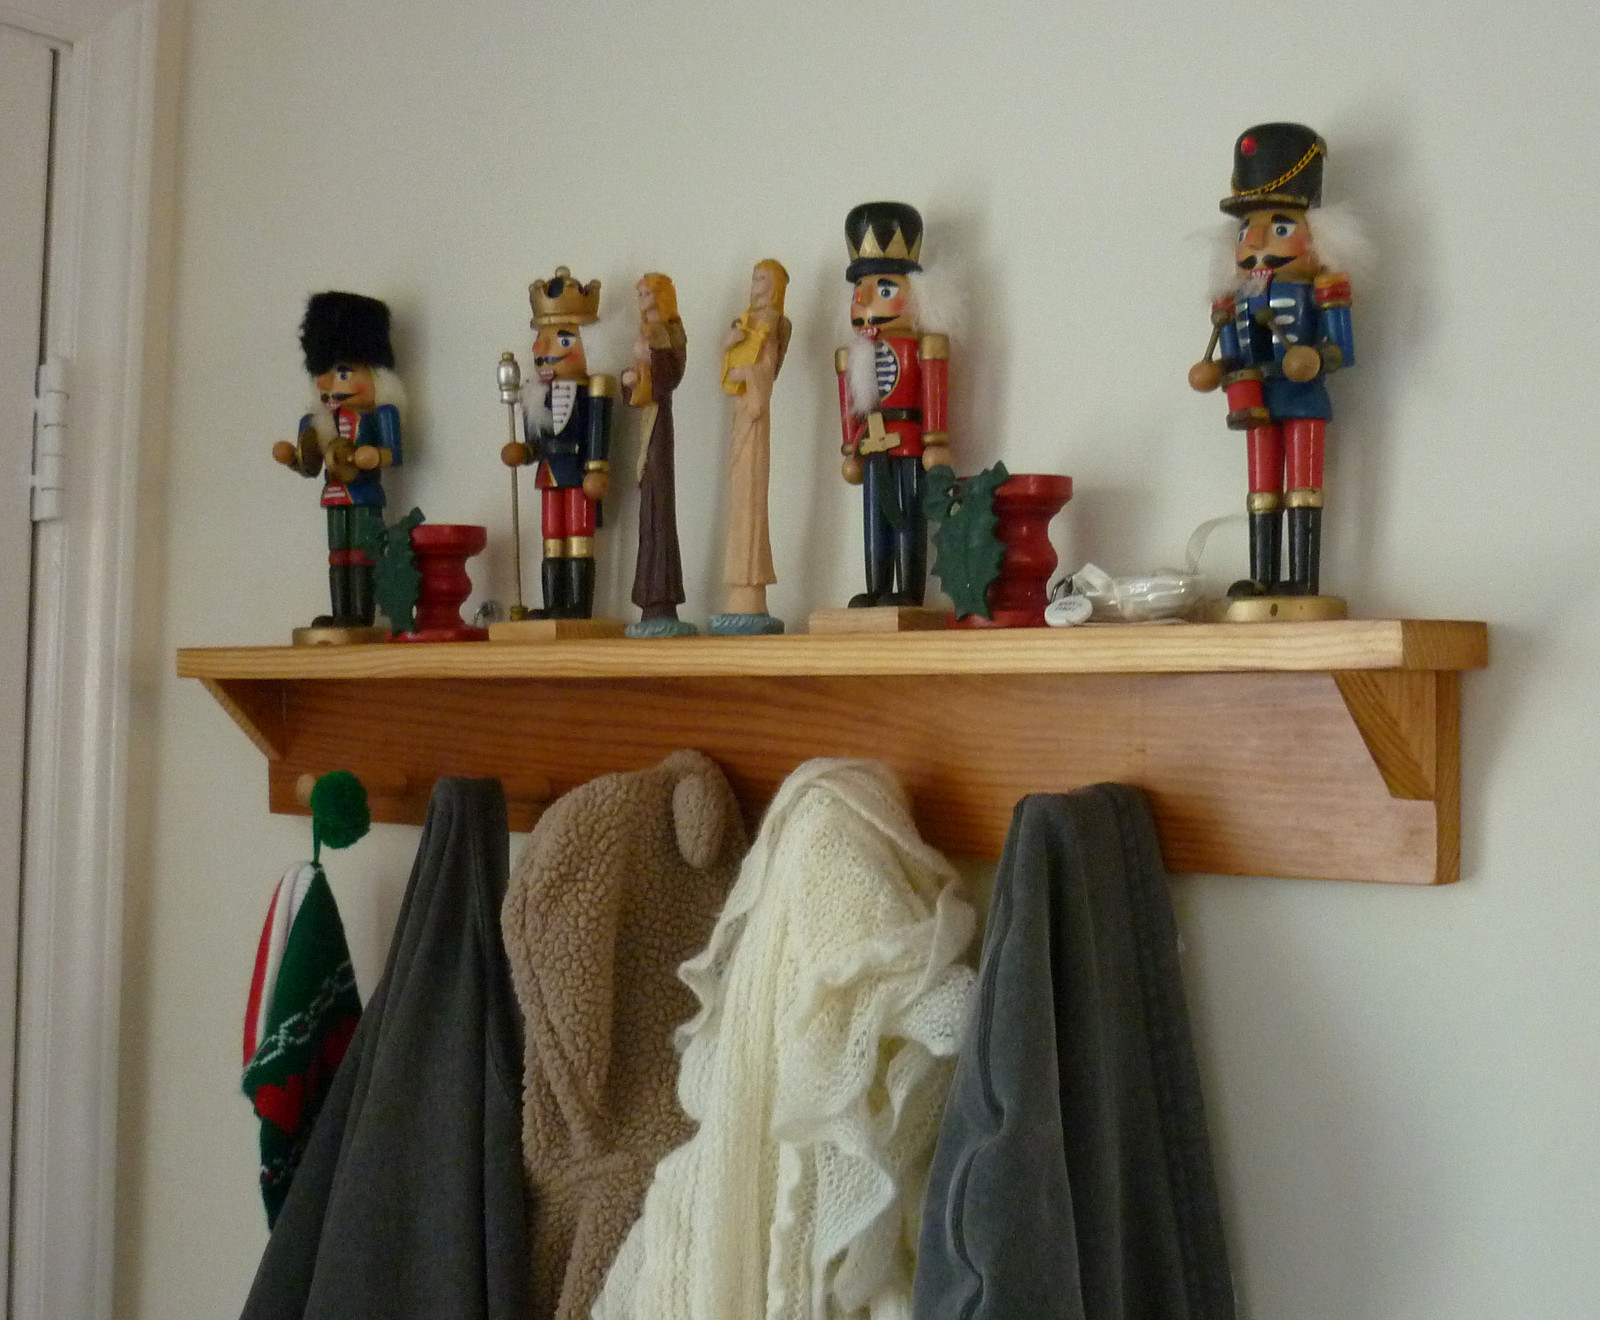
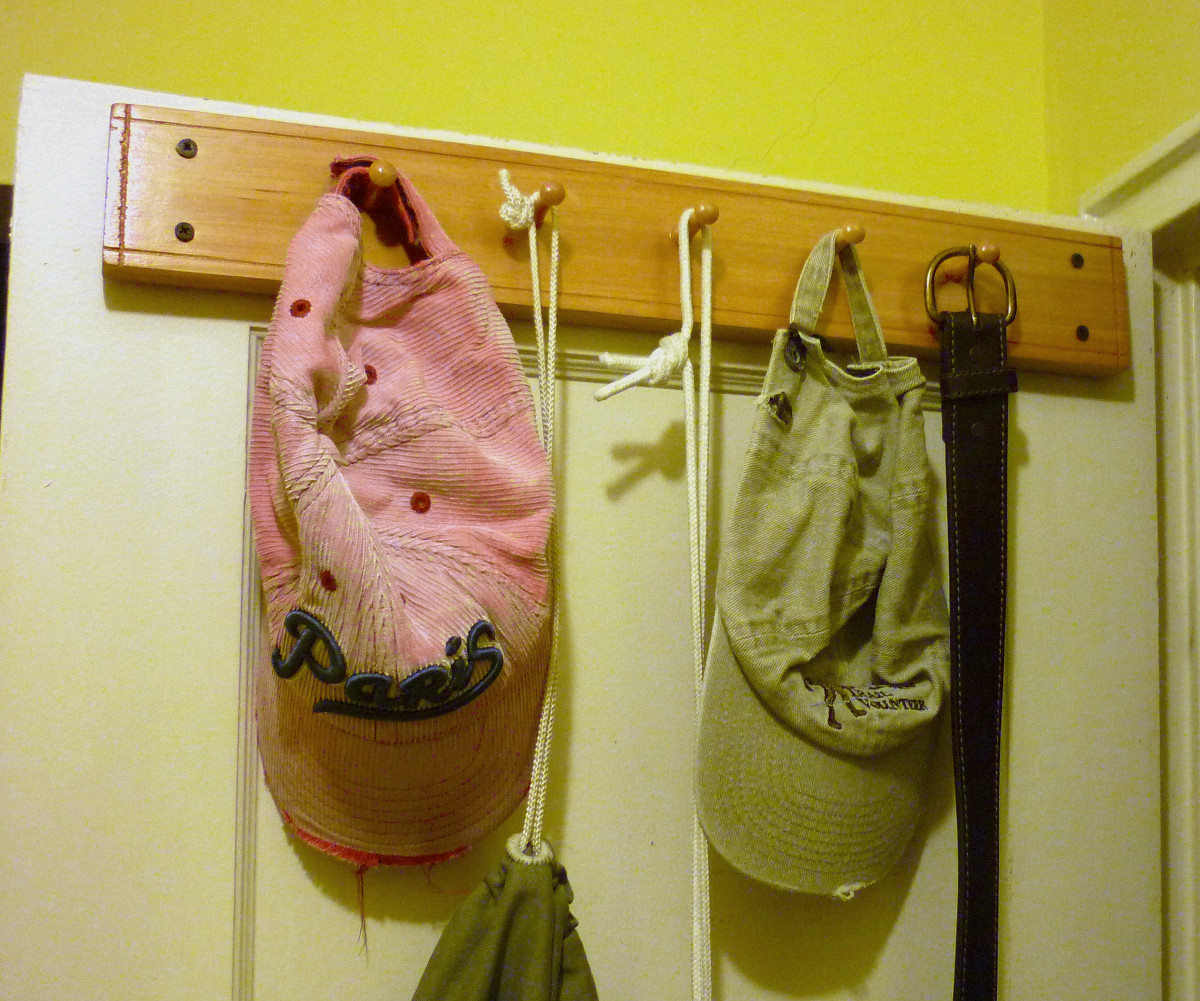
Joe built several coat racks and gave one to Marie and Levi. They didn't waste time putting it to good use.
December 23rd, 2014
Posted by Paul
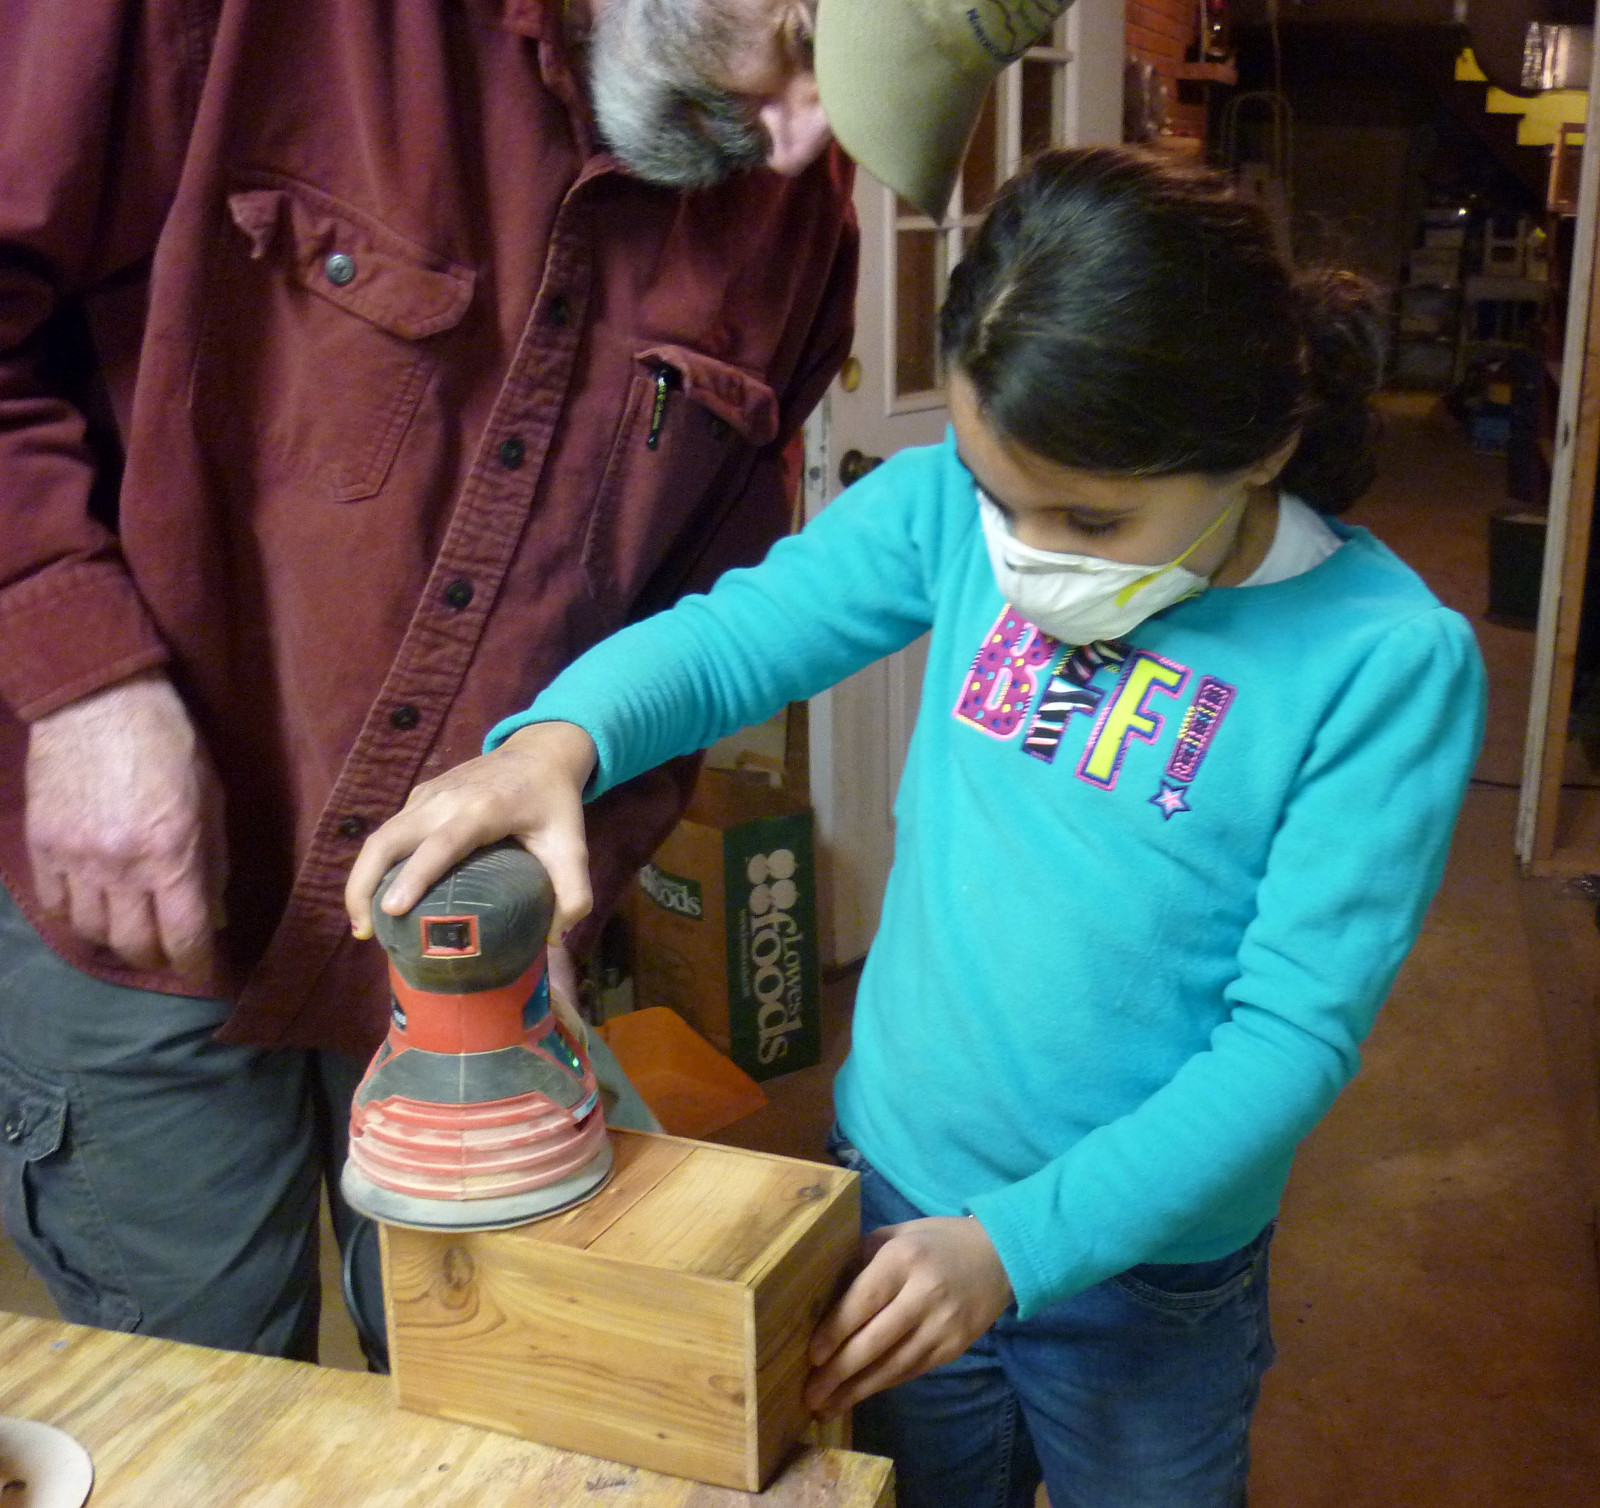
Faith came downstairs to work on her box. First she and Joe glued up two pieces to make one big enough for the bottom, and when it was dry she cut it to size in the miter box. Then she glued it in place, and once that was dry, she used the orbital sander to smooth the whole box out nicely. The sander made a lot of dust so she had to wear a mask, but even so running the sander was great fun. Joe will cut the mortises for the hinges and clasp, and then next time she visits the woodshop, Faith can screw them in place and be ready for finishing.
December 16th, 2014
Posted by Paul
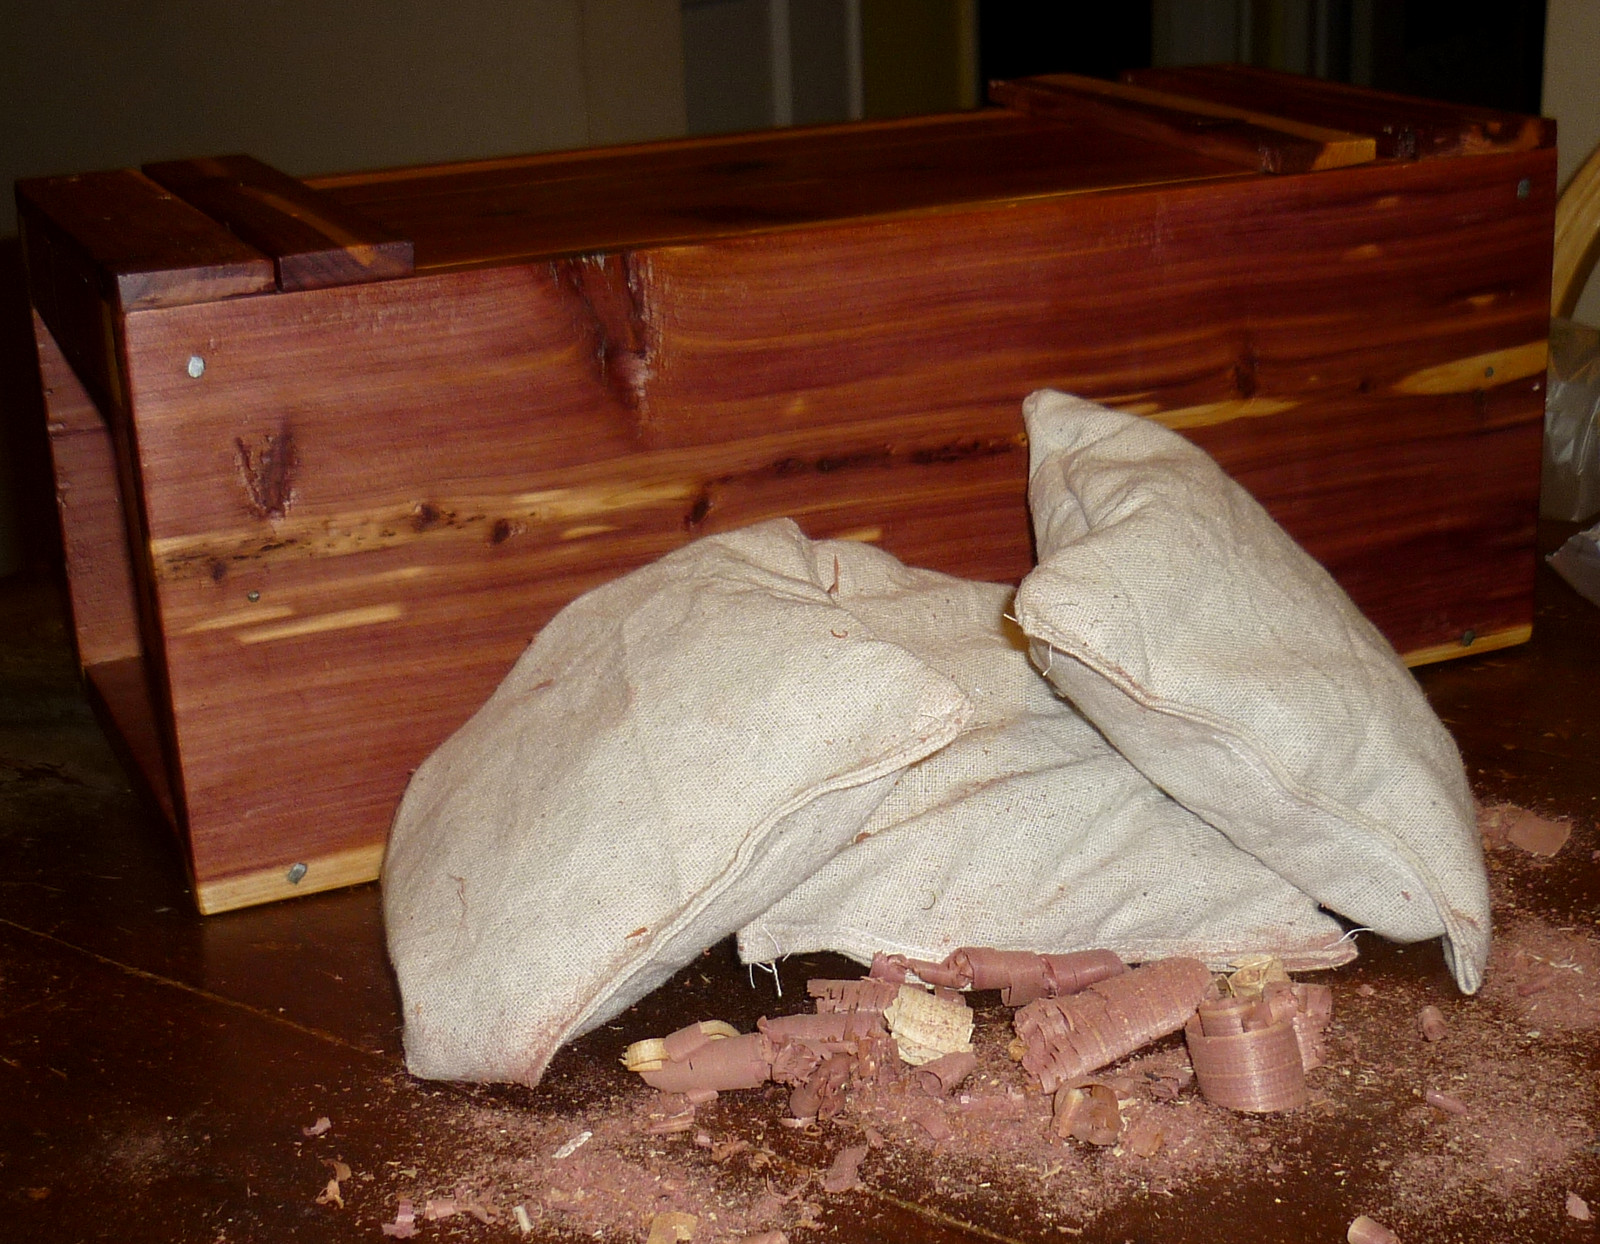
We don't waste anything if we can help it. All the cedar projects have left a lot of shavings, and Marcia and I have been bagging them up to put in the back of closets and drawers. I make mine out of Osnaburg cloth. Marcia uses empty Crown Royal bags. I don't know where they come from but she seems to have a lot of them. Southerners like us know that the scent of cedar will keep moths away. What's left over makes good kindling for the wood fire.
December 15th, 2014
Posted by Paul

Most of the biplane parts are cut out and rough-fitted. Once it is done, I hope Joe will keep it on his desk as an attraction to all the kids, young or old, who visit the woodshop.
December 10th, 2014
Posted by Paul
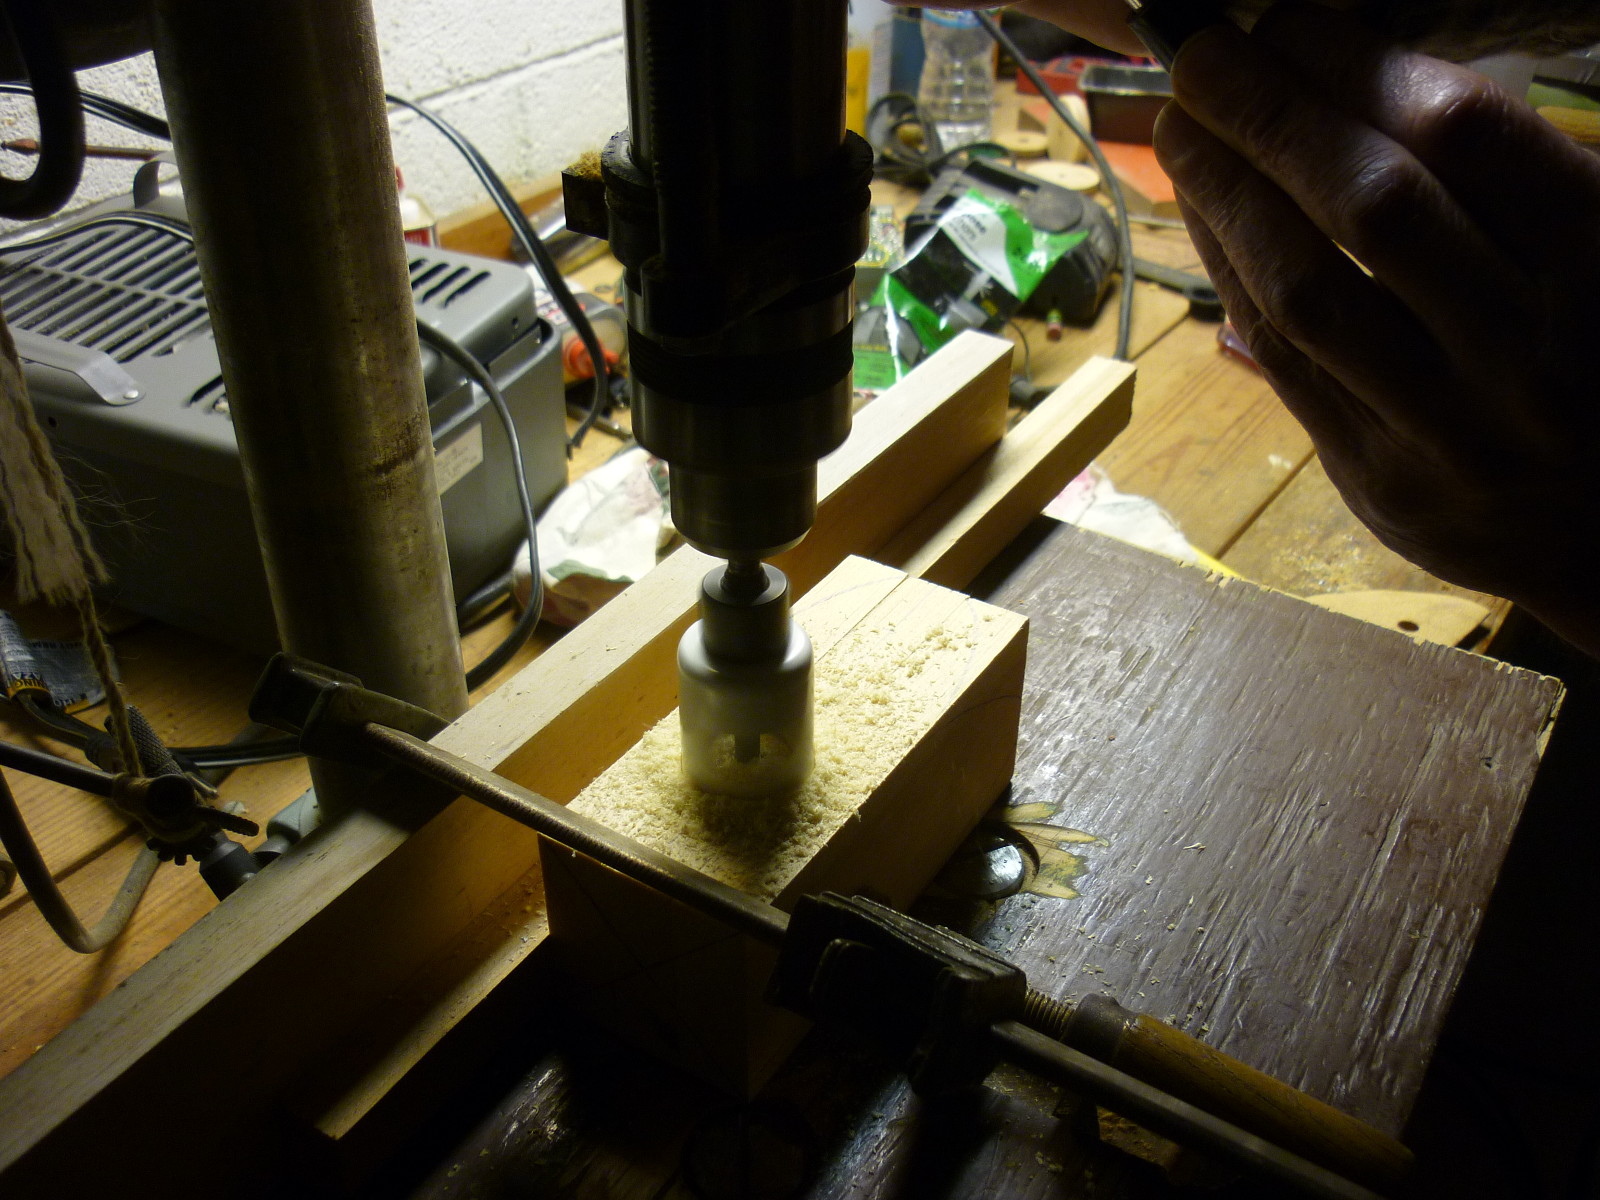
Drilling out the cockpit of the biplane.
December 10th, 2014
Posted by Paul
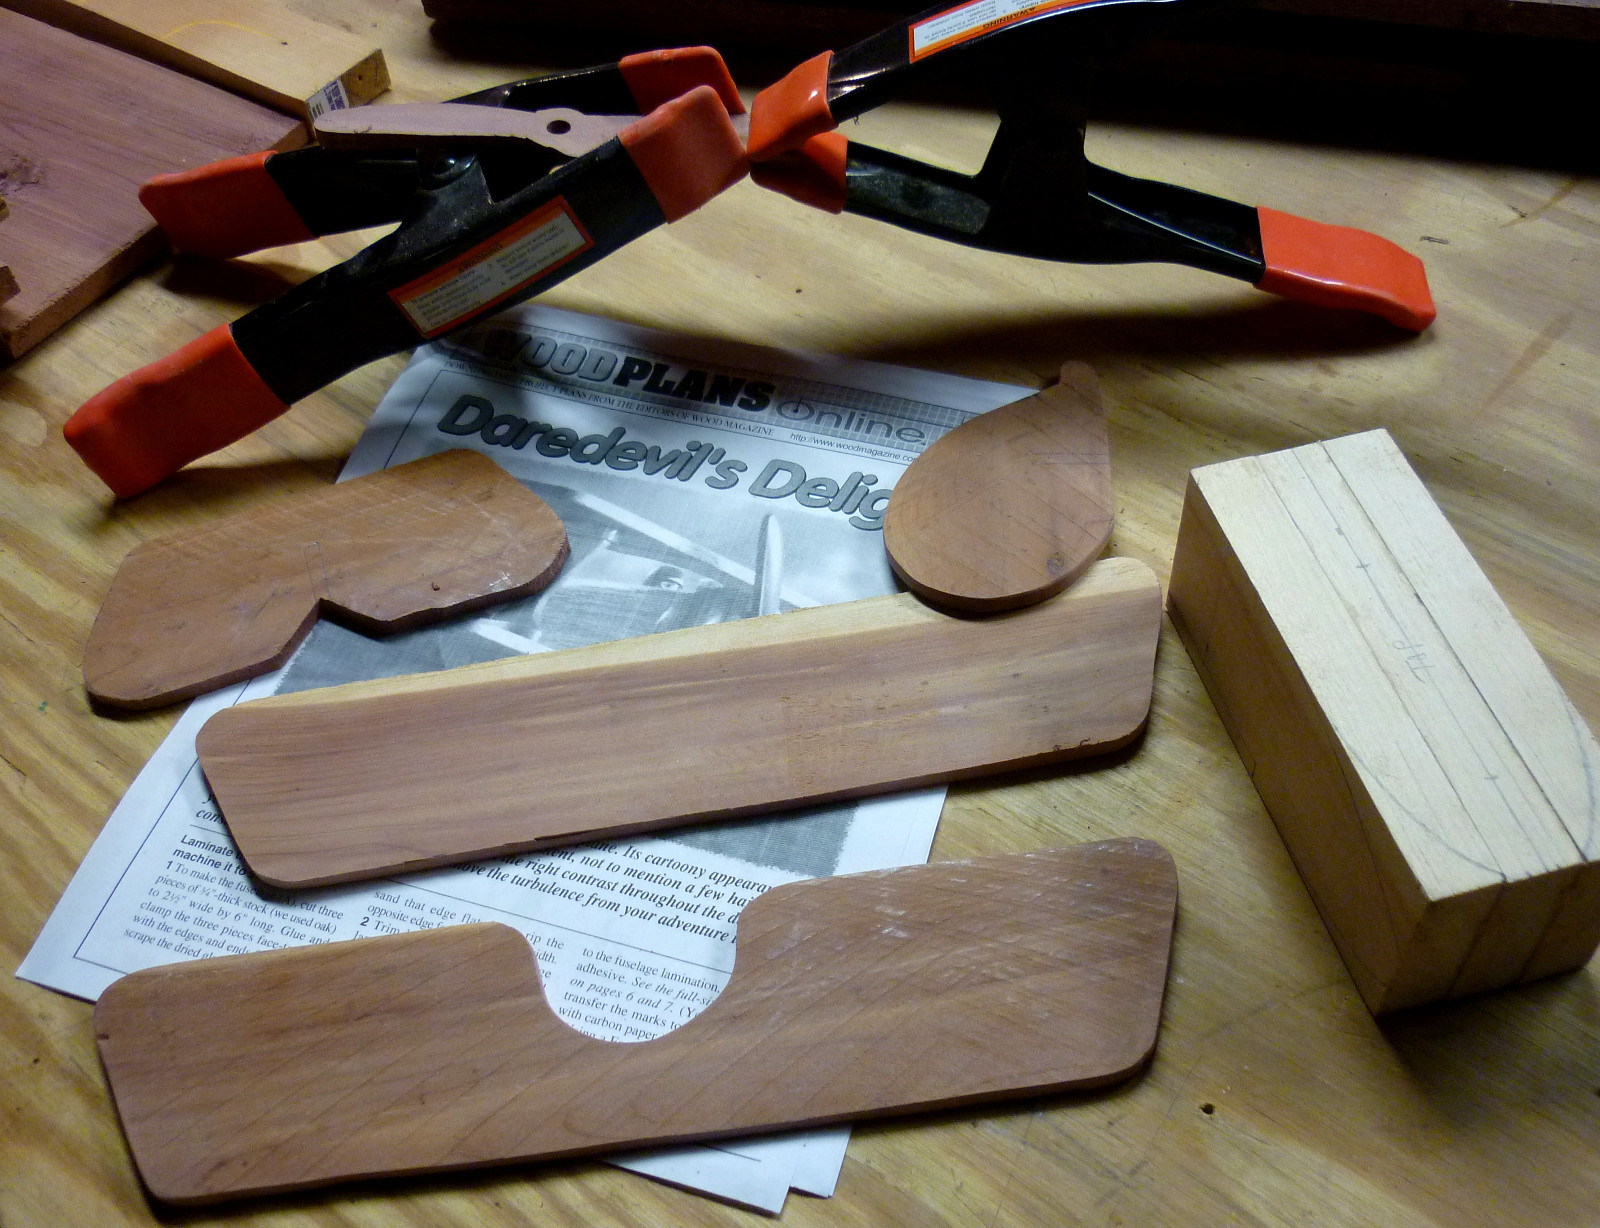
Joe found plans for a toy biplane online and we decided to build one. This was a jigsaw job, and Joe is much better with that tool than me, so after helping laminate a block that will become the fuselage I stepped aside and let Joe cut out the other parts. It went so quickly that he started thinking about making some more for the next burn survivors' group sale. I worked on cutting out parts for Sophie's Japanese toolbox. We finished out the evening putting a last coat of polyeurethane on the two boxes we completed a few days ago.
December 9th, 2014
Posted by Paul
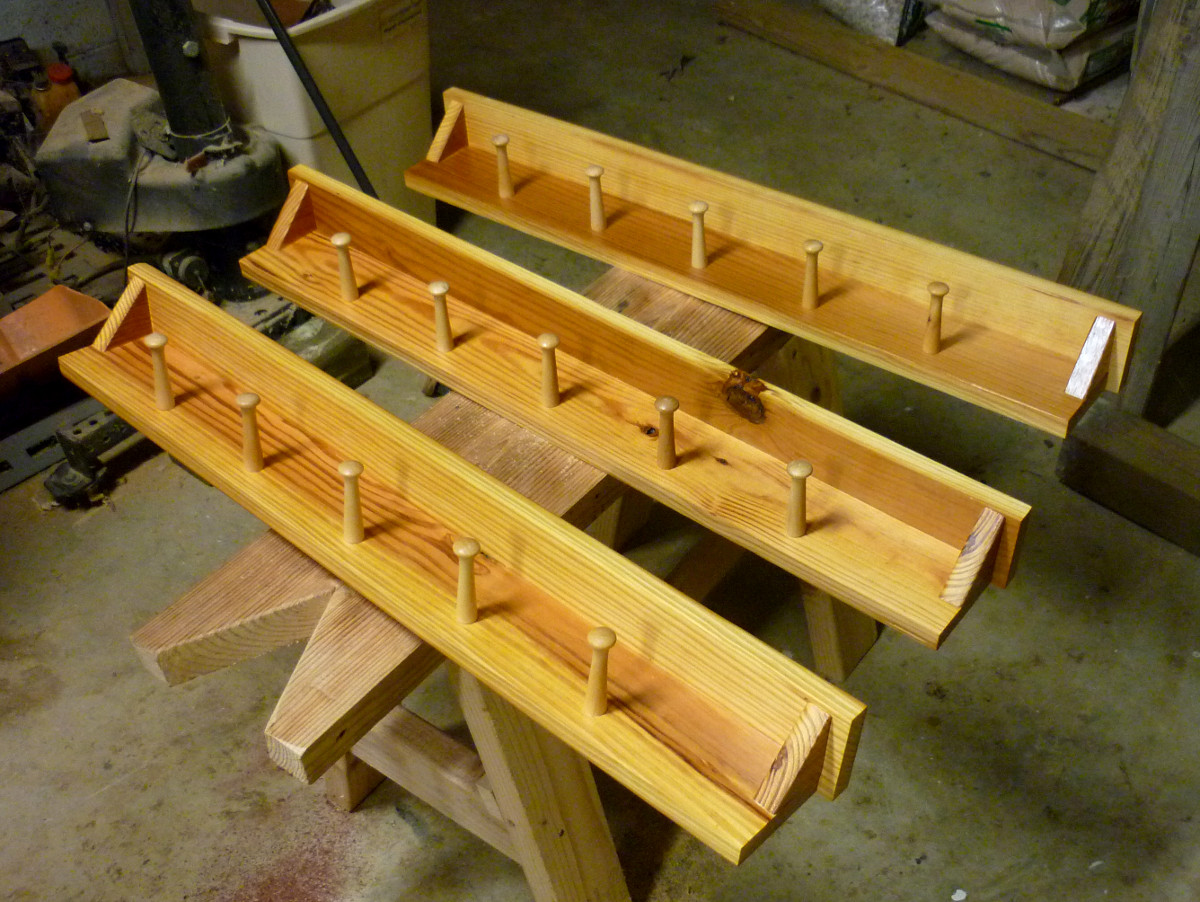
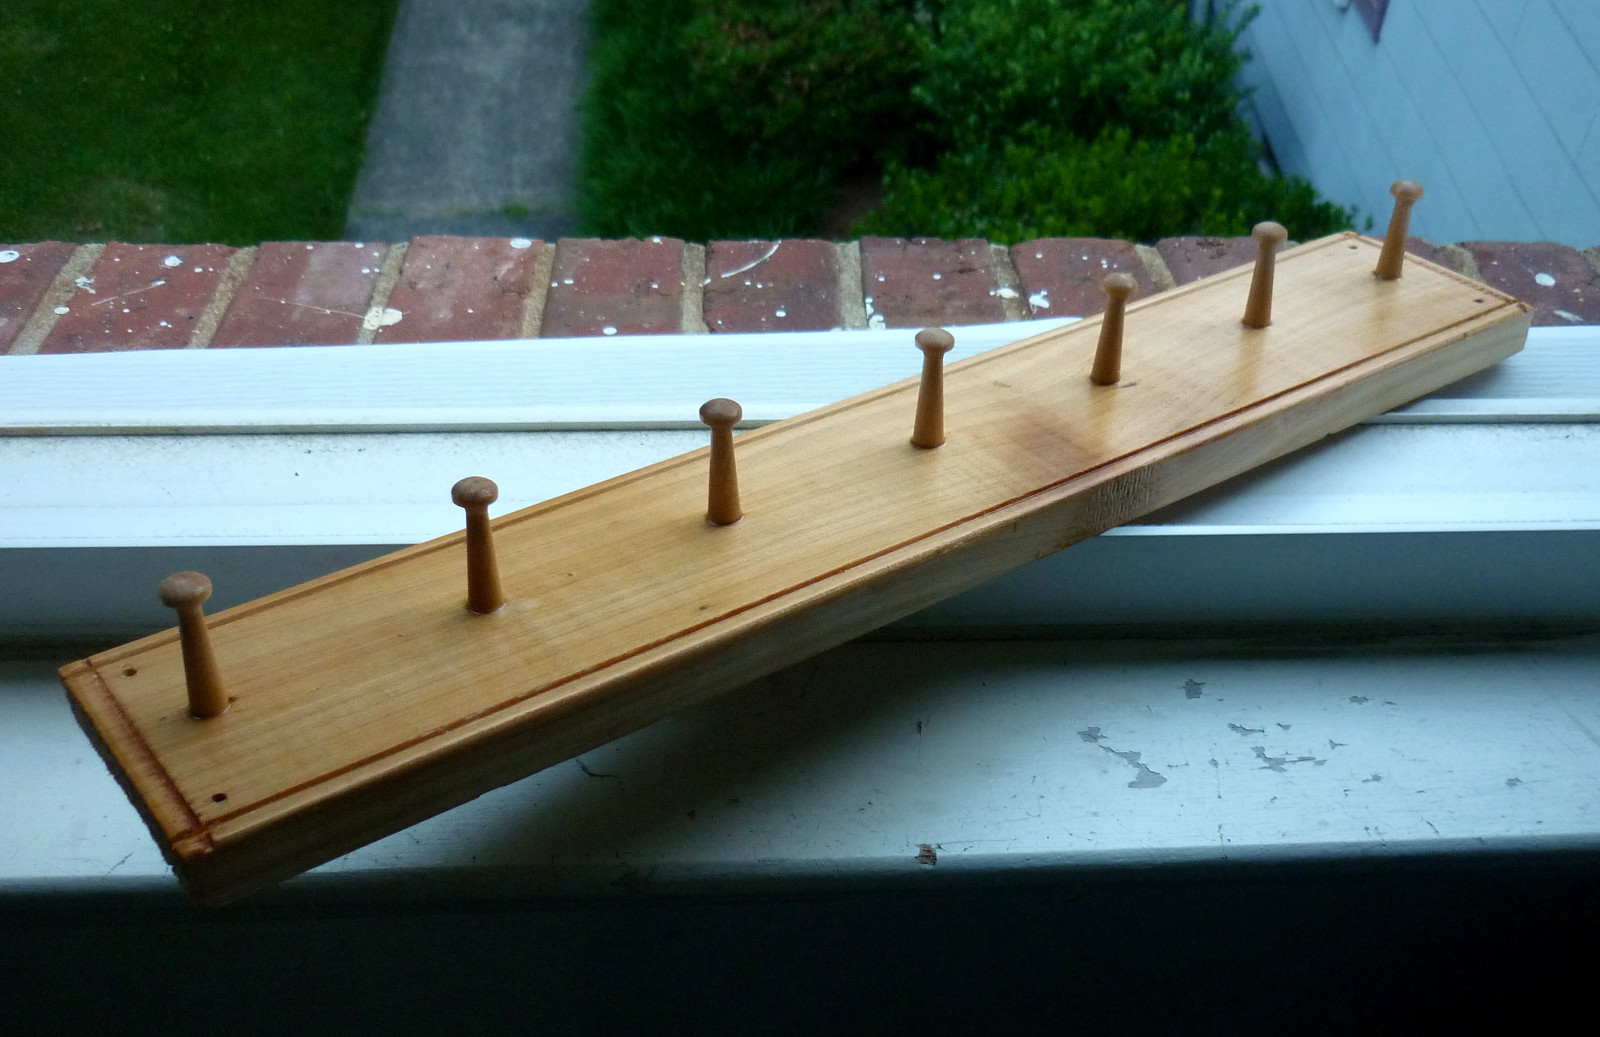
These little peg boards are a convenient way to use the space on the back of a closet door. We've made several of them. They only take a few minutes.
December 8th, 2014
Posted by Paul
We started off this hobby making tools and we're still making tools. This little clamping jig is to help us get boxes square. It is made of hickory and should last a lot longer than either Joe or me. The final sanding on a true flat steel surface took a good hour of tedious work before we were satisfied that we had a near-perfect square.
November 26th, 2014
Posted by Paul
Evidently Joe is just as much taken with the Japanese Toolbox form as I am. While I was at the coast last week he made one for himself. I think it brings back fond memories of his military service, since it has a strong resemblance to the ammo boxes he used to tote back in his halcyon days in the army.
We counted up the box production and it seems we have made twenty-one of them in various forms and sizes since we took up this hobby.
November 14th, 2014
Posted by Paul
Just because we're done with my larder box doesn't mean we're done with the Japanese Toolbox form. I'm much taken with their strength and rigidity without a lot of complex joinery. We started on box number 2 earlier in the week and are well into glue-up stage now. This one is in resawn cedar and is for my nephew Ryan. I liked the proportions of my box, so for Ryan, we scaled the box down to two thirds of the size.
We have a large supply of six inch rough sawn cedar that's a good inch thick. For Ryan's box, we started off by resawing the cedar down to 1/2 inch thickness. This has been a learning experience and we wasted some cedar, but we got plenty enough for the project. Resawing involves kerfing all the way around the board and then carefully ripping down the length of the board, trying to stay in the kerfs. Joe built a second plate for the kerfing plane so that now we can kerf either 1/4 inch or 1/2 inch.
Faith came down to the shop for a while and Joe helped her start making a box of her own.
November 9th, 2014
Posted by Paul
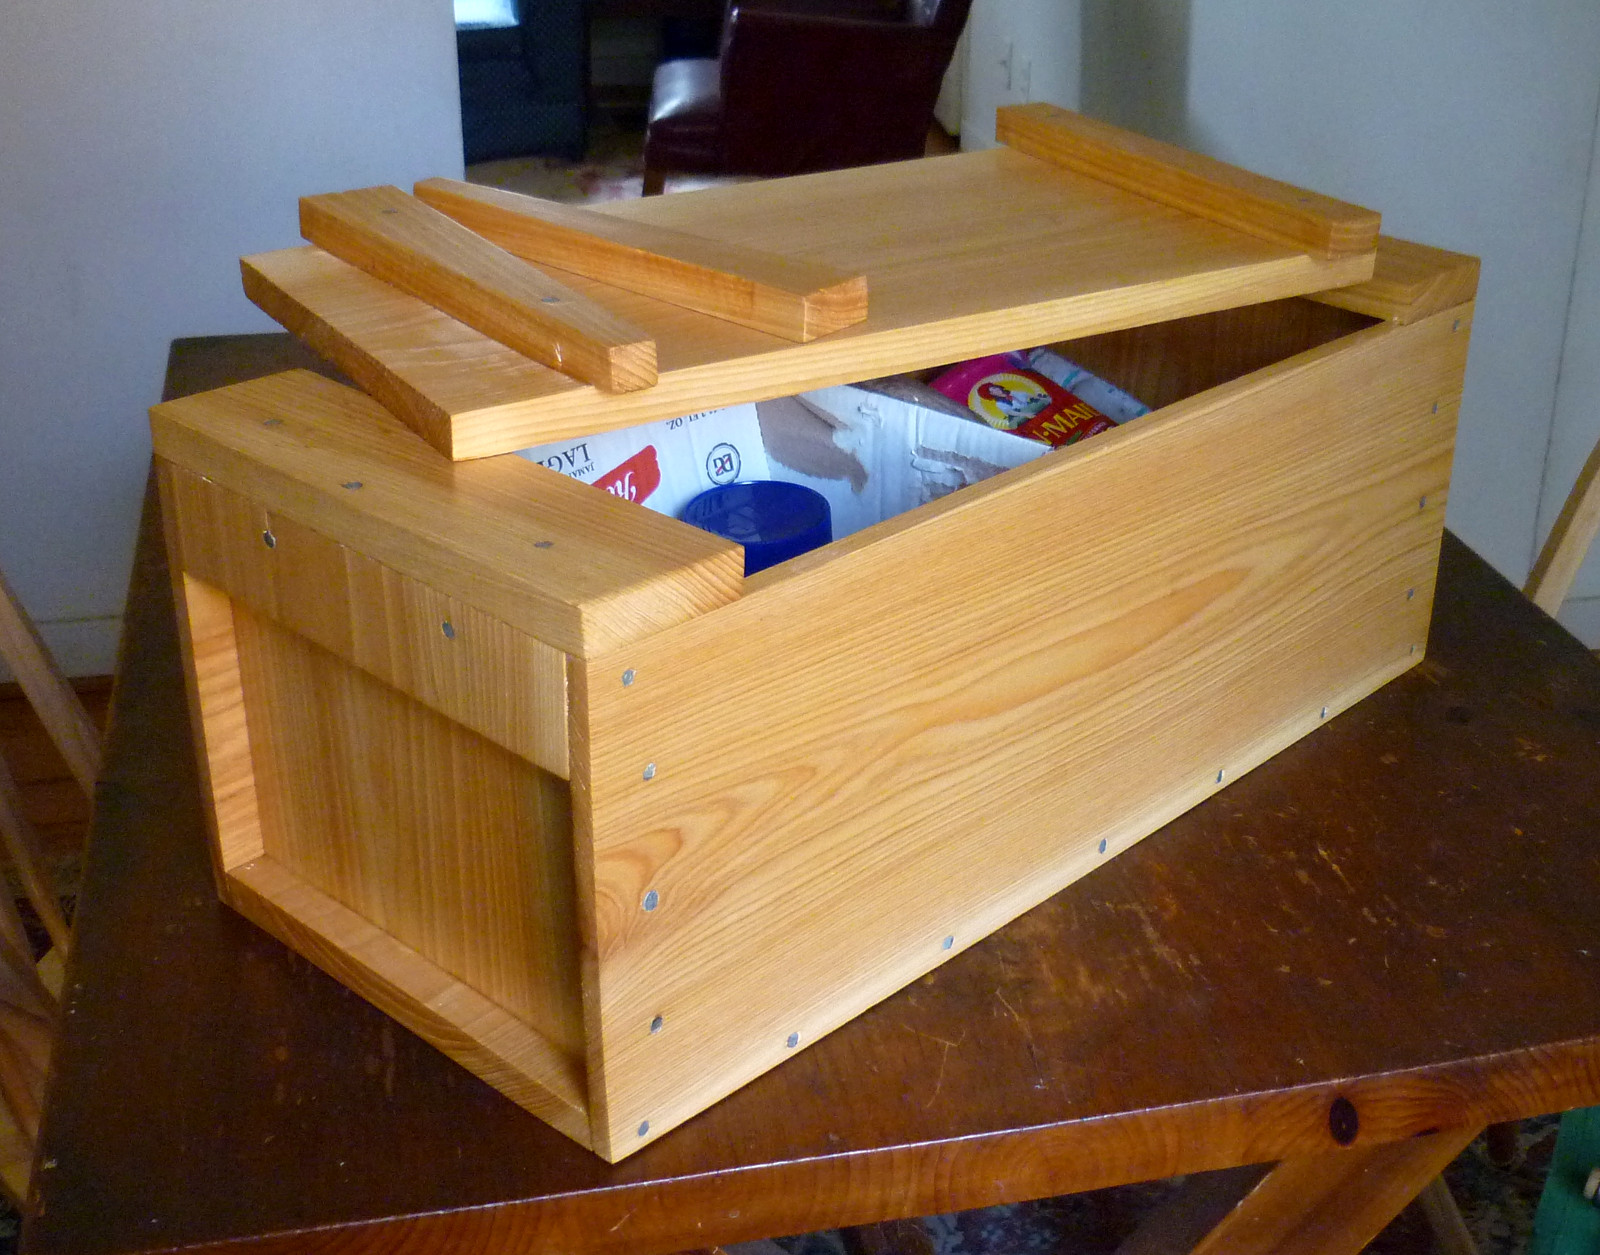
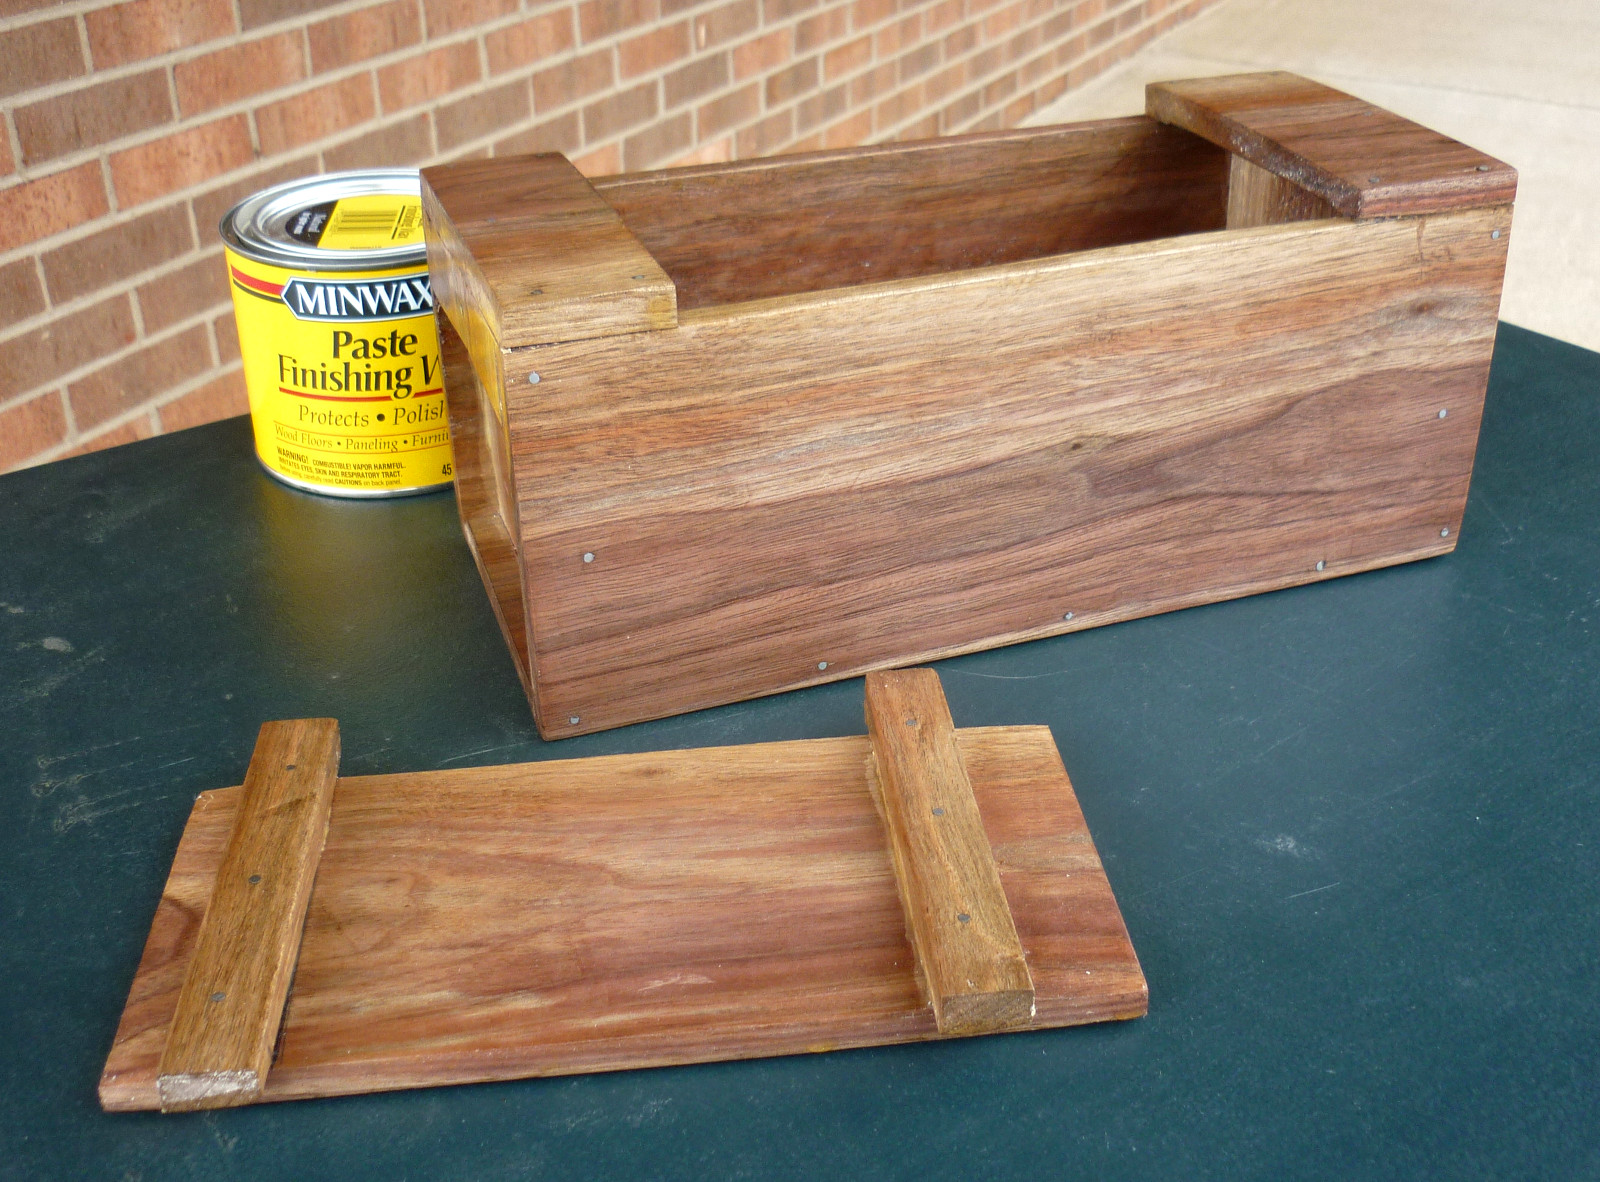
This project is complete. Joe worked down the top surfaces that slide under the ends so they would slip in place easily and then gave the sanded spots and the bottom of the box a couple more coats of poly. We waxed the whole thing with Minwax and I carried it home.
This will be the perfect box for taking a week's worth of groceries to the boat and storing them on board.
I think this box, as simple and easy to build as it was, is one of our best projects so far. It is square, the joints are tight, and the finish came out really nicely. The credit goes to the Japanese carpenters and joiners who developed and refined the form over the centuries. It is economical on wood and extremely strong. It is easy to build, easy to carry, and capacious. We already have plans to make some more boxes to this pattern in other woods and sizes.
October 31st, 2014
Posted by Paul
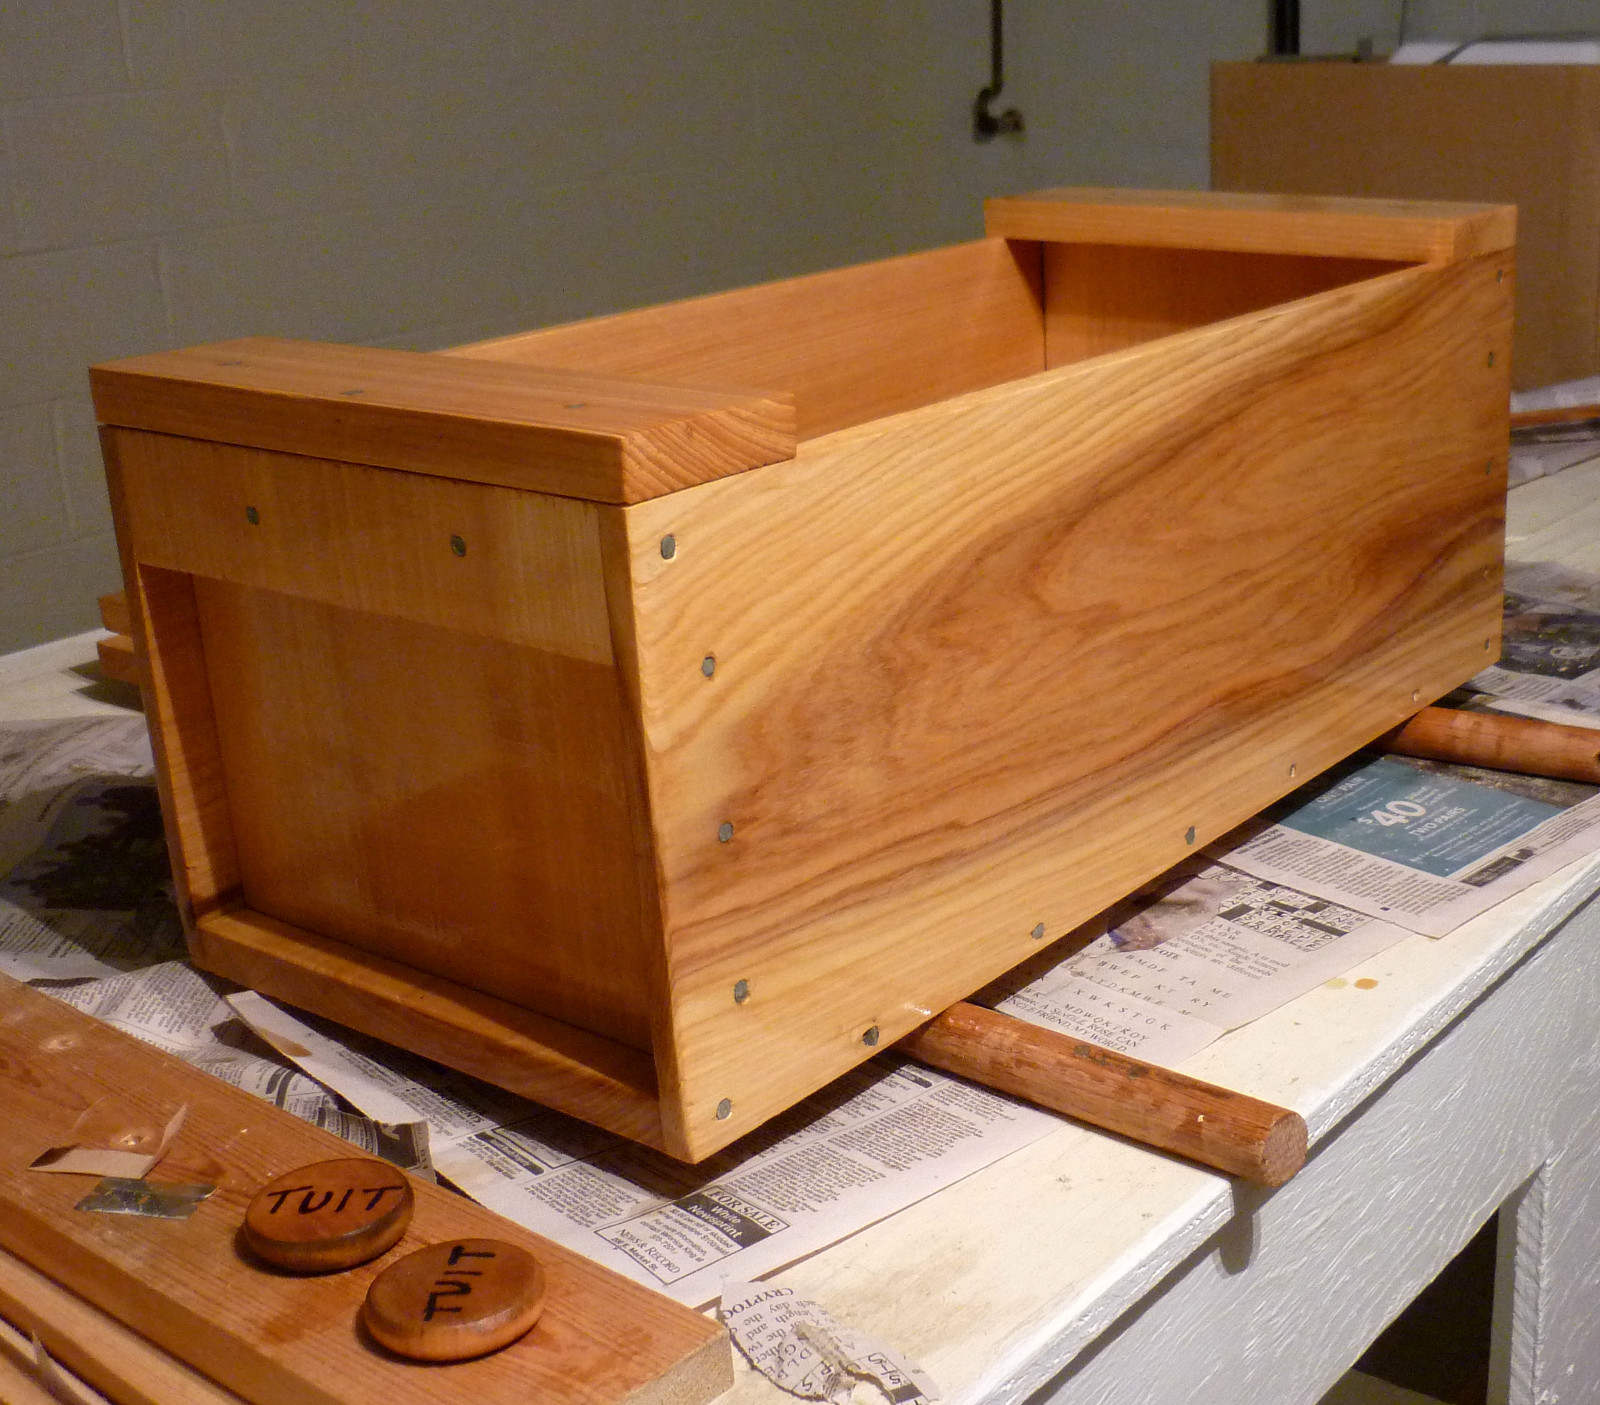
The larder box has three coats of poly on it and that is enough. Joe is going to flip the box over and put another coat or two on the bottom once tonight's coat is dry. We have been cutting the finish with single edge razors used like scraper blades between coats, and it has worked really well for getting a smooth surface.
Joe is responsible for the round tuits.
October 29th, 2014
Posted by Joe

With these three boxes, our total number of boxes has exceeded 15, I think. It's not boxes, boxes, as far as the eye can see just yet but we're still young and have a giant stack of wood. I wonder what the Guinness world record is for a line of homemade boxes is (as far as the eye can see?) If we get good at this, we could box up the world in a custom cypress japanese tool box to carry on our shoulders.
October 28th, 2014
Posted by Paul
Joe has been working hard building small boxes and coat racks to donate to the burn survivors' support group auction. Most of them are built with salvage wood, only the pegs are purchased. It's a matter of principle for us to use recycled wood where we can.
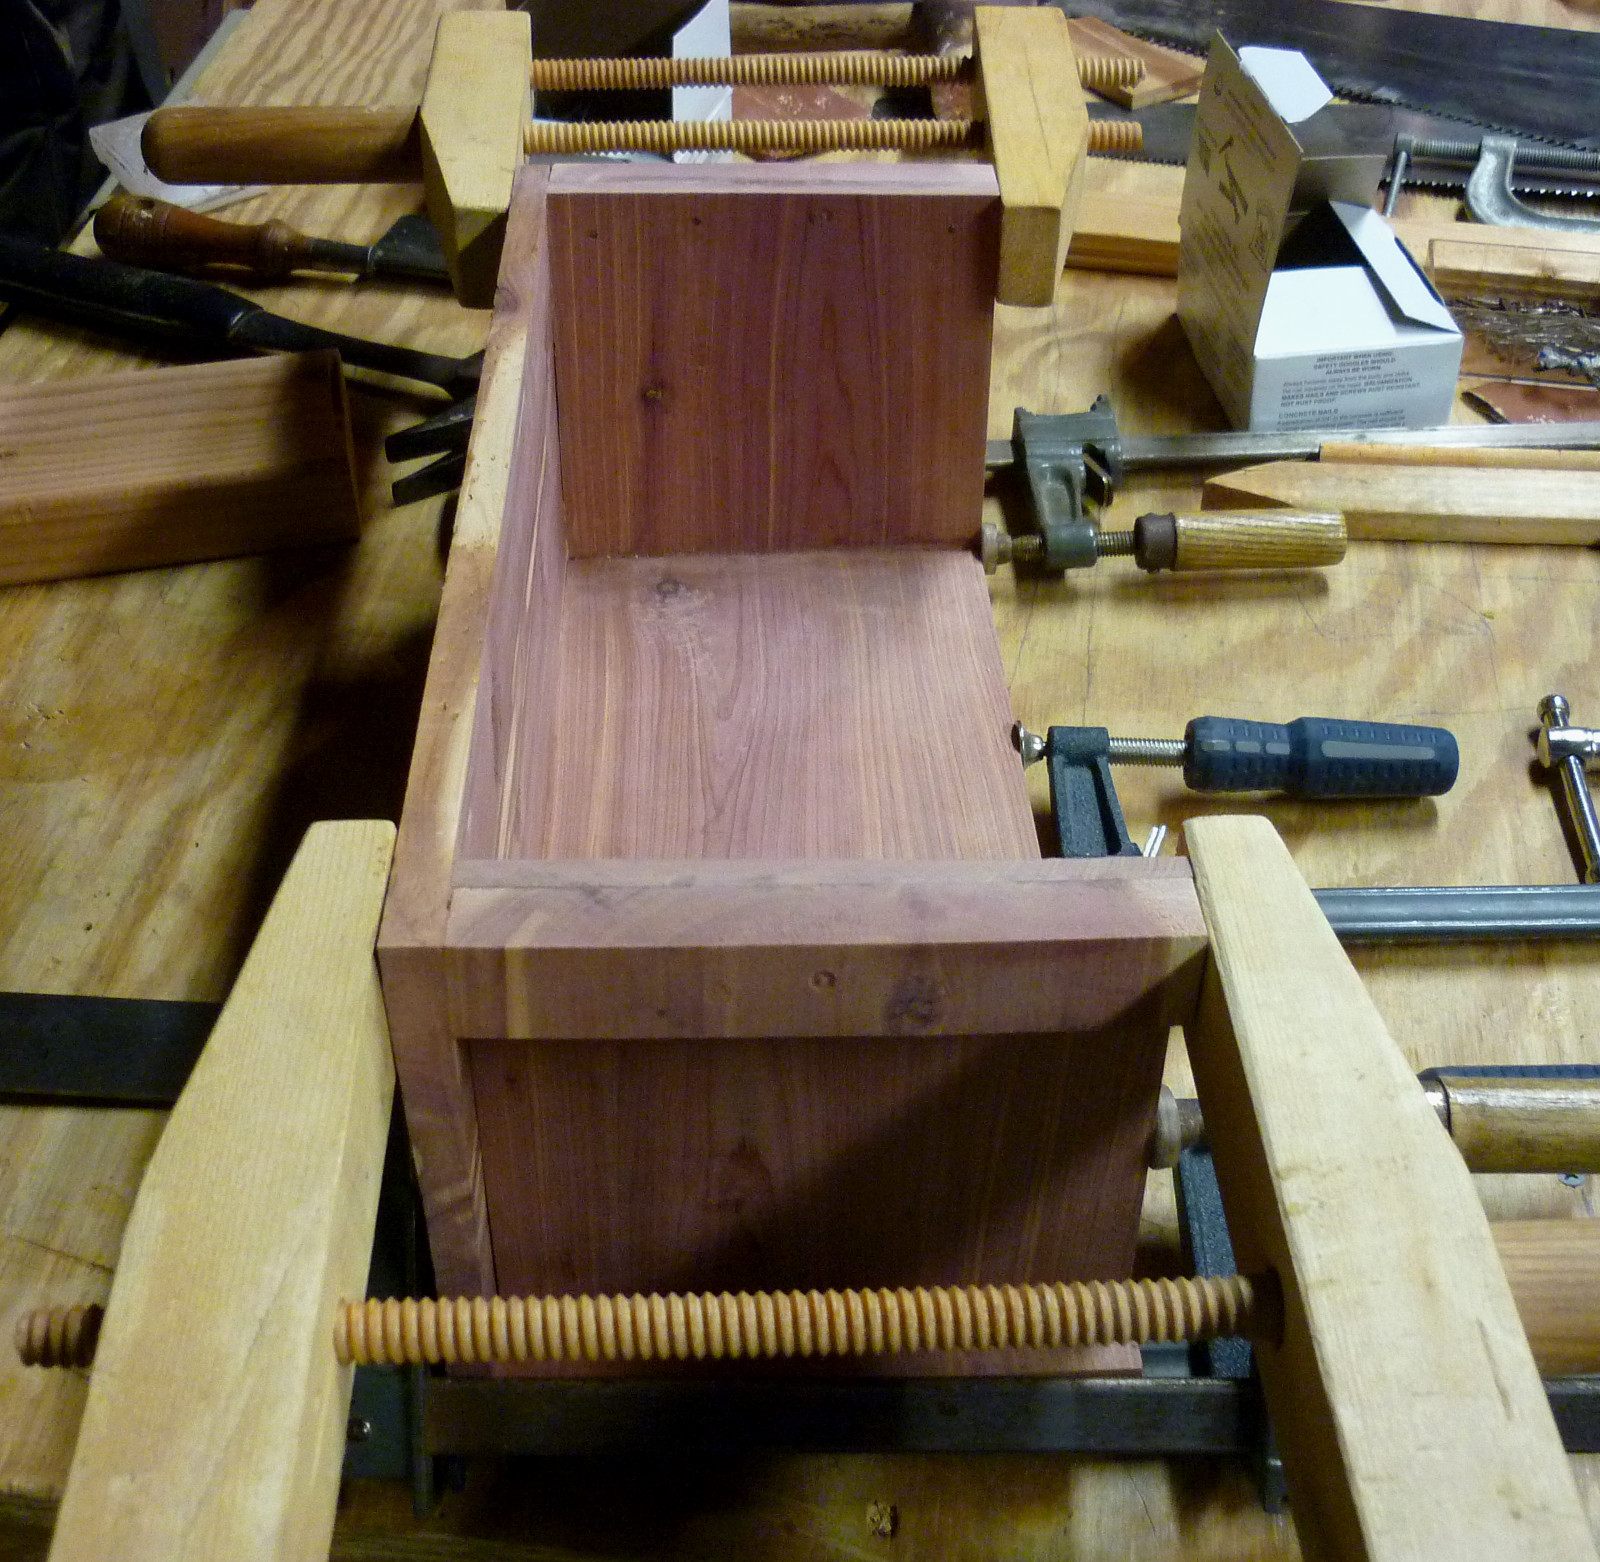
It was a big night at the woodshop. We finished building the larder box and got the first coat of poly on it. We built a base for the Moxon vise so we can clamp it more securely to the bench. And we experimented, with limited success, at resawing cedar using the frame saw.
Looking at the larder box, I was concerned that the sides would eventually warp away at the corners, so we started the night by putting four more nails in each side. Right out at the corners there was a danger of splitting the wood, so we proceeded carefully. We used the little egg-beater drill to make pilot holes since Joe's contractor drill was out of battery. We cut the big 7d nails to length and waxed them, and then Joe, with his steady hammer hand, carefully drove each nail. Next, I ripped the parts for the battens and we nailed them in place. Then we did a little light sanding, signed the box and set it aside for finishing.
The Moxon has always been a little wobbly since the table top is not very thick and the dogs don't have much to grab onto. We fixed that problem by attaching a plate to the bottom of the vise that extends out past the ends and gives us a place to clamp.
I got a great deal on 100 board feet of cedar at Wall Lumber a while back, so we have plenty. It's rough sawed and a solid inch thick, so we would like to resaw some of it to make small boxes. Joe made a spacer plate for the kerfing plane that allows us to cut a half inch kerf. Joe kerfed all the way around a three foot length of cedar, and we set about trying to resaw it. It was easy enough to follow the kerf with the ripsaw, but to resaw the whole board would have been extremely time-consuming. We tried using the frame saw with its very aggressive blade, but had no end of trouble staying in the kerf. In the end, we more or less ruined a foot or so of cedar plank, but we haven't given up yet. Joe, who has the time for it, is going to resaw some with the rip saw, and I may try to find a less aggressive blade for the frame saw so we can try it again. We'll figure this out eventually.
With that out of the way, we put a coat of poly on the larder box and had a round of brews.
October 23rd, 2014
Posted by Paul
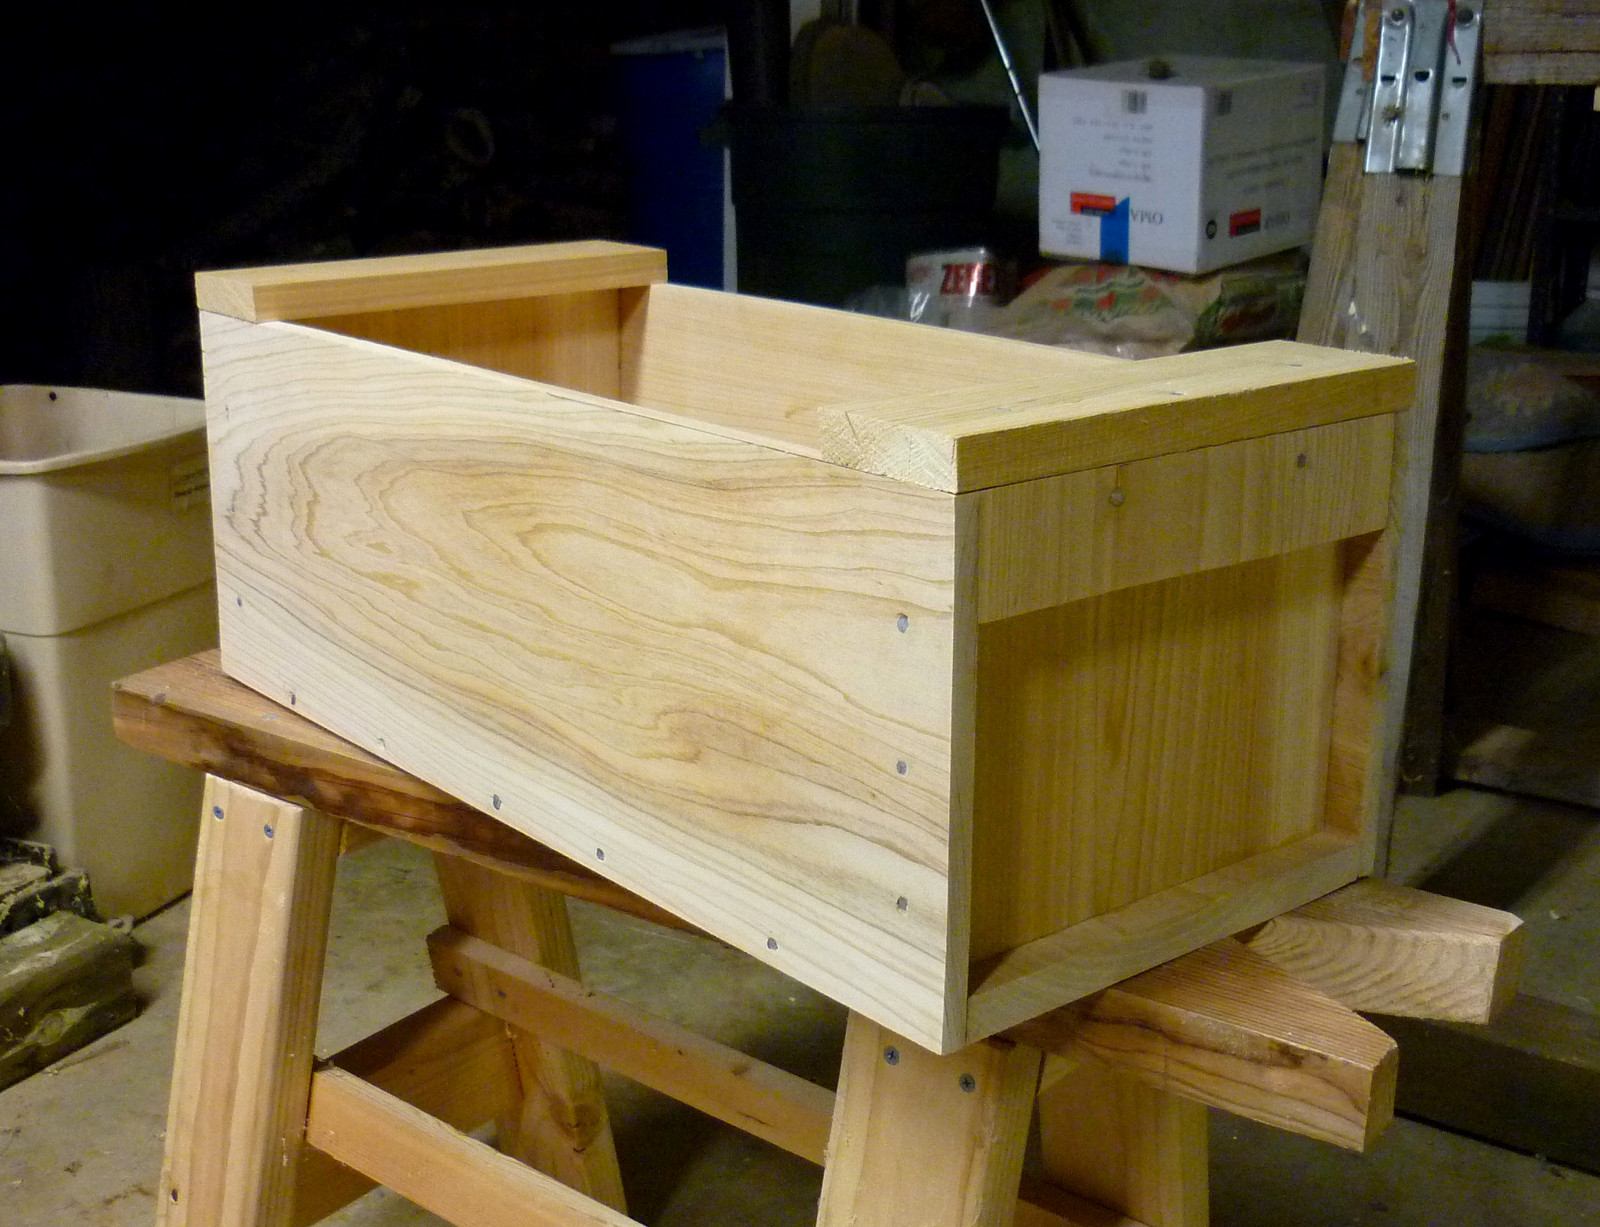
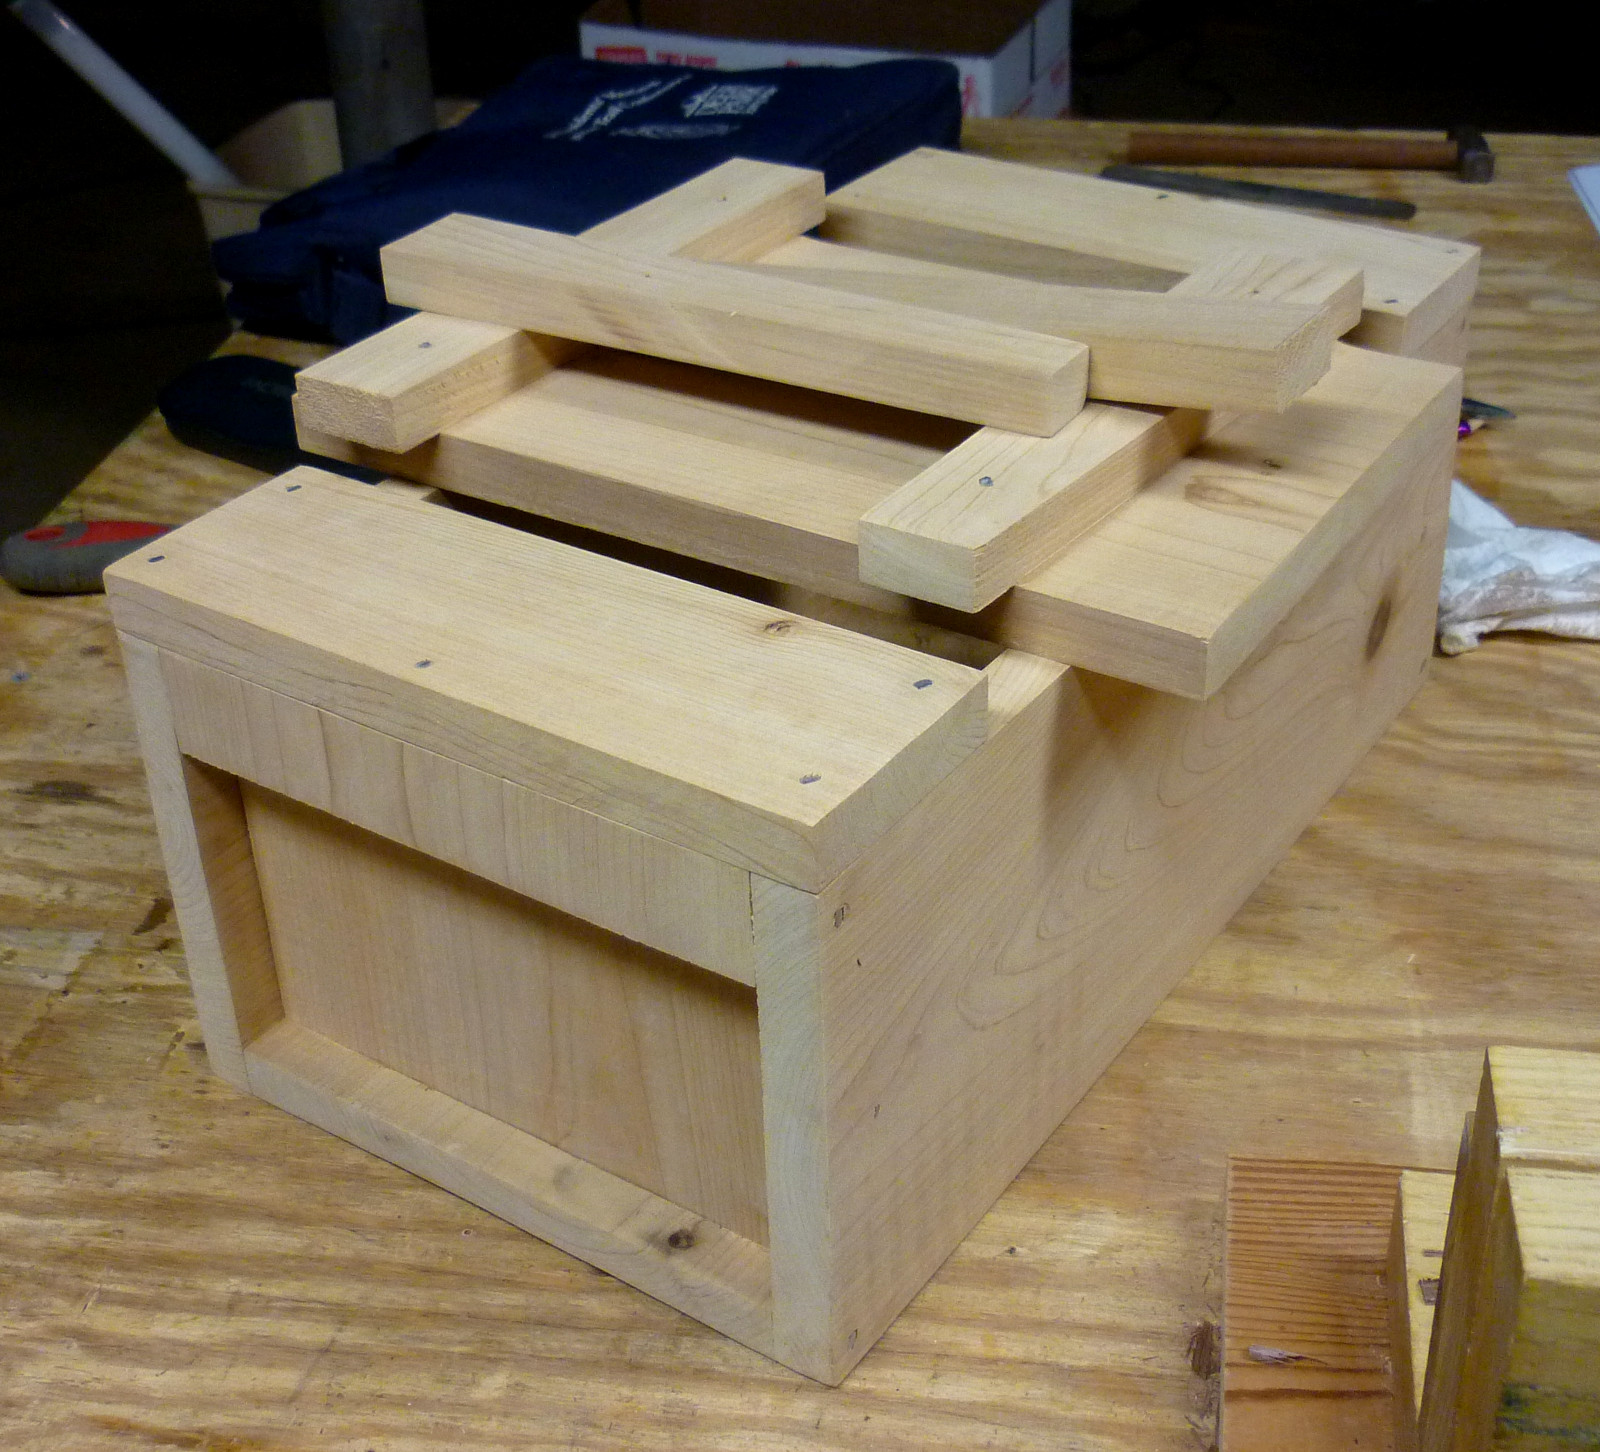
The larder box is nailed up and all that remains to make is the top. The 7d nails were too big but easily cut to size with Joe's heavy wire cutters. We used a limited amount of glue in joints where the boards would expand and contract in the same direction, but mostly just galvanized cut nails. This box is designed and built for the severe marine environment, with lots of humidity and heat changes, the possibility of getting wet, and being slammed around in a truck and boat. The cypress wood is rot-resistant and strong enough for the job. It is also light and very easy to work. Plus it has nice grain, and we will finish this box bright.
October 22nd, 2014
Posted by Paul
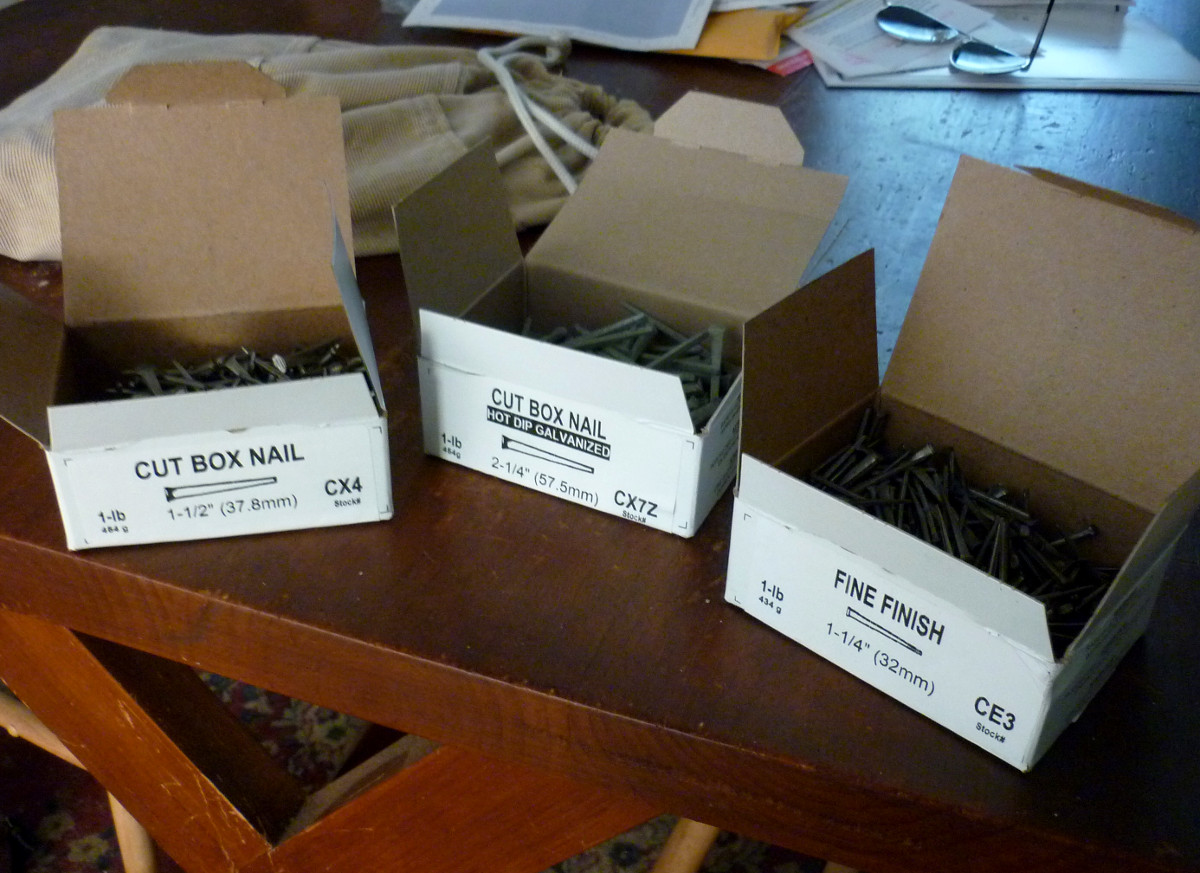
Nails. My Tremont order finally came in. I called a few days ago looking for my nails, and found that they were backordered, waiting on the 6d galvanized. We agreed that they could substitute 7d, and they got the order right out. The 7d are a bit large, but I think we can cut them off and it will work fine. I'm looking forward to getting my larder box finished.
October 18th, 2014
Posted by Paul
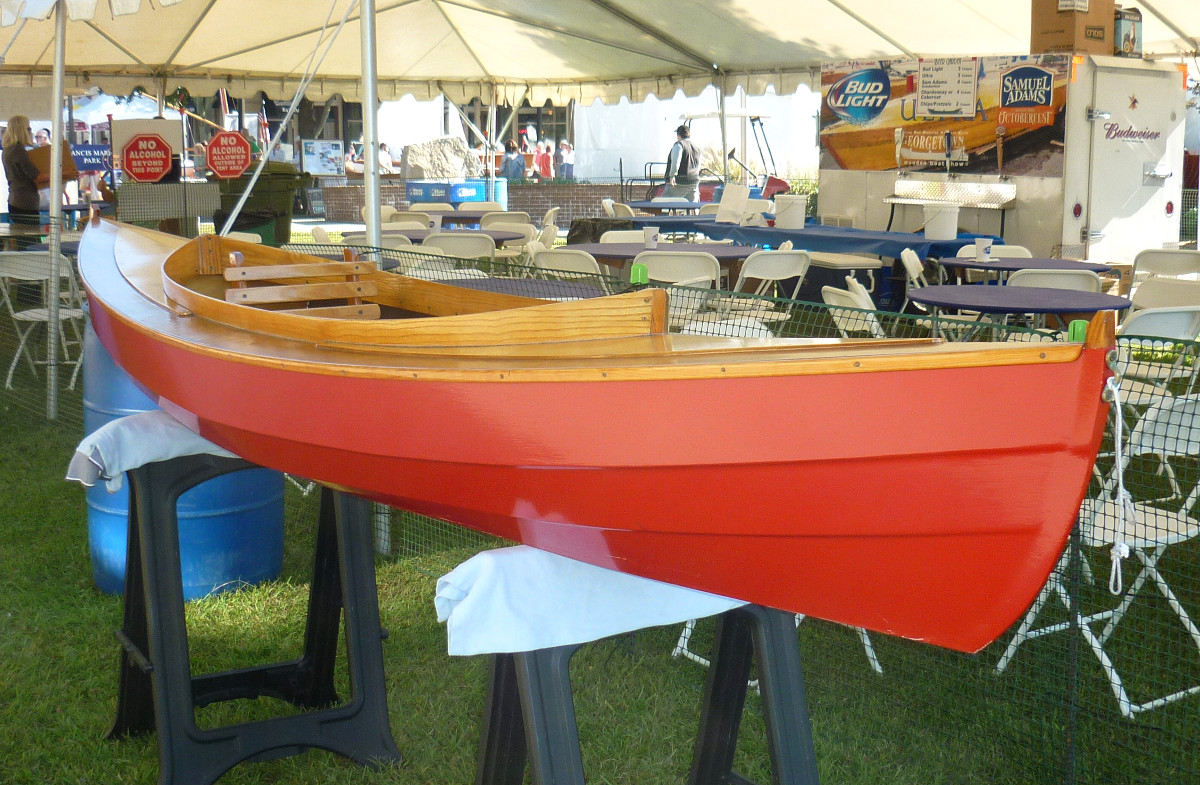
I found this strip built canoe out behind the beer garden at the Georgetown Wooden Boat Show. Joe and I could probably build one of these.
Full coverage of the 2014 Georgetown Wooden Boat Show at my other website, neuseriversailors.com.
October 10th, 2014
Posted by Paul
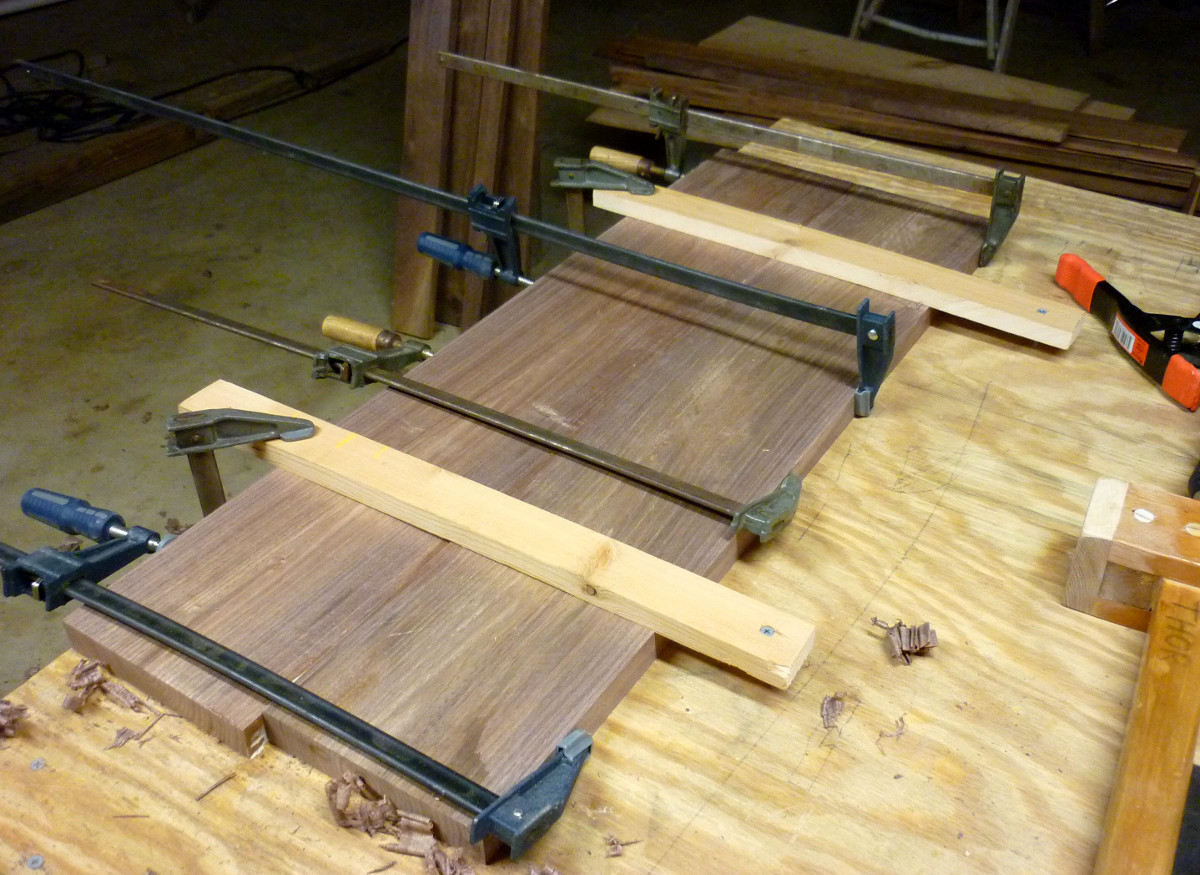
Stock preparation is heavy work. We four squared several more walnut boards and ripped a couple to length. Joe caught the job of ripping one board right through some swirly grain alongside a knot, and I thought it was going to whip him, but he finished with the sweat pouring down his face. I really need to sharpen the rip saw, and the planes could use a touch-up too.
With that done, we glued up a couple boards to use in making the ends. Then we cleaned up the shop and had a round of Millers.
October 8th, 2014
Posted by Paul
Joe put the hasp on Katie's box, gave the whole thing a couple of coats of polyurethane, and put adjusters under the feet. It's finished and Katie can pick it up next time she is in town. Looking back at my notes, it appears we started this project in May, so we hardly set any speed records, but Joe still commented on how easily it went together once we got the parts cut. The whole box came out of one 12 foot length of poplar.
We're waiting for the cut nails to come in to finish the larder box. In the meantime, we have started the next big project, a shoe rack and bench for Marie and Levi. We had considered making it out of cedar, but I had a nagging concern that it wouldn't work easily for all the mortises and dadoes we would have to cut. Cedar tends to splinter and tear when you work across the grain. Then Joe pointed out that we still had a stock of walnut, and we quickly decided to use that. Our experience with walnut is that it works very easily. It looks like we have just enough for the project, but if we come up short, we can always drive up to Wall Lumber and get more.
Once we matched up boards for the various parts, Joe and I scrubbed and four squared the two needed for the top. Then we matched an edge on each and glued them up. Once the glue sets up, we will have enough width to rip down to 12 inches, the depth that we want for the top.
September 29th, 2014
Posted by Paul
More of the parts for the larder box are cut out. I find the sawbench to be a help, Joe hasn't said yet if he prefers it over the corner of the bench, but he has been using it. I did crack a board by putting my knee in the wrong place, but that's part of the learning curve. We glued it back together and can use it for battens.
The cypress saws and planes easily and we have been able to fit the parts for this project more precisely than on any earlier ones.
I ordered some galvanized cut nails from Tremont for putting the box together. The only glue joints will be the ends to the bottom and the handles to the ends. This will allow the wood to move as it expands and contracts. On the boat, temperatures will vary from sub-freezing to over 100 degrees, and humidity from less than 50 percent to 100, so wood movement has to be taken into account. I think people worry too much about wood movement in furniture, since most homes now are climate controlled, heated in the winter and air conditioned in the summer. But the marine environment is a different story.
September 26th, 2014
Posted by Paul
Jim Notis took Chris Schwarz' Anarchist's Tool Chest and repurposed it.
Someday I'll make one of these for Marie's cats, Skittles, Downy and Grimlock.
September 25th, 2014
Posted by Paul
Chris Schwarz has come up with another amazing idea.
In his words: "During the last 10 years, my students have gotten younger and younger each year. When I started teaching, most students were retired and well-off. These days, most of my students are younger than me - including many in their late teens and 20s.
"Many of them make great sacrifices when it comes to taking classes in handwork. Most can barely afford the tuition. Many have young families to support. And a fair number are scraping by with poor tools.
"I remember what that was like. I took my first woodworking class when I was 24, and the only way I could swing it was because the class was at a publicly funded university.
"For 2015, I am teaching two classes - one in the United States and one in England - that are aimed at helping young adults get started in handwork. I have worked with two schools - the Marc Adams School of Woodworking and the New English Workshop - to produce a special (almost crazy) class for new woodworkers. I have slashed my teaching rate to almost nothing; and the schools have slashed the tuition. So these classes will be a small fraction of a normal one-week class. We are also arranging for accommodations that will be free or almost free - camping in some cases. And we are going to attempt to cook communally as a class to save money."
Chris, you are the Linus Torvalds of woodworking.
Full announcement, here.
September 25th, 2014
Posted by Paul
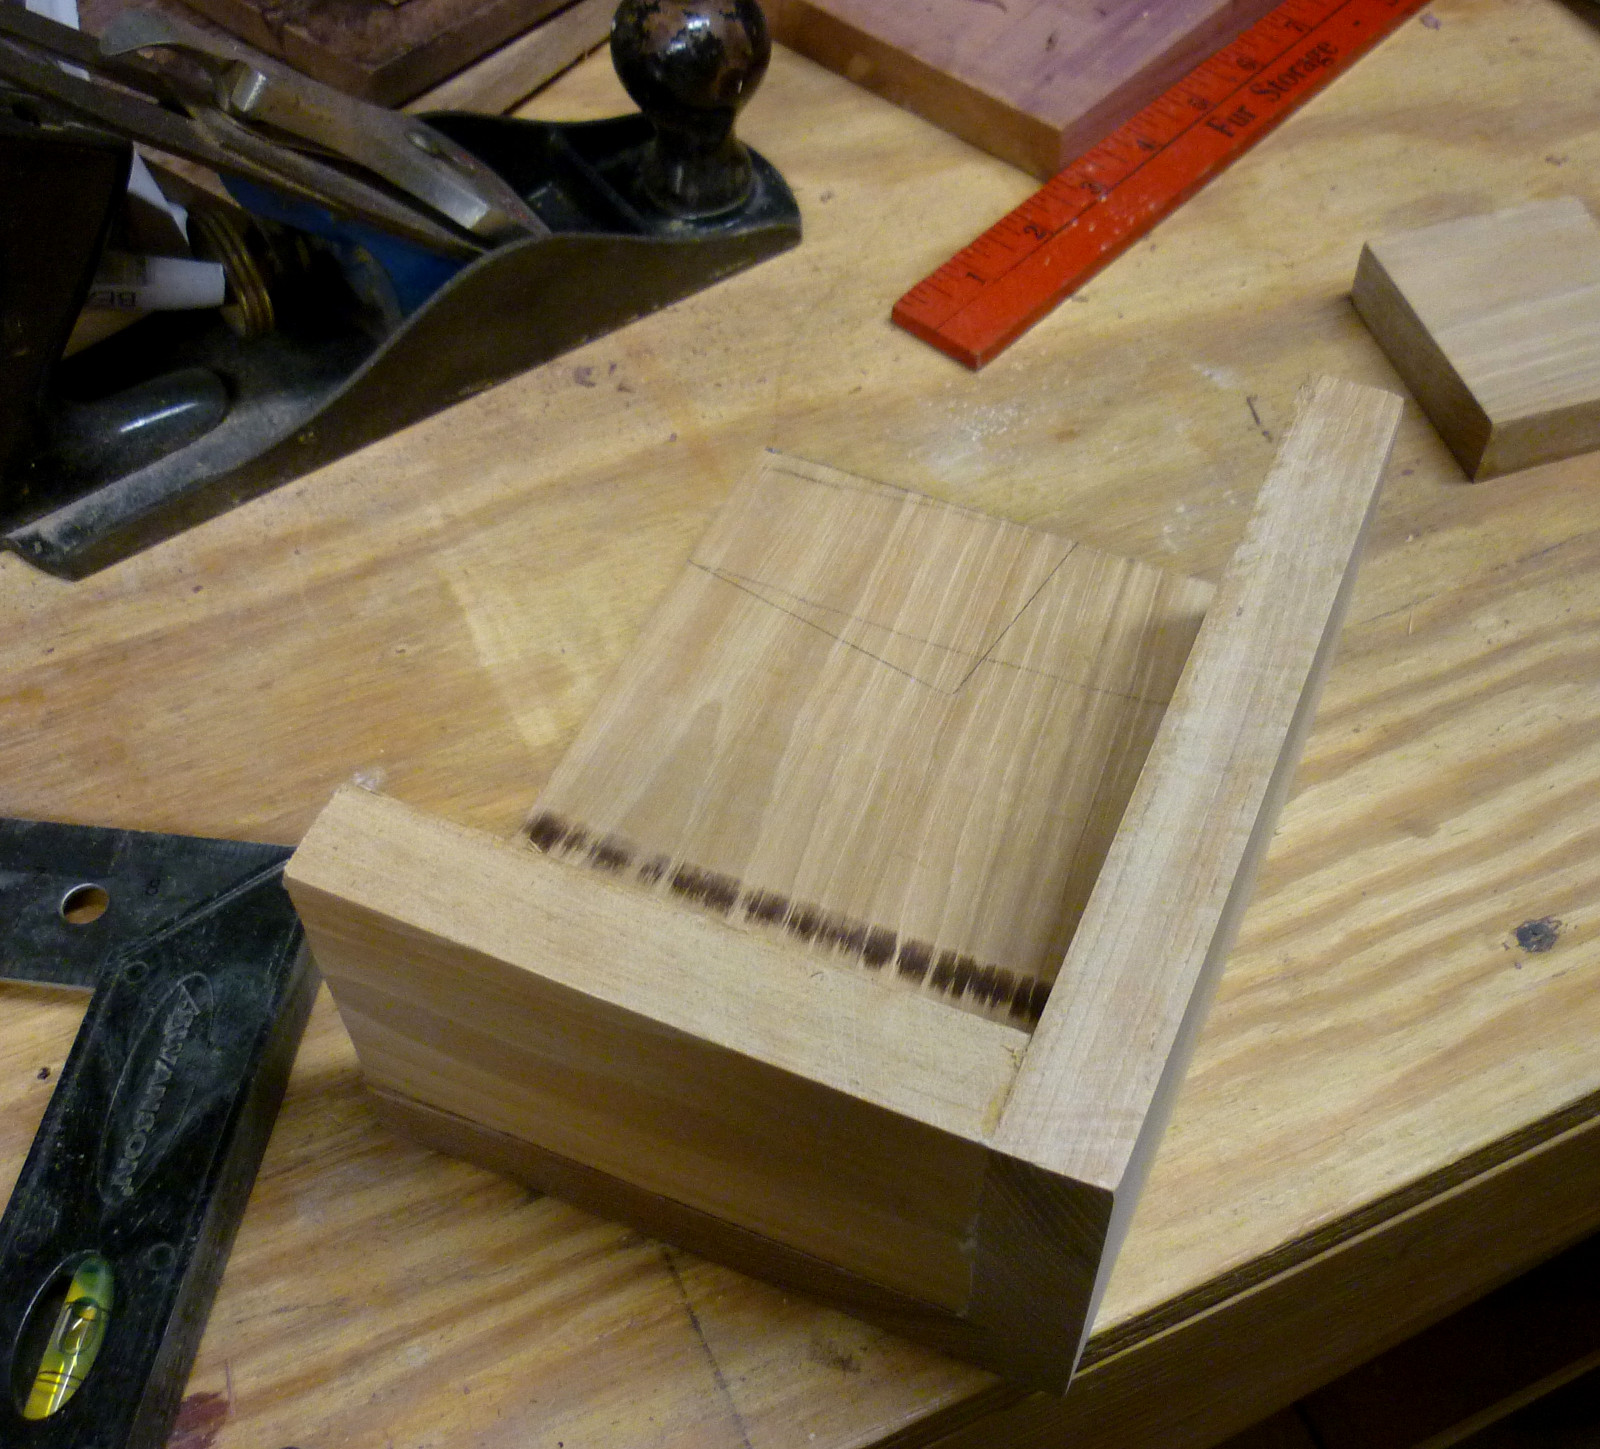
With Katie's box almost complete, we started thinking about the next project. Joe generously suggested that we build my larder box for the boat. We bought cypress for this project last time we visited Wall Lumber, so now we dug out the board and started measuring. The plan is to build it on the pattern of a Japanese toolbox. While the traditional box is all butt joints and nails, we decided to dado the ends into the bottom, since the joints will be completely covered by the sides. We scored the sides of the dados with a saw, then Joe chiseled out enough to allow a narrow moulding plane to drop into the joint and ride along the shoulder. The plane cut a beautiful, smooth joint. We really enjoy working with soft, straight-grained cypress. It saws, planes and chisels easily. It is light but very rot resistant, an ideal wood for a boat box.
September 24th, 2014
Posted by Paul
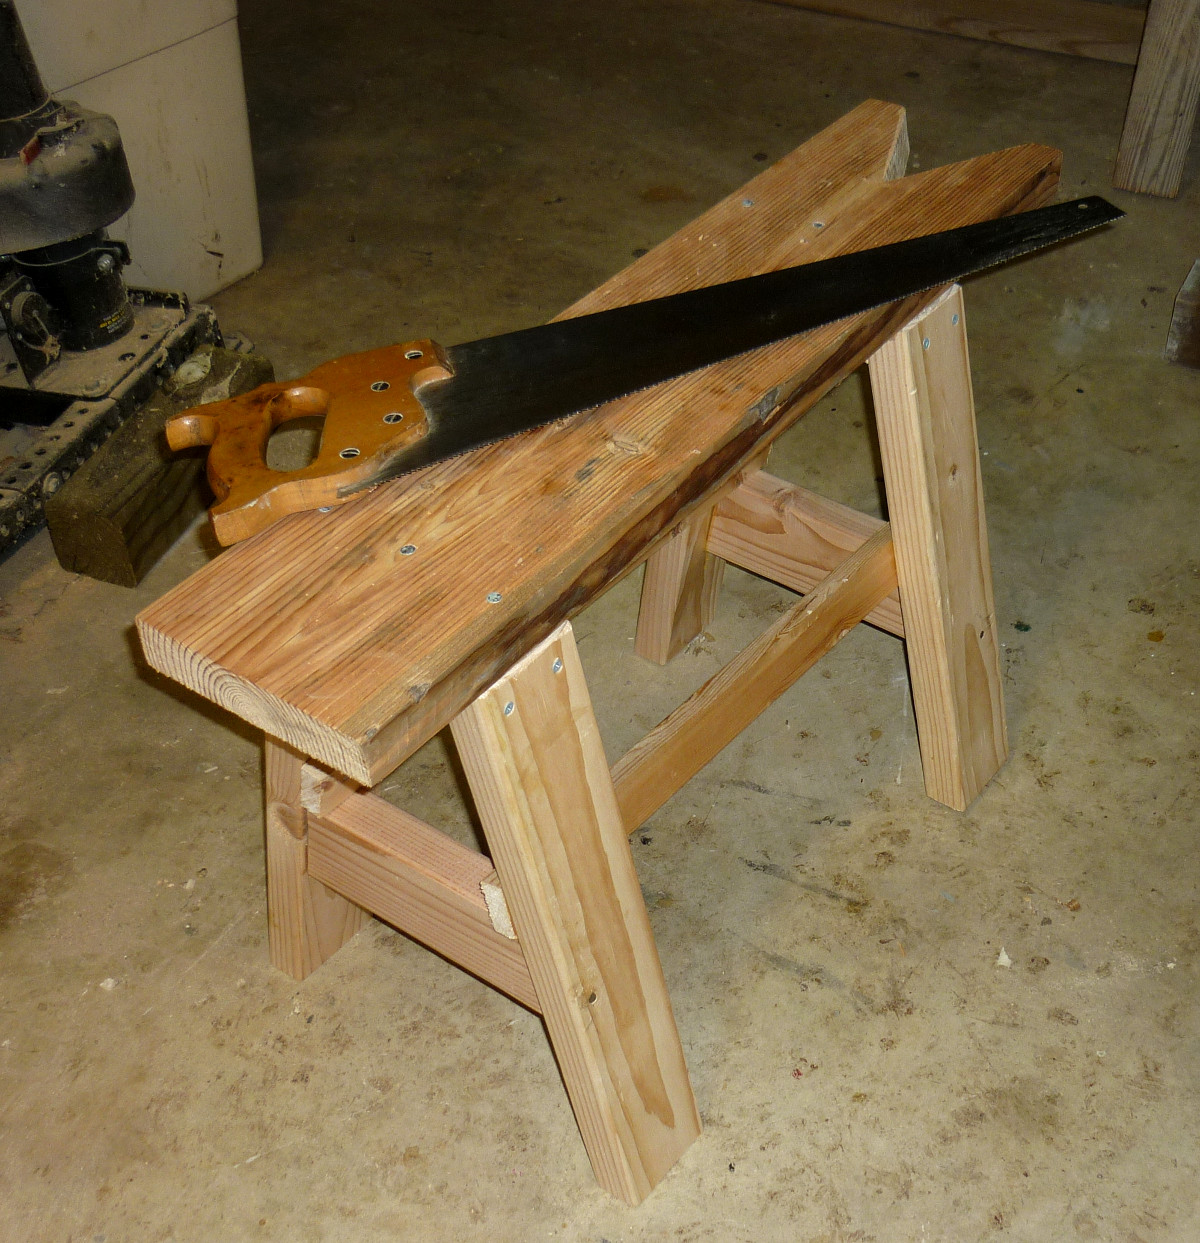
We knocked together this little sawbench one evening earlier in the week.
September 11th, 2014
Posted by Paul

We're still here, life has just gotten in the way of woodworking for a couple of weeks. Tonight's job was to get the top of Katie's box flat and ready for hardware. We also discussed another project, some wooden blocks for my boat. I bought a couple of decent ball-bearing sheaves that should work for the rolling parts. Joe thought that a purchase might be the trick for setting up the marten house, so we may make a set of blocks for that, too. Joe also wants to start making toys for Lars. He mentioned a rattle. I mentioned blocks (not the kind that take sheaves).
August 25th, 2014
Posted by Paul
We work mainly with hand tools but we're not doctrinaire. We use the drill press and the orbital sander on a regular basis, and the jig saw and table saw now and then. Katie's box required sanding - a lot of sanding - and Joe spent some hours at it over the last couple of days.
Tonight we pinned the sides into the ends and bottom. Yes, we know glue joints are stronger than wood and pins aren't needed. We know it but we're not completely convinced. Our glue joints may not be as perfect as some people's. Plus, we like the way pins look. You can't please everyone, so you gotta please yourself.
August 23rd, 2014
Posted by Paul
Here's Katie's box, glued up. Like I said, it's more like a strongbox than a chest. Solid 4/4 poplar. Next comes the lid, hardware, and a whole lot of sanding - then, a clear finish, because Joe is partial to natural wood. When we told Katie we were building her a box, she asked us to carve Beowulf in it. We had to disappoint her and tell her neither of us could carve. But this box looks like it could hold Beowulf's hoard - can you see it overflowing with gold and silver?
August 22nd, 2014
Posted by Paul

We left Katie's box dry-fitted and clamped a few days ago, and last night we took it apart, did a few minor adjustments, and glued it up. To our wonder and amazement, all the joints were square and tight. I think the time dry-fitted helped the parts settle in to their locations, and that is something we will try on future projects. The box still needs a whole lot of sanding, pegs at all the joints, and a hinged and hasped lid, but the most difficult work is done.
The box went together so fast that we had time for another project. Joe's burn survivor group does a craft fair each year to benefit the firemen, and he has been working on a few things for that. We decided that peg racks like the one I made for my closet might be a popular item. We have a stack of panelling shorts left over from a project that Marcia's father did many years ago, so we used one of them for the back. We made four racks out of one board, with Northlady's pegs (and there are still plenty left for more projects). It took less than an hour to build the four. Joe will put a coat of poly on them, and we will tape to each one a plastic bag with the screws needed to mount it. I bet Joe can get $7.50 apiece for them at the craft fair - $30.00 for the firemen!
August 15th, 2014
Posted by Paul
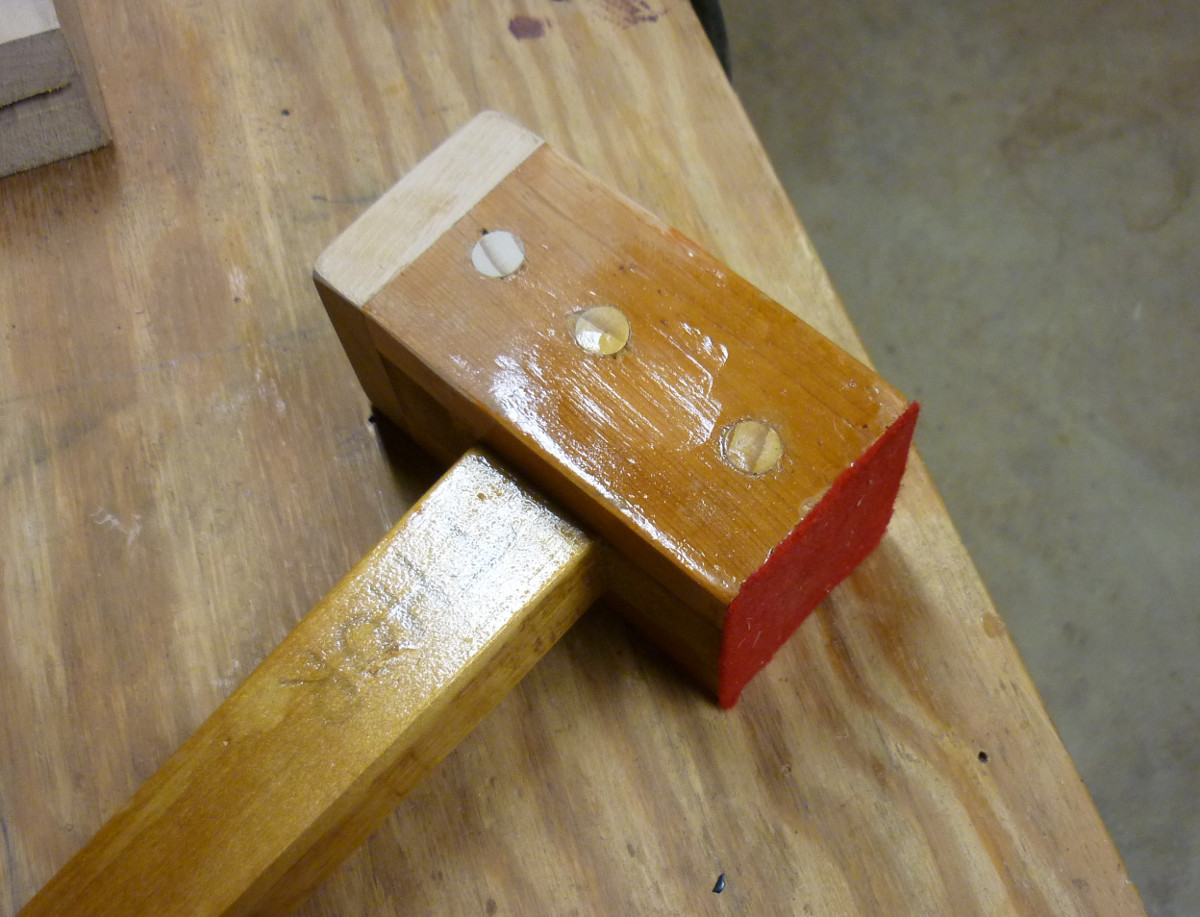
Here's a shot of the upgraded Thor.
August 15th, 2014
Posted by Paul
The parts for Katie's chest are all cut except the lid. We've spent a couple of evenings fiddling with them, getting them to fit without too many big gaps. Glue-up is in the near future. We're also working on kitting out a small box that Hope would be able to put together. We cut out all the pieces and then drilled holes for locating pins so the whole thing will go together like a plastic model. Since Hope expressed the interest, she gets to do the first one but once Faith hears about it, she'll probably want to do one too. Other news - Joe upgraded Thor with a felt pad on one side of his head and a hickory pad on the other - sort of a good cop/bad cop combination.
August 13th, 2014
Posted by Paul
Joe finished the martin house and the next stage is to make the post for it.
August 11th, 2014
Posted by Paul
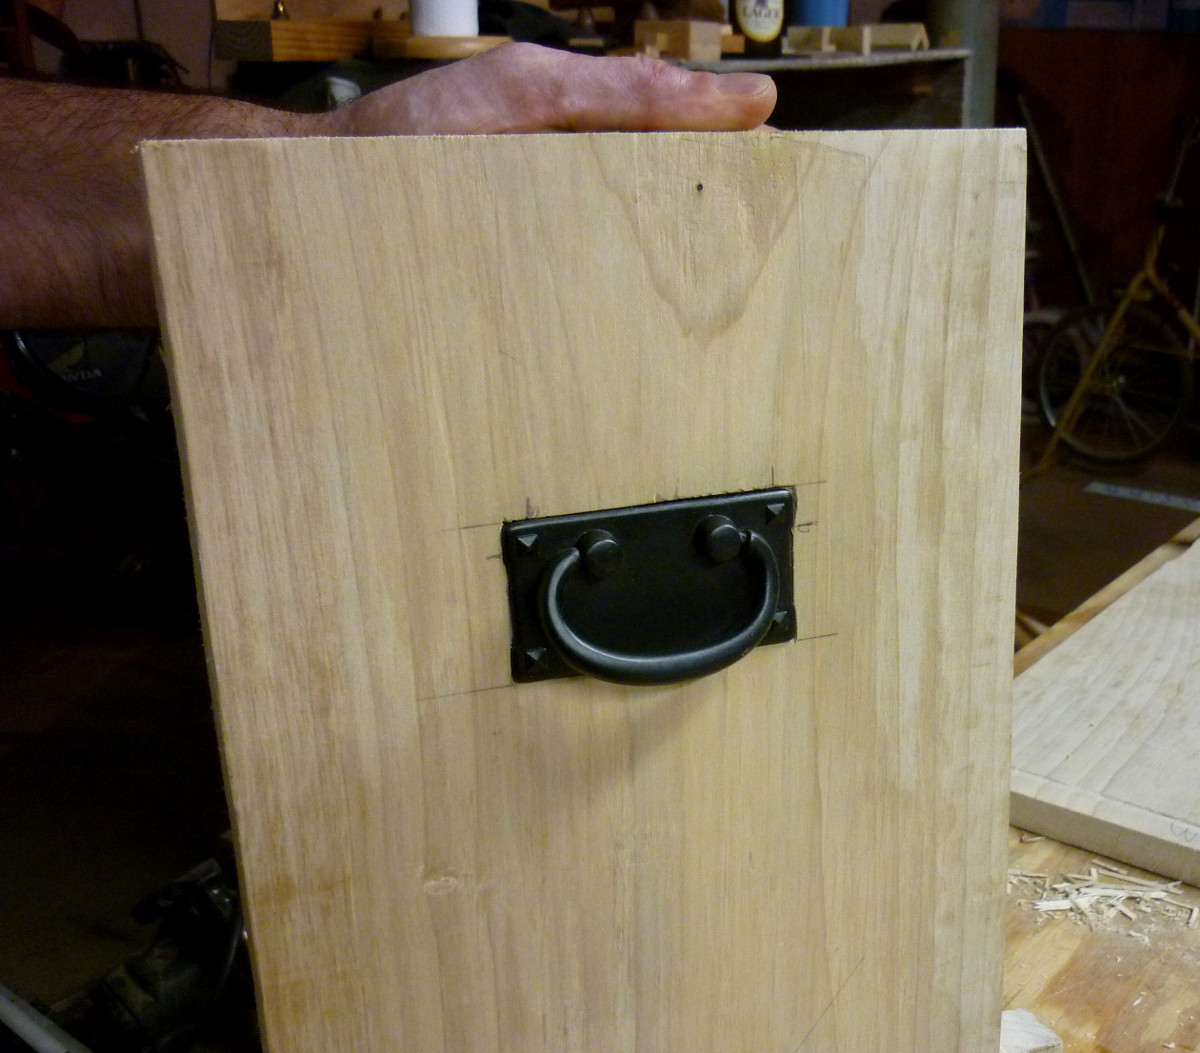
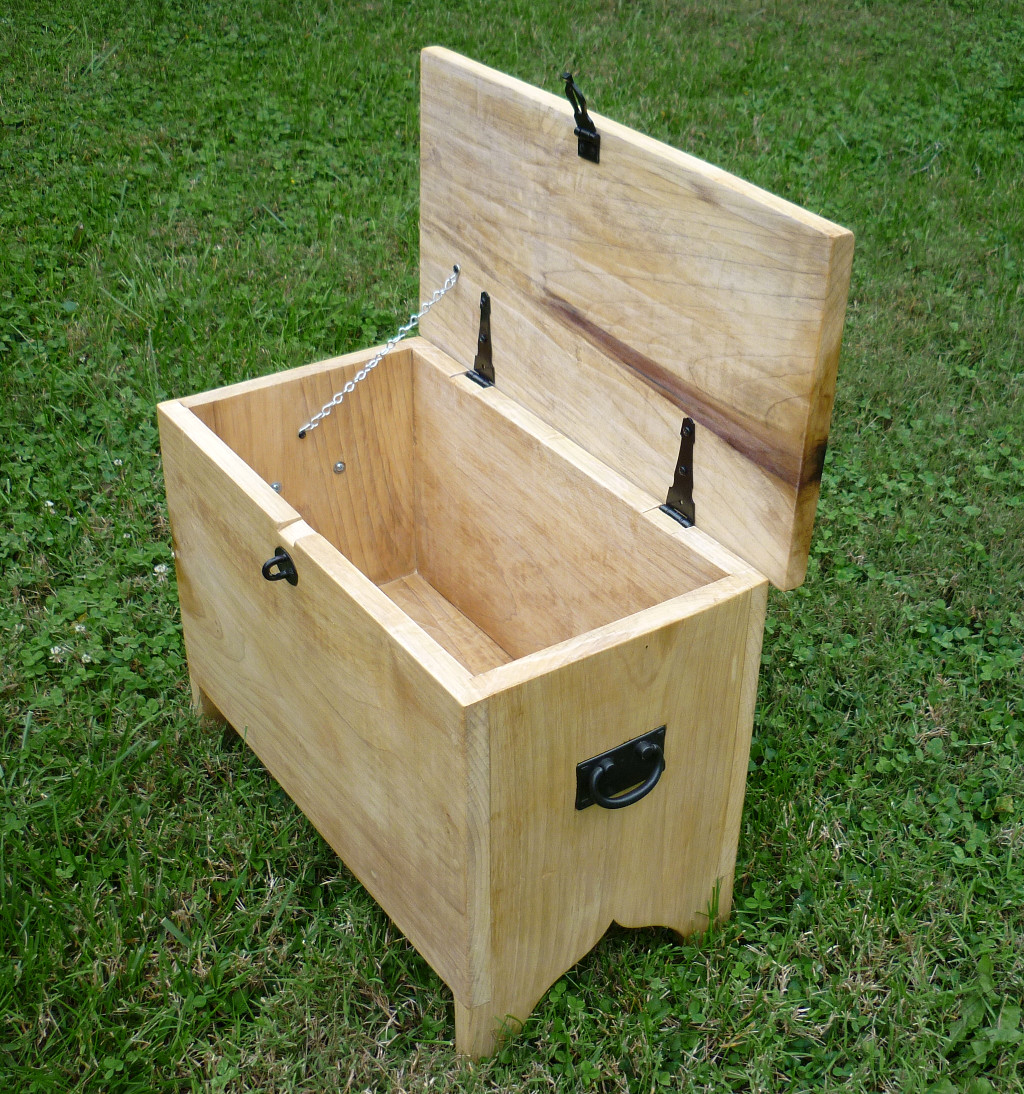
With the ends of Katie's box cut and fitted, Joe took on inletting handles into the ends. We dry-fitted it and it came out pretty good. This box is a small six-board chest, built out of one 13 inch wide poplar board that we got at Wall Lumber. It's small, but very stout, more of a strongbox than a chest. Marcia has promised to make a cushion to go on top of it so it can double as a seat. Like most of our more ambitious projects, it took us a while to nerve ourselves up to start it, but now it is going swimmingly.
July 15th, 2014
Posted by Paul
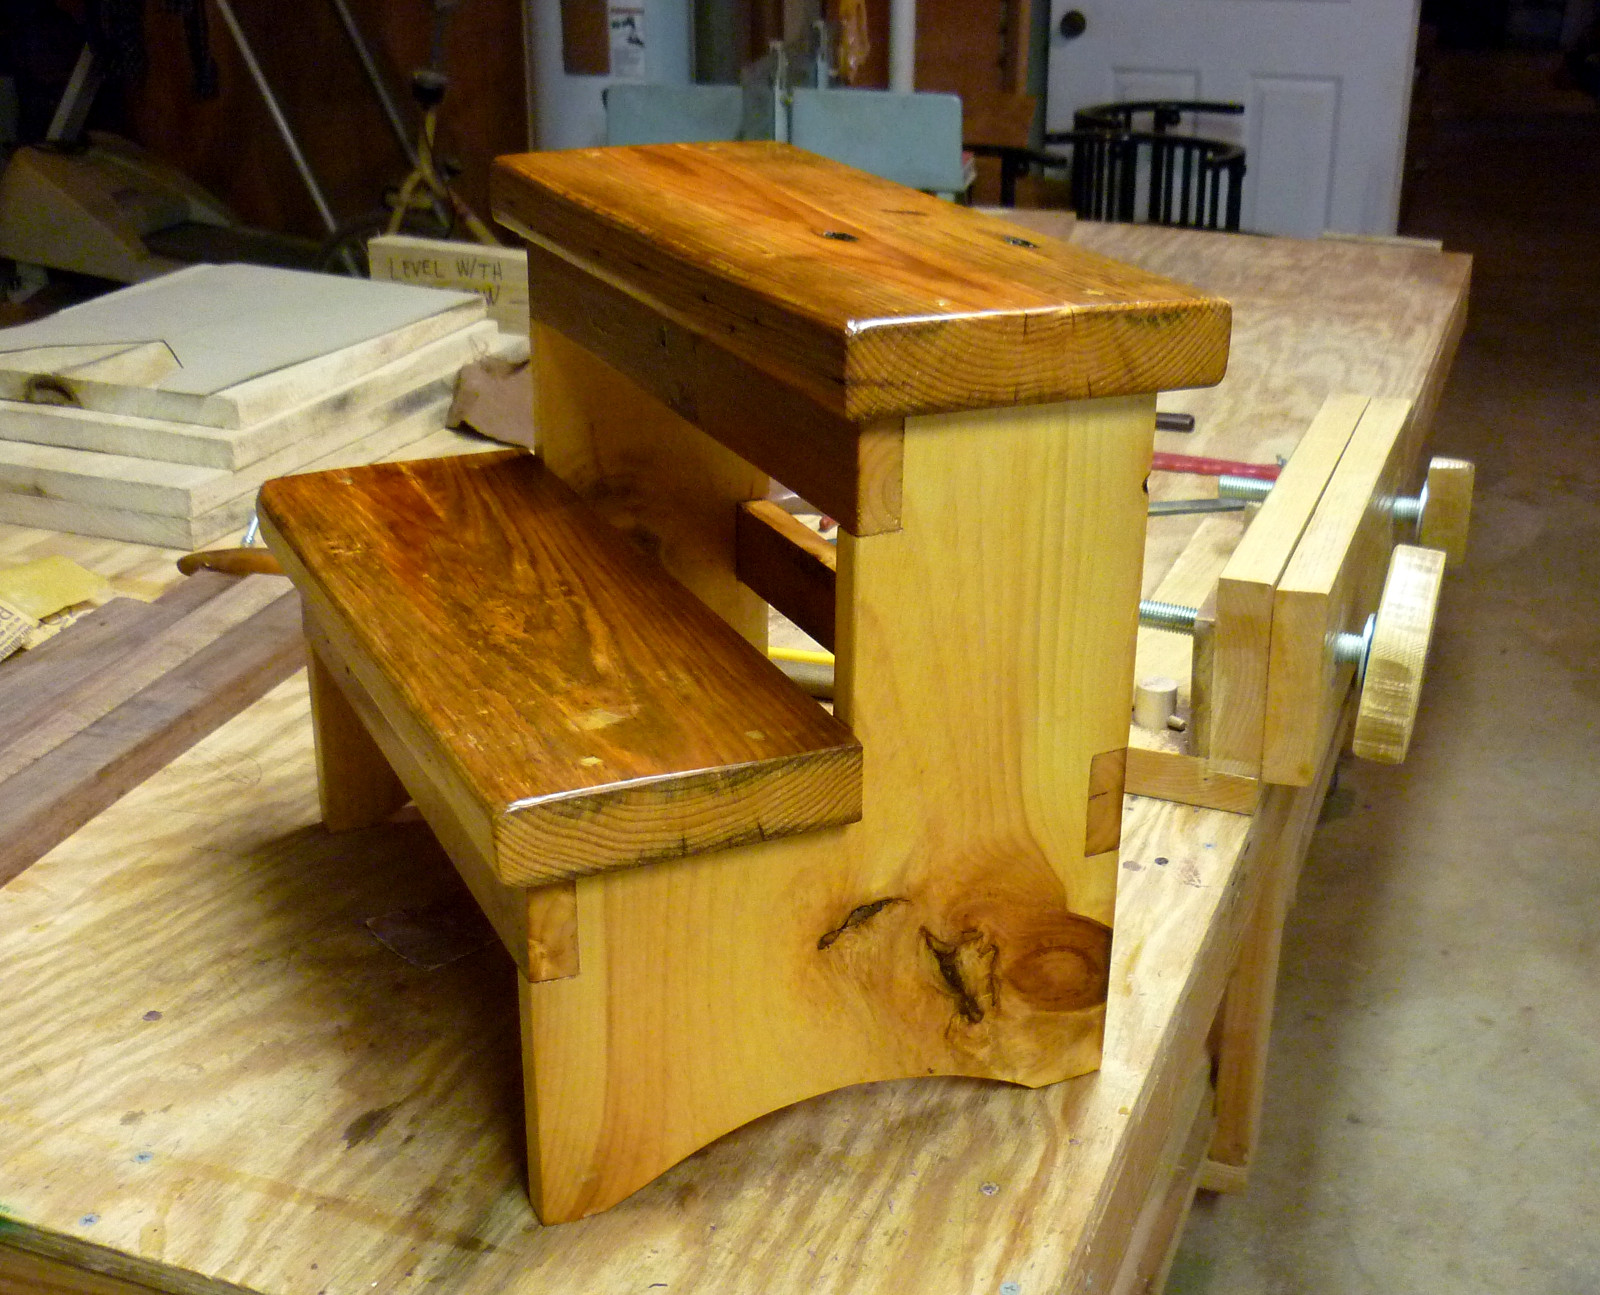
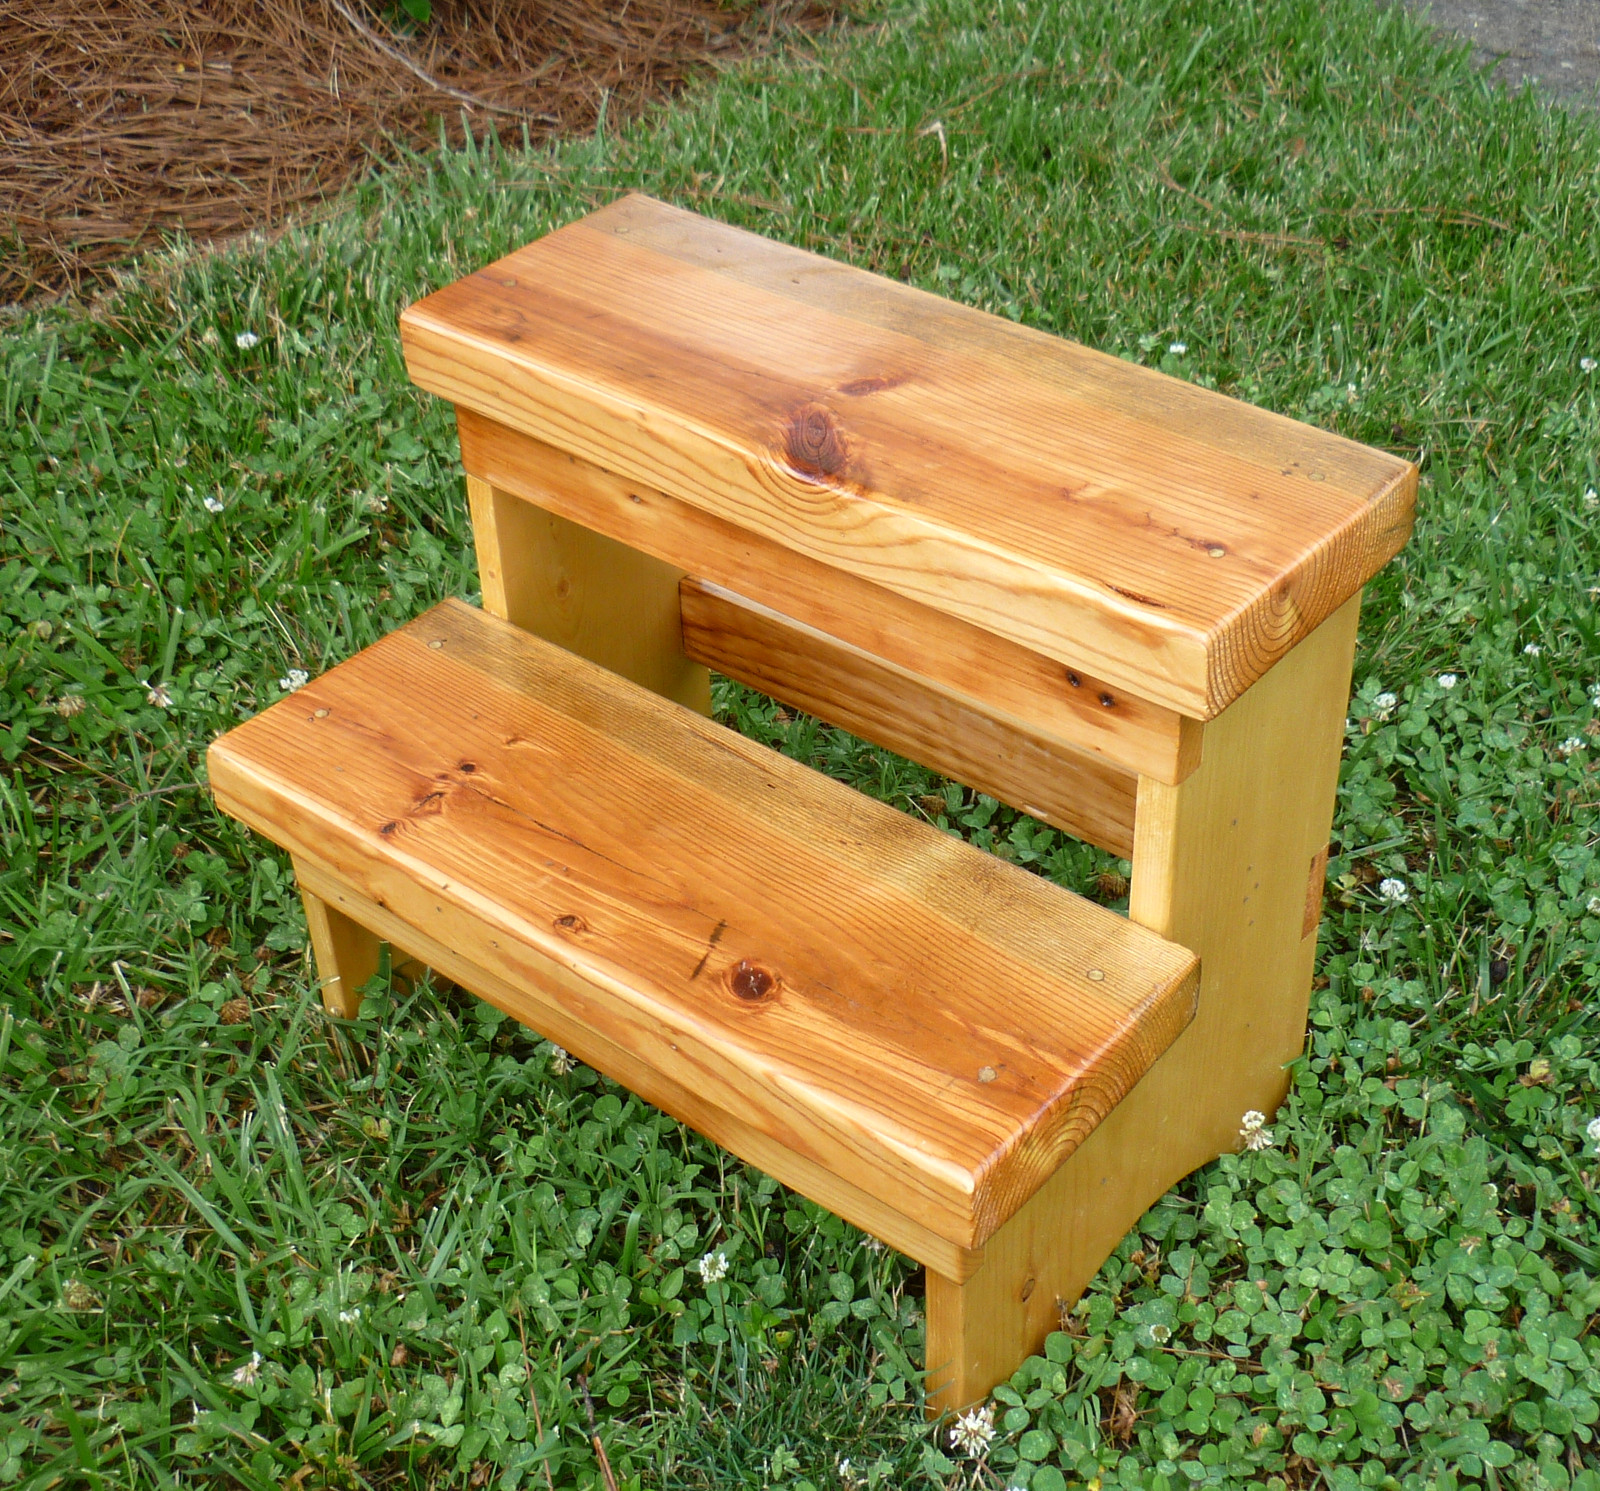
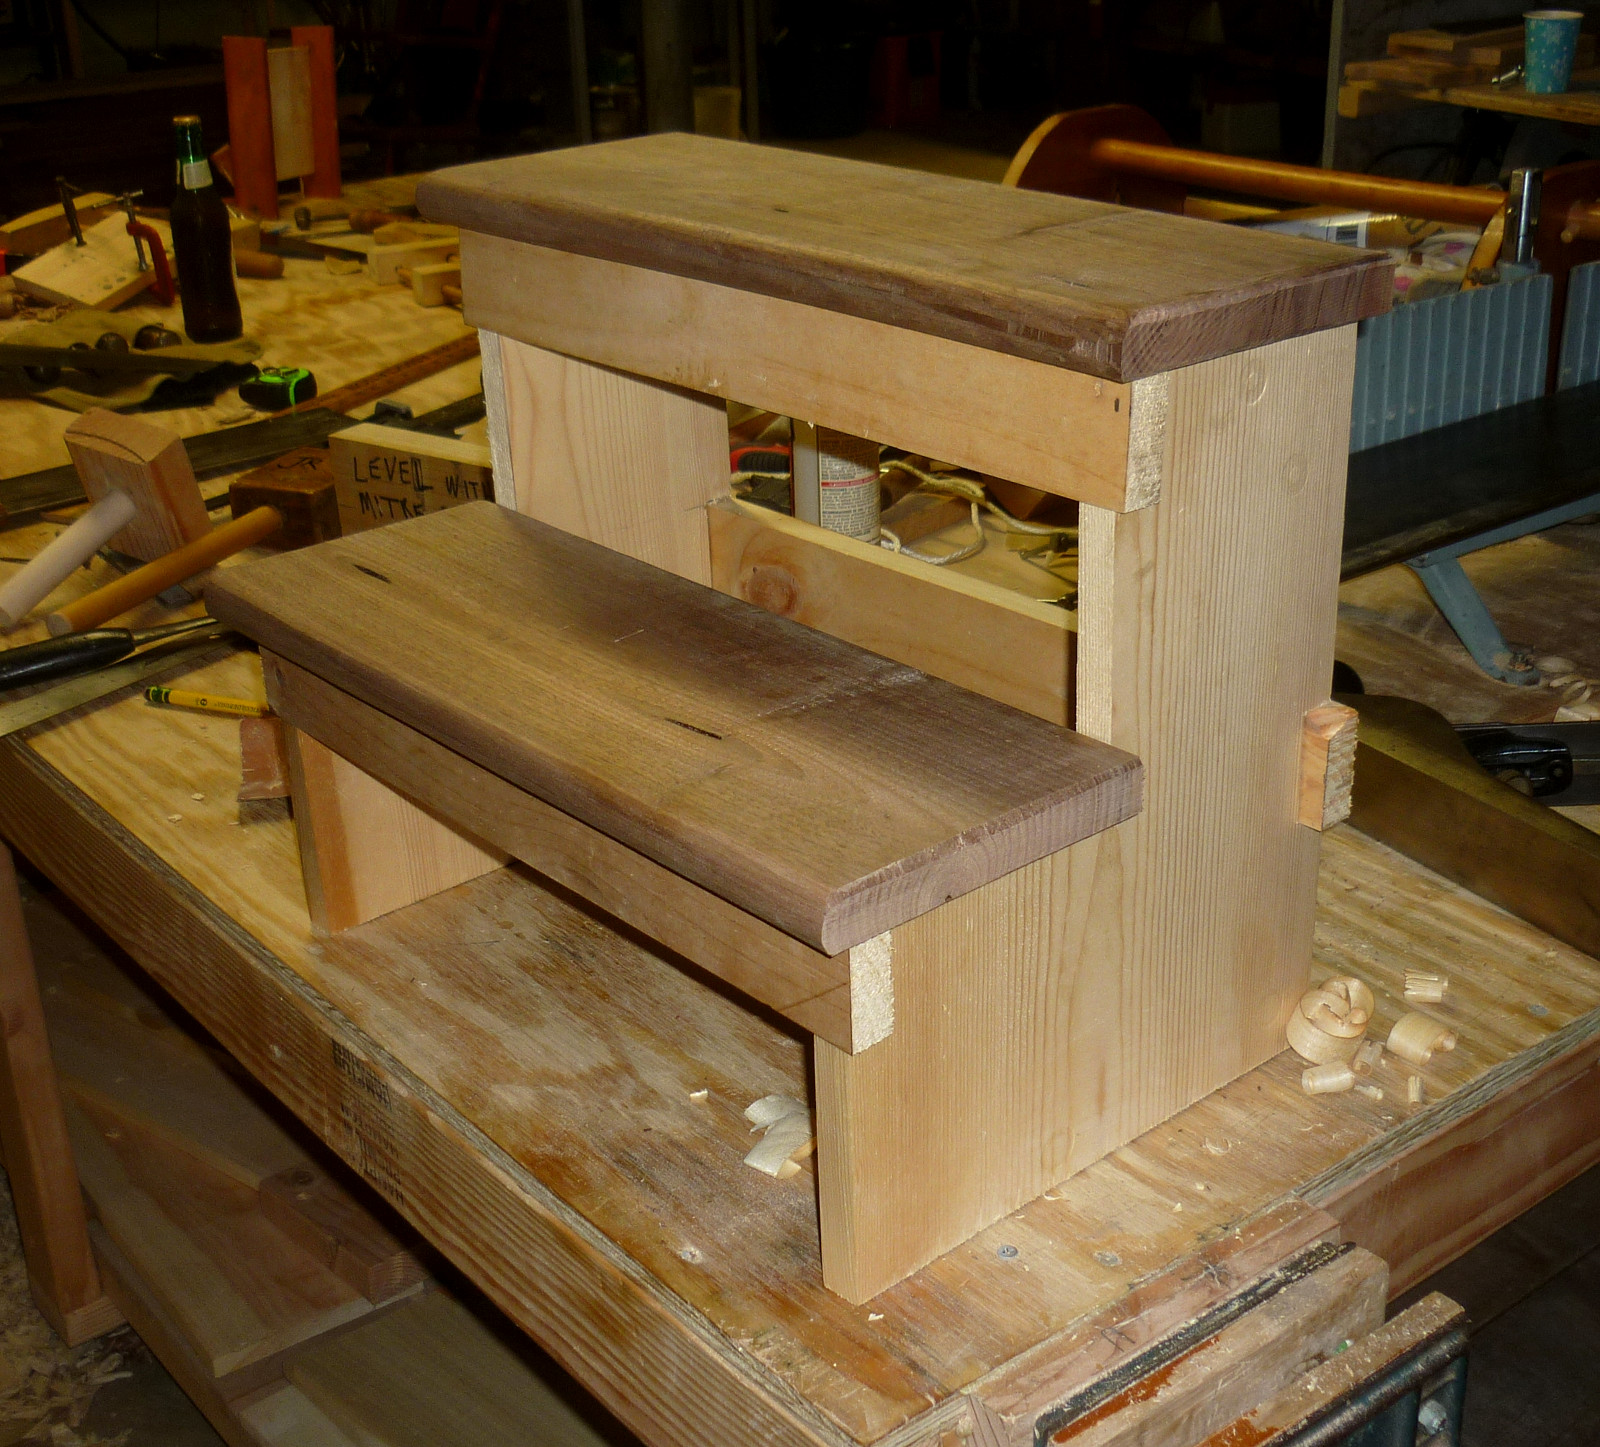
The third Shaker step-stool, the one for Katie, is complete. This is Joe's favorite of the three. He likes the detail of the knots and nail-holes. I'm much taken with all of them. Making these has been a lot of fun, and I expect we will revisit the Shaker step-stool sometime in the future. I may redraw it with a slightly deeper base and treads, to take into account the general larger size of modern Americans.
July 14th, 2014
Posted by Paul
Chris Schwarz has a picture of a "Campaign Birdhouse" at his website.
I'm not kidding.
July 11th, 2014
Posted by Paul
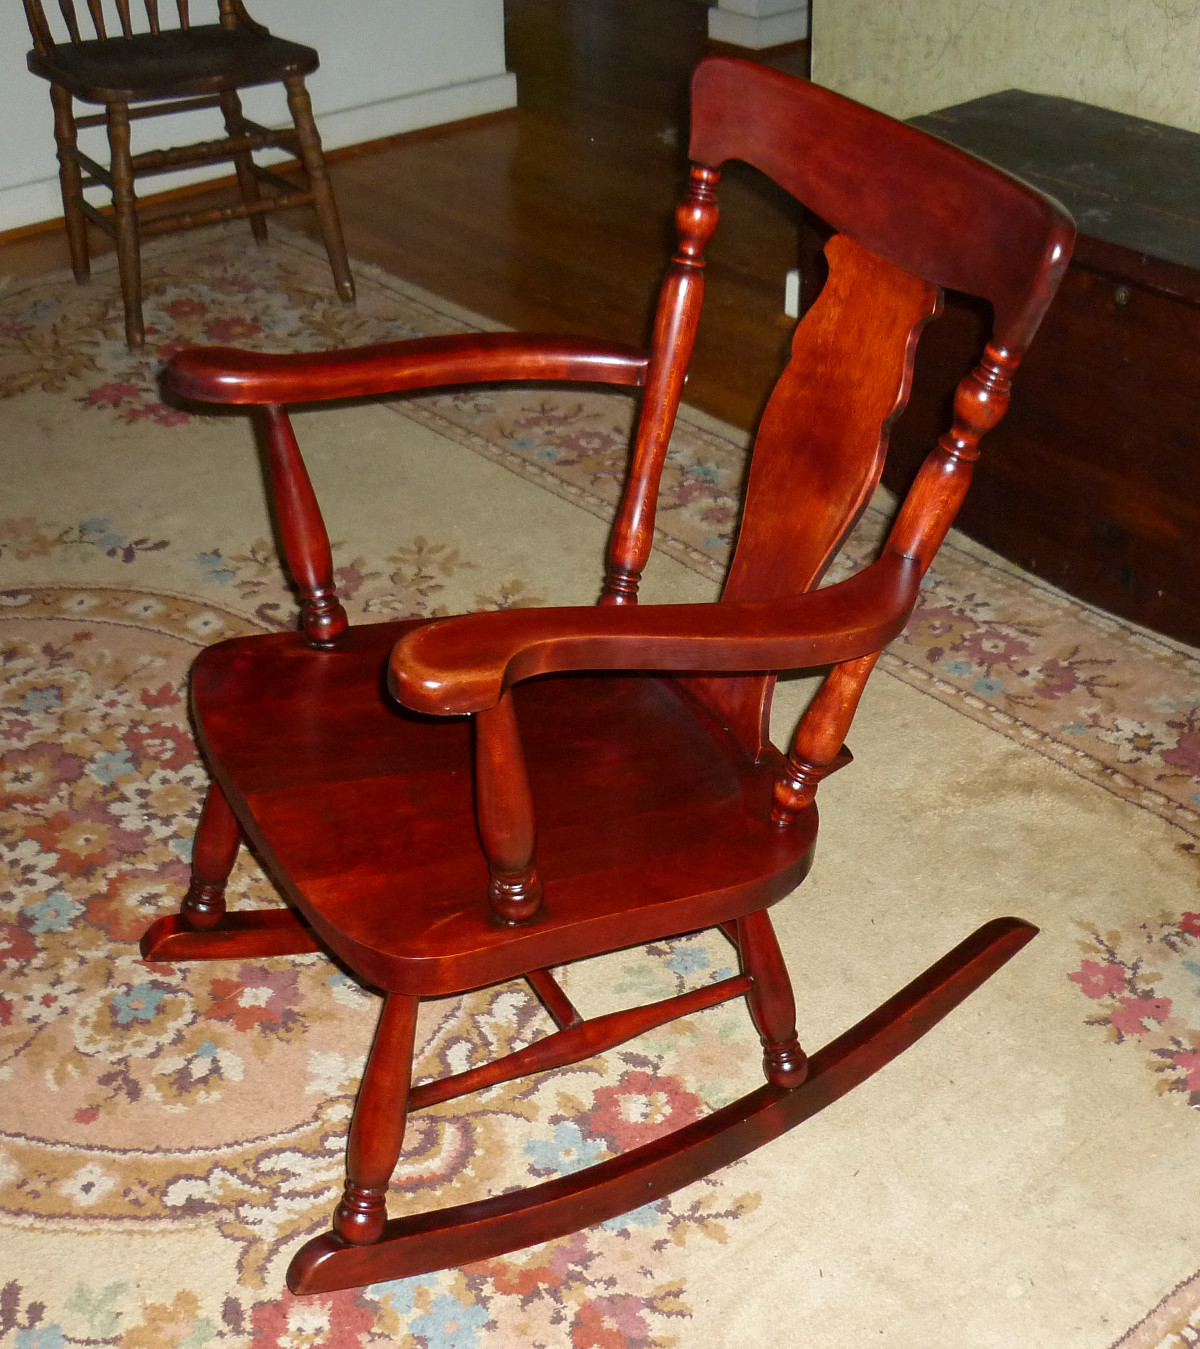
The rocker is finally done. We brought it into the shop in late March and have worked on it a few minutes at a time ever since. Joe has a lot more experience with finishing than me, having installed hardwood floors professionally in earlier years, but neither of us had much at removing the old finish. It was a tedious and time-consuming process, involving noxious chemicals and much sandpaper. We never did really get all the old finish off, but eventually we called it close enough, rubbed in some stain - the Olympic color "Cabernet" was closer than their "Cherry" - and put a couple coats of polyurethane over it. We ended up with some runs but if you don't look too close, you won't notice. The person who owns the chair sees fairly well for a woman of 96, so I think we're safe.
July 7th, 2014
Posted by Paul
It all started with a simple bird feeder. I knew then we were treading on thin ice. I tried to warn Joe, but he wouldn't listen. Bird things are drugs, and bird feeders are like those starter drugs they warned us about in high school - you know, first it's a toke of pot, then grandmother's placidyls, and next thing you know you're living in a Harlem tenement with track marks up and down your arms.
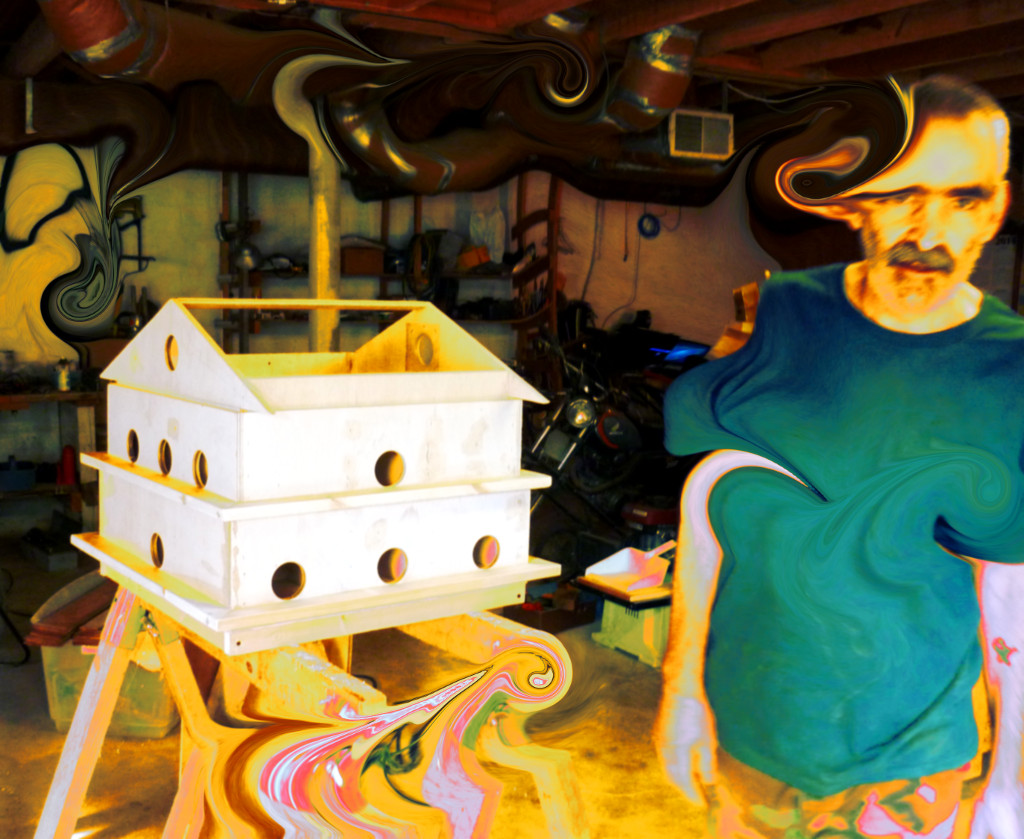
So in a way, I guess I had been expecting it - but nothing prepared me for the lurid scene when I stopped by the basement earlier this evening. A veritable bird condominium - and Joe had been slaving over this thing, day in and day out, for better than a week. Little Hope looked up at him in awe and asked, "Joe, do you ever stop working," and he had no answer.
Abandon hope, all ye who enter here.
June 20th, 2014
Posted by Paul
We've picked up a fair amount of decent wood out of trash piles and dumpsters. Joe used to follow Craigslist for leads on free wood, and he emailed me at work one day about a listing for a shed in West Salem that had been torn down, salvage available to any and all on a first-come basis. I drove over there after work and found a picked over pile of shorts, cracked boards and boards studded with nails. Digging carefully through the rubbish, I found a few decent planks and loaded them in the back of the truck.
Back at the basement, Joe and I cleaned the nails out of a couple of them, and then set to work with the planes. All the clay, sand and soot embedded in the ancient wood dulled the blades quickly, but we got a plank cleaned up enough to see the color and grain. It looked good, so we set it aside while we thought about a worthwhile project. One thing we considered was building a campaign bench like one we saw at the Christopher Clarke site, and we may yet get around to that.
When we built the first Shaker step stool, we found that the white wood base contrasted well with the rich, featured walnut treads. That led to a hunt through the stacks for something else that would have lots of grain and color to use on the next step stool. We found one of the old yellow pine boards and decided it was worth a try.
A couple of coats of polyurethane really brought out the golden glow of the wood. We are completely satisfied with the finished product. Preparing the wood was a lot of work, but the price was right. There is still a lot of this old yellow pine in sheds, barns and houses around the south, and I intend to grab it whenever chance arises.
June 19th, 2014
Posted by Paul
I went by the shop last night and found that Joe had finished off some boxes and started more. Simple rabbet joints are quick to cut and add a little strength. Maybe he'll do some with box joints, or, dare I say it, dovetails, somewhere down the road.
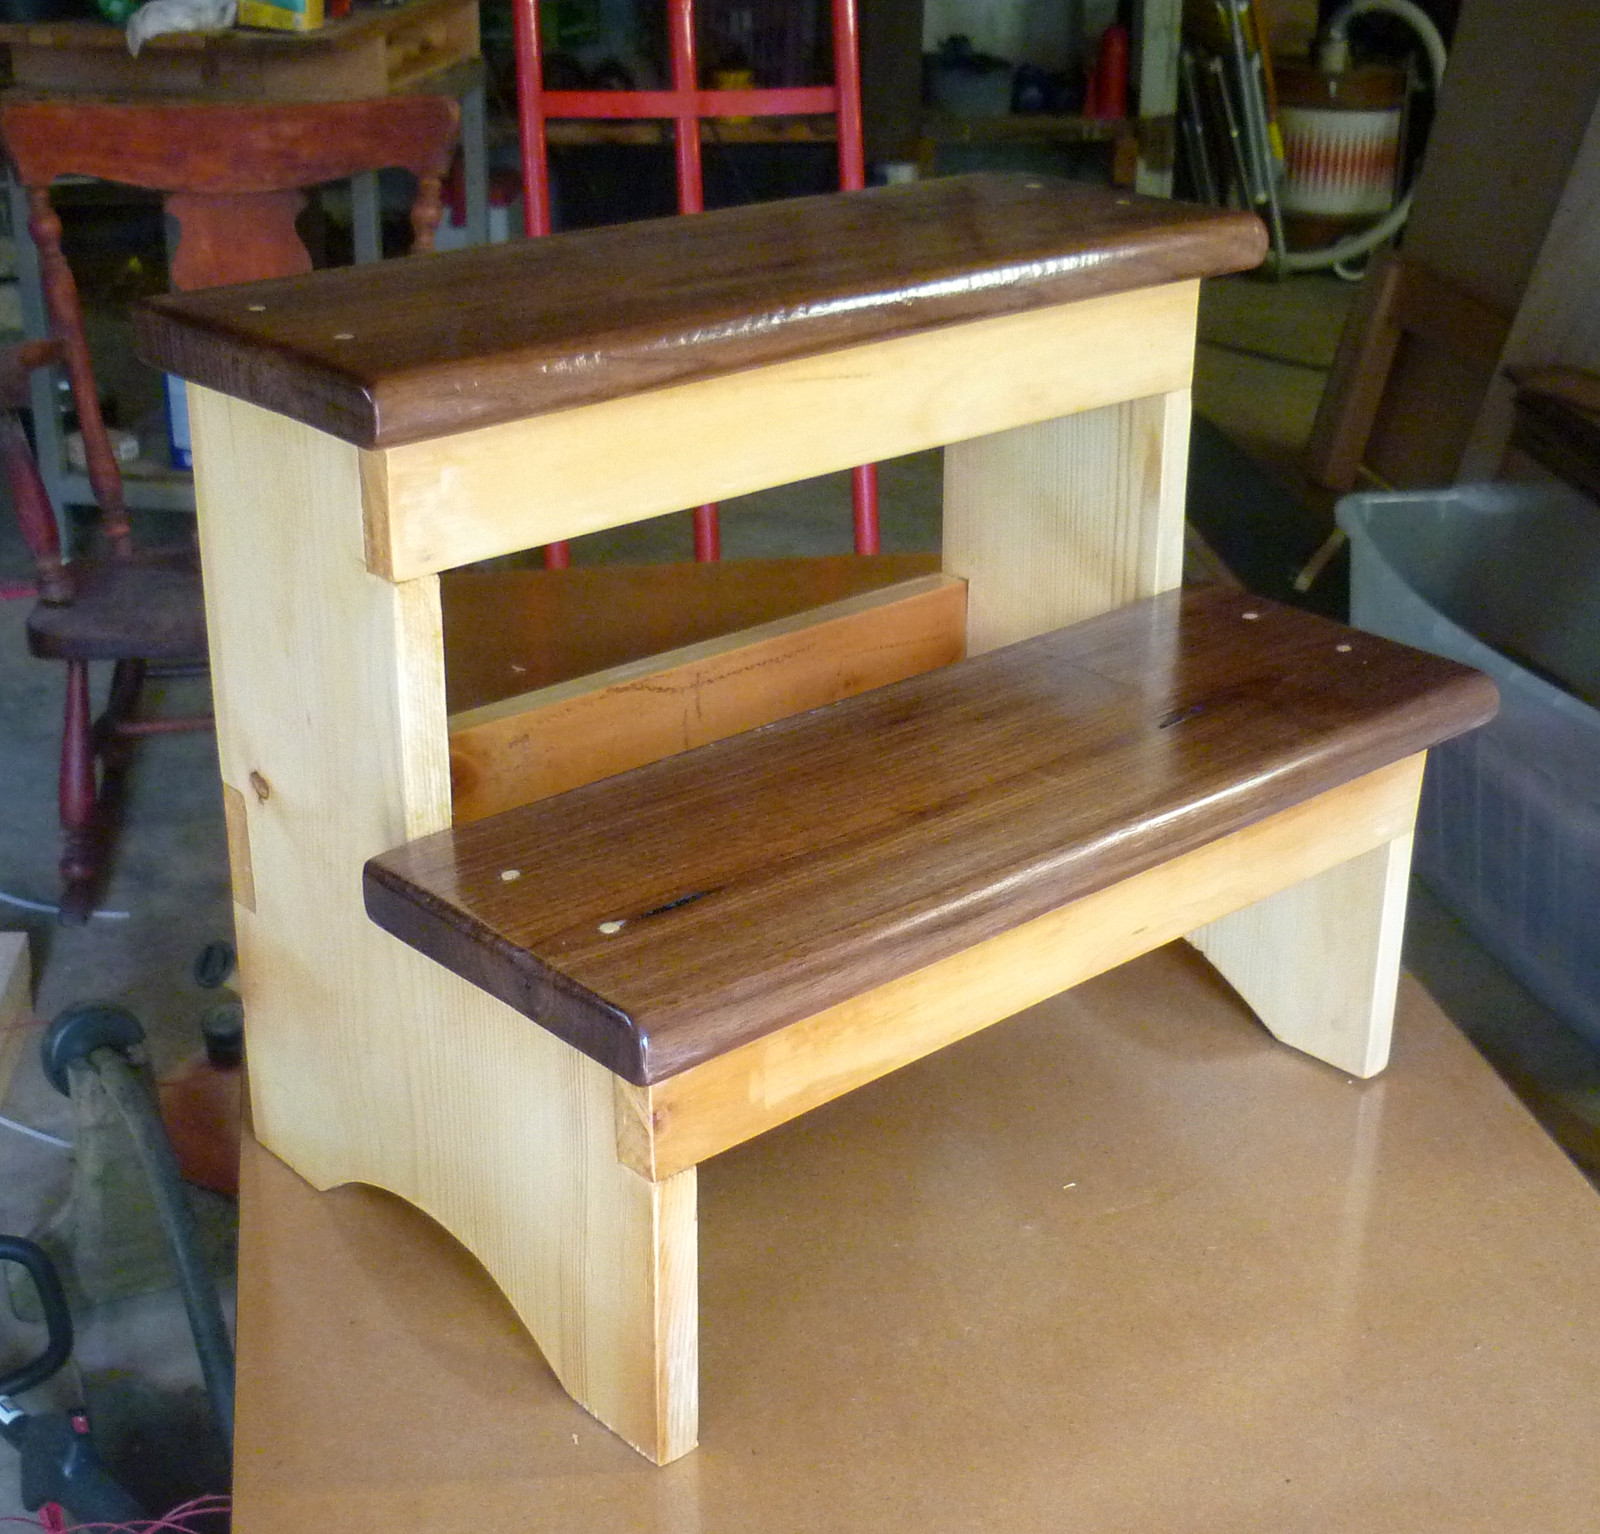
Marie's step stool is complete, and the golden hues of reclaimed yellow pine look as good as, if not better than, the walnut on mine. The parts for Katie's are all cut out, and the frame glued up. Joe has already started marking parts for a fourth, though as far as I know it is not designated to anyone. Maybe it will stay in the shop.
I'm still working a few minutes at a time on getting the old rocker ready for refinishing, and hope to have that done soon. Under consideration - a shoe rack for Marie and Levi. And we could probably get back to work on Katie's six board box now that the wood has had another month to dry out.
June 13th, 2014
Posted by Paul
Joe turned up a cache of old cedar panelling cutoffs and has been making boxes. They're square, the joints are tight, and they will look nice with a finish on them. I'm impressed.
June 12th, 2014
Posted by Paul

Scrubbing another reclaimed board from the old shed in West Salem. The Stanley Number 5 makes quick work of it, but I will have to sharpen it soon. The embedded dirt and grit on the old board takes a toll on the blade.
June 10th, 2014
Posted by Paul

Nothing to do with woodworking, really, except maybe the perfect rig to move furniture. One of the guys at the plant drives it now and then.
June 10th, 2014
Posted by Paul
The first Shaker step stool is complete. This was our first experience using walnut, and we found it easy to work. Joe resawed some and built a box with it, just in the couple of days since my last visit to the basement.
I took the step stool home with me and found it to be a good height for changing light bulbs and the filter on the ductwork return. It will be a lot safer and more convenient than using a chair. The next one will go to Marie and Levi, and then we will make one for Katie. We might build one for the shop as well. Before I took mine home, Joe used it to get above a large chest of drawers to chisel out a broken top.
June 10th, 2014
Posted by Paul
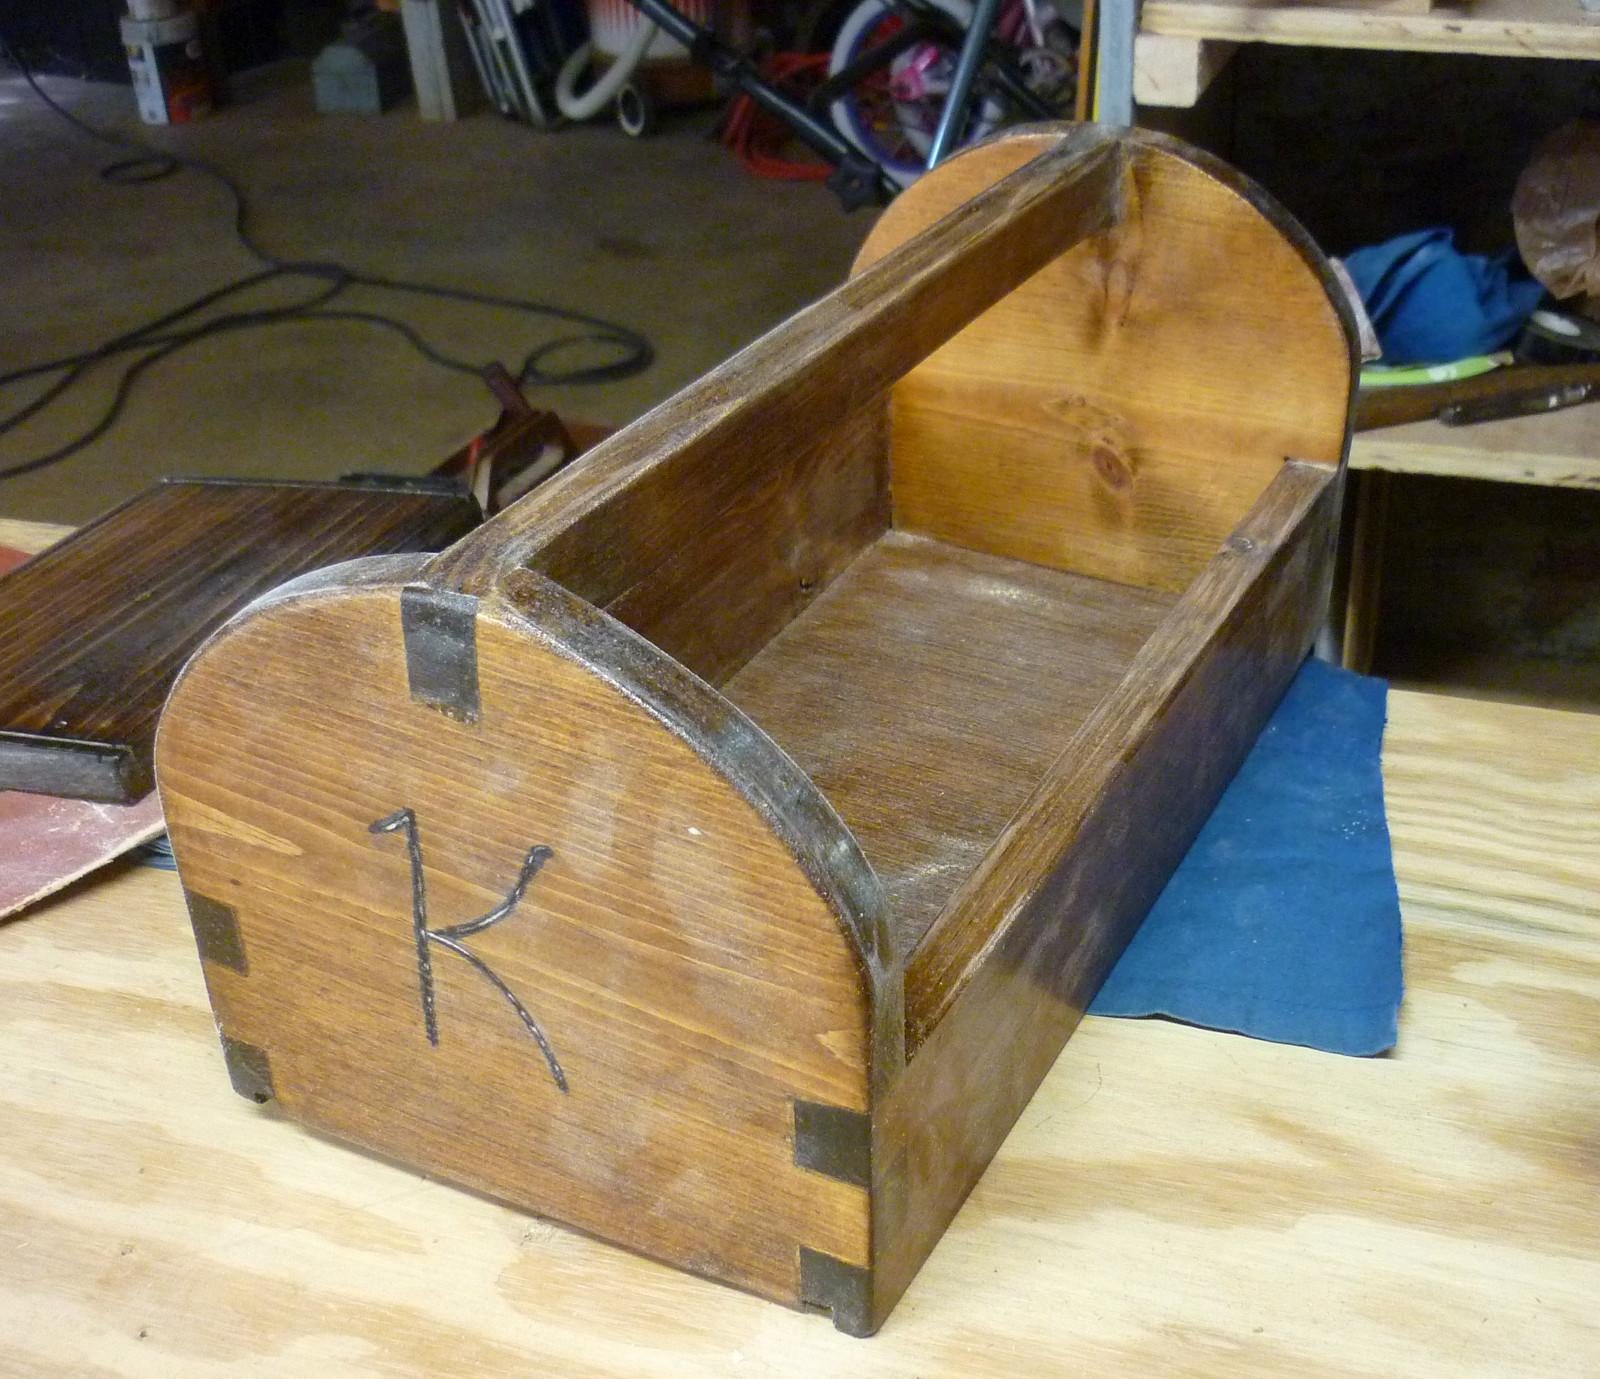
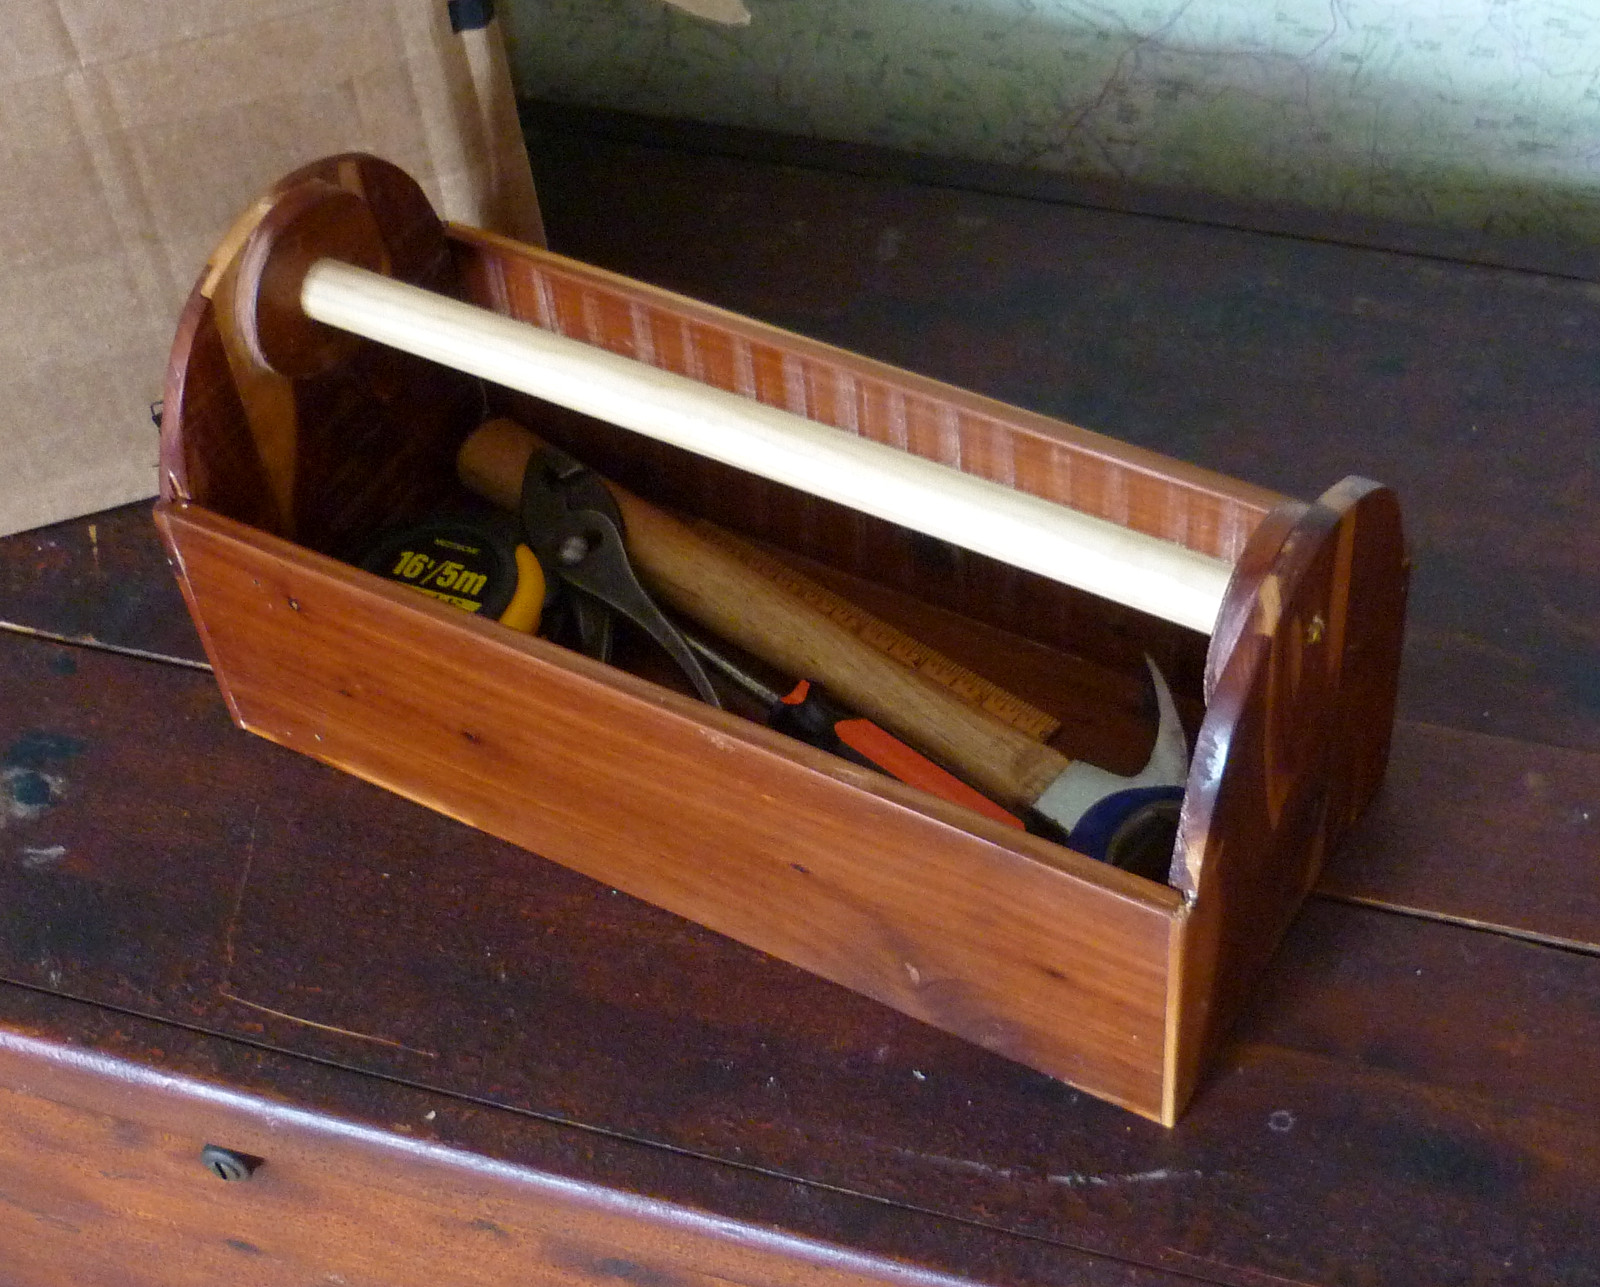
Now that Katie is a rising junior, she wants to live off campus. She has a place lined up and is working hard this summer to earn money to pay for it. Joe made a tool tote for her and we will stock it with things a young person would need to do minor maintenance and repairs around the house - pliers, screwdrivers, tape measure, adjustable wrench, ruler and hammer.
June 6th, 2014
Posted by Paul
Free furniture. Maybe furniture is too big a word for a Shaker step-stool, but this, our second one, is definitely free. The frame is made from 1 x 12 cutoffs we found laying around the shop. The stringers are from scrap wood I found in the dumpster at the marina. And the treads are reclaimed yellow pine from a shed that someone pulled down in West Salem.
Chris Schwarz speculated in an article about Moravian stools that some of the unusual construction techniques used by the Moravians might have been to allow them to use scrap wood and cutoffs. Having lived in this thrifty and industrious Moravian town for fifty years, I think Chris is right. The man who built the shed in West Salem a hundred or more years ago would probably have approved of us using the reclaimed wood for our Shaker step-stool.
June 1st, 2014
Posted by Paul
Monthend accounting work will take all my time for the next few days, so I arranged with Joe to meet him at the basement today for a spot of woodworking. We did the final glue-up and detailing on the step-stool, likewise for the bird feeder. There was something I wanted to build, a peg rack to go on the inside of my closet door, to replace the metal hooks which I have used to hang hats and gunny sacks. This little project took all of thirty minutes. I ripped a length of cypress to 3 1/2 inch width, then cut it off at 20 inches. The decorative grooving along the edges was done with a molding plane for the long edges and the kerfing plane for the verticals. We used the press to drill the holes for the pegs. The adjustable table and fence we made for the press made the job easy and accurate. Then we glued in pegs bought from Northlady of Maine through Amazon.
With three projects complete, we fired up the compressor and blew the dust off each one, then applied coats of polyurethane. I carried the peg rack home to install later in the evening. It was a fun, easy and useful project. I could use a few more of them for other closets, and Joe would like to make some to donate to the burn support group for their annual auction. So we'll make them as time allows. We have enough pegs to do at least ten more.
May 23rd, 2014
Posted by Paul
With all the parts cut out, we dry assembled the step stool to see where it still needed work. The main things left are to cut the stringers to length, cut out arcs in the ends, and drill the treads and frames for pins. Then we can glue it up and finish it.
May 22nd, 2014
Posted by Paul
Furniture of Necessity has caught my interest and as we wait for Chris Schwarz to publish his book by that name, we are going ahead with our own projects. Katie will be a junior in the fall and plans to move off campus so she will need to furnish a place. Marie and Levi need furniture. And there are certain specific articles that I need as well.
Changing light bulbs and reaching high shelves can be a real chore if you're not seven feet tall. I found an article in one of the woodworking magazines about making a Shaker style step stool and drew up my own plans for one. I proposed to Joe that we could quickly make several of these and that they would probably be warmly received by whoever we chose to give them to. He was as enthusiastic as me about the idea, so we started in immediately. We found some 1 by 12 scraps in the basement that would work for the frame, and decided to use walnut cutoffs that we bought at Wall Lumber a couple of weeks ago for the treads. This project went really quickly and well. We each took a component and worked on it. I cut the insets in the sidewalls and ripped out the stringers while Joe planed and shaped the walnut treads. In a matter of a couple of hours we had the parts complete and roughly fitted. It was the quickest work we have done and a real pleasure to work as a team.
Faith spent most of the evening in the basement, planing with one of my little Stanley block planes. She swept up the shop and got 4 bags of shavings plus some small scraps to take home. The girls are all fascinated by plane shavings. Having one of the twins down to the shop gives Marcia time to do things with the other, and when we went upstairs at the end of the evening we found that Hope had crocheted an anklet. So both girls had fun. Their big sister Grace is always welcome in the woodshop and sometimes joins us. Lately though she is too involved with her reading to want to come downstairs, and we are threatening to demote her to helper monkey 3.
May 20th, 2014
Posted by Paul

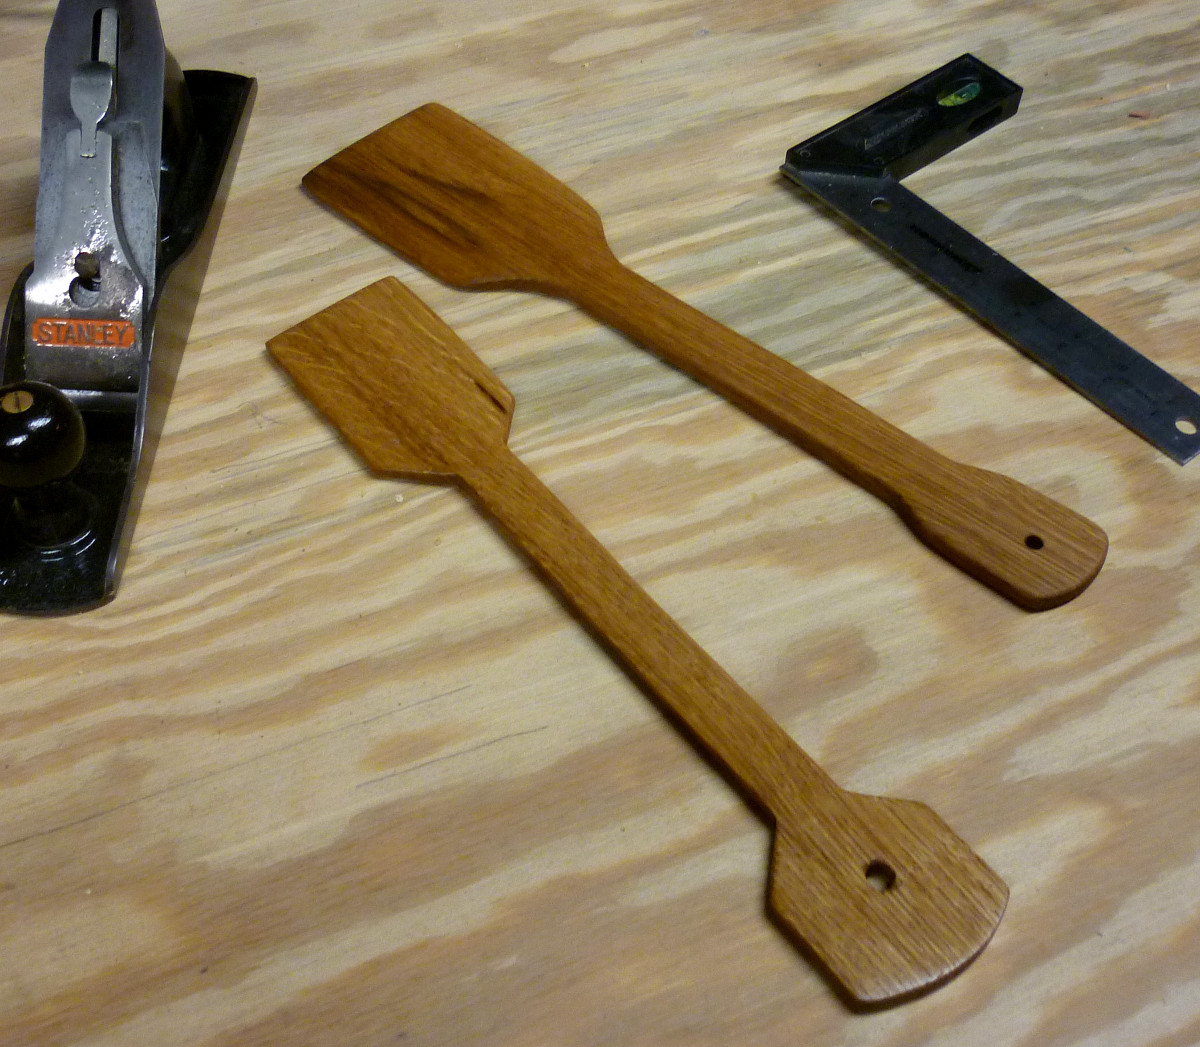
Joe's friend Tim sent this picture of his brother stirring the pot with the paddle Joe made a couple of months ago. Tim said that it's the perfect length for their stew cauldron.
May 14th, 2014
Posted by Paul
Stanley No. 5 - I'll take this one over any other for 90% of work - when it's sharp. And today, it's sharp.
May 13th, 2014
Posted by Paul
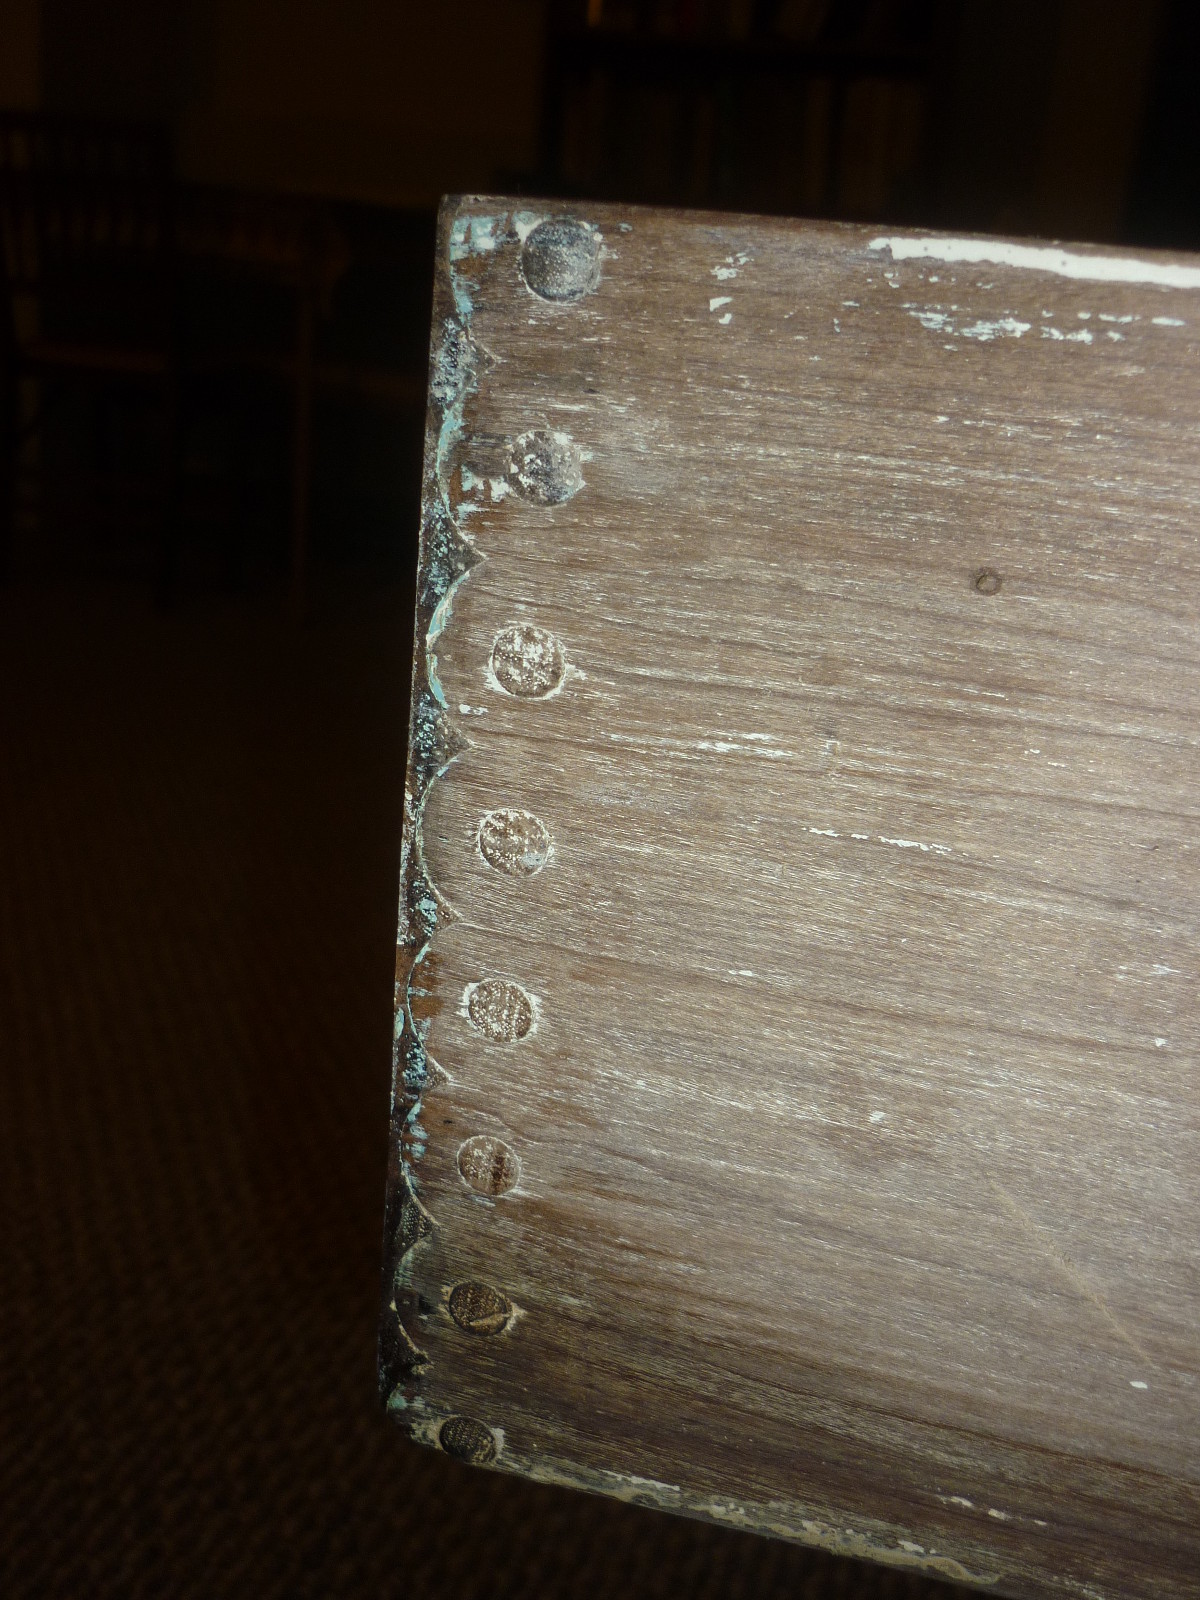
A Knapp-jointed drawer in an old piece from my parents' house in Florida. Invented in 1871, this machine-cut joint enjoyed some popularity, but was eventually killed off by the Colonial Revival style, when dovetails became a necessity so that people could pretend their new pieces of furniture had been in the family for generations. As an interesting article at Auctioncentralnews.com puts it, "...there were a great many more Victorians wanting to acquire Colonial artifacts, including furniture, than there were Colonial artifacts." This piece really has been in my family for generations, being something that came from my mother's grandfather's Mississippi plantation. The last Knapp joints were cut along about 1905.
May 10th, 2014
Posted by Paul

A visit to Wall Lumber was in order and it was a great day for a ride in the country. We left the basement shortly after 9:00 AM and got to Mayodan before 10:00. Joe spotted the new delivery truck (under construction) immediately and was entranced by it - a Model T with an all-wood body and bed. Once it is done, it will replace their current truck, a 1954 Chevrolet 1-tonner that rumor has it is for sale.
Wide boards lured us to Wall Lumber, and wide boards we found. First, a 13 inch wide, 12 foot long poplar board which we plan to use to build Katie a small 6-board chest. It will be finished bright. Next, an exceptional clear 17 inch by 12 foot white pine board for my own 6-board chest, which I plan to finish with blue milk-paint. We just gawked at the 25 inch mahogany boards - some craftsman will make something beautiful with them, but not us. Then we moved on to the racks of cutoffs, shorts and hobby boards, where we picked up some cypress to use for a project Marcia has requested, gag, birdfeeders. When Joe and I started the basement, we agreed, no birdhouses, birdfeeders or bird anything, but for Marcia, I guess we will make an exception. There is a continuum in woodworking between making fine reproductions of Queen Anne and making plywood cutouts of kissing dutch children, and bird things for me are a little too close to the dutch children - not that we will ever make Queen Anne reproductions. I know a lot of people get pleasure out of making these things - Queen Anne and dutch children - and more power to them.
Back to Wall Lumber - we also picked up a bundle of walnut shorts that I'm looking forward to experimenting with. We spent about an hour at Wall Lumber, much of it just looking and marveling at the wood. Anyone coming to Winston-Salem for the Woodworking in America Show in September could do worse than to set aside a couple of hours to visit Wall Lumber. The selection is fantastic and the prices will be eye-openingly low for people from many parts of the country. Check out their online catalog...it's the first link at the top right of this page. Wall Lumber in Mayodan is only 35 miles up the road from Winston, and a beautiful drive through the country.
May 8th, 2014
Posted by Paul
This chest is in bad cosmetic shape, but the only structural issue we found was a missing drawer divider. Joe realized that one of our molding planes would create a profile similar to that on the other dividers, and as luck would have it we already had a piece of wood with the molding cut, from when we were first experimenting with the plane. All he had to do was rip the piece down to width and chisel out a high section in the center, then fit it to length and glue it in place.
We tested the piece with a dark stain and it looks like we can make the color match. The whole chest will get a light sanding, then stain will be rubbed in, concentrating on the areas of heavy wear, and finally we will put on a coat of wax. It will still look like an old, well used item when we are finished, and that's ok with us.
April 29th, 2014
Posted by Paul
We built this hanging corner shelf for Marcia's sunroom to Joe's design. It's hard to see in the picture, but we ran a simple molding around the edges of the shelves with a molding plane I got off ebay. I really had my doubts about this project when we started, but it came out nicely. The golden color of the finish - just satin polyurethane - really looks good.
We're still working on refinishing the old rocker. Beyond that, we are turning over ideas for a box for Katie. I need to build a larder box to carry supplies on the boat, and I want to make a six-board box. Boxes, boxes, out as far as the eye can see.
April 29th, 2014
Posted by Paul
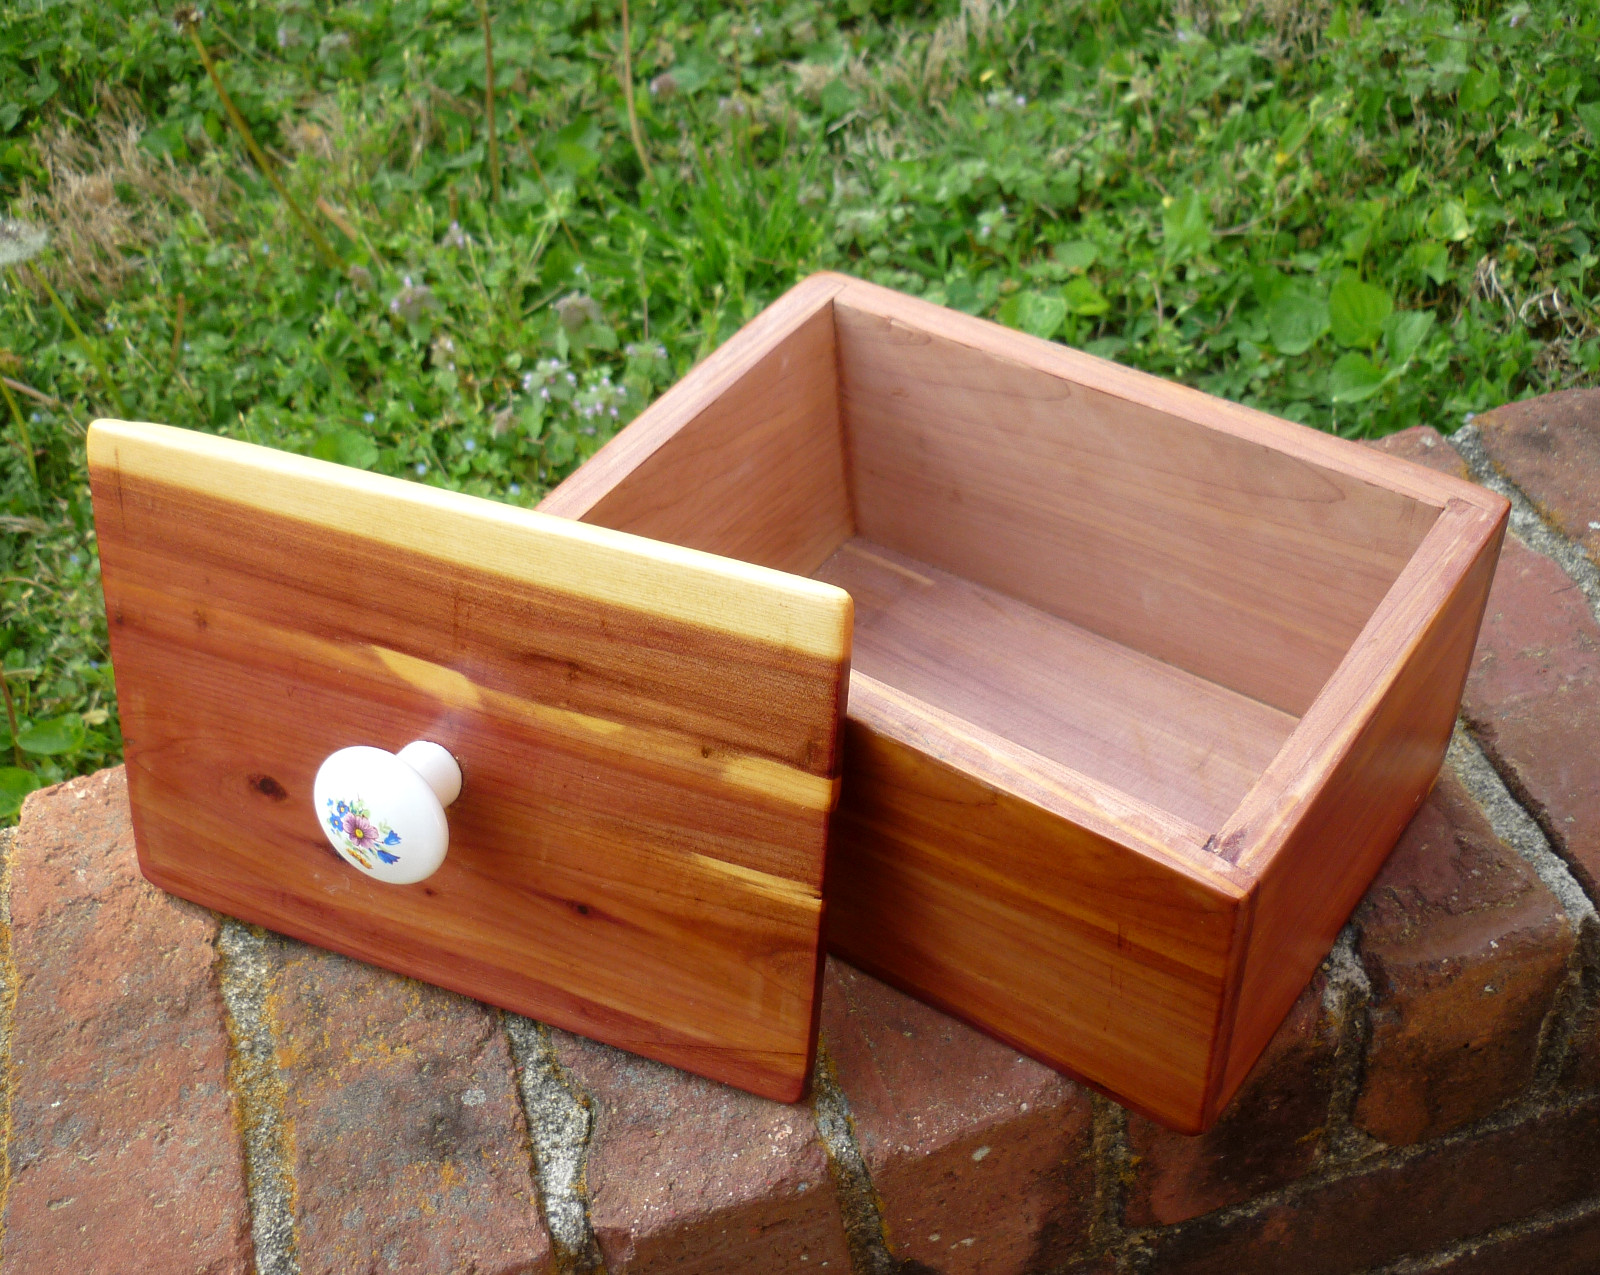
Joe did most of the work on this little box for Grace. I contributed the knob, found in a Burlington antique mall.
April 17th, 2014
Posted by Paul
Chris Schwarz has a new post up at Lost Art Press about some of the titles they have planned for 2014 release. It sounds like we have a lot of good reading in store. Two books in particular will make their ways onto my digital bookshelf - "The Furniture of Necessity" and "The Woodworker: The Charles Hayward Years". "The Furniture of Necessity" is Chris's book about the typical furniture of an American home - in other words, the blanket chests, trestle tables, corner cupboards, bedsteads and other items frequently found in a farm house, a city apartment, or a factory row house - not the kind of furniture found in the house on the hill. As Chris put it a while back when first planning the book, "This is the furniture of the typical North American family that could never afford a highboy, a secretary or a carved bedstead. It is plain because ornamentation is expensive. It is sturdy because disposable furniture is a recent idea. And it is beautiful because we have always tried to shape our surroundings to please us."
This is just the kind of thing that we want to build at the basement. I'm really pumped to see this book. When I got "The Anarchist's Toolchest", I read it through six times in the first couple of months, and I still consult it regularly. This book is going to be the same, I think.
The Charles Hayward book will be a collection of hundreds of articles that Hayward, the dean of woodworking in England, wrote in the years when he was editor of The Woodworker Magazine. This will be like a cookbook for woodworkers, with hundreds of articles devoted to every facet of joinery, tools and design. Chris hopes to have this "massive tome" released by the end of 2014, but no promises.
In addition, Lost Art Press is planning a book on Windsor chair making, a couple more on antiquarian joinery to go with Roubo, and one on H.O. Studley, the amazing piano and organ maker of Massachusetts best known for his hanging tool chest (long displayed at the Smithsonian, now in private ownership) and hand-made vises of incomparable craftsmanship. So 2014 promises to be a big year for the reading woodworker.
April 16th, 2014
Posted by Paul
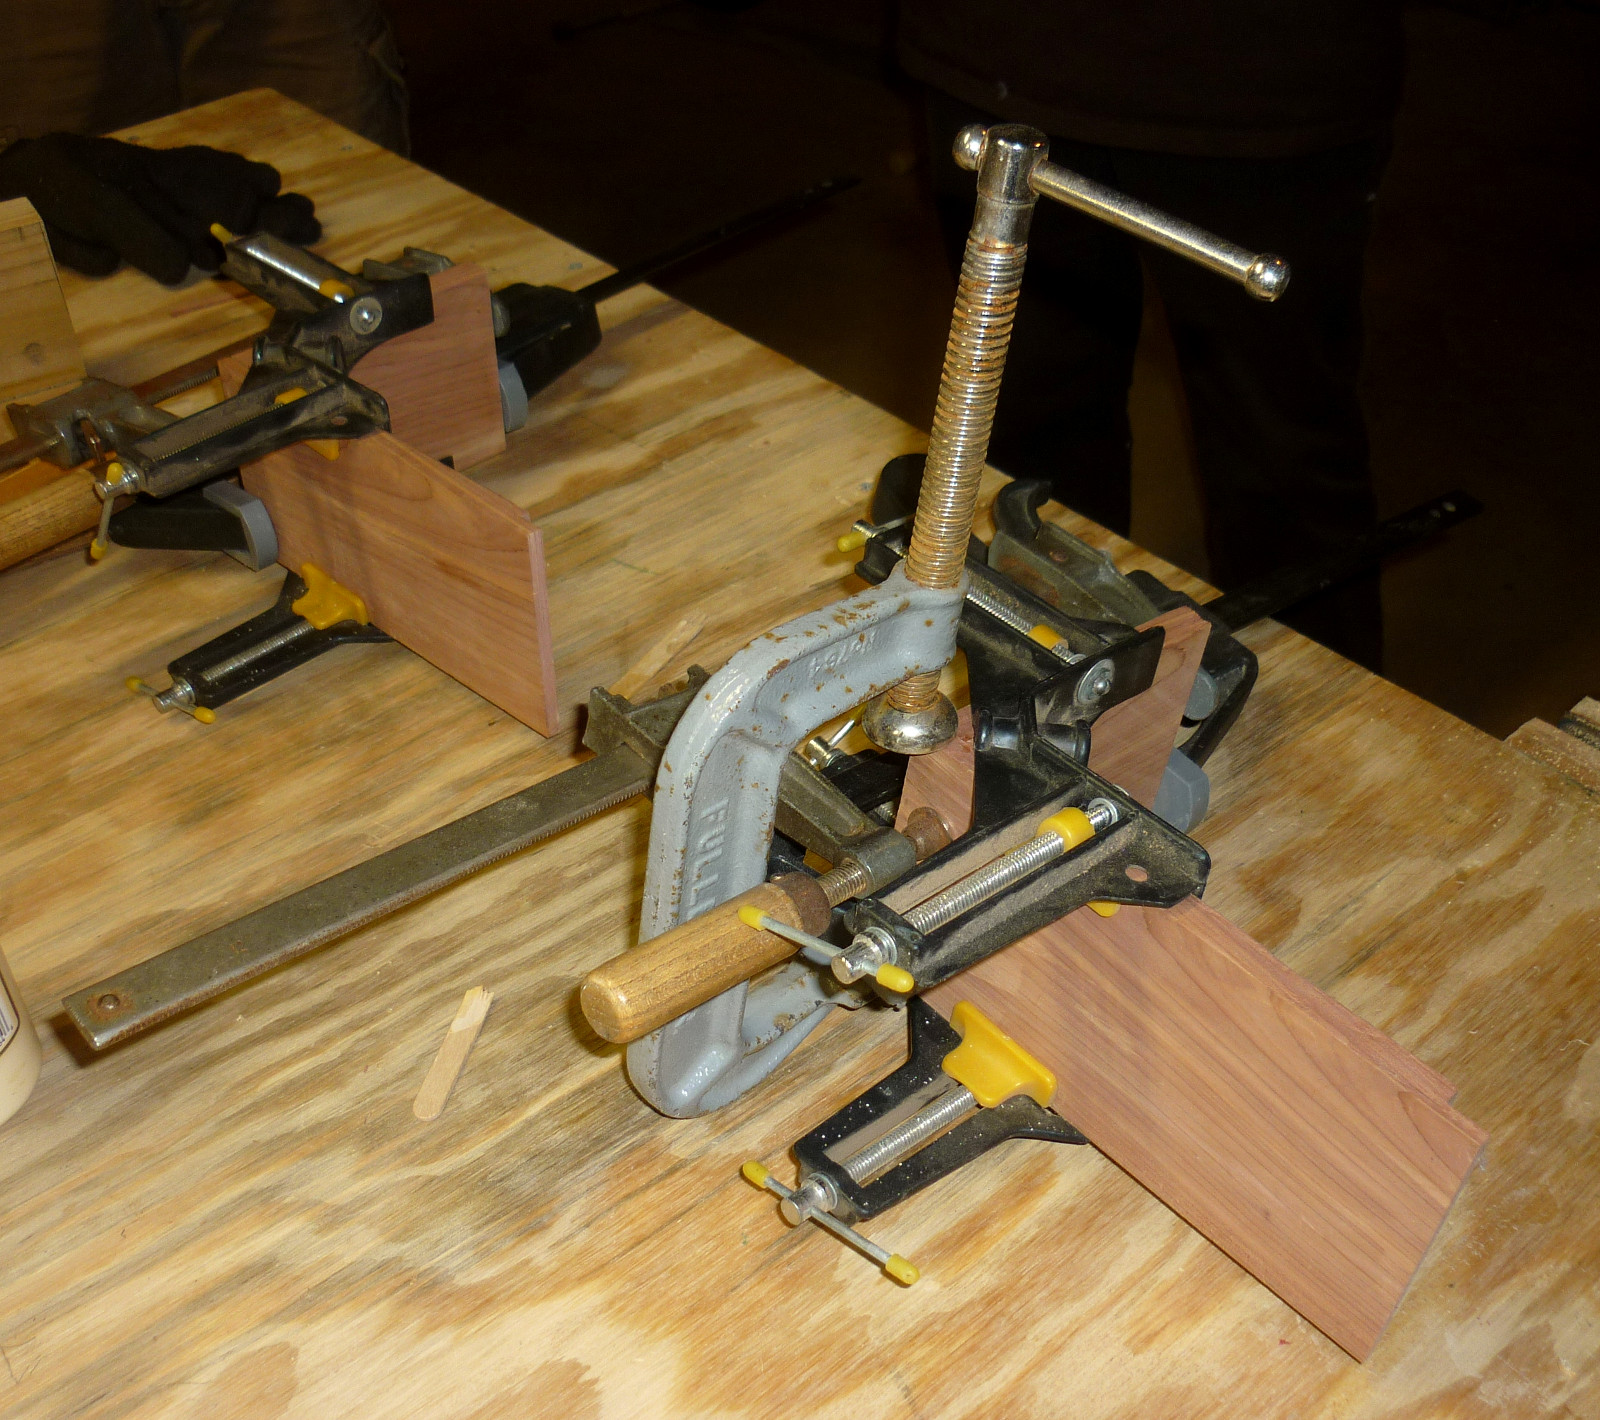
Yet another glue-up from hell. It took us more time to figure out how to do this glue-up than it did to spread the glue and clamp it up.
Then I got it in my head to resaw a fairly large piece of cedar to use as a lining in a box I'm thinking of making. That took about a half hour as Joe and I tag-teamed it. I told Joe about the resawing fool I read about on the internet who spent eight hours resawing a huge chunk of hardwood with a frame saw. I could feel his anxiety that I was going to propose we do something like that. We're just so tickled with the kerfing plane that I have to dream up reasons to use it.
Hope came downstairs and used one of the little planes to make shavings. Amazing how easily entertained children can be. We told her she could be "helper monkey" when she grows up. She was thrilled.
April 13th, 2014
Posted by Paul
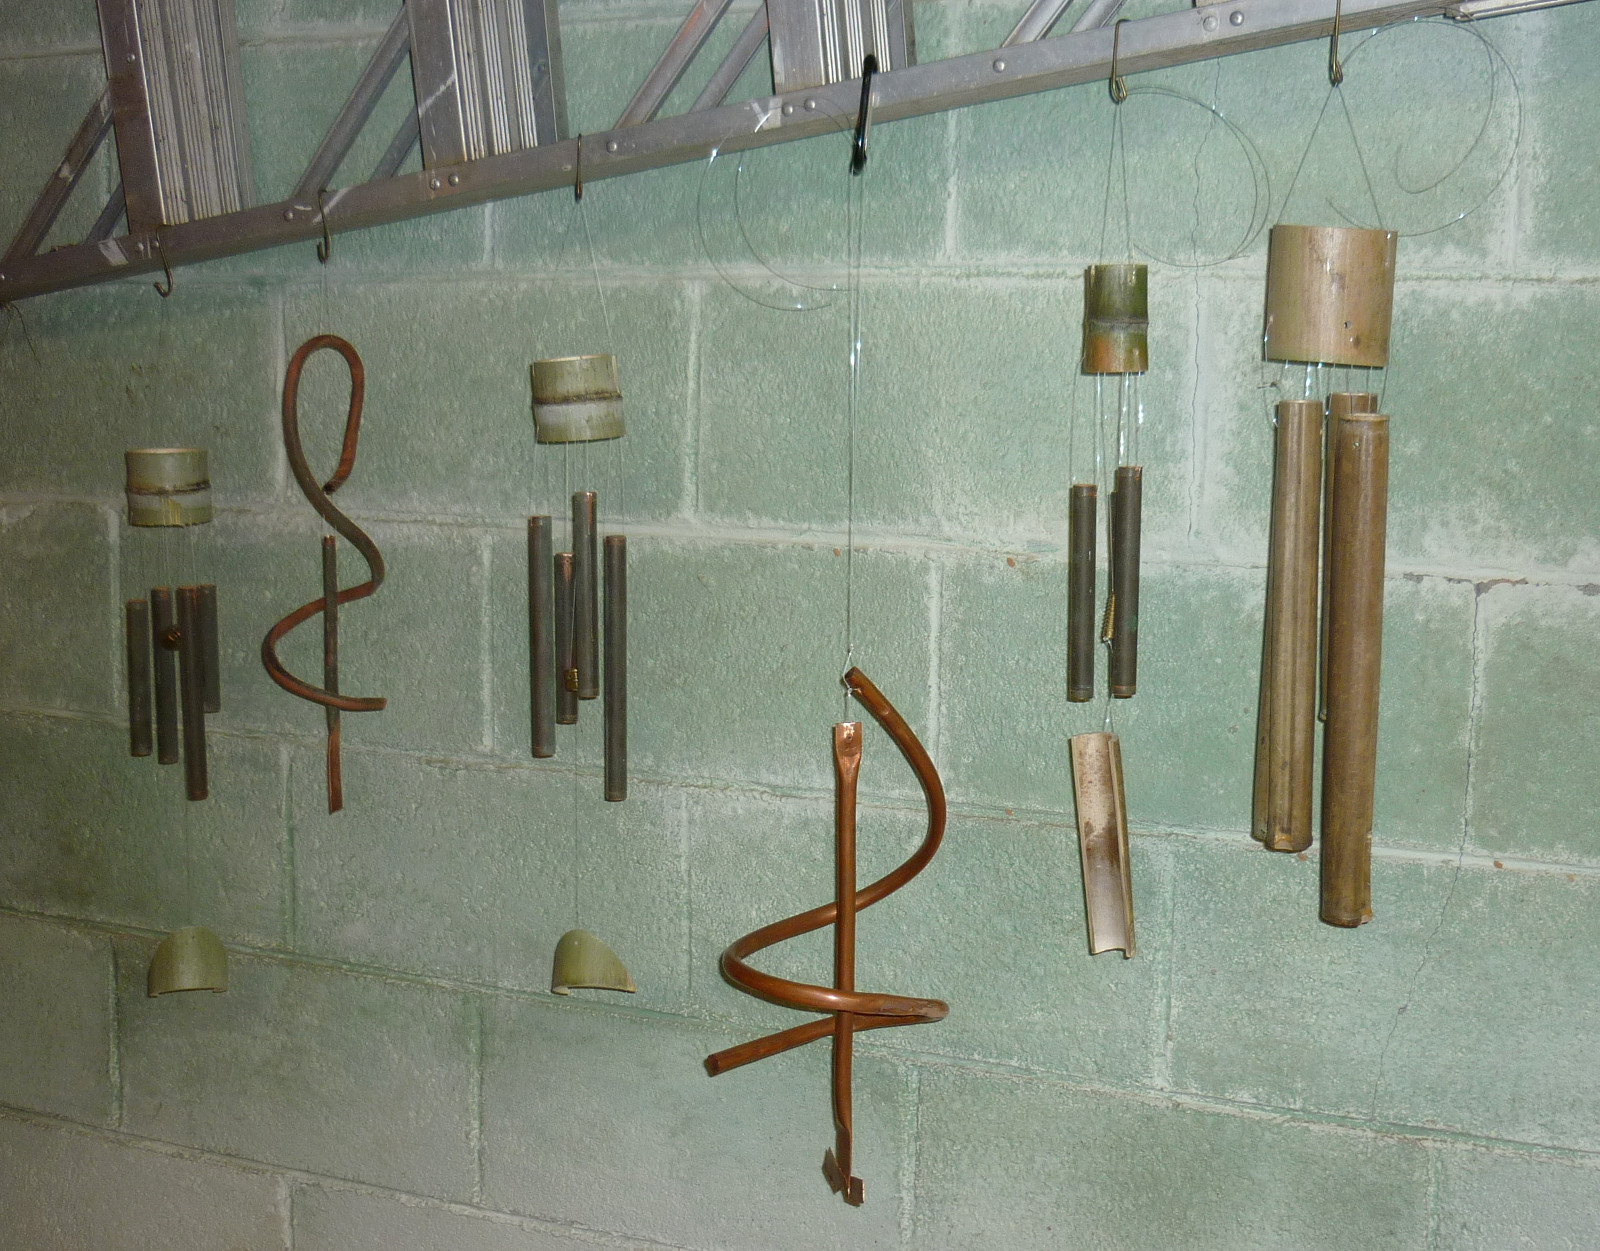
Joe has been making wind chimes out of scrap copper piping and bamboo. They have a beautiful tone to them. It shows what you can do with found materials. See you at Maker Faire next year, maybe? These will go to the annual craft sale that the burn victims' support group holds - all except one, which Joe gave me. It now hangs on my front porch.
April 13th, 2014
Posted by Paul

We put in a long Sunday at the basement, making a lot of progress on stripping paint off the rocker, fixing drawers for Marcia's old dresser and starting glue-up on the corner shelves. Plus, we finished the 1/4 inch kerfing plane. Ours is made of a length of old crosscut saw and some of the hickory we bought at Wall's Lumber a while back. We put it to the test by cutting a kerf all the way around a small piece of cedar, and then using the kerf as a guide to resaw a 1/4 thick slab off with a rip saw. The first time around I let the rip saw get out of the kerf and messed it up, but the second time I was more careful and it worked perfectly. I'd say we are both really pumped by this new tool. We will probably make a second fence for this one to cut 1/8 inch kerfs, and then make a bigger plane to cut 1/2 inch and up. We have plenty of saw blade and hickory stock to make more.
April 12th, 2014
Posted by Paul
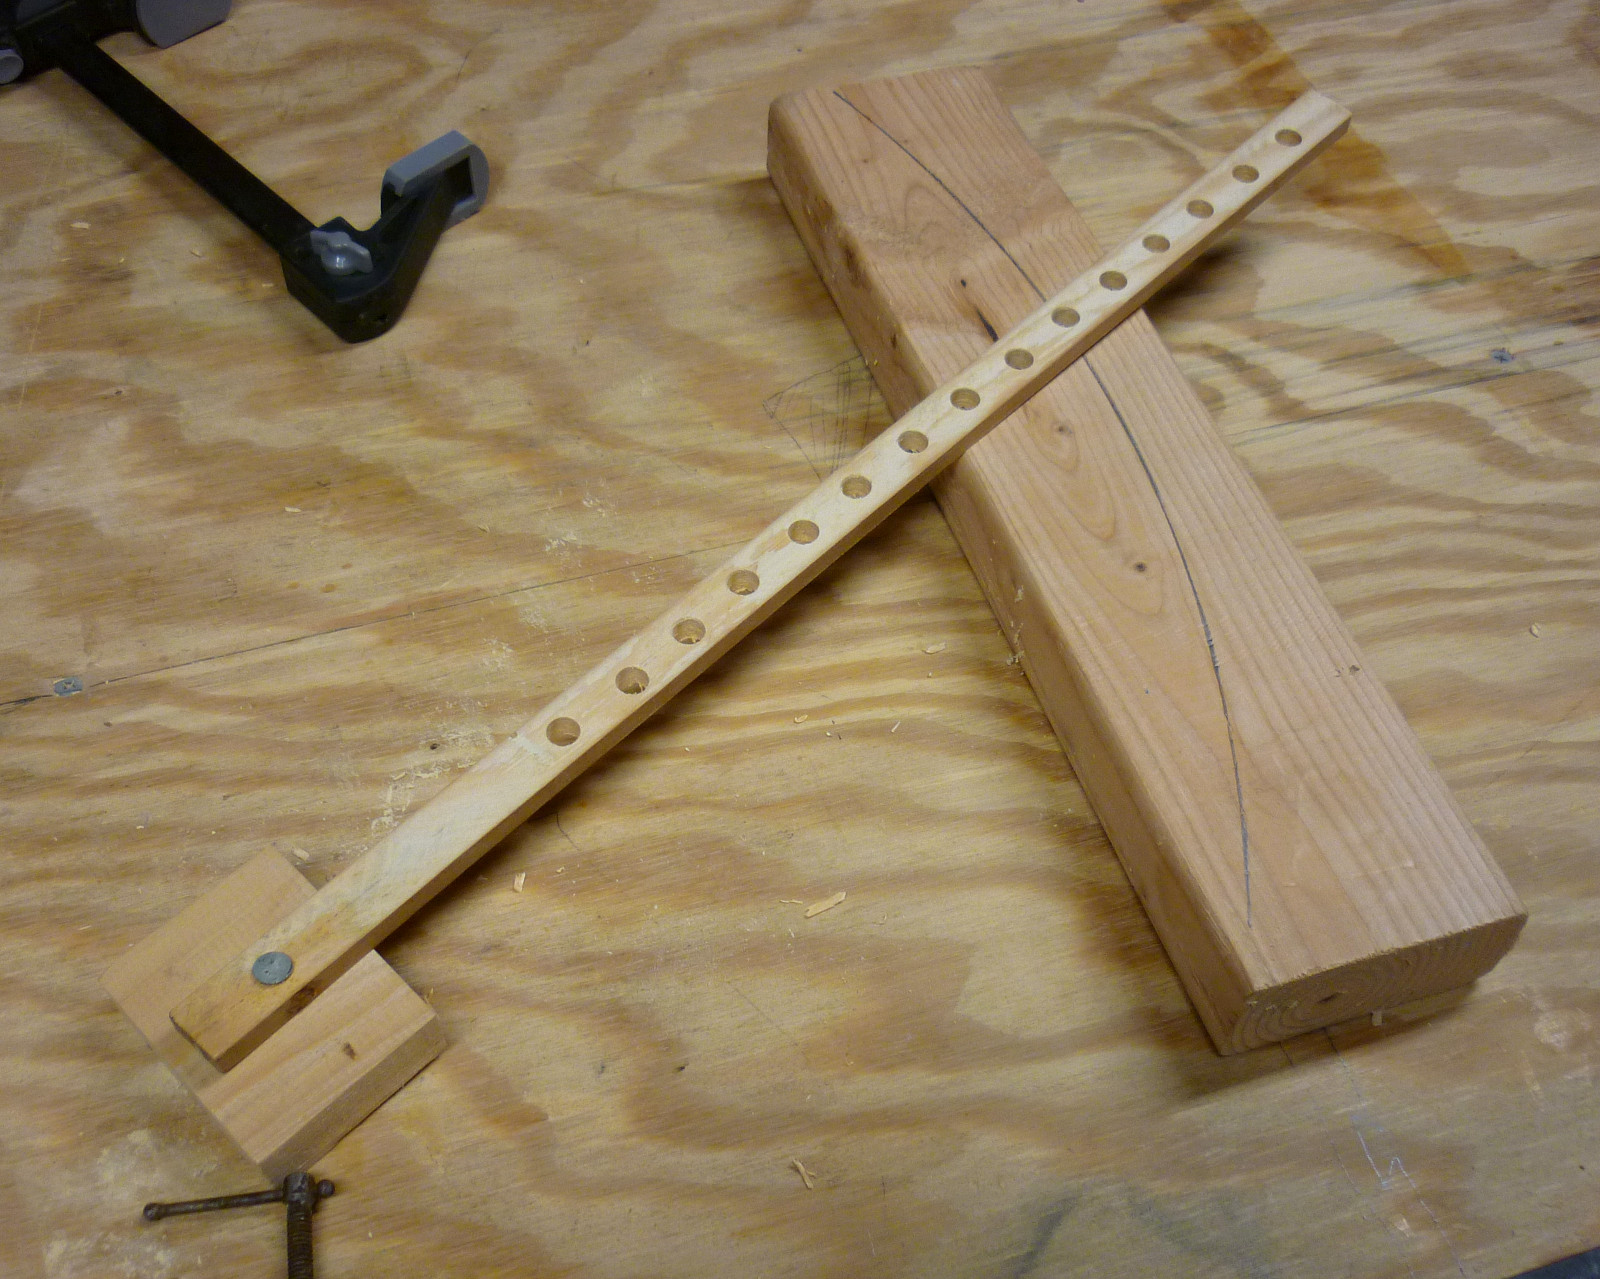
I made this tool for scribing arcs.
April 12th, 2014
Posted by Paul
Marcia always has some furniture in need of repair. Recently she brought home a big dresser with some minor issues. A spot on the base had gotten wet and rotted out, and Joe packed it full of glue and sawdust. Most of the drawers were loose at the joints, so we started gluing them up. Once we get done, the old dresser will be ready to give good service for many more years. We get a lot of pleasure in saving these old pieces from the landfill.
April 9th, 2014
Posted by Paul
A quick visit to the basement this evening. We drilled out the mounting holes in the saw blade for the kerfing plane. The first hole went easy but dulled the bit so badly that the second hole was a lot more difficult. I'll pick up a proper bit for drilling steel before we do the next one. Afterward we took the clamps off the two halves of Grace's box that we glued up last time. You would think that with all the clamps, it would have been square, but it wasn't as close as we hoped. We tried to pull it into square tonight when we glued the two halves together. We'll see...I'm sure Grace will be happy with it anyway.
April 6th, 2014
Posted by Paul
After a long week at work, I was ready for a long day at the basement. Joe was agreeable to that, so we started just after noon. First article of business was to load Marie's table in the truck and deliver it. Second, we stopped by Lowe's and got a sheet of plywood for a repair to Marcia's Hoosier Cabinet. When Marcia's mother passed away recently, this family heirloom came into Marcia's possesion. The back had some wear from years of service and was missing a moulding which covered the joint between two panels. Joe and I laminated a plywood sheet onto it, which covered the gap between the panels and added some structural integrity to the whole cabinet. Once Marcia gets done with the cosmetic restoration, it should be good for another 50 years, easy.
Now that chores were out of the way, we started something new - a kerfing plane. I saw an article about kerfing planes at The Unplugged Woodshop a while back and decided we needed to have one - no, several. I started watching for an old, cheap crosscut saw that we could cut up. I found one for $4.00 at a local antique mall, with a decent blade but nothing special that would be a crime to cut up. We weren't sure how easily a hacksaw would handle the job, but, other than an excruciating sound, it wasn't too bad. We cut a section about five inches long off the end of the saw and have plenty more saw for making more later. For a handle we used some hickory that I bought at Wall's Lumber a while back. As we looked through the pack I kept commenting "oh, this one's too nice to use for a tool, let's look at the next one,' until Joe clued me in that all hickory has nice pattern and color. Cutting the hickory to length on the miter box was a major task, but it ripped to width easily with a recently acquired ripsaw. Then we kerfed the fence side and started rabbetting. The planes hardly put a dent in it and finally we broke out a chisel. I didn't make much progress, but eventually I came to my senses and turned the tool over to Joe, who demonstrated the proper use of a chisel.
By this time it was late at night, and I still had to go home and bake bread, so we cleaned up the shop and left completion of the kerfing plane for next time.
March 31st, 2014
Posted by Paul
Now that the table is complete, we have several more projects that will get some time. We are working on a set of corner shelves for Marcia's sun-room, a small box for Grace, and are in the planning stage of a box for Katie. We are going to refinish this rocker for Susan's mother. The old finish is badly crazed and dulled, and the chair, while of great sentimental value, is not of rare make or great age. Therefore, a good candidate for refinishing. It is surprisingly solid for its age, and a new finish should make it good for another hundred years, at least. We tested a furniture stripper on an inconspicuous area, and the old shellac came right off.
March 31st, 2014
Posted by Paul
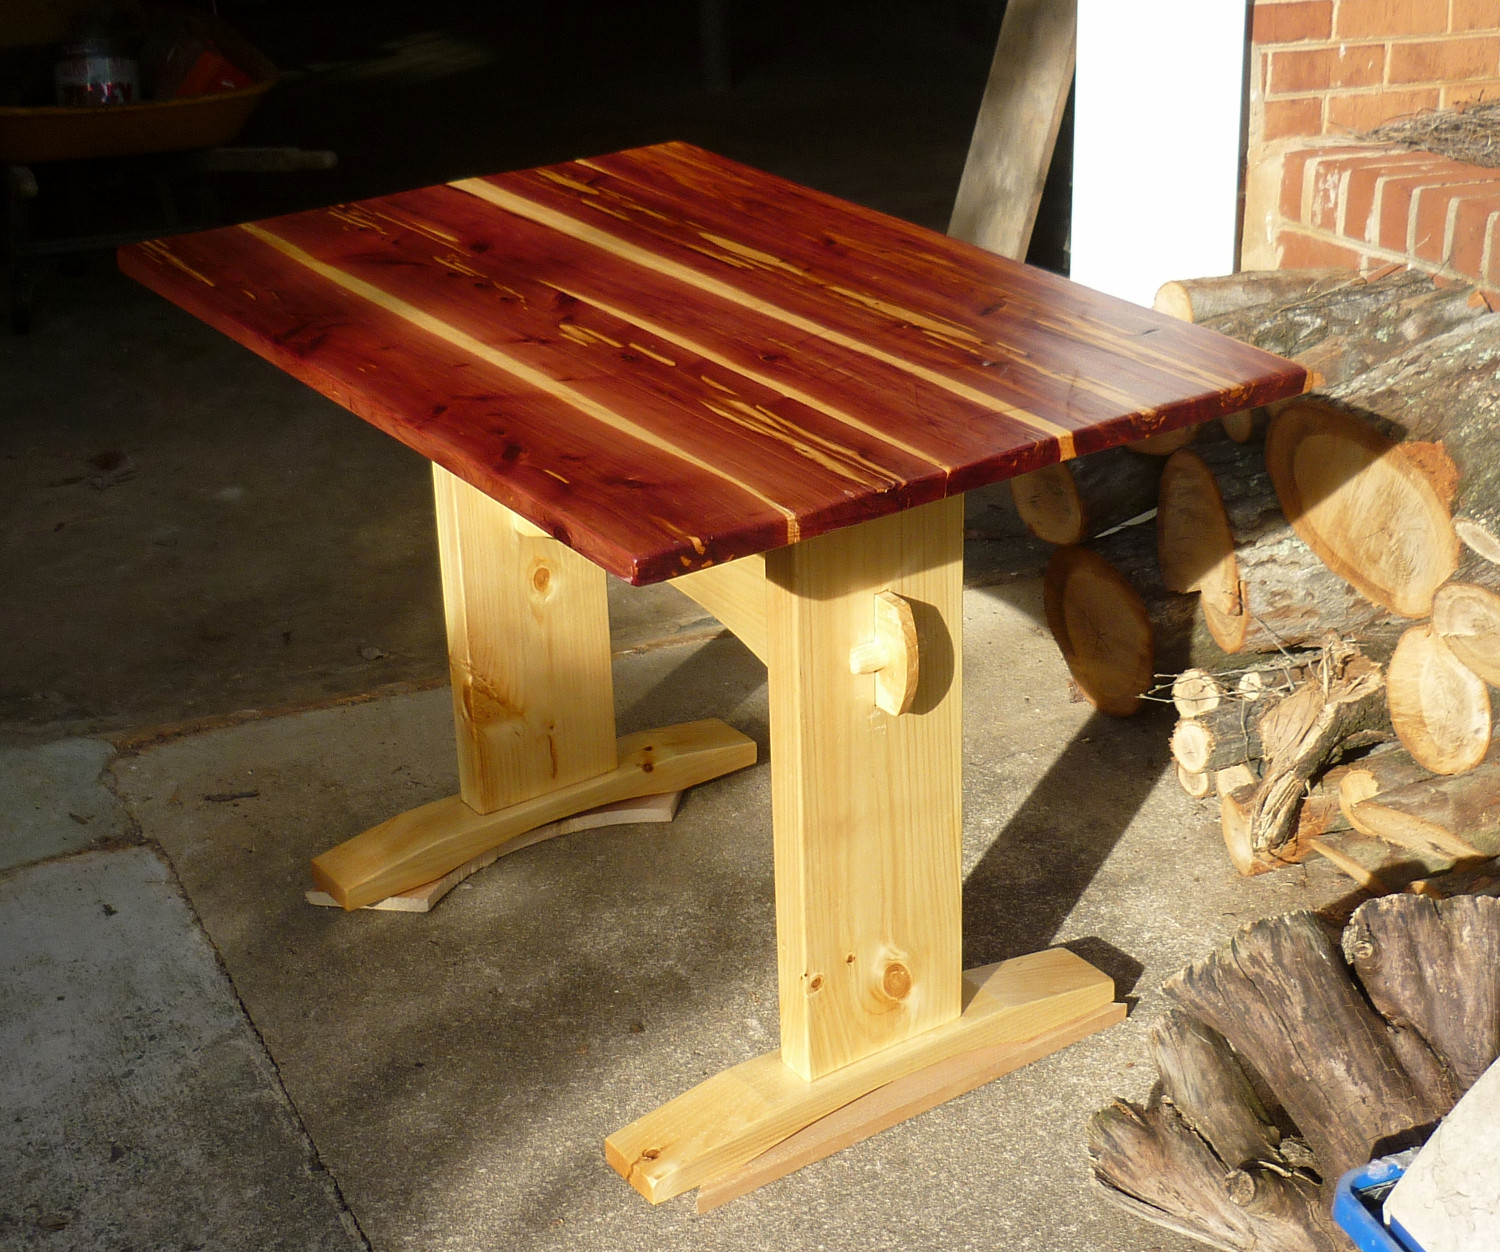
Joe put another coat on the table and rubbed it down while I was at the coast. Tonight we put levellers on the feet, signed the back of the top and pronounced it complete. Maybe we can deliver it this weekend.
March 13th, 2014
Posted by Paul
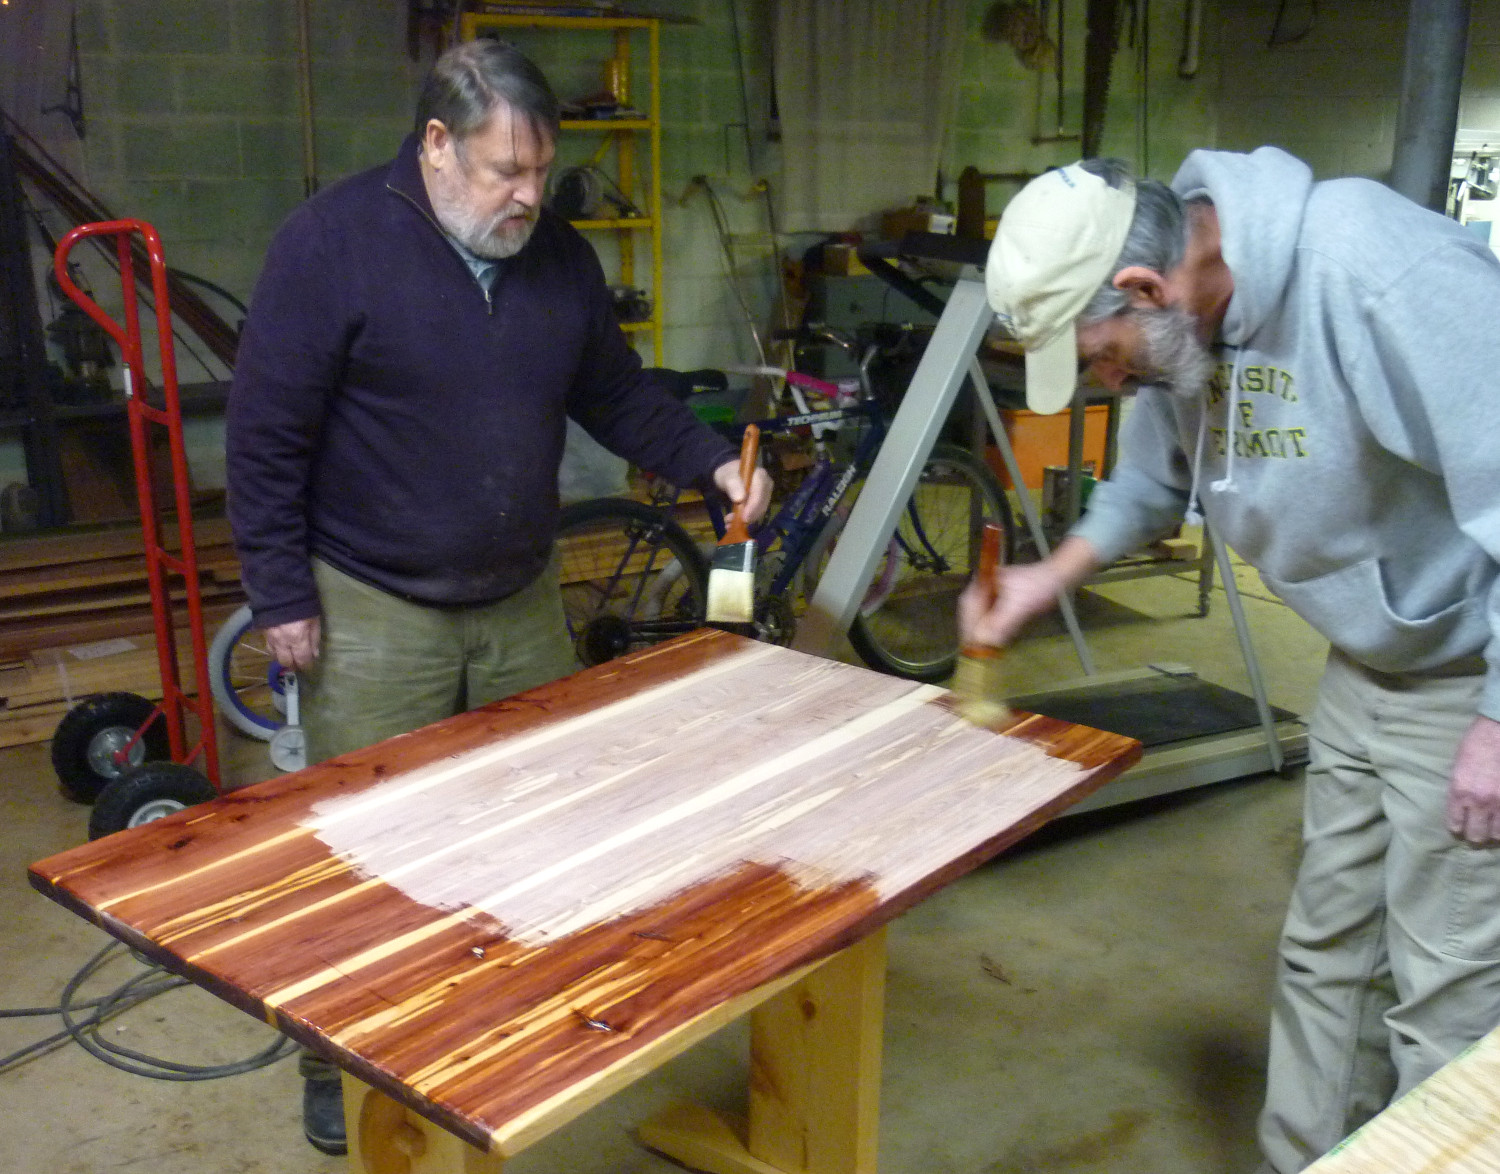
The first coat of polyurethane went on the table top tonight.
March 12th, 2014
Posted by Paul
Today I went to the Lost Arts Press site and purchased Chris Schwarz's new book on Campaign Furniture. With mounting anticipation I waited for the 77 mb pdf file to download. This is a book that I have been looking forward to ever since Chris announced that he was working on it several months ago. The download finally completed and I dug in. It took just a minute to know that the wait was worth it, Chris has produced another exceptional work. The first thing that struck me was just what a fluent and literate writer Chris is. The introductory material on the background and history of campaign furniture was the perfect lead-in to the real substance - detailed instructions with charts and pictures on how to build several pieces. Just as in his earlier books, Chris has chosen a variety of items that will stretch the skills of most woodworkers. The one I'm most interested in is the folding bookshelf - the only joints are two easy dadoes, but there are twelve hinges that must be placed with precision so that the finished shelf folds up flat. Of course, Joe has installed many, many door hinges, but this will be a whole new level when it comes to making accurate measurements and cuts. If we can manage this, hinges should hold no terrors the next time.
Another quick note. I have added a link to The Furniture Record website. This is the place to go to get ideas for projects and to see how craftsmen have handled things in the past. The site features hundreds - probably thousands - of photographs of fine and not so fine furniture from antique shops, flea markets and museums all over the country, but mainly in the southeast. Well worth visiting.
March 8th, 2014
Posted by Paul
We are far from achieving the level of craftsmanship of the cabinetmakers I knew at Salem Woodworking years ago, but we are making progress.
March 7th, 2014
Posted by Paul
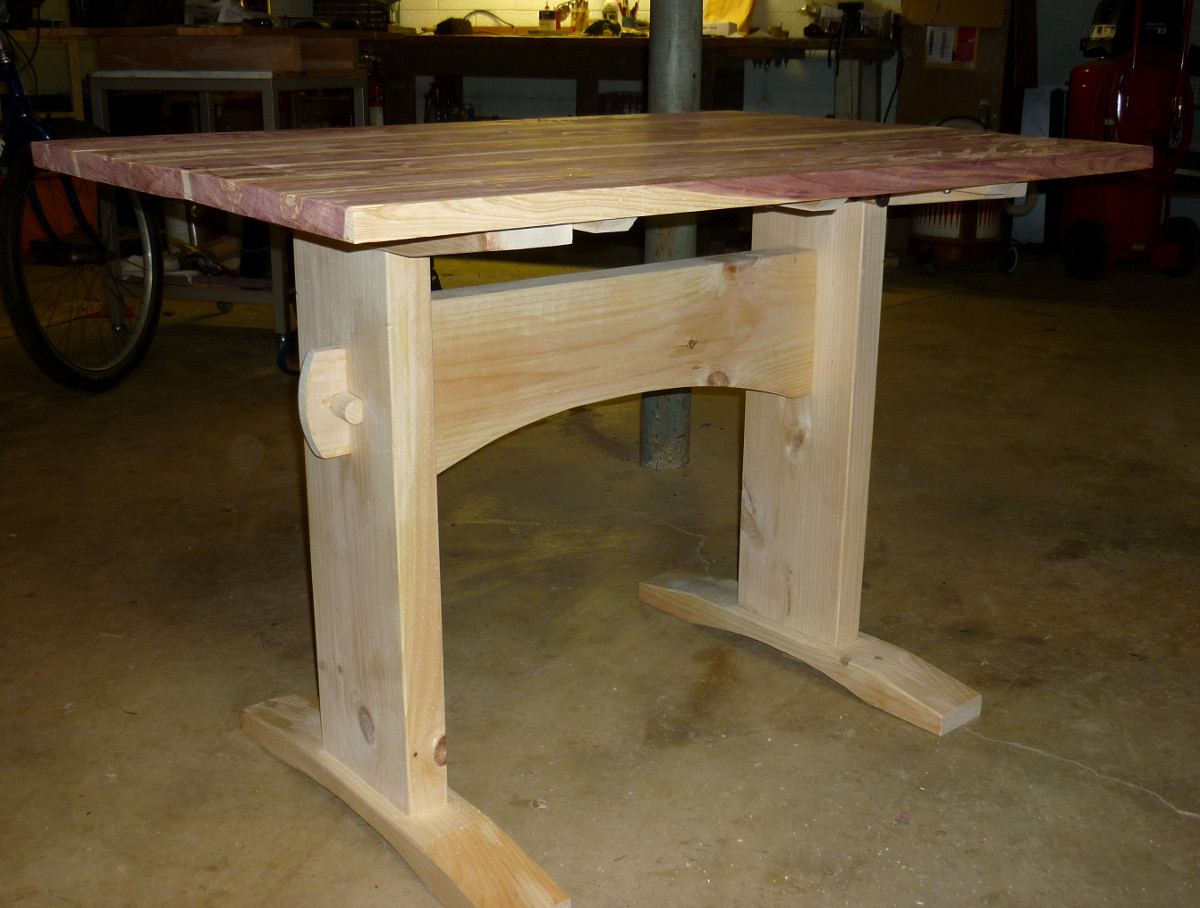
We worked out how to batten and attach the top this week and finished assembly. Next comes sanding and finishing. We are looking at several coats of satin polyurethane, which ought to make a durable and easy to clean surface.
February 15th, 2014
Posted by Paul
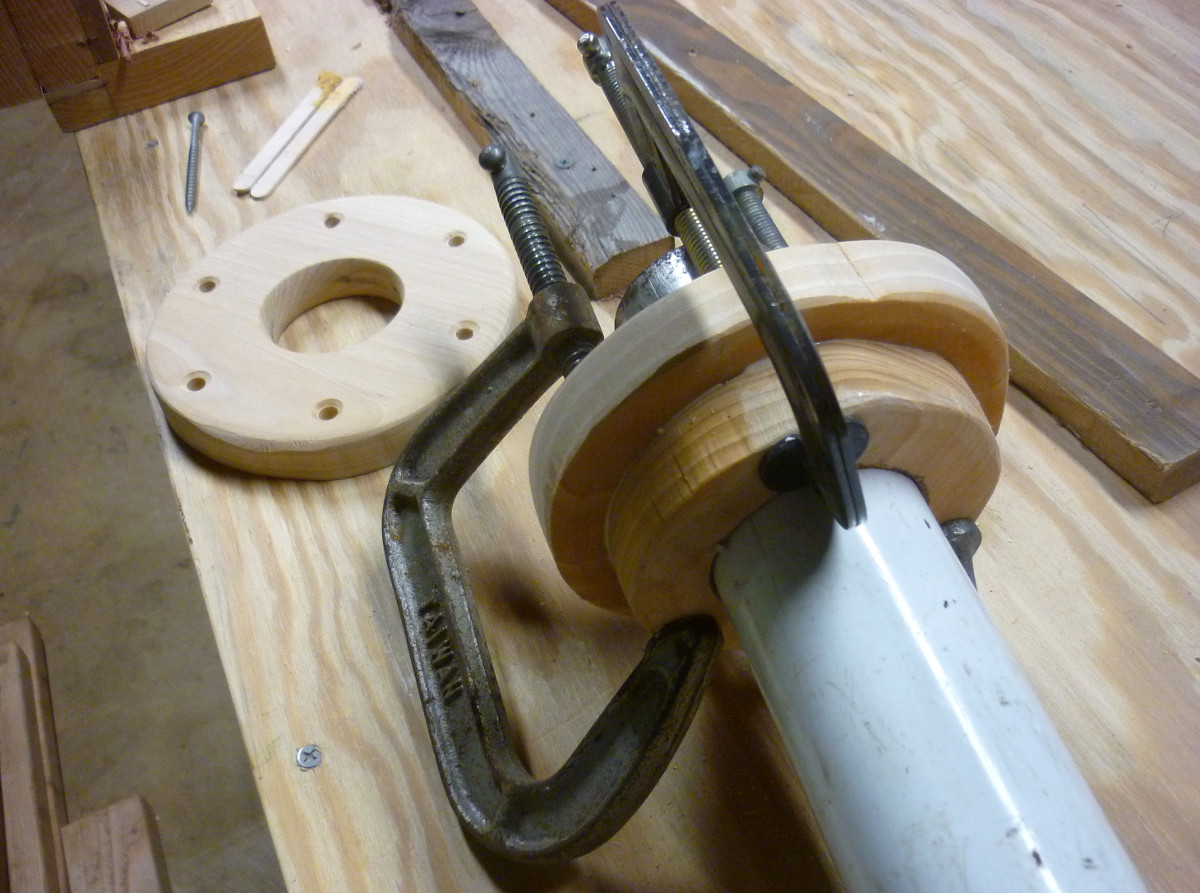
The bracket for the boat table post is glued up and the base that will bolt to the cabin sole is completed. All ready to take down to the marina this weekend.
February 14th, 2014
Posted by Paul
The base to Marie and Levi's table is glued up, except for the top cross-members, and the top is glued up as well. The main tasks left are smoothing the top and attaching battens, working out the attachment of the top to base, and finishing.
February 14th, 2014
Posted by Paul
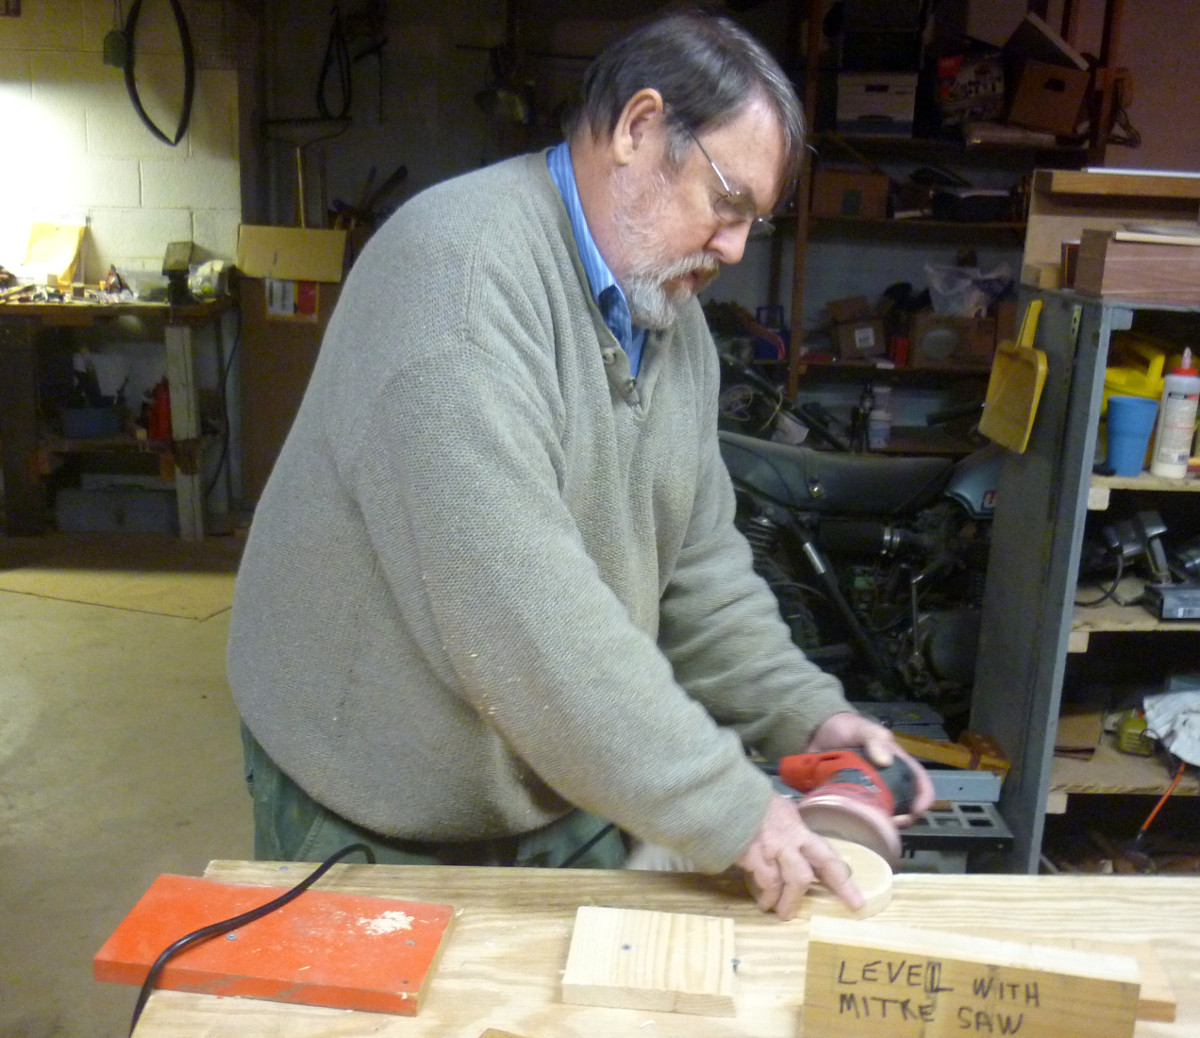
As much as we have come to prefer using hand tools, we're not doctrinaire about it and do use power tools on occasion - most frequently, the drill press and the orbital sander. We took a break from Marie's table one night to finish up a quick project, a bracket for the table on my boat. The bracket will be screwed to the cabin sole and support an upright, which in turn supports the table top. I used the orbital to break the edges of the bracket so that stubbed toes would be less painful.
February 8th, 2014
Posted by Paul
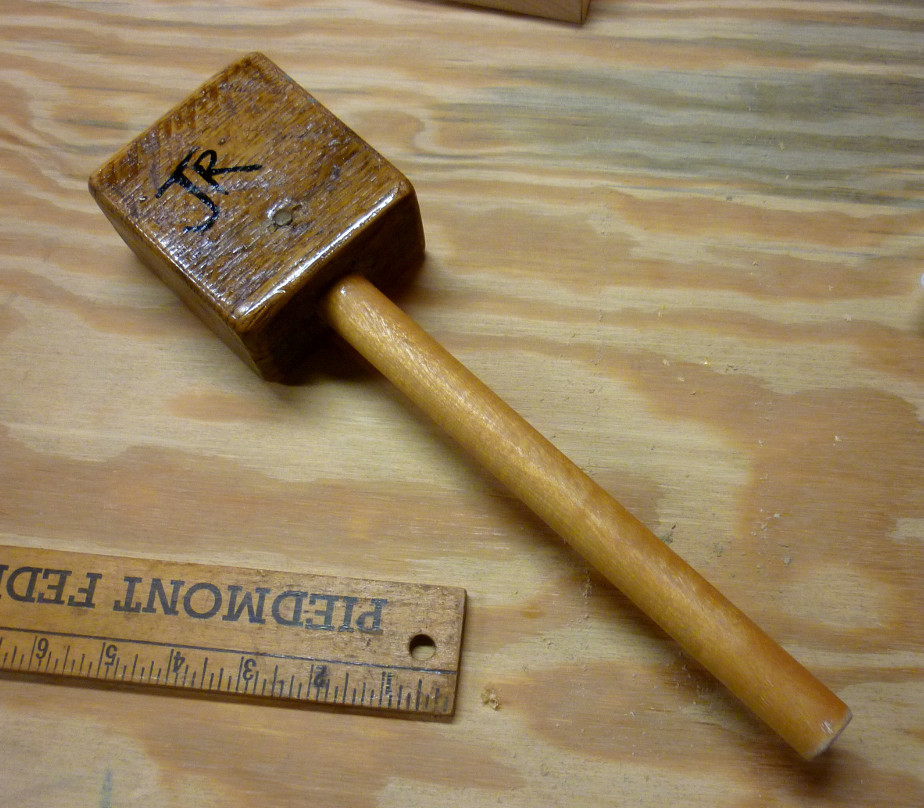
We came into this hobby with very few tools, and have found that it is more fun to make them than buy them. Joe likes making hammers. His first was Thor. Thor has a big head, but it is light and soft. Thor is a good hammer for pounding joints home. My favorite, Jr, is smaller, but has a hard oaken head that doesn't take no for an answer. The newest, EZ, has a tapered head that is good for getting into tight spots. Last I saw Joe, he was muttering something about not making a hammer in a long time, and examining a chunk of sweet gum.
February 7th, 2014
Posted by Paul
After a brutal long week at work I finally got back to the basement Friday night. We put a George Thorogood cd on and started planing the table top flat. Then we switched over to gluing up the base and got a good start at that. Finally we worked at building a base plate to attach to the cabin sole on my boat. It will carry a post for a removable table. We did this in cypress and discovered it to be easy to work, attractive and light - truly a pleasure in the woodshop. And with its imperviousness to rot, it should work well on the sometimes wet cabin sole.
January 31st, 2014
Posted by Paul
Tonight we did the final glue-up of the table top using battens screwed to the workbench and wedges, since we didn't have clamps wide enough for the job. Afterwards Joe said we were "scary close to being finished with this project," though I think we have at least three more weeks before we start brushing on finish.
January 25th, 2014
Posted by Paul

We are making steady progress on Marie's table. I messed up a jigsaw cut on a piece and had to make a patch, but it's in an inconspicuous place. All the parts for the base are cut out and fitted, and we are working on cleaning them up before we glue them. We chose the boards for the top and cut them to rough length. At this stage we are finally starting to get a good idea of how the completed table is going to look. We still don't dare drive the trestle tenons into place as we probably would never get them apart. That will be a one-shot deal with glue.
January 20th, 2014
Posted by Paul
Joe took the big stew paddle to his friend at the burn survivors group Saturday and sent me the following afterward: "The stew paddle was a big hit! So much so that Marcia asked me to make a miniature one for her kitchen. I got to work on it on Sunday and finished it rather quickly. Once again, I finished it with vegetable oil. It turned out a little lopsided but that just confirms that it was hand made, I hope she likes it."
I made it to the woodshop Monday night to find not one, but two miniature stew paddles. One now resides in Marcia's kitchen, and the other in mine. Thanks, Joe!
January 15th, 2014
Posted by Paul
When we started the woodshop in mid-2013, we had a motley assortment of household tools and some of Joe's carpenter equipment that had been saved from the fire - a chop saw, a hand drill, a jig saw, a portable table saw, and such. With this, we were able to build some small projects with scrap wood that we found in the basement when Joe and Marcia moved in. It was a lot of fun, and we decided to move forward, but what tools did we need? I was leaning toward traditional hand tools while Joe was looking at modern light power tools. We picked up a used Delta drill press at a good price, and Marcia provided a new router. Meanwhile, I started accumulating hand tools - planes, a brace, hand saws.
Joe's old chop saw got plenty of use, but left a lot to be desired. Years of knocking about on job sites meant that it was loose and out of alignment, and the bed was only wide enough for narrow stock. A new radial arm saw looked like the ticket, and was definitely on Joe's wish list.
I had been reading the praises of the Millers Falls Langdon Acme miter box all over the internet, and told Joe to hold off on that new saw for a little while. The Acmes I found on Ebay were expensive, running upwards of $100 for a box with matching backsaw, but still far less than a radial arm saw. Then, while browsing Craigslist one day, I found a late model Acme from the Ingersoll Rand days with a 28 inch Disston backsaw, listed for $25. Now, most of the bloggers worship the older boxes from 100 years ago and have a degree of disdain for post-war production, but I figured for $25 it was worth taking a chance.
The seller told me his bro-in-law had bought the box some years earlier to put molding in his house and it had set unused since. I carted it home, cleaned it up and then carried it to the basement next trip over. It took a little practice to learn the motions, but soon we got the idea and were cutting clean ends to measure. Of course, our measuring and marking abilities still left a lot to be desired. One evening Joe found a cut that was a sixteenth over. He eyed the miter box for a minute, then placed the board beneath the blade and shaved that sixteenth off. Then he looked at me with wonder and said "this thing will take a half a blade-width off. You can't do that with a chop saw." That was the apotheosis. From that evening Joe's desire for a radial arm saw started to fade, and soon it disappeared altogether.
Since then we have used the Acme almost every work night. We cut boards to length, but we have also used it to cut bevels on the base of Marie's table and to resaw small pieces of cedar down to half-inch thickness for a box we are making for Grace. I've heard Joe say several times, "this is the perfect tool." I'm in full agreement. Buy a Millers Falls Acme, old, new or in between. You won't be disappointed.
January 14th, 2014
Posted by Paul
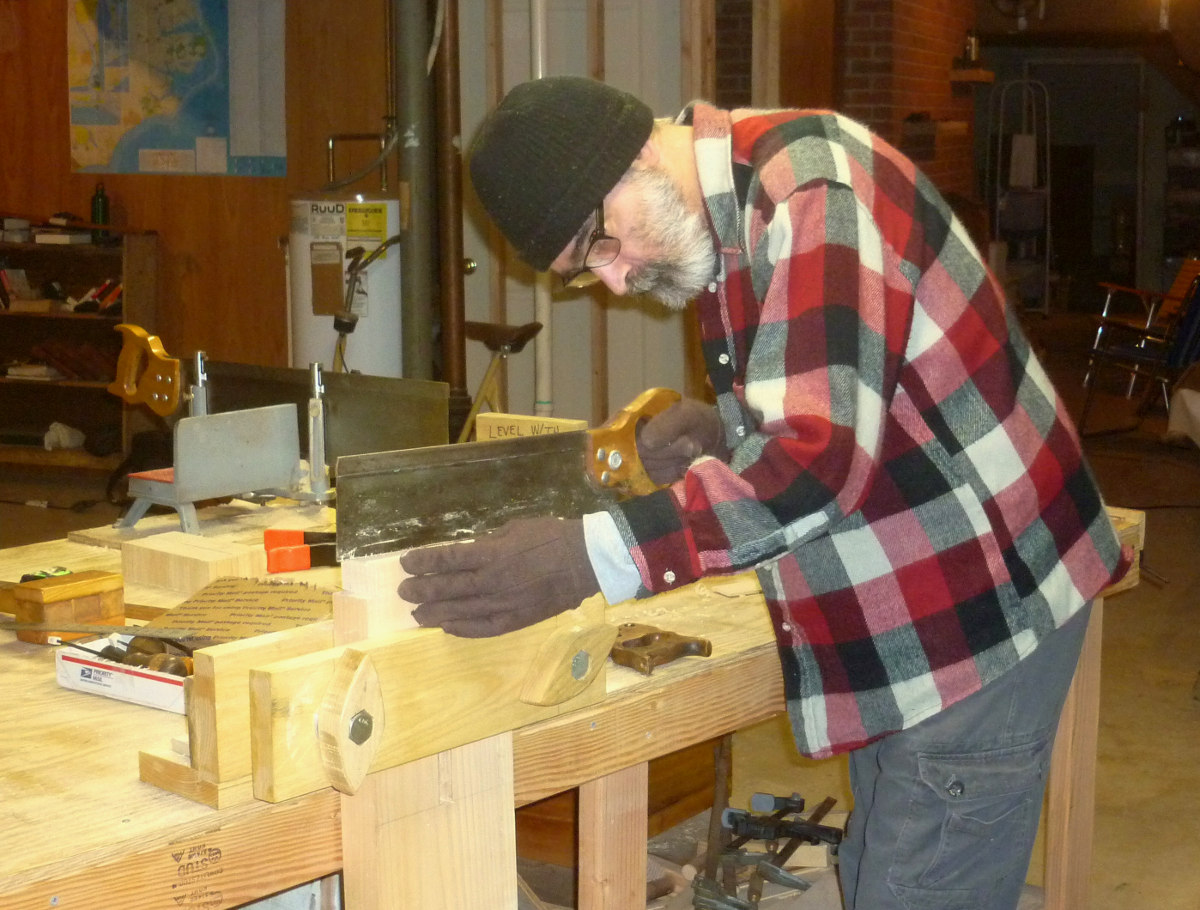
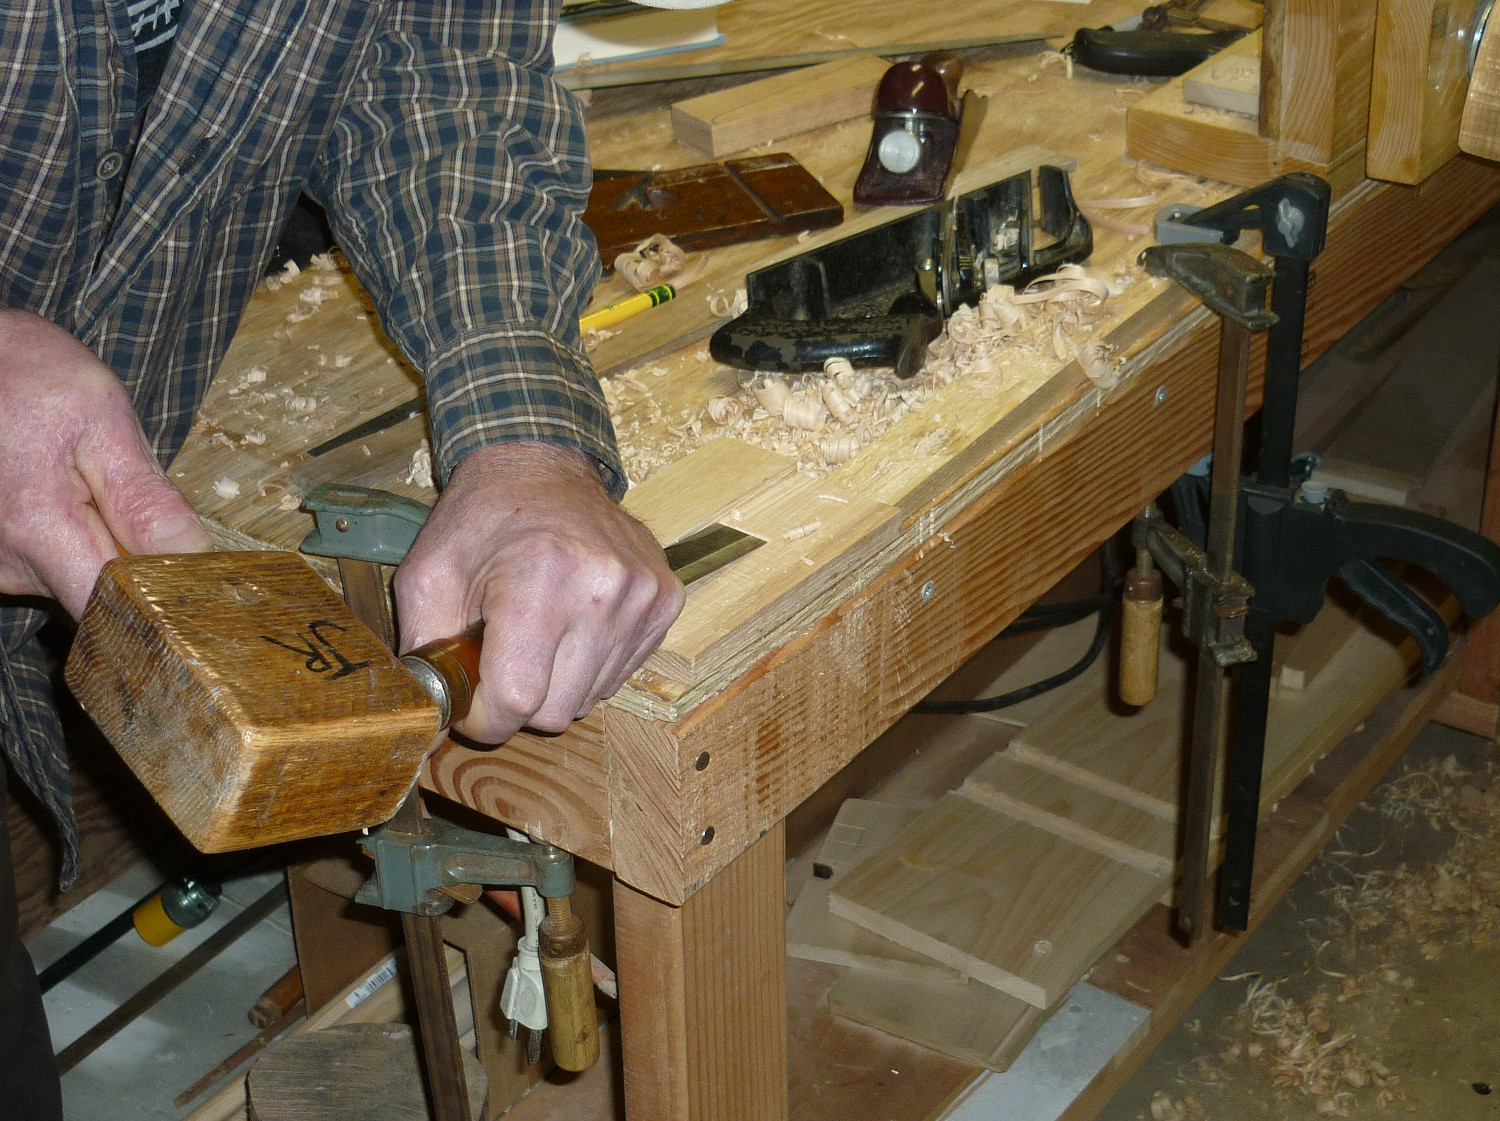
During the Great Polar Vortex of January 2014, Joe had to wear gloves while sawing tenons in the workshop.
January 12th, 2014
Posted by Joe
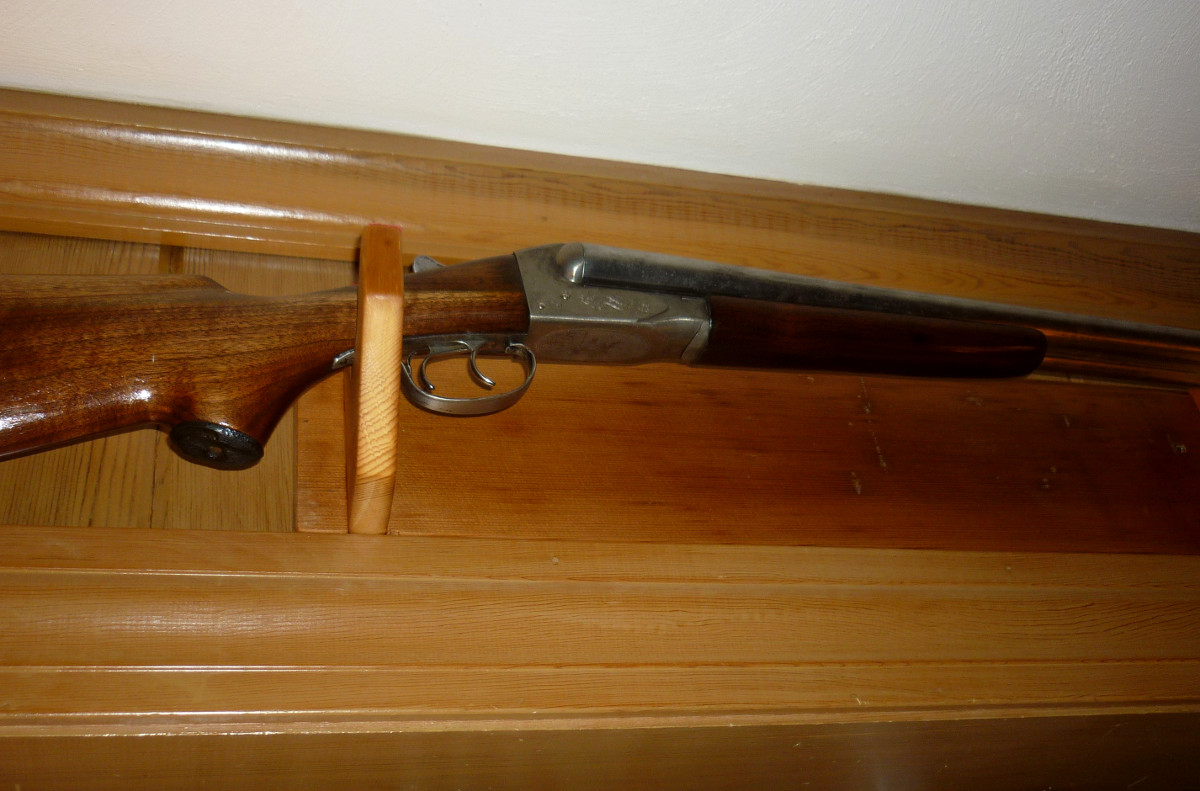
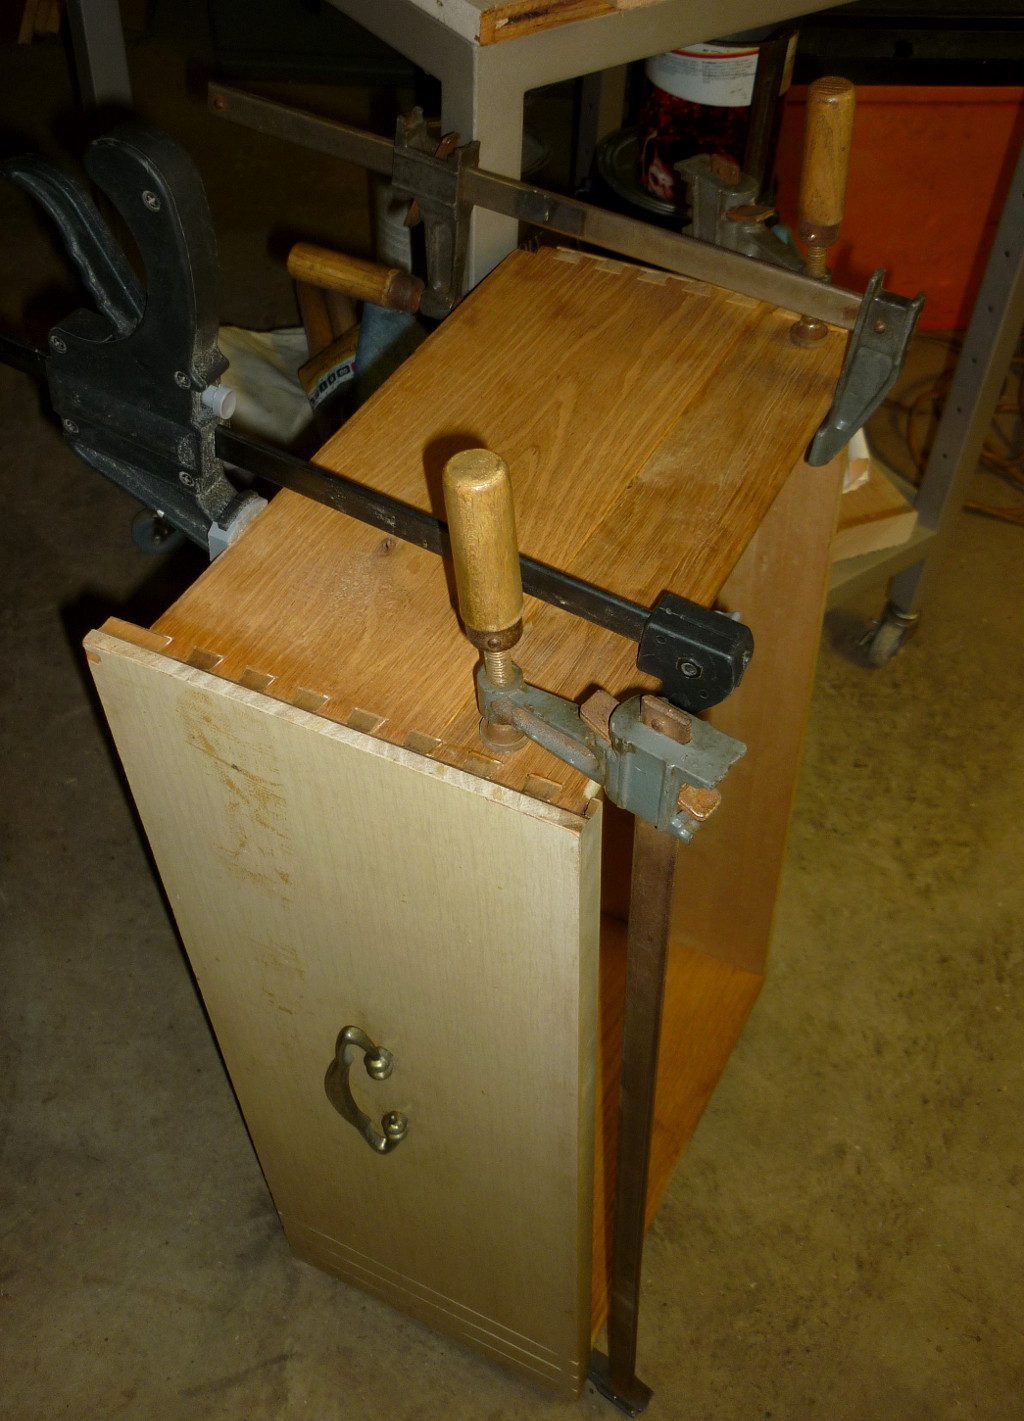
After the fire, I looked at this shotgun closely to see if it could be restored to some kind of original condition ( it did not look good) and decided to try anyway. Marcia was away for a couple of weeks and I worked on it, I was surprised to be able to sand the fire and most of the water damage from the stock; also with a good deal of effort and steel wool, I cleaned the metal parts (I didn't re-blue it) and reassembled the gun. I was pleased with the outcome and Marcia was delighted with the surprise when she returned.
Marcia wanted to display this restored treasure so I took a piece of recovered wormy pine paneling and built this simple gun rack. Now this restored shotgun rests on a small piece of the old house. It's a reminder that some things did survive the tragedy of the fire that laid waste to our old house.
January 8th, 2014
Posted by Paul
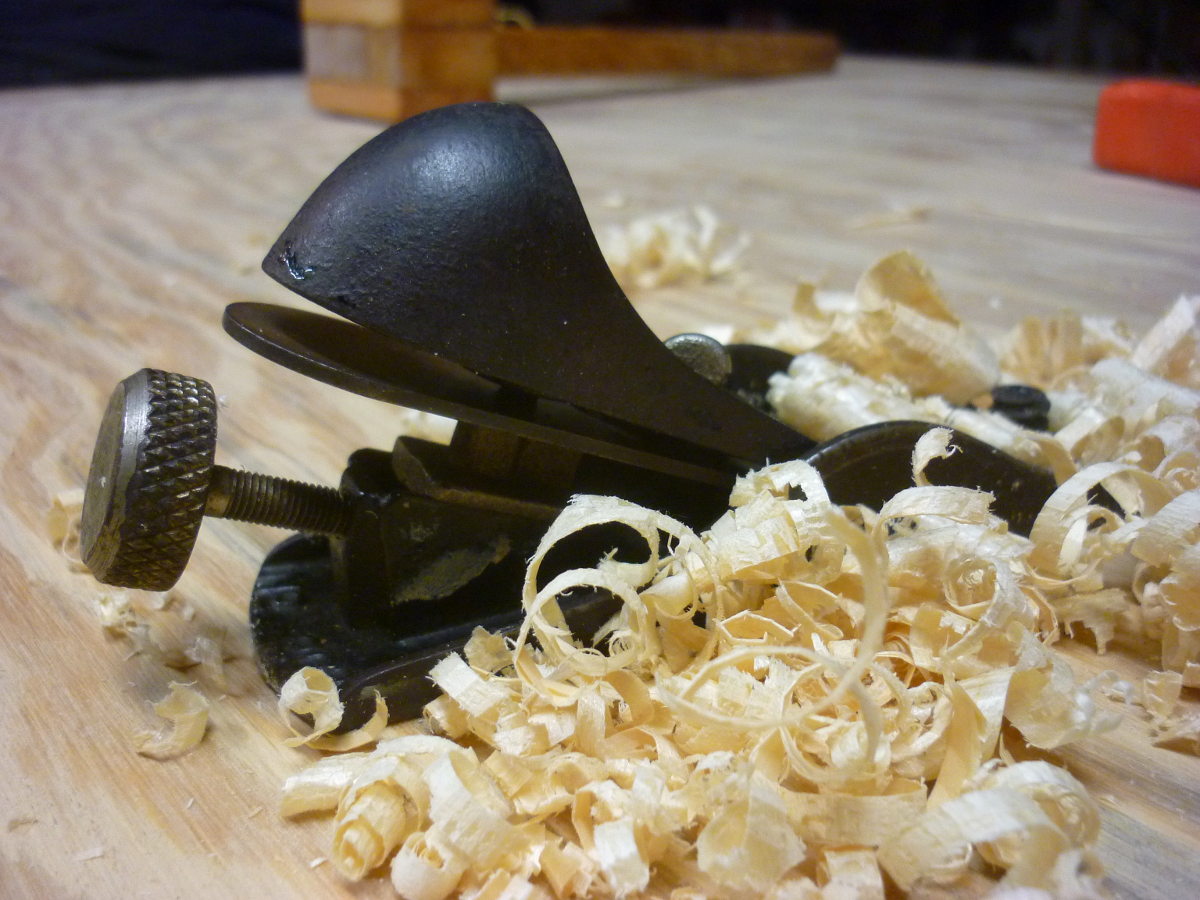
The Stanley 203 is fettled and put to work. You can't tell from the picture, but the sole is fairly smooth and the blade is sharp. Well, maybe you can tell from the pile of shavings. After the test run, we used it to smooth the sides of a new handle for a metalworker's hammer. It served perfectly.
January 7th, 2014
Posted by Paul
Better tools, better techniques...The quality and speed of our work is increasing. We laid out and cut two tenons for Marie's table this evening. I followed Chris Schwarz's advice from his blog a few weeks ago and bought a 3mm mechanical pencil that makes much cleaner and narrower lines than the school pencil we had been using, allowing for more precise layout. Plus, Joe says I no longer look like a complete nitwit when trying to use the squares and straightedges - practice has not yet made perfect, but it has made an appreciable difference. The rock-solid Moxon vise has been a real boon to making clean cuts, and we are starting to get the hang of the backsaws and the Simmons panel saw.
This is fun.
January 1st, 2014
Posted by Paul
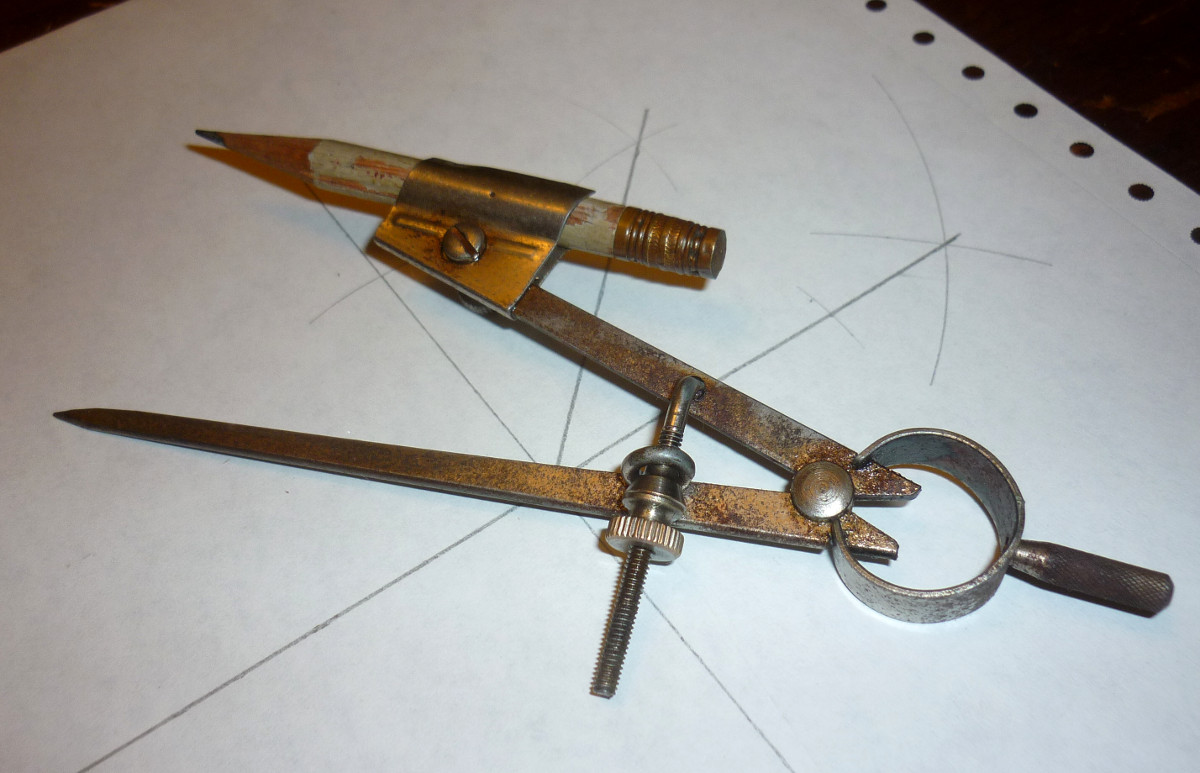
I found this little school compass at an antique store in Ocala. There are no markings to indicate who made it, but it is a decent instrument, still quite usable even though lightly rusted and pitted. I wouldn't be at all surprised if it were 50 or more years old. It cost me $3.00 and a few minutes rubbing it down with machine oil.
December 30th, 2013
Posted by Paul
This table is in my parents' house in Ocala. It has been in my mother's family for a long time and was the kitchen table in their house in New Orleans.

These five-legged leaf tables are commonly known as Robbins tables, for the Robbins Table Company of Owosso, Michigan, which popularized them in the late 1800s. Other manufacturers made similar tables, and they were marketed through Montgomery Ward and Sears as well as through furniture retailers, through the early 1900s. The style is associated with the Eastlake Movement which attempted to reform and simplify Victorian furniture to make it easier to build and maintain.
Robbins Table Company had a patent on a method of storing the table leaves in a rack set into the end of the table, and this was a distinguishing feature of tables made by the company. Since this table doesn't have the feature, I would guess it was made by another manufacturer. The legs are removable, slotting into tapered grooves. This suggests to me the table might be one of the Sears or Wards catalog tables that could be shipped flat.
The table has been heavily used and all the leaves are missing. My grandfather applied a central portion where a leaf would go to widen the table, and it appears he made other repairs as well.December 25th, 2013
Posted by Paul
Our first effort at building real furniture has been a trestle table for Marie and Levi. I had this project in mind when we visited Wall Lumber in early November and we bought some white pine to use as the base, because I had read that it was easy to work. I figured we needed every advantage to be able to build something way beyond the simple totes and boxes we had done before.
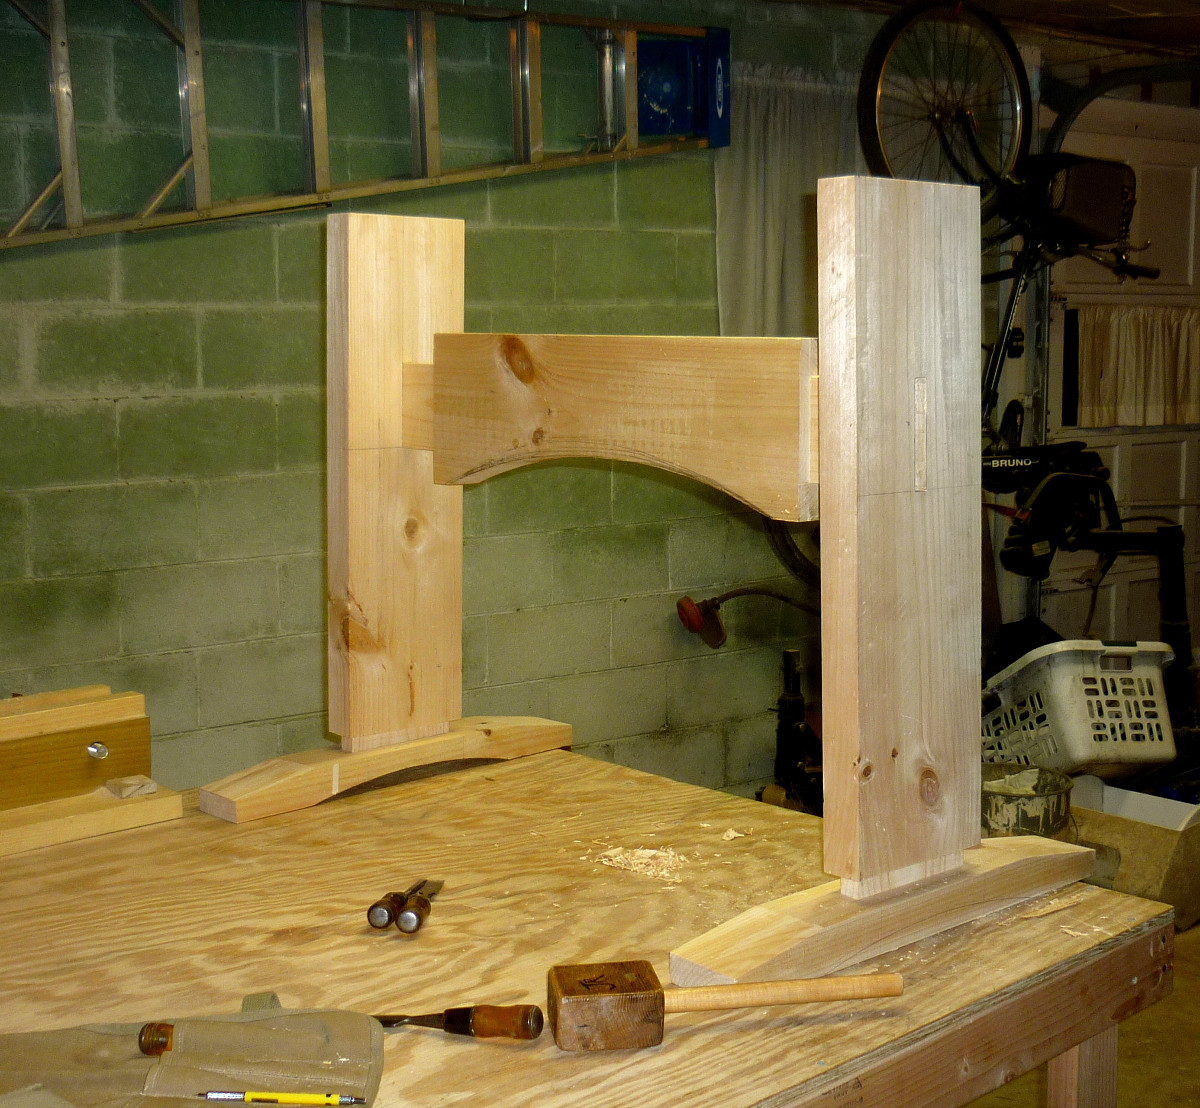
Cutting out the parts on the Acme miter box was straightforward and easy, and we got to use the angle function of the box to cut the wide bevels on the table feet. The arches were done with a jigsaw, and that was slow, laborious work, but by no means difficult. As far as cutting the tenons - we found that we could make the long cuts spanning the width of the boards with the miter box using the stops that regulate the depth of cut. Then the other cuts were fairly simple to do with our assortment of backsaws and the little Simmons ripsaw.
We laid out the mortises and then drilled out as much as possible on the Delta press, squaring up the edges with chisels. It was easier than we expected, and a lot of fun to bang the chisels through with Joe's little oak-headed mallet, "Jr". Tonight we finally got far enough along to dry-fit the base together and get a good idea of how the finished project will look. We didn't drive the joints completely together for fear that we would never get them apart again, but even so it is clear that we will have a very solid and substantial table when we are done.
The top will probably be cedar, which should make a striking contrast with the white pine base.
December 25th, 2013
Posted by Joe
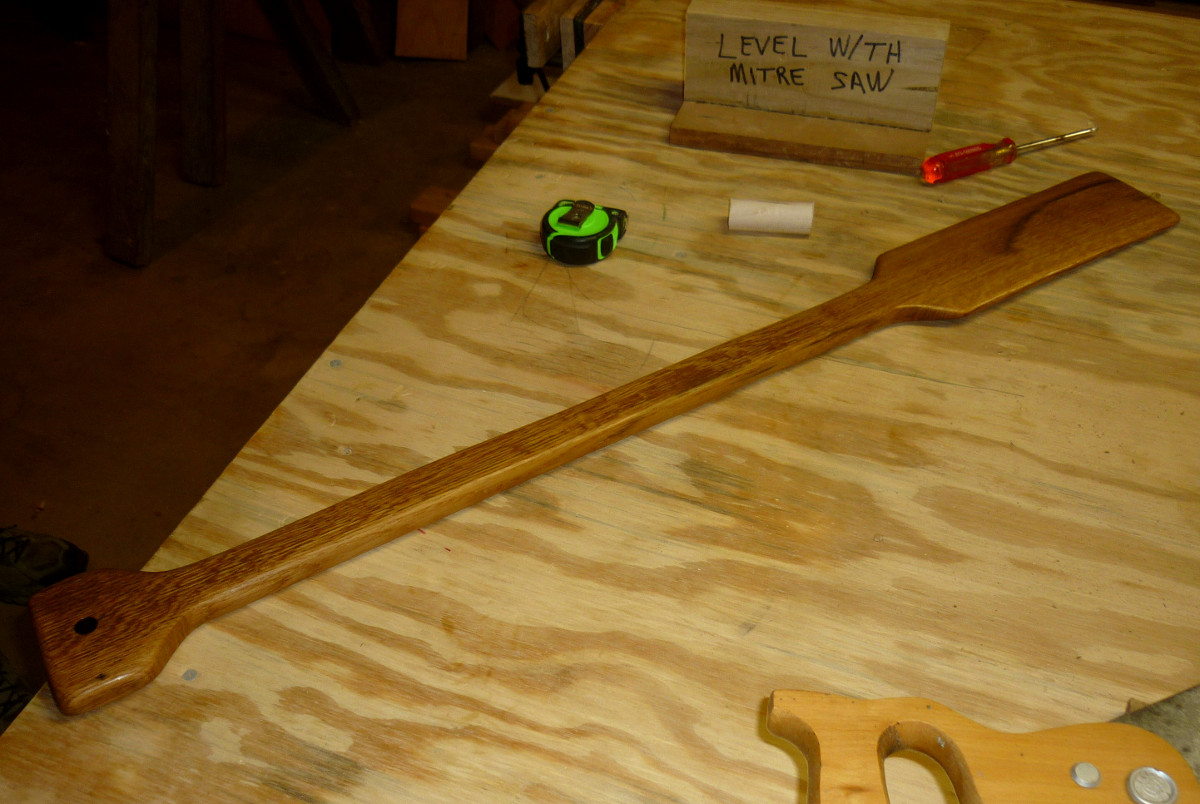
I was sharing the fact that we are on the internet with a friend when he said that a family member needed a stir paddle for his chicken stew cauldron. I took this challenge on one Sunday and completed in just a few hours. I used an old white oak 2 x4 ( an old, truly 2" by 4" 2x4) and many power tools: Delta table saw, Black and Decker jig saw, Delta drill press and Skil orbital sander. The finish is just plain vegetable oil; the effect is a deep caramel brown color with a very profound grain contrast. I used vegetable oil because this is to be used with food, it will need to be reapplied at each use but will not harm the food. I hope this paddle will be enjoyed many times and maybe we'll get a picture of it being used.
December 22nd, 2013
Posted by Paul
Two more Stanley block planes, a 102 and a 203.
Chris Schwarz says don't buy these old junkers that are going to take a lot of time and effort to get in shape, because if you buy ones in good working order you can spend that time in the shop. But Chris, Joe's Basement is clear across town from me. I can't just walk down the steps and start working. I get over there twice or thrice a week, at best. On the other hand, I get ten or fifteen minutes of downtime at home now and then, and what better use than fettling old block planes? Watching TV? Plus, making a new knob for the 203 will be a fun, quick project.
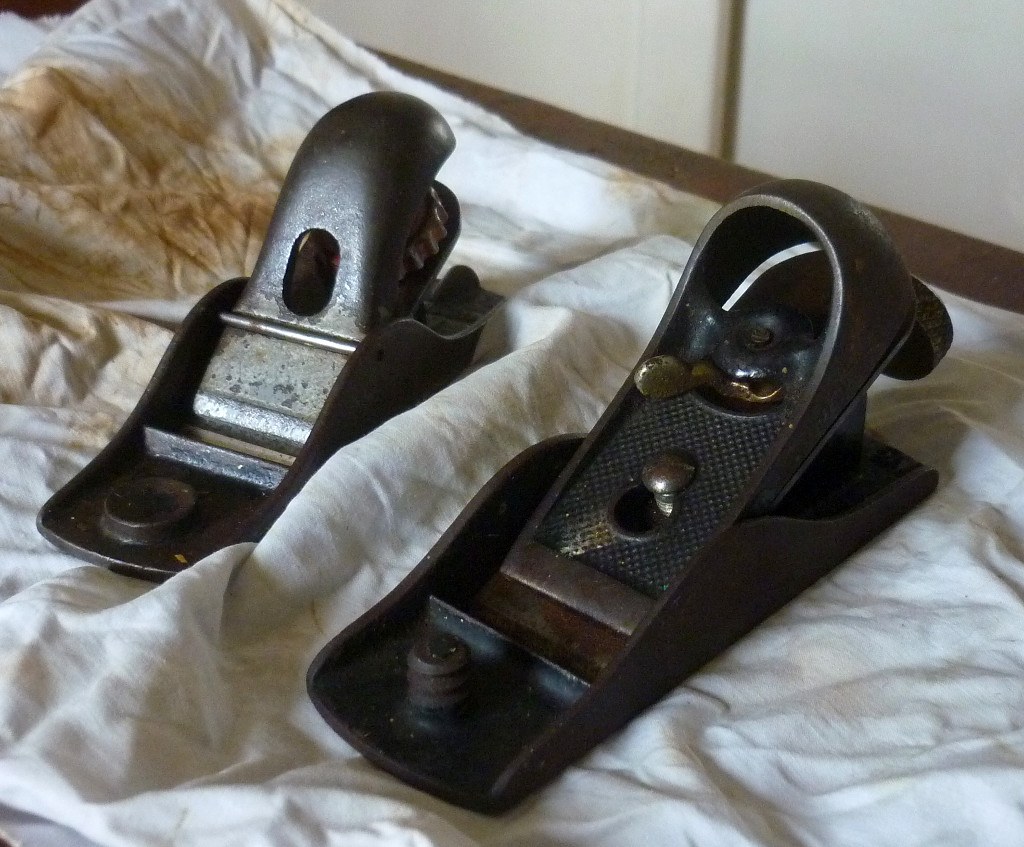
Patrick Leach over at Patrick's Blood and Gore suggests that the 102 is such a worthless piece of iron that you should give it to your dog for a chew toy. And as far as the 203 goes, the best he can say is "Although this is a nice, functional plane, you may choose to leave this plane for the kiddies, and get a larger one for the mature and muscular you."
Whatever, guys. I intend to get both of these old Stanleys back to work. No plane left behind, that's what I say.
December 18th, 2013
Posted by Paul
This Stanley 220 arrived from Ebay today. Yes, one of the notorious maroon ones from the 1970s that are supposedly total junk.
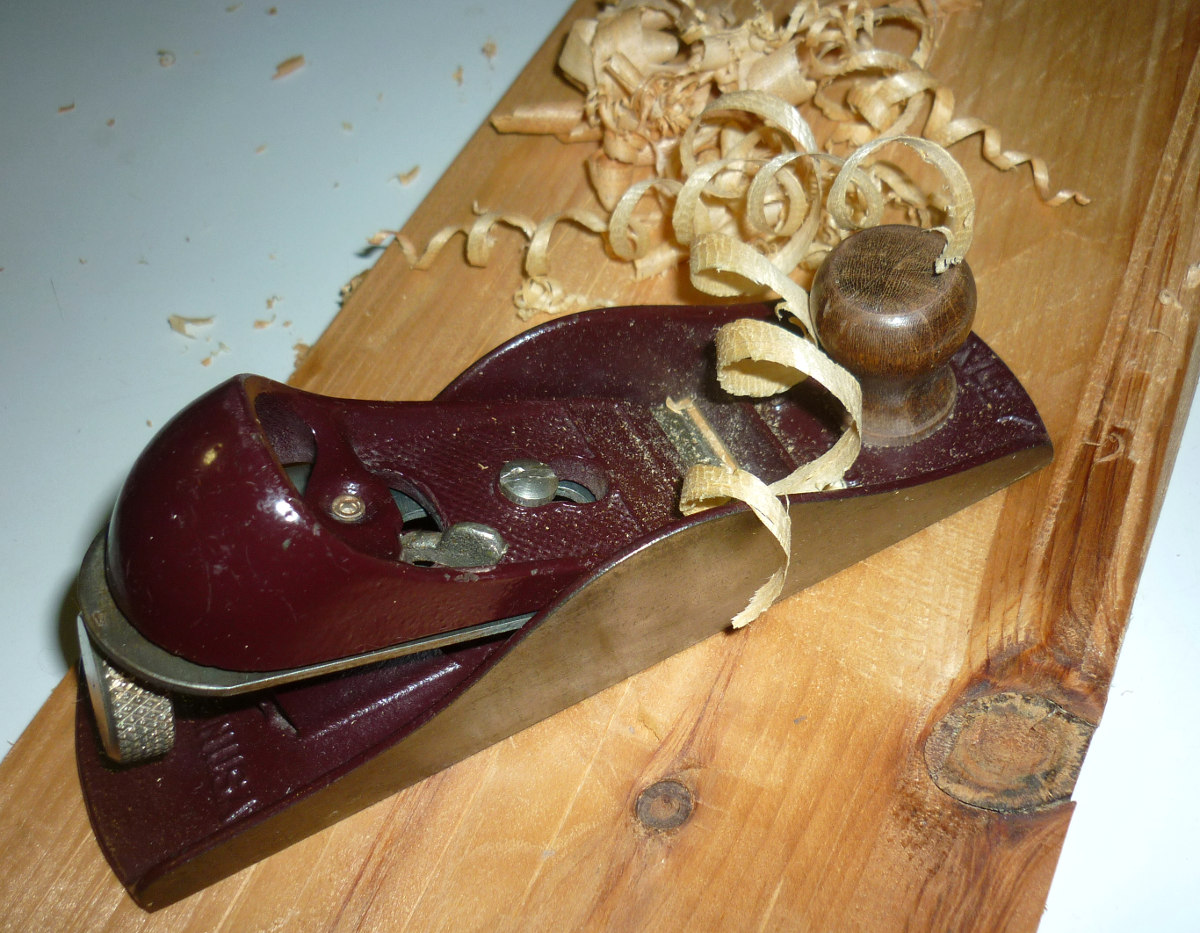
I have not seen one of the 220s from the prewar years when Stanley was at its peak, but this little plane looks like a perfectly usable tool. So far I haven't done a thing to it and it is already peeling off nice shavings from my test board at home. Once I flatten the sole, clean up the frog, smooth off the lever plate and, most importantly, sharpen the blade, I expect this to be a cutting little son of a gun. I can't wait to take it to Joe's Basement and put it through its paces.
December 16th, 2013
Posted by Joe
I'm really pleased that this project has come to completion; for some time I doubted that it would. When I began, I thought that I had a good plan and it would be simple. Throughout the process, I changed the plan and had a difficult time holding on to the finished image in my head. I went through phases of doubt in my ability to ever get it done. Paul helped me immensely to keep going through the many steps of shaping the pieces as I kept worrying about messing something up and having to start over.
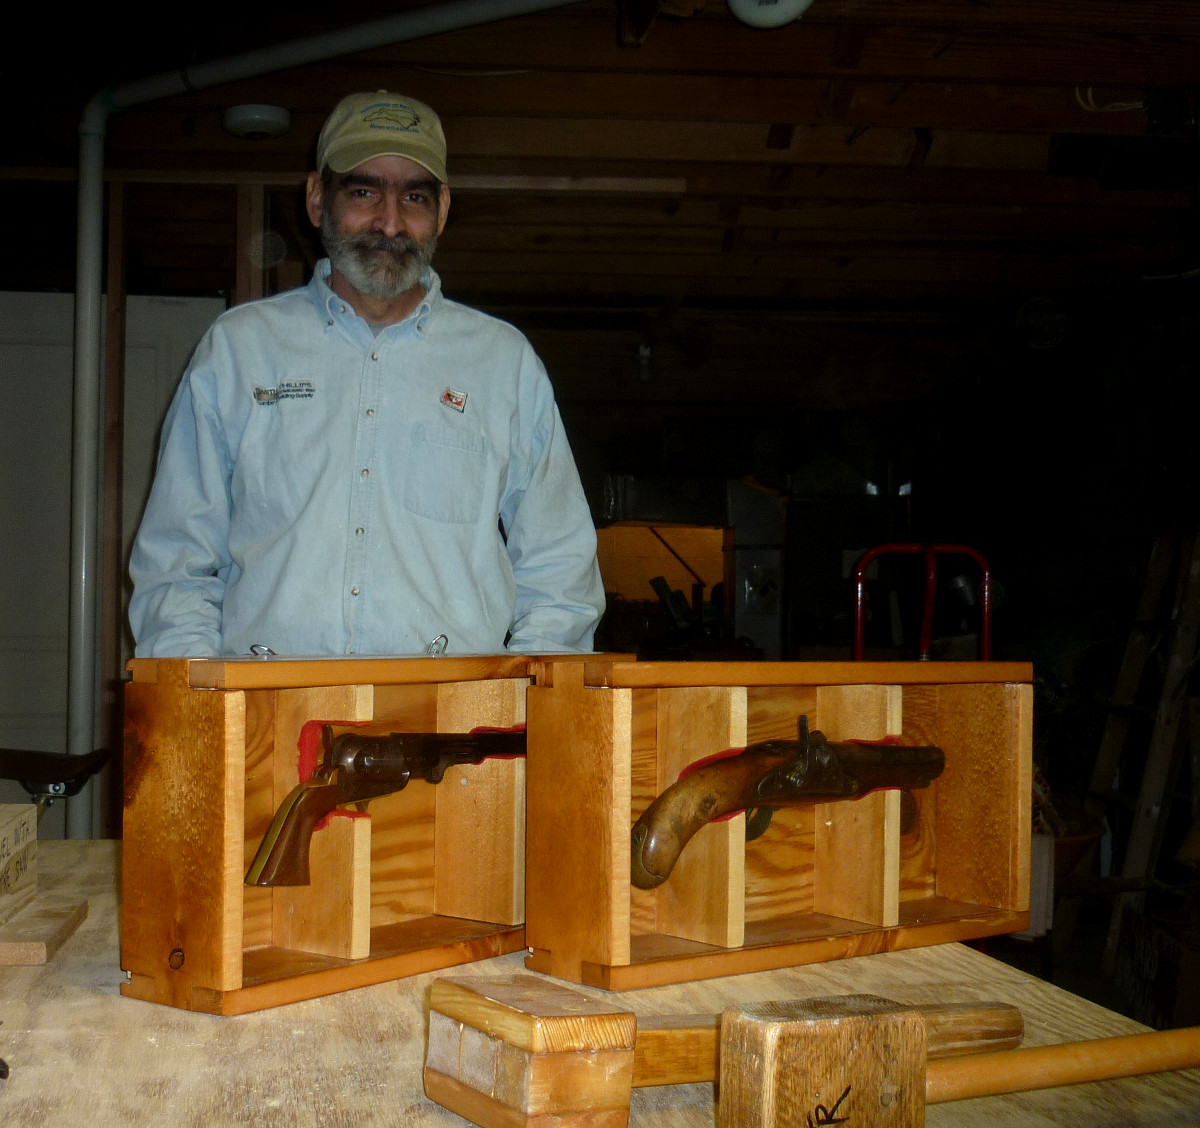
The techniques used to assemble these cases are not new to me, some have even been used over and over, but I have not attempted such precise fits before. There are more moving parts than I have used before ( there are moving parts). The top edge is removable, then the plexi-glass slides up to remove the guns. The biggest lesson that I learned is that; dreading is worse than doing. Many of the processes that we have attempted are easier than we thought they would be. You can't give in to the fear of messing up a piece or project, especially since, as hobbyists, there is not the pressure of having to make a living off of our work. I am so glad that we have decided not to sell anything we make, that way we never have to add up the costs ( labor time and materials) of our projects.
When John first saw these display cases, he was so impressed that he called us artists; I don't know about that, but it did feel good.
December 13th, 2013
Posted by Paul
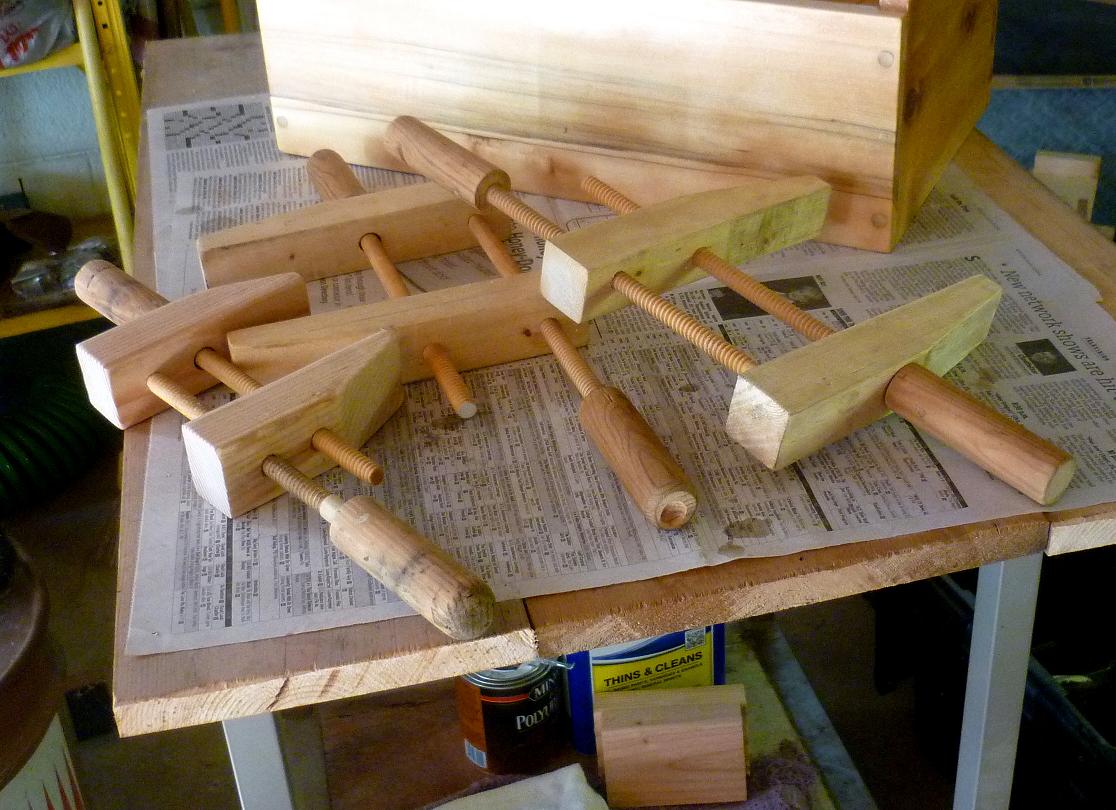
We started up the woodshop soon after Marcia and Joe moved into their new house in August 2013. Since we had almost no tools, we had to make our own. We made these screw clamps out of scrap, plus Home Depot dowels and a threading kit I bought online.
These were the only good threads we managed to cut. After this project, every dowel we tried - whether from Home Depot, Lowe's, or even the supposedly high quality dowels we bought online - shredded off it's threads as fast as we could cut them.
December 12th, 2013
Posted by Paul
Say what you will about flamboyant front-man Chris Schwarz -- Lost Art Press is making a huge contribution to the woodworking craft with their publications. "The Anarchist's Tool Chest", Chris's manifesto for quality hand work and craftsmanship and against crass, throw-away consumerism, is the most captivating thing I read in 2013 -- and read it I did, five times through. There is just so much here -- the philosophy, of course, but also the practical advice on tools and their uses, and the step by step instructions for building the chest. At the end, I came away with a clear map of how to become the kind of craftsman who could make things worth keeping. I still have a long road to follow, but I feel confident I'm not going backwards.
"The Anarchist's Tool Chest" was just the first of several Lost Art Press books I read in the year. There was also "With the Grain" by Chris Becksvoort that opened my eyes to the importance of wood selection and the variety of good choices available. There was "By Hand and Eye" by George Walker and Jim Tolpin, an amazing book on design that appeals to the geometrician in me, and "The Essential Woodworker", the old standard by Robert Wearing that lays out the essential techniques of hand working wood. Finally, there was "The Joiner and Cabinetmaker", pedagogical, yes, but also something to read for the sheer pleasure of it.
There are more Lost Art Press publications that I look forward to reading in the upcoming year. I'm guessing "Roubo on Marquetry" is going to be a real treat, along with Chris Schwarz's upcoming book on campaign furniture.
For me, the culminating virtue of these editions is they are all available in DRM-free digital formats. The room on my bookshelves has run out and my tiny condominiun is filled to the brim. In addition, my aging back rebels against carrying a sack full of hardcover books on my travels. Digital is the way to go for this budding cabinetmaker, and it is most gratifying to find a source of high-quality works in pdf and epub formats. So thank you, Lost Art Press, you are making a difference. I'm looking forward to your 2014 offerings.
December 9th, 2013
Posted by Paul
This Wards #4 was one of the first tools I bought last August when we started up the woodshop. I paid $20 for it at an antique mall in New Bern. Back home, I followed the instructions available all over the internet as to how to tune it up and get it in good working condition. Fettled and sharpened, it was pressed into work cleaning the dusty and dented boards we used to make my first big tote. It was a revelation as the shavings rolled off and the clean, smooth wood appeared.
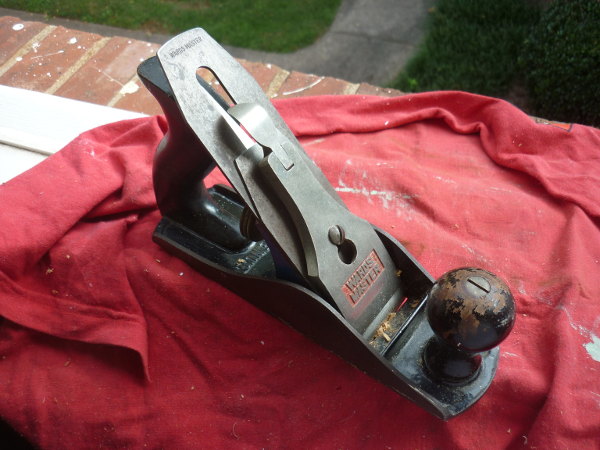
I think there is a good chance that the Wards was made by Stanley, and its quality is every bit as good as my Stanley #5. I tend to grab the Stanley for most work, but the Wards gets its share. Grace likes to use it to make shavings from cedar scrap.
December 5th, 2013
Posted by Paul
Another little tote, this one for Marie and Levi, stocked with a few of the tools that young householders might need.

We like poplar - it is easy to work, light and inexpensive. The green and yellow tones and the nice grain patterns look good under the protective coats of polyurethane.
December 1st, 2013
Posted by Paul
We made these totes for the twins. They were almost all handwork, though we used a jigsaw to round the ends on one of them, a drill press to make the holes for the handles, and an orbital sander to break the corners. We used 4 and 6 inch poplar hobby wood for the sides and ends, cut to length on the Millers Falls Acme miter box, and we cut the rabbets with a Stanley 78 plane. The bottoms are 1/8 inch finish grade plywood, set in rabbets, glued and nailed.
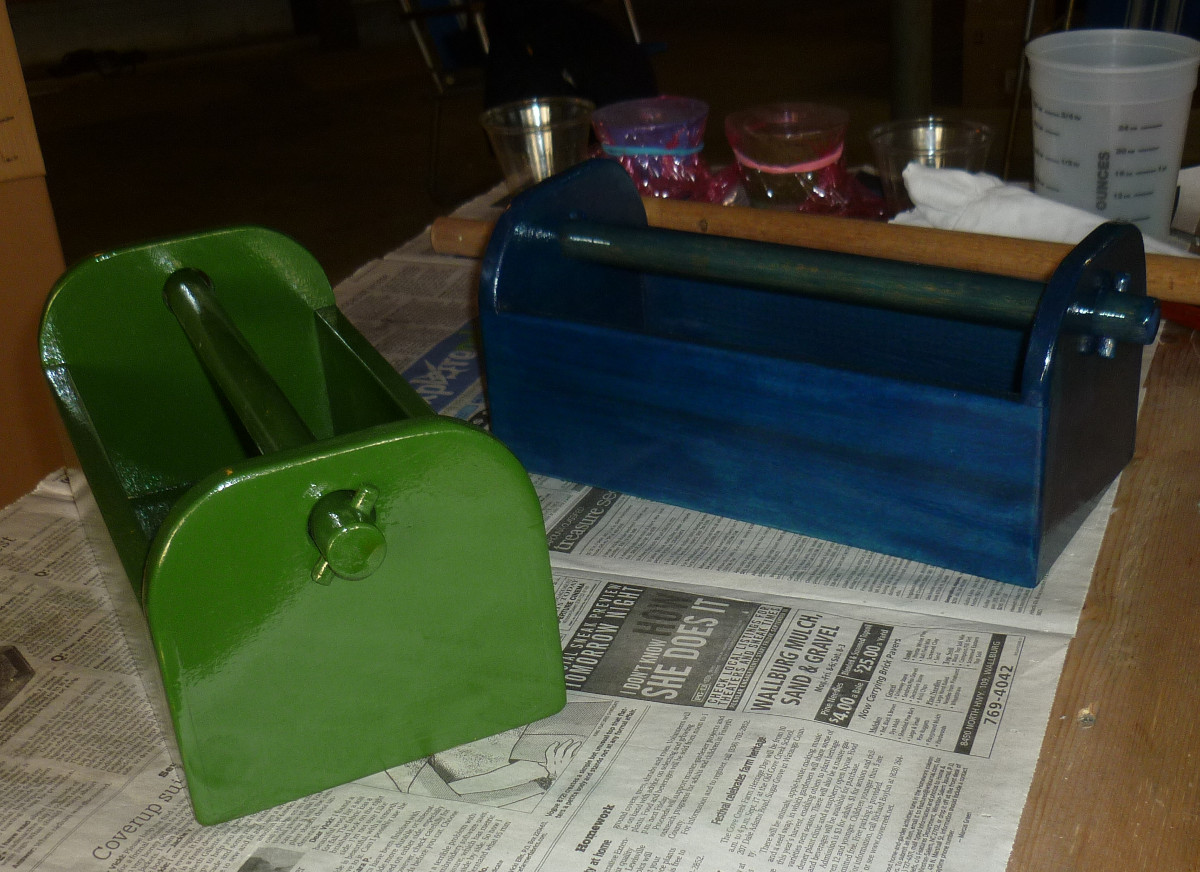
We finished these with milk paint and a couple of coats of polyurethane. The green paint covered thoroughly but the blue came out more like a stain or wash. We wanted them to be a little different since each of the twins is her own individual, so we were happy with the way they turned out.
I heard that the twins carried their new totes around all evening and even took them to bed. Who needs a teddy bear when you've got a tote?
November 1st, 2013
Posted by Paul
Early on we figured out that solid clamping was a necessity for making accurate cuts. We got a small bench vise that helped, but it still didn't allow us to work with larger stock, so we decided to build a Moxon vise. We bought a clear board of 5/4 ash at Wall Lumber and set to work.
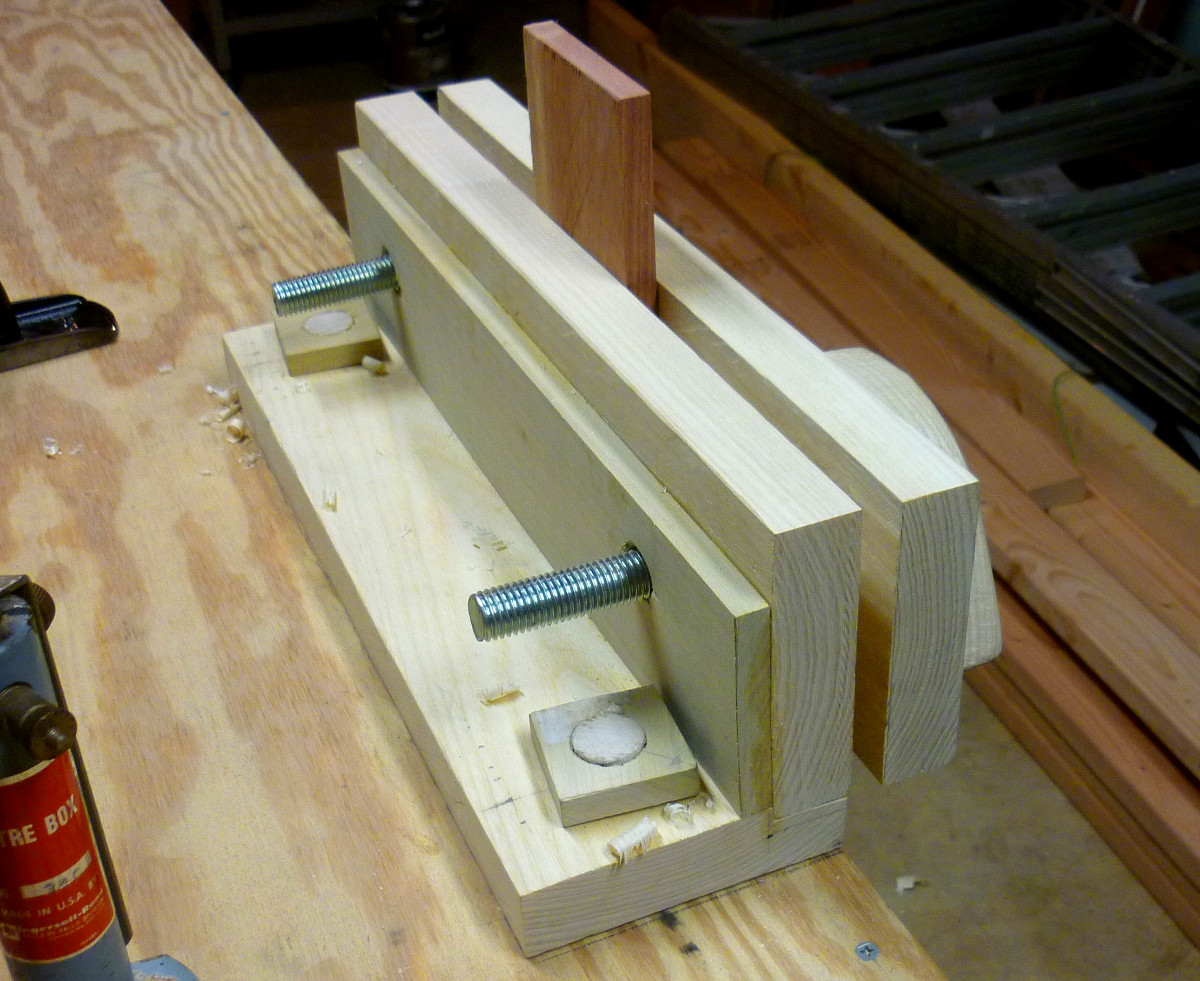
This hardwood was a lot more work to cut and drill than the poplar and yellow pine we were used to. We cut the pieces to length on a Millers Falls Acme miter box. We had no luck drilling out the screw holes with our press or electric hand drill, so we took turns with a Stanley hand brace and eventually got them done. The bolt heads and nuts fit in hexagonal holes mortised out with a chisel.
October 1st, 2013
Posted by Paul
Joe made this paint tote for Marcia. Note the finger joints. This is the first project to come out of the shop with joinery more complex than a rabbet or dado.
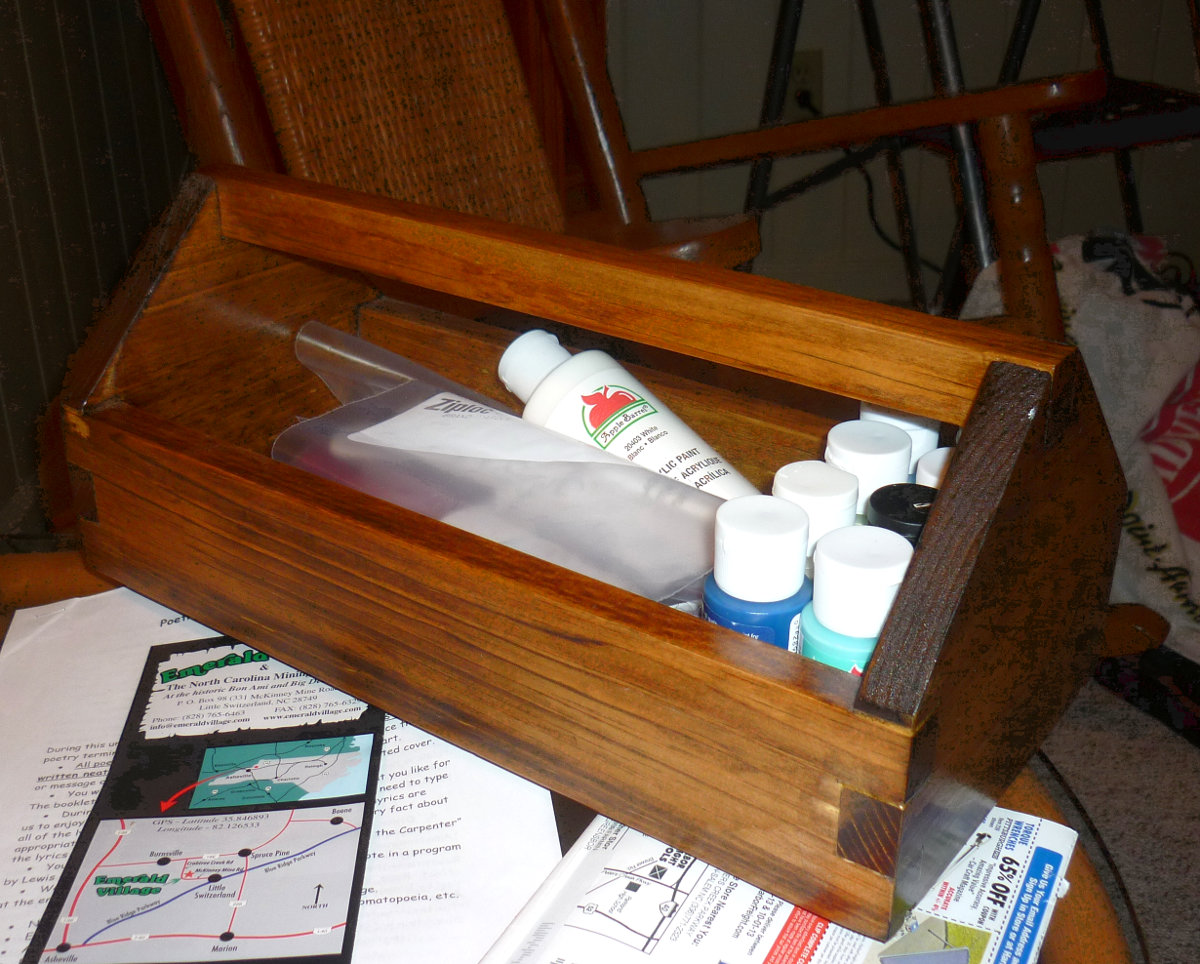
Joe made this all out of scrap he found laying around the basement.
September 15th, 2013
Posted by Paul
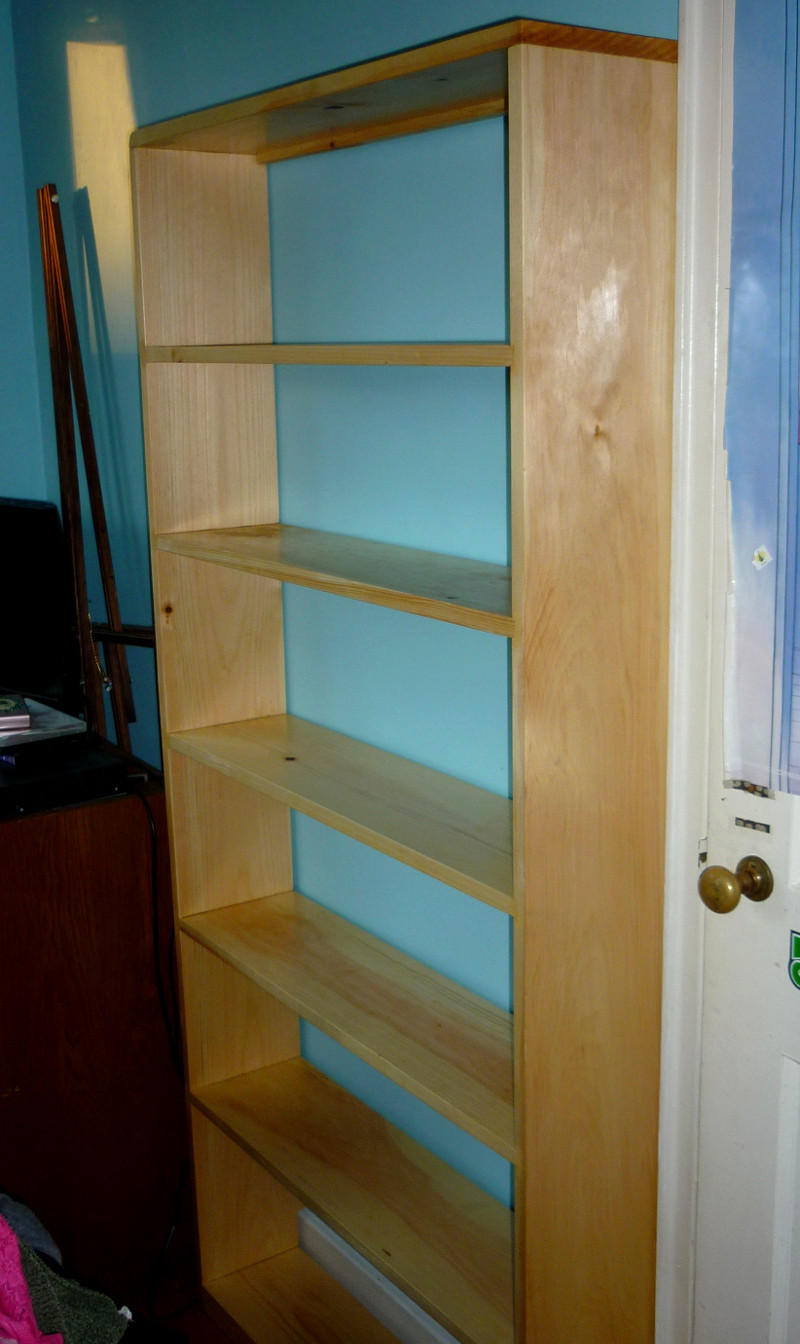
Marie needed storage for her books and trinkets, so I designed a bookcase to make efficient use of space in our small apartment. We used 8 inch shelving boards and cut away the base to allow the case to fit around the baseboard and sit up flush against the wall. That saved space and meant that we didn't have to put on a back. We put a rail under the case top and screwed it into the wall so there would be no risk of the whole thing toppling over if, say, a cat decided to try to climb it.
I had made a similar case with Dale's help years before so the process of building one was familiar. The main problem we had was in the glue-up. We didn't have enough clamps and did the best we could with twisted cord but still didn't get all the shelves pulled down tight in their grooves. Even so, it's plenty sturdy and is now holding a full rack of books.
Comments?
Email us at woodshopatjoesbasement@gmail.com